1. Introduction
Thank you for choosing the Reboot MIG 200A 5-in-1 Multi-Process Welder. This versatile machine is designed for various welding applications, including Gas MIG, Gasless Flux Core MIG, Lift TIG, Stick (MMA), and Spot welding. This manual provides essential information for the safe and efficient operation, setup, and maintenance of your welding equipment. Please read this manual thoroughly before use and retain it for future reference.
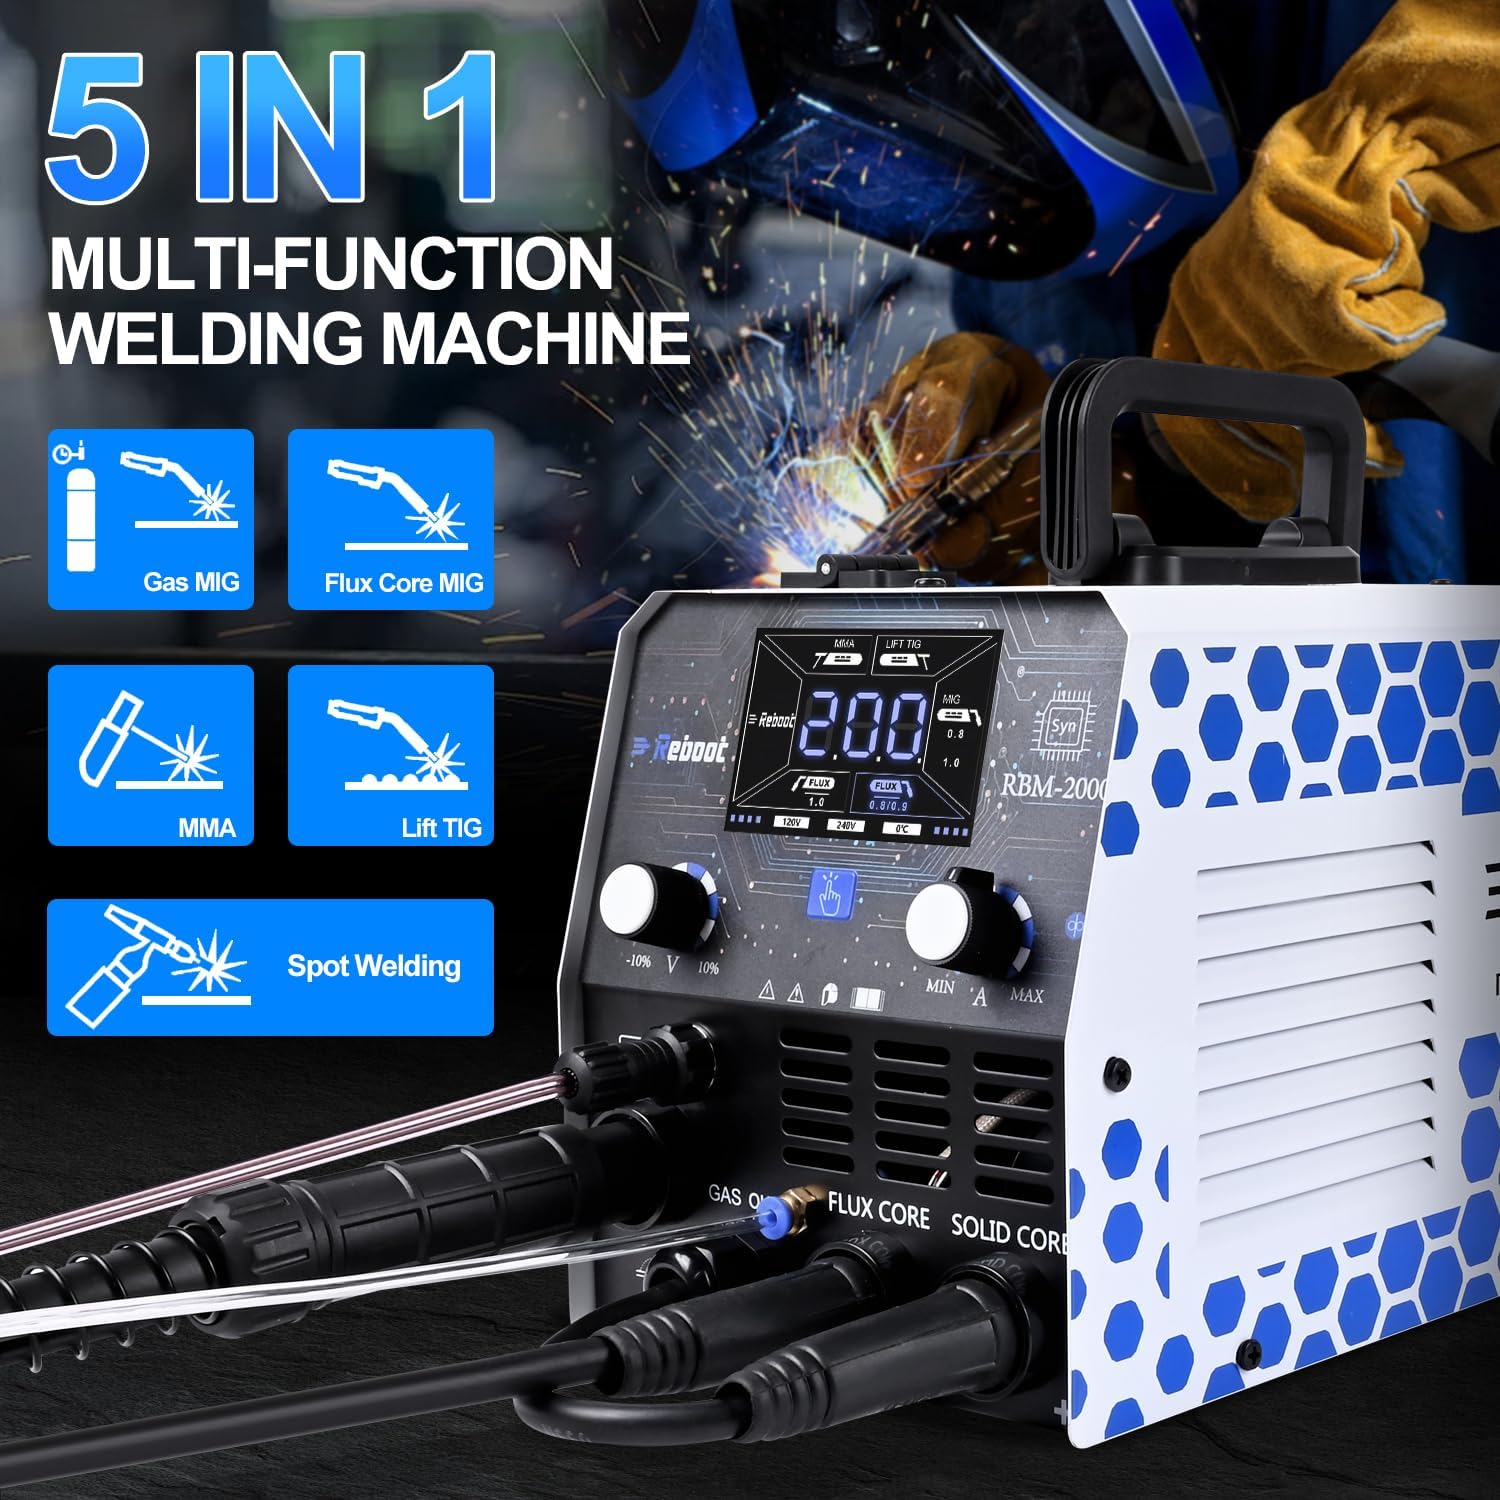
Figure 1.1: The Reboot RBM-2000-42UK Multi-Process Welder highlighting its five welding functions: Gas MIG, Flux Core MIG, MMA, Lift TIG, and Spot Welding.
2. Safety Information
Welding can be dangerous. Always follow safety precautions to prevent injury or damage. This section outlines general safety guidelines. Refer to local safety regulations and standards for comprehensive information.
- Electric Shock: Welding current can cause fatal electric shock. Ensure proper grounding. Do not touch live electrical parts. Wear dry welding gloves and protective clothing.
- Fumes and Gases: Welding produces fumes and gases that can be hazardous to health. Work in a well-ventilated area. Use fume extraction if necessary.
- Arc Rays: Arc rays can burn eyes and skin. Wear a welding helmet with appropriate shade filter and protective clothing.
- Fire and Explosion: Welding sparks and hot metal can cause fires. Keep flammable materials away from the welding area. Have a fire extinguisher readily available.
- Hot Parts: Welded materials and equipment can remain hot for a long time. Allow them to cool before handling.
- Power Supply: Ensure the power supply matches the welder's requirements. Incorrect power can lead to equipment damage or safety hazards. Refer to the specifications for voltage and current requirements.
3. Package Contents
Carefully unpack your Reboot MIG 200A Welder and check that all items listed below are present and undamaged. If any items are missing or damaged, contact your supplier immediately.
- 1 x Reboot RBM-2000-42UK Welder Unit
- 1 x MIG Torch
- 1 x Earth Clamp
- 1 x Electrode Holder (for Stick welding)
- 1 x Gas Hose
- 1 x 0.5kg Flux Cored Wire Spool
- 1 x Ceramic Nozzle (for TIG or MIG)
- 1 x Contact Tip (for MIG)
- Additional Contact Tips and Ceramic Nozzles (various sizes)
- 1 x Drive Roller
- Gas Hose Clamps
- 1 x User Manual (this document)

Figure 3.1: Overview of the Reboot RBM-2000-42UK welder and its included accessories, such as the MIG torch, earth clamp, electrode holder, gas hose, flux cored wire, and various consumables.
4. Product Overview
The Reboot RBM-2000-42UK is a compact and powerful multi-process welding machine. It features a large LED display for clear parameter visibility and synergic control for simplified setup. Understanding the control panel and connections is crucial for effective operation.
4.1. Control Panel

Figure 4.1: The welder's control panel, featuring a large LED display for welding parameters, mode selection buttons, voltage/amperage adjustment knobs, and indicators for 120V/240V input and overload (OC).
The LED display shows current welding parameters such as amperage, voltage, and wire feed speed. Buttons allow selection between welding modes (MMA/Stick, Lift TIG, MIG/MAG) and wire types (Flux, Solid). Adjustment knobs control fine-tuning of welding current and voltage. Indicators show the input voltage (120V or 240V) and alert for overload conditions (OC).
4.2. Front Panel Connections
- MIG Torch Connection: For connecting the MIG welding torch.
- Earth Clamp Connection: For connecting the earth clamp to the workpiece.
- Electrode Holder Connection: For connecting the electrode holder for Stick (MMA) welding.
- Gas Inlet: For connecting the gas hose for Gas MIG or TIG welding.
- Wire Feed Unit: Internal mechanism for feeding welding wire.

Figure 4.2: Close-up view of the welder's cable and gas hose connections. The image highlights the quality of the internal copper cable for high efficiency and the strong pressure resistance of the gas hose.
5. Setup
Proper setup is critical for safe and effective welding. Follow these steps carefully for each welding process.
5.1. Power Connection
- Ensure the welder is switched OFF before connecting to power.
- Connect the welder to an appropriate power supply. The machine supports both 120V and 240V input.
- Important: This 200A welder can draw significant current. For 240V operation at higher amperages (e.g., 190A), a 32A circuit may be required. Using a 16A circuit at high settings may cause circuit breakers to trip or plugs to overheat. Always ensure your power supply circuit can safely handle the maximum current draw for your intended welding parameters.
5.2. MIG/Flux Core Setup
- Install the appropriate wire spool (Flux Core or Solid Wire) into the wire feed compartment. Ensure the wire size matches the drive roller groove and contact tip.
- Thread the welding wire through the drive roller and into the MIG torch liner.
- Connect the MIG torch to the designated connector on the front panel.
- Connect the Earth Clamp to the negative (-) terminal and securely attach it to the workpiece.
- For Gas MIG: Connect the gas hose from your shielding gas cylinder (e.g., Argon/CO2 mix) to the gas inlet on the welder. Ensure all connections are tight to prevent gas leaks.
- For Gasless Flux Core: No shielding gas connection is required.
5.3. Lift TIG Setup
- Connect a TIG torch (not included in standard package, but ceramic nozzle is provided) to the appropriate connection point.
- Connect the Earth Clamp to the positive (+) terminal and securely attach it to the workpiece.
- Connect the gas hose from your Argon shielding gas cylinder to the gas inlet on the welder.
- Ensure a tungsten electrode is correctly installed in the TIG torch.
5.4. Stick (MMA) Setup
- Connect the Electrode Holder to the positive (+) terminal.
- Connect the Earth Clamp to the negative (-) terminal and securely attach it to the workpiece.
- Insert the appropriate welding electrode into the electrode holder.
6. Operating Instructions
Once the welder is set up for your desired process, follow these steps to begin welding.
6.1. Power On and Mode Selection
- Switch on the welder. The LED display will illuminate.
- Use the mode selection buttons on the control panel to choose your desired welding process (MIG/MAG, MMA/Stick, Lift TIG).
- For MIG/MAG, select between Flux Core or Solid Wire settings as appropriate.
6.2. Parameter Adjustment
The Reboot RBM-2000-42UK features synergic control, which simplifies parameter setting. When you adjust one primary parameter (e.g., amperage), the machine automatically suggests corresponding voltage and wire feed speed settings.
- Amperage/Voltage: Use the main adjustment knobs to set the desired welding current (amperage) and voltage. The display will show the selected values.
- Wire Feed Speed (MIG): For MIG welding, the wire feed speed is often linked to the amperage. Adjust as needed for optimal arc stability and bead appearance.
- Material Thickness: Adjust parameters based on the thickness and type of material being welded. Refer to welding charts for recommended settings.
6.3. Welding Techniques
This manual provides general operational guidance. For detailed welding techniques, refer to specialized welding guides or training courses.
- MIG Welding: Maintain a consistent travel speed and stick-out. Use a push or pull technique depending on the joint and desired penetration.
- Lift TIG Welding: Initiate the arc by gently touching the tungsten to the workpiece and lifting slightly. Maintain a short arc length.
- Stick (MMA) Welding: Maintain a consistent arc length and travel speed. The electrode angle is important for proper penetration and bead shape.
- Spot Welding: Position the MIG torch over the desired spot. The machine will deliver a timed burst of current to create a spot weld.
7. Maintenance
Regular maintenance ensures the longevity and optimal performance of your welder.
- Cleaning: Regularly clean the internal components of the welder using compressed air to remove dust and metal particles. Ensure the power is disconnected before cleaning.
- Consumables: Inspect and replace MIG contact tips, nozzles, TIG ceramic nozzles, and tungsten electrodes as they wear out. Worn consumables can affect weld quality.
- Cables and Connections: Check all welding cables, gas hoses, and electrical connections for damage or loose fittings. Replace damaged components immediately.
- Wire Feed System (MIG): Clean the drive rollers and wire liner regularly to prevent wire feeding issues. Ensure the drive roller tension is correctly set.
8. Troubleshooting
This section addresses common issues you might encounter with your welder.
| Problem | Possible Cause | Solution |
|---|---|---|
| Welder trips circuit breaker | Overload, insufficient power supply, faulty component | Reduce welding amperage. Ensure power supply meets specifications (e.g., 32A circuit for high 240V output). Check for short circuits. |
| No arc / Weak arc | Poor earth connection, incorrect parameters, worn consumables, power issue | Ensure earth clamp is clean and securely attached. Adjust amperage/voltage. Replace contact tip/electrode. Check power input. |
| Wire feeding issues (MIG) | Incorrect drive roller tension, clogged liner, wrong drive roller groove, wire jamming | Adjust drive roller tension. Clean wire liner. Ensure correct drive roller groove for wire size. Check for kinks in wire or blockages in torch. |
| Poor weld quality | Incorrect parameters, improper technique, contaminated material, insufficient shielding gas | Adjust amperage, voltage, and wire feed speed. Review welding technique. Clean workpiece. Check gas flow and connections (for Gas MIG/TIG). |
| Welder powers on but then trips immediately | Capacitor charging issue, internal fault | Try cycling power (on/off/on) quickly a few times to allow capacitors to charge. If problem persists, contact support. |
9. Specifications
Technical specifications for the Reboot RBM-2000-42UK Multi-Process Welder.
| Feature | Specification |
|---|---|
| Model Number | RBM-2000-42UK |
| Manufacturer | Reboot-UK |
| Input Voltage | 120V / 240V (Auto-sensing) |
| Max Output Current | 200A |
| Welding Processes | MIG (Gas/Gasless Flux Core), Lift TIG, Stick (MMA), Spot Welding |
| Power Type | AC/DC |
| Power Factor | 0.75 |
| Insulation Class | B |
| Protection Class | IP23 |
| Package Dimensions | 36.7 x 25 x 24 cm |
| Weight | 6.44 kg |
| Duty Cycle (240V) | 60% at 200A (MIG/MMA/TIG) |
| Duty Cycle (120V) | 60% at 100A (MIG/MMA/TIG) |

Figure 9.1: Detailed technical specifications, including duty cycle ratings for 120V and 240V input, power factor, and protection class.

Figure 9.2: Physical dimensions of the welder unit (11.4 inches length, 6.5 inches width, 7.3 inches height) and lengths of included cables and hoses.
10. Warranty and Support
The Reboot RBM-2000-42UK Multi-Process Welder comes with a 1-Year Warranty from the date of purchase. This warranty covers manufacturing defects under normal use. Please retain your proof of purchase for warranty claims.
For technical support, troubleshooting assistance, or warranty inquiries, please contact your retailer or the manufacturer directly. Refer to the contact information provided with your purchase documentation.


