
Introduction
This manual provides detailed instructions for the proper use and care of your Advocate Pettest Expert's Pet Glucose Monitoring Kit. This kit is designed to help pet owners accurately monitor blood glucose levels in diabetic dogs and cats. Following these instructions will ensure reliable results and contribute to the effective management of your pet's diabetes.
Kit Contents
Your Advocate Pettest Expert's Pet Glucose Monitoring Kit includes the following components:
- 1 x PetTest Blood Glucose Meter
- 1 x Silicone Meter Case (Purple)
- 25 x Individually Foil-Wrapped Test Strips
- 25 x Twist-Top Lancets
- 1 x Lancing Device
- 1 x Control Solution
- 1 x Soft Carrying Case
- 2 x AAA Batteries

Figure 1: The complete Advocate Pettest Expert's Pet Glucose Monitoring Kit contents.
Setup
1. Install Batteries
- Open the battery compartment on the back of the PetTest Blood Glucose Meter.
- Insert the two AAA batteries, ensuring correct polarity (+/-).
- Close the battery compartment securely.
2. Install Silicone Bumper Case
The included purple silicone bumper case provides protection for your meter.
- Gently slide the PetTest Blood Glucose Meter into the silicone bumper case, ensuring all buttons and the display are accessible.
- Verify the case fits snugly around the meter.

Figure 2: PetTest meter with the protective bumper case.
3. Prepare Lancing Device
- Unscrew the cap from the lancing device.
- Insert a fresh lancet firmly into the lancet holder.
- Twist off the protective cap from the lancet.
- Replace the lancing device cap.
- Adjust the penetration depth by rotating the cap. The lancing device offers 6 depth adjustments for different skin thicknesses. Start with a shallower setting and adjust as needed to obtain a sufficient blood sample.
- Pull back the cocking mechanism until it clicks, indicating it is ready for use.
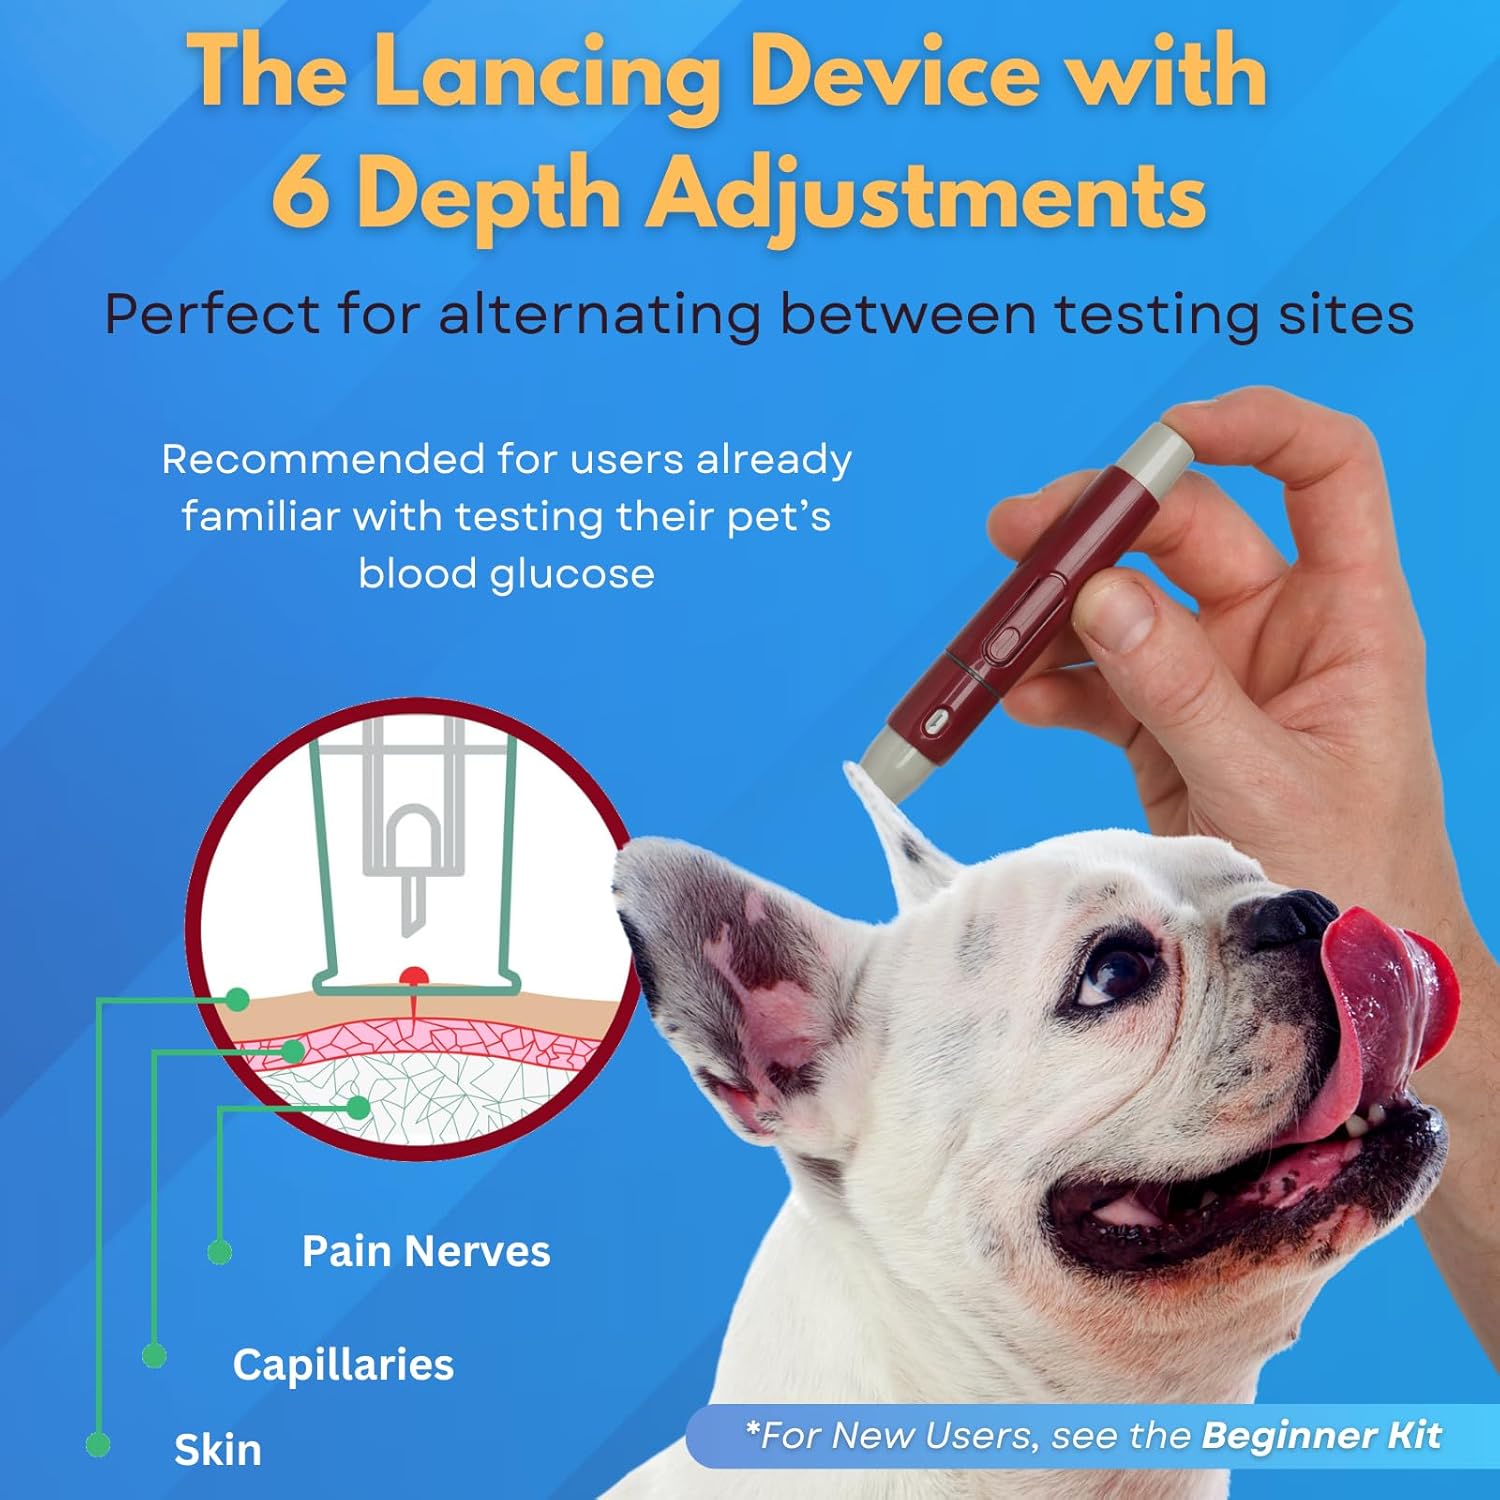
Figure 3: The lancing device with adjustable depth settings.
Operating Instructions
1. Prepare for Testing
- Wash your hands thoroughly with soap and water and dry them.
- Ensure your pet is calm and comfortable.
- Remove one test strip from its individual foil packaging. Each strip is individually sealed to prevent contamination and maintain accuracy.

Figure 4: Easy-open foil sealed test strips.
2. Insert Test Strip
With the meter off, insert the test strip into the test strip port of the meter. The meter will automatically turn on and display a code number. Ensure the code on the meter matches the code on the test strip vial (if applicable, though PetTest strips are no-coding).
3. Obtain Blood Sample
Choose a suitable lancing site on your pet, such as the ear margin, paw pad, or lip. Gently massage the area to increase blood flow.
- Place the lancing device firmly against the chosen lancing site.
- Press the release button to prick the skin.
- Gently squeeze the area to form a small drop of blood (approximately 0.3 μL). Avoid smearing the blood.
4. Apply Blood to Test Strip
Touch the tip of the test strip to the blood drop. The strip will draw the blood into the reaction area automatically. Do not apply blood to the top of the strip.

Figure 5: Applying blood to the test strip with the meter.
5. Read Results
The meter will display the blood glucose reading within 5 seconds. Record the result in your pet's logbook or the data management app.
6. Discard Used Materials
Carefully remove the used test strip and lancet. Dispose of them properly in a sharps container or according to local regulations.
7. Using the Data Management App
The PetTest kit includes access to a free downloadable data management app. This app allows you to store and track hundreds of test results, which can be shared with your veterinarian for comprehensive health monitoring.

Figure 6: PetTest Digital Companion App for data management.
Maintenance
Cleaning the Meter
Wipe the meter exterior with a soft, damp cloth. Do not immerse the meter in water or use harsh cleaning agents. Ensure no liquid enters the test strip port.
Storage
- Store the meter and test strips in the provided carrying case at room temperature, away from direct sunlight and moisture.
- Keep test strips in their individual foil packets until immediately before use to protect them from humidity and contamination.
- Do not store test strips in a refrigerator.
Battery Replacement
When the low battery indicator appears on the meter display, replace the AAA batteries as described in the Setup section.
Troubleshooting
If you encounter issues with your PetTest Glucose Monitoring Kit, refer to the following common problems and solutions:
| Problem | Possible Cause | Solution |
|---|---|---|
| Meter does not turn on | Dead or incorrectly installed batteries | Check battery installation or replace with new AAA batteries. |
| Error message on display | Improper strip insertion, insufficient blood sample, or damaged strip | Ensure strip is inserted correctly. Re-test with a new strip and sufficient blood. Refer to the full manual for specific error codes. |
| Inaccurate readings | Expired test strips, improper storage, or incorrect testing technique | Check strip expiry date. Ensure strips are stored correctly. Review testing steps. Perform a control solution test. |
| Difficulty obtaining blood sample | Lancing device depth too shallow, insufficient blood flow | Increase lancing device depth setting. Gently massage the lancing site to improve blood flow. |
If problems persist, please contact customer support.
Specifications
- Brand: Advocate Pettest
- Model: Classic Glucose Meter
- Sample Size: 0.3 μL blood
- Test Time: 5 seconds
- Battery Type: 2 x AAA Alkaline batteries
- ASIN: B0D2TQ2N91
Warranty & Support
Advocate Pettest is committed to providing quality products. For specific warranty information, please refer to the documentation included with your kit or visit the official Advocate Pettest website.
For any questions, concerns, or technical assistance, our 24/7 customer service team is available to help. Please refer to the contact information provided in your kit packaging or on the Advocate Pettest website.