
1. Introduction
The FELICON x Attack Shark R3 is a high-performance wireless gaming mouse designed for precision and comfort. Featuring a lightweight magnesium alloy construction, a high-accuracy PAW3395 optical sensor, and versatile tri-mode connectivity, this mouse is engineered to enhance your gaming experience.

Image 1.1: The FELICON x Attack Shark R3 Gaming Mouse, showcasing its magnesium alloy, 46g ultra-light design, PixArt PAW3395 sensor, up to 26000 DPI, Kailh GM 8.0 switches, and tri-mode connectivity.
Key Features:
- Magnesium Alloy Construction: Aerospace-grade magnesium for a superior strength-to-weight ratio and enhanced durability.
- 46g Ultra-Lightweight Design: Minimizes rotational inertia and wrist fatigue for faster movements.
- PAW3395 Optical Sensor: Provides up to 26,000 DPI and 650 IPS tracking speed for surgical precision.
- 8K Wireless Polling Rate: Reduces input latency to 0.125ms for ultra-smooth cursor movement.
- Tri-Mode Versatility: Supports 2.4GHz wireless, Bluetooth 5.2, and wired USB-C connections.
- Customizable Software: Smart AI Cloud Driver for macros, button remapping, and Lift-Off Distance (LOD) customization.
2. Setup
2.1 Package Contents
Before proceeding, ensure all items are present in the package:
- FELICON x Attack Shark R3 Gaming Mouse
- USB-C to USB-A Cable (for wired connection and charging)
- 2.4GHz Wireless Receiver (USB dongle)
- User Manual (this document)
2.2 Initial Charging
For optimal performance, fully charge the mouse before first use. Connect the provided USB-C cable to the mouse's Type-C port and the USB-A end to a powered USB port on your computer or a USB charger. The mouse's indicator light will show charging status.
2.3 Connectivity Modes
The R3 mouse offers three connection options: 2.4GHz Wireless, Bluetooth 5.2, and Wired USB-C. Use the mode switch located on the bottom of the mouse to select your desired connection type.
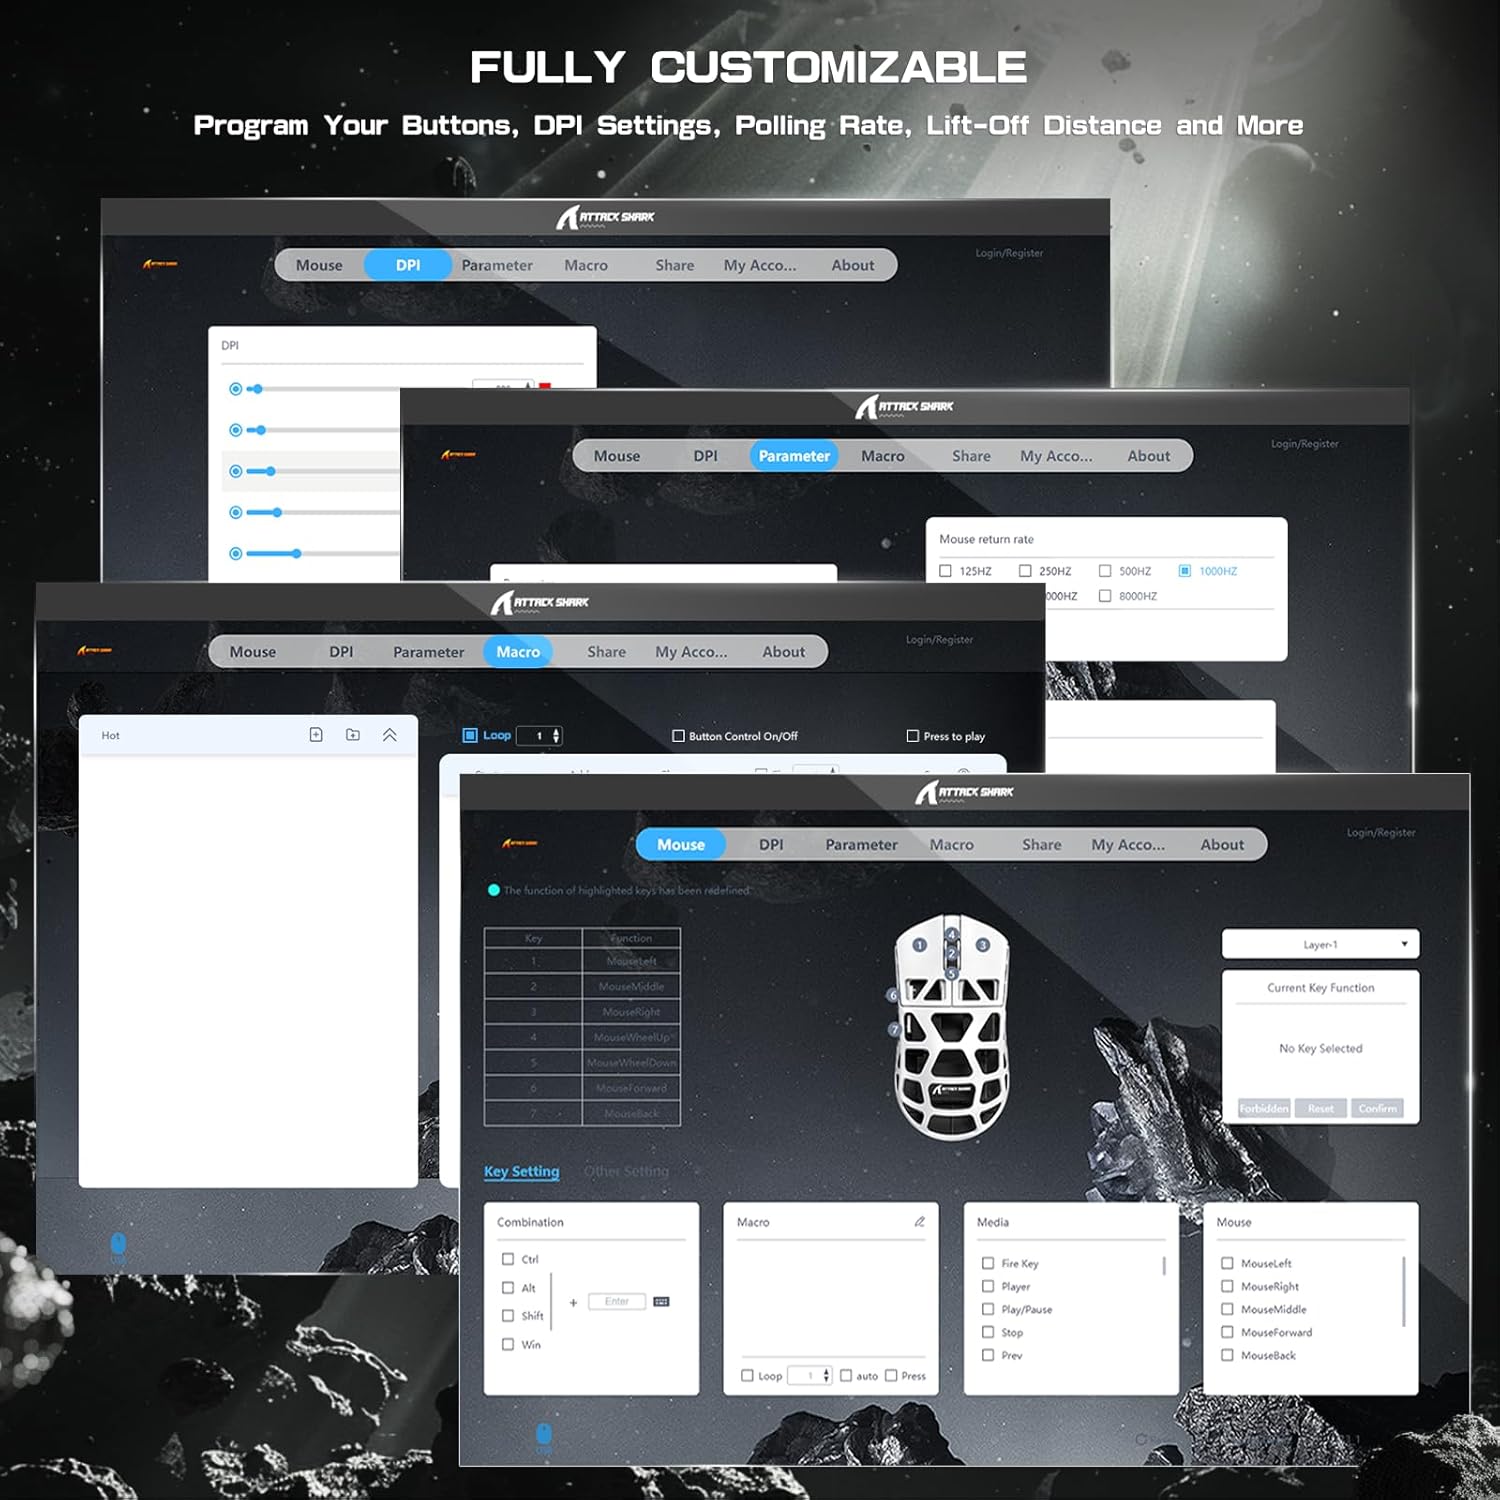
Image 2.1: The customizable software interface for the R3 mouse, allowing users to program buttons, DPI settings, polling rate, and Lift-Off Distance.
2.3.1 2.4GHz Wireless Mode
- Locate the 2.4GHz wireless receiver (USB dongle).
- Plug the receiver into an available USB port on your computer.
- Slide the mode switch on the bottom of the mouse to the '2.4G' position.
- The mouse should automatically connect. If not, press the pairing button (if available, refer to the mouse bottom diagram) or re-plug the receiver.
2.3.2 Bluetooth 5.2 Mode
- Slide the mode switch on the bottom of the mouse to the 'BT' position.
- On your computer, open Bluetooth settings and search for new devices.
- Select 'Attack Shark R3' or similar from the list of available devices to pair.
2.3.3 Wired Mode
- Connect the USB-C end of the cable to the mouse and the USB-A end to your computer.
- The mouse will automatically switch to wired mode and begin charging. No specific switch position is required for wired operation, but ensure it's not in 'OFF' mode.
Video 2.1: An official product video demonstrating the FELICON x Attack Shark R3 Magnesium Alloy Wireless Gaming Mouse and its features, including connectivity options.
2.4 Driver Software (Smart AI Cloud Driver)
To unlock the full customization potential of your R3 mouse, utilize the Smart AI Cloud Driver. This web-based software allows you to adjust DPI, program macros, rebind buttons, and customize Lift-Off Distance (LOD).
- Access the official FELICON or Attack Shark website (refer to product packaging or manufacturer's website for the exact URL).
- Navigate to the support or downloads section and locate the Smart AI Cloud Driver for the R3 mouse.
- Follow the on-screen instructions to configure your mouse settings. The software is designed for instant tuning without requiring local installation.
3. Operating the Mouse
3.1 Basic Functions
- Left Click: Primary action.
- Right Click: Secondary action, typically opens context menus.
- Scroll Wheel: Scrolls content up/down. Can also be clicked for a middle-click function.
- Side Buttons: Default functions are usually forward/back in web browsers, customizable via software.
3.2 DPI Adjustment
The R3 mouse features a dedicated DPI switch button, typically located on the bottom of the mouse or near the scroll wheel, allowing you to cycle through preset DPI levels. Each press changes the sensitivity, indicated by an LED color or pattern. For precise DPI customization, use the Smart AI Cloud Driver.

Image 3.1: The PixArt PAW3395 optical sensor, capable of up to 26,000 DPI, 650 IPS, and 50G acceleration, ensuring precise tracking.
3.3 Polling Rate Adjustment
The R3 mouse supports up to an 8000Hz polling rate, which can be configured through the Smart AI Cloud Driver. A higher polling rate reduces input lag, providing a smoother and more responsive experience, especially on high-refresh-rate monitors.
Video 3.2: An official product video highlighting the PAW3395 sensor and its capabilities, including high DPI and IPS tracking.
3.4 Advanced Customization
Using the Smart AI Cloud Driver, you can:
- Button Remapping: Assign different functions to any of the mouse buttons.
- Macro Programming: Create and assign complex sequences of commands to a single button.
- Lift-Off Distance (LOD): Adjust how high the mouse can be lifted before tracking stops, preventing unwanted cursor movement.
- Profile Management: Save and switch between multiple custom profiles for different games or applications.
4. Maintenance
4.1 Cleaning
To maintain optimal performance and hygiene:
- Use a soft, dry, lint-free cloth to wipe the surface of the mouse.
- For stubborn dirt, slightly dampen the cloth with water or a mild cleaning solution. Avoid harsh chemicals.
- Use compressed air to clear dust and debris from the sensor area and button crevices.
- Do not immerse the mouse in water or any liquid.
4.2 Battery Care
The R3 mouse uses a Lithium Ion battery. Follow these guidelines for battery longevity:
- Avoid fully discharging the battery frequently.
- Store the mouse at room temperature when not in use for extended periods.
- If storing for a long time, charge the battery to about 50% before storage.
4.3 Storage
When not in use, store the mouse in a clean, dry environment away from direct sunlight and extreme temperatures. The original packaging can provide good protection during storage or transport.
5. Troubleshooting
If you encounter issues with your FELICON x Attack Shark R3 mouse, refer to the following common solutions:
| Problem | Possible Cause | Solution |
|---|---|---|
| Mouse not responding (Wireless) | Low battery, incorrect mode, receiver not connected, interference. | Charge the mouse. Ensure mode switch is on '2.4G' or 'BT'. Re-plug the USB receiver. Move closer to the receiver or clear obstructions. |
| Mouse not responding (Wired) | Loose cable, faulty USB port, driver issue. | Ensure the USB-C cable is securely connected. Try a different USB port. Restart your computer. |
| Cursor movement is erratic or jumpy | Dirty sensor, unsuitable mouse pad surface, software conflict. | Clean the optical sensor with compressed air. Use a clean, uniform mouse pad. Check for conflicting software or update mouse drivers. |
| Bluetooth pairing fails | Mouse not in pairing mode, device already paired, Bluetooth disabled on computer. | Ensure mouse is in 'BT' mode and discoverable. Remove previous pairings from your computer's Bluetooth settings. Enable Bluetooth on your computer. |
| Custom settings not applying | Cloud Driver not connected, profile not saved/activated. | Ensure your mouse is connected and recognized by the Smart AI Cloud Driver. Save and activate the desired profile. |
If the problem persists after trying these solutions, please contact customer support.
6. Specifications

Image 6.1: Detailed product parameters and dimensions of the R3 mouse.
| Feature | Detail |
|---|---|
| Model | R3 |
| Brand | FELICON x Attack Shark |
| Connectivity | Tri-Mode (2.4GHz Wireless, Bluetooth 5.2, Wired USB-C) |
| Sensor | PixArt PAW3395 Optical Sensor |
| DPI Range | 800-26,000 DPI (Adjustable) |
| IPS Tracking Speed | 650 IPS |
| Acceleration | 50G |
| Polling Rate | Up to 8000Hz (Wireless) |
| Weight | Approximately 46g (1.62 ounces) |
| Material | Magnesium Alloy |
| Switches | Kailh GM 8.0 Black Mamba (80 million clicks life) |
| Battery | 1 Lithium Ion battery (included) |
| Dimensions | 119.5mm (Length) x 61mm (Width) x 39mm (Height) (Approximate) |
7. Warranty and Support
7.1 Warranty Information
This product is covered by a manufacturer's warranty. Please refer to the warranty card included with your product or visit the official FELICON website for detailed warranty terms and conditions. Keep your proof of purchase for warranty claims.
7.2 Customer Support
For technical assistance, troubleshooting beyond this manual, or warranty inquiries, please contact FELICON customer support through their official website or the contact information provided on the product packaging.
