
1. Introduction
Thank you for choosing the INALSA Steam Master Plus Standing Garment Steamer. This appliance is designed to provide efficient and gentle wrinkle removal for various fabrics, offering both vertical and horizontal steaming capabilities. Please read this instruction manual carefully before using the appliance to ensure safe operation and optimal performance. Keep this manual for future reference.

Image: Front view of the INALSA Steam Master Plus Standing Garment Steamer.
2. Important Safety Instructions
When using electrical appliances, basic safety precautions should always be followed to reduce the risk of fire, electric shock, and injury to persons.
- Read all instructions before using the appliance.
- Ensure the voltage indicated on the appliance corresponds to your local mains voltage before connecting.
- Do not immerse the appliance, power cord, or plug in water or other liquids.
- Always unplug the appliance from the power outlet when filling or emptying the water tank, and when not in use.
- This appliance is equipped with Dry Boiling Protection and Over-Heat Protection, which automatically switch off the heating element if the water tank is empty or overheats.
- Use the appliance only for its intended household purpose as described in this manual.
- Keep the steam hose straight during operation to prevent kinks and ensure consistent steam flow.
- Do not direct steam at people, pets, or electrical appliances. Steam is hot and can cause burns.
- Keep the appliance out of reach of children.
- Do not operate any appliance with a damaged cord or plug, or after the appliance malfunctions or has been damaged in any manner.
3. Product Components
Familiarize yourself with the parts of your INALSA Steam Master Plus Garment Steamer for proper assembly and operation.
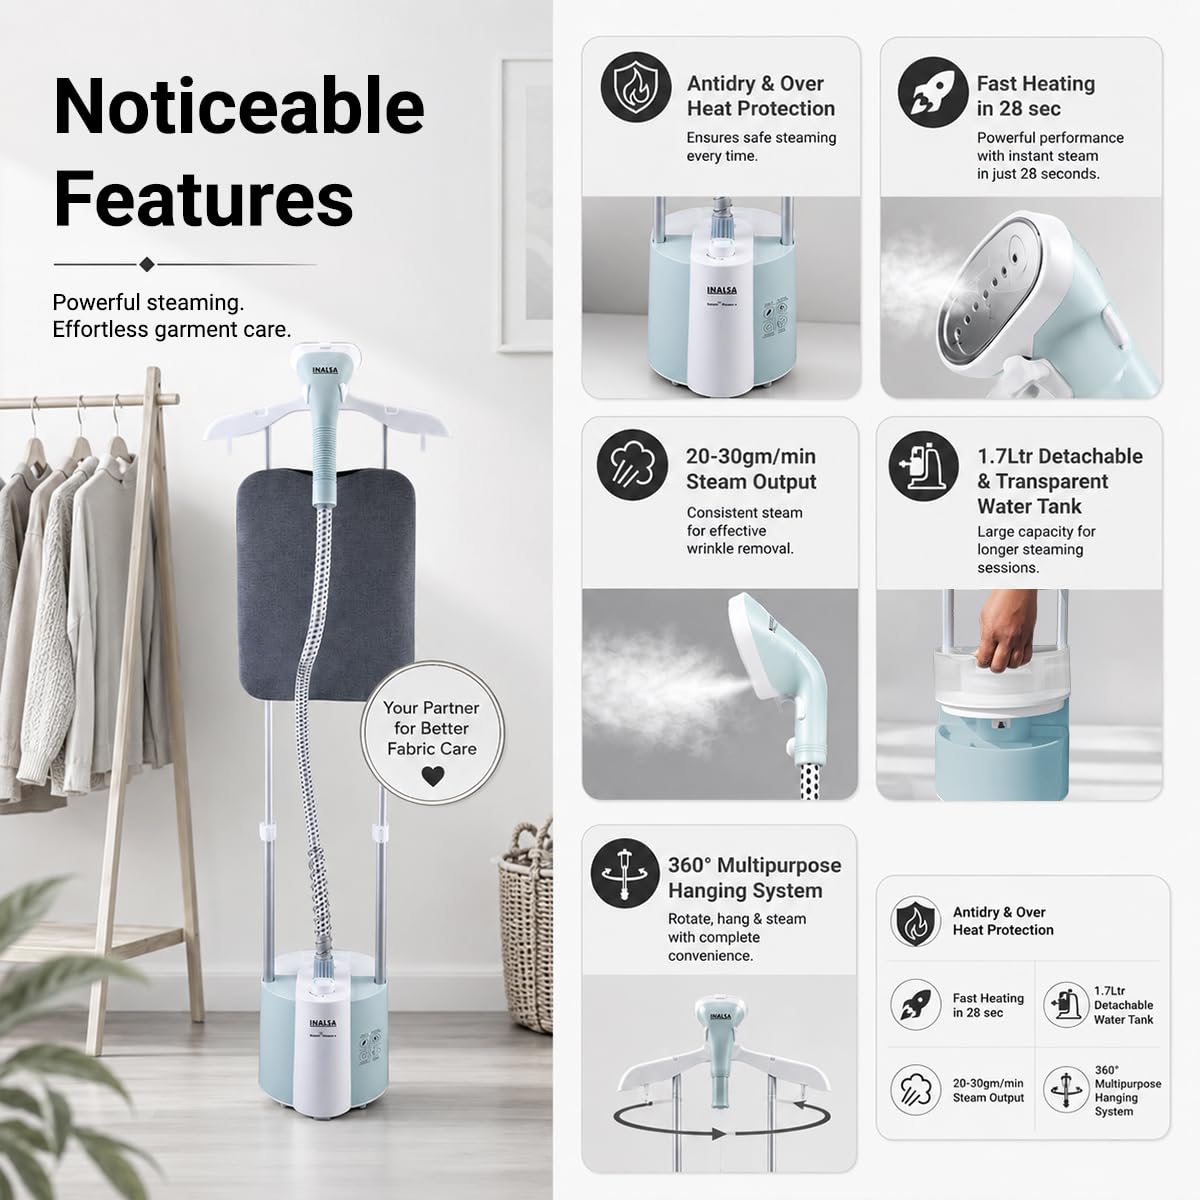
Image: Detailed view of the steamer's design and technology, highlighting key components.
- Powerful Steam Vents: For effective steam distribution.
- 2-Way Adjustment Iron Board: Allows for both vertical and horizontal steaming positions.
- Double Pole for Sturdiness: Provides stability during use.
- Clothes Hanging: Integrated hanger for garments.
- Anti-Scald Catheter: Designed for user safety.
- Stainless Steel Spring: Durable and flexible hose connection.
- 2 Steam Setting: Variable control knob for different fabric types.
- 1.7 L Detachable Water Tank: Large capacity for extended steaming sessions.
4. Setup
Follow these steps to set up your garment steamer before first use.
- Unpack: Carefully remove all components from the packaging.
- Assemble Poles: Insert the adjustable poles into the main unit base.
- Attach Hanger and Board: Secure the garment hanger and adjustable iron board to the top of the poles.
- Connect Hose: Attach the steam hose to the main unit. Ensure it is securely fastened.
- Fill Water Tank: Remove the 1.7 L detachable water tank. Fill it with clean, filtered water. Do not exceed the maximum fill line.

Image: The 1.7L detachable water tank and included safety glove, essential for setup and operation.
- Reattach Water Tank: Place the filled water tank back into the main unit, ensuring it is seated correctly.
- Adjust Height: Adjust the height of the poles to your preferred working level for comfortable standing or sitting use.
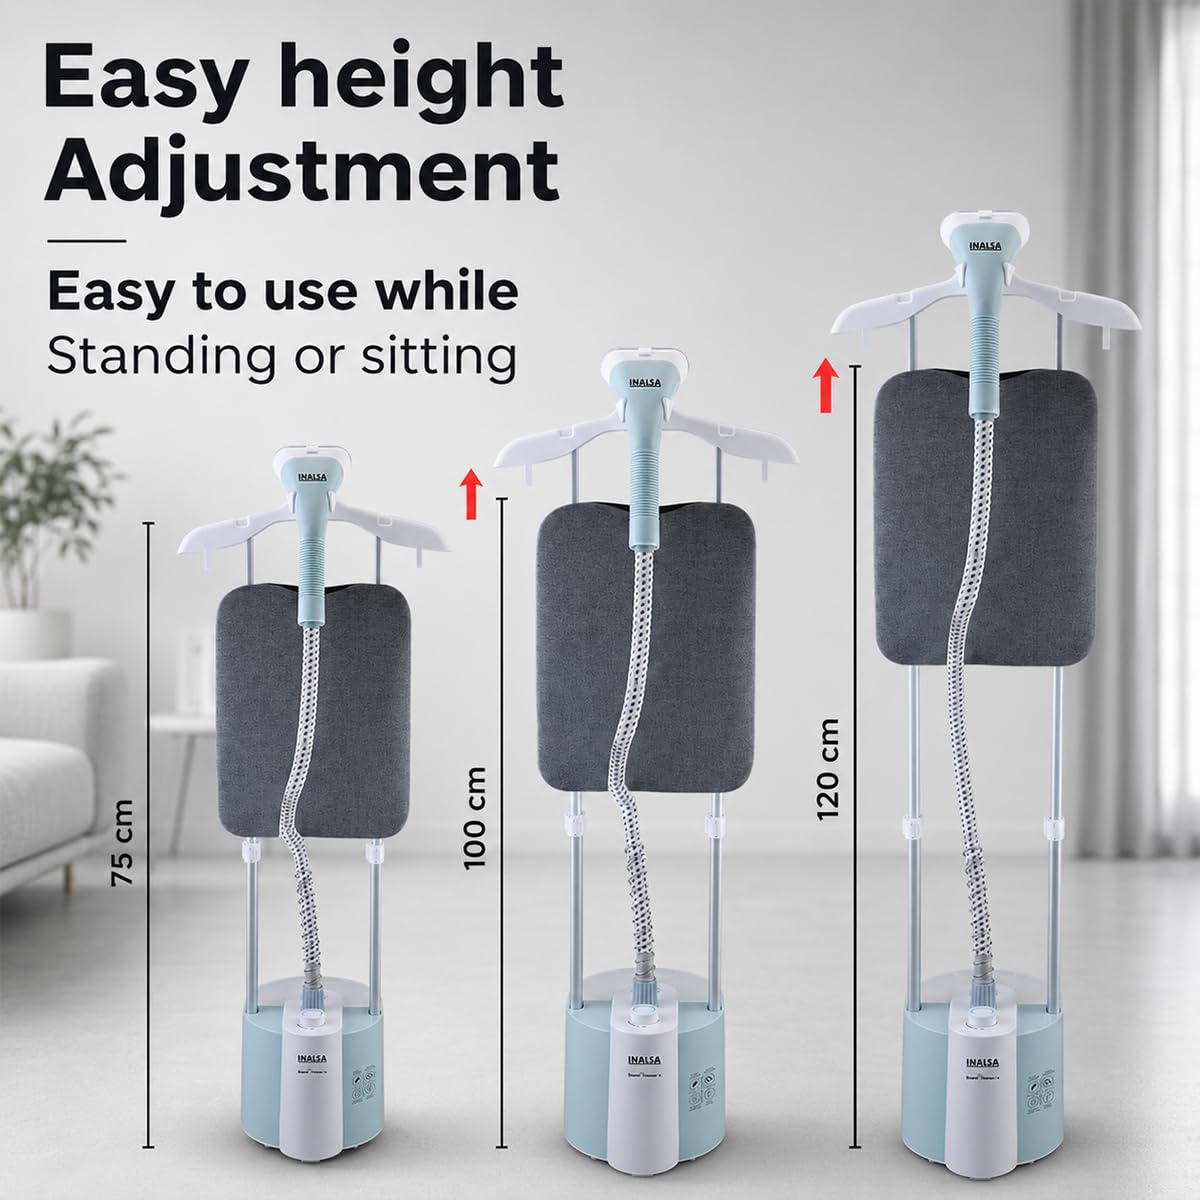
Image: The steamer's adjustable height feature, allowing for comfortable use while standing or sitting.
5. Operating Instructions
Learn how to effectively use your INALSA Steam Master Plus Garment Steamer for wrinkle-free clothes.

Image: Visual guide for optimal steaming performance, including water type, hose position, garment hanging, and preheating.
- Power On: Plug the appliance into a suitable power outlet. The power indicator light will illuminate.
- Preheating: The steamer will heat up in approximately 28 seconds. Wait for the steam to become consistent before beginning.
- Select Steam Setting: Use the variable control knob to select the appropriate steam output (20-30 g/min) for your fabric type.
- Prepare Garment: Hang the garment on the integrated hanger. For best results, ensure the garment is taut.
- Steaming: Hold the steam nozzle a few inches away from the fabric and move it in a vertical, downward motion. For stubborn wrinkles, gently press the nozzle against the fabric.
- Vertical & Horizontal Steaming: Utilize the adjustable 90° & 180° iron board position to comfortably steam clothes vertically or horizontally.
- Using Fabric Brush: Attach the fabric brush for heavy embroidery and embellished fabrics to help lift fibers and remove lint.
- Post-Steaming: Allow the garment to cool and dry completely before wearing or storing.
- Power Off: Unplug the appliance from the power outlet after use.
Usage Tips:
- Use RO / Filtered Water: This helps reduce scaling and maintains smooth steam performance.
- Keep the Hose Straight: Avoid kinks in the hose to ensure steam flows freely and evenly.
- Hang Garments Properly: Use the hanger and support board for neat, effective steaming.
- Steam After Preheating: Let the steamer heat up first, then glide vertically in slow strokes.

Image: The 2-in-1 functionality of the steamer, allowing for both standing and handheld use.
Steaming Delicate and Embellished Garments:
The INALSA Steam Master Plus is safe for delicate fabrics and embellished garments as it refreshes fabric without direct hot-plate contact.

Image: Demonstrates the safety of the garment steamer for delicate fabrics like embroidery, silk, chiffon, satin, and blazers, compared to a traditional hot iron.
Garment Steamer vs. Steam Iron:
Understand the differences to use the right tool for the right garment.

Image: Illustrates that a garment steamer is not a replacement for a steam iron, detailing their best uses: steam iron for sharp creases and heavy cottons, garment steamer for hanging garments, quick touch-ups, and delicate fabrics.
6. Maintenance
Regular maintenance ensures the longevity and optimal performance of your steamer.
Anti-Calc System (Descaling):
This system is built for hard water areas. Monthly descaling removes limescale and mineral build-up, ensuring powerful steam and long-lasting performance without clogs.

Image: Step-by-step guide for using the Anti-Calc System to descale the steamer, involving water, white vinegar, and a release knob.
- Prepare Solution: Fill the water tank with 200ml water and 200ml white vinegar.
- Soak: Reattach the tank and leave it for 8 hours to dissolve mineral build-up.
- Release Solution: Locate the knob at the very bottom of the unit and release it to drain the solution.
- Rinse: Refill with fresh water, run the steamer until dry, and then turn it off. Rinse the tank completely with fresh water before the next use to prevent any lingering odors.
Cleaning and Storage:
- Always unplug the steamer and allow it to cool completely before cleaning.
- Empty any remaining water from the tank after each use.
- Wipe the exterior of the appliance with a soft, damp cloth. Do not use abrasive cleaners.
- Store the steamer in a cool, dry place, away from direct sunlight and moisture.
7. Troubleshooting
If you encounter any issues with your steamer, refer to the following common problems and solutions.
| Problem | Possible Cause | Solution |
|---|---|---|
| No steam or low steam output | Water tank empty; Steamer not preheated; Hose kinked; Mineral build-up. | Fill water tank; Allow 28 seconds for preheating; Straighten hose; Perform descaling (Anti-Calc System). |
| Water leakage from nozzle | Hose not straight; Overfilling water tank; Condensation in hose. | Ensure hose is straight and elevated; Do not overfill tank; Allow steamer to heat fully before use. |
| Appliance not turning on | Not plugged in; Power outlet issue; Overheat protection activated. | Check power connection; Try a different outlet; Allow appliance to cool down. |
8. Specifications
Key technical details for the INALSA Steam Master Plus Garment Steamer.
- Model: Steam Master Plus
- Wattage: 2000 Watts
- Voltage: 230 Volts (AC)
- Heat Time: 28 Seconds
- Water Tank Capacity: 1.7 Liters
- Steam Output: 20-30 g/min (Variable)
- Product Dimensions (L x W x H): 23L x 31.6W x 22.5H Centimeters
- Item Weight: 3450 Grams
- Included Components: Main Unit
- Country of Origin: China
9. Warranty and Support
INALSA provides comprehensive support for your product.
Warranty Information:
This product comes with a 2 Year Warranty by the brand INALSA from the date of purchase. Please retain your purchase receipt for warranty claims.
Customer Support:
For any assistance, including installation support, product registration, or service center location, please contact INALSA support:
- Contact Number: 9773982065
- Email: customercare@inalsa.co.in
- WhatsApp: 7428931518
- Product Registration: Register your product and get extended support by scanning the QR code or visiting the official website: inalsaappliances.com/product-registration

Image: INALSA customer support details, including contact numbers, email, WhatsApp, and product registration information.