
Koolatron KKCMEMT AZ
Kenmore Espresso Machine User Manual
Model: KKCMEMT AZ
1. Product Overview
The Kenmore Espresso Machine is a semi-automatic coffee maker designed for home use, featuring an integrated bean grinder, milk steamer, and frother. It allows users to create professional barista-style beverages such as cappuccinos and café lattes.
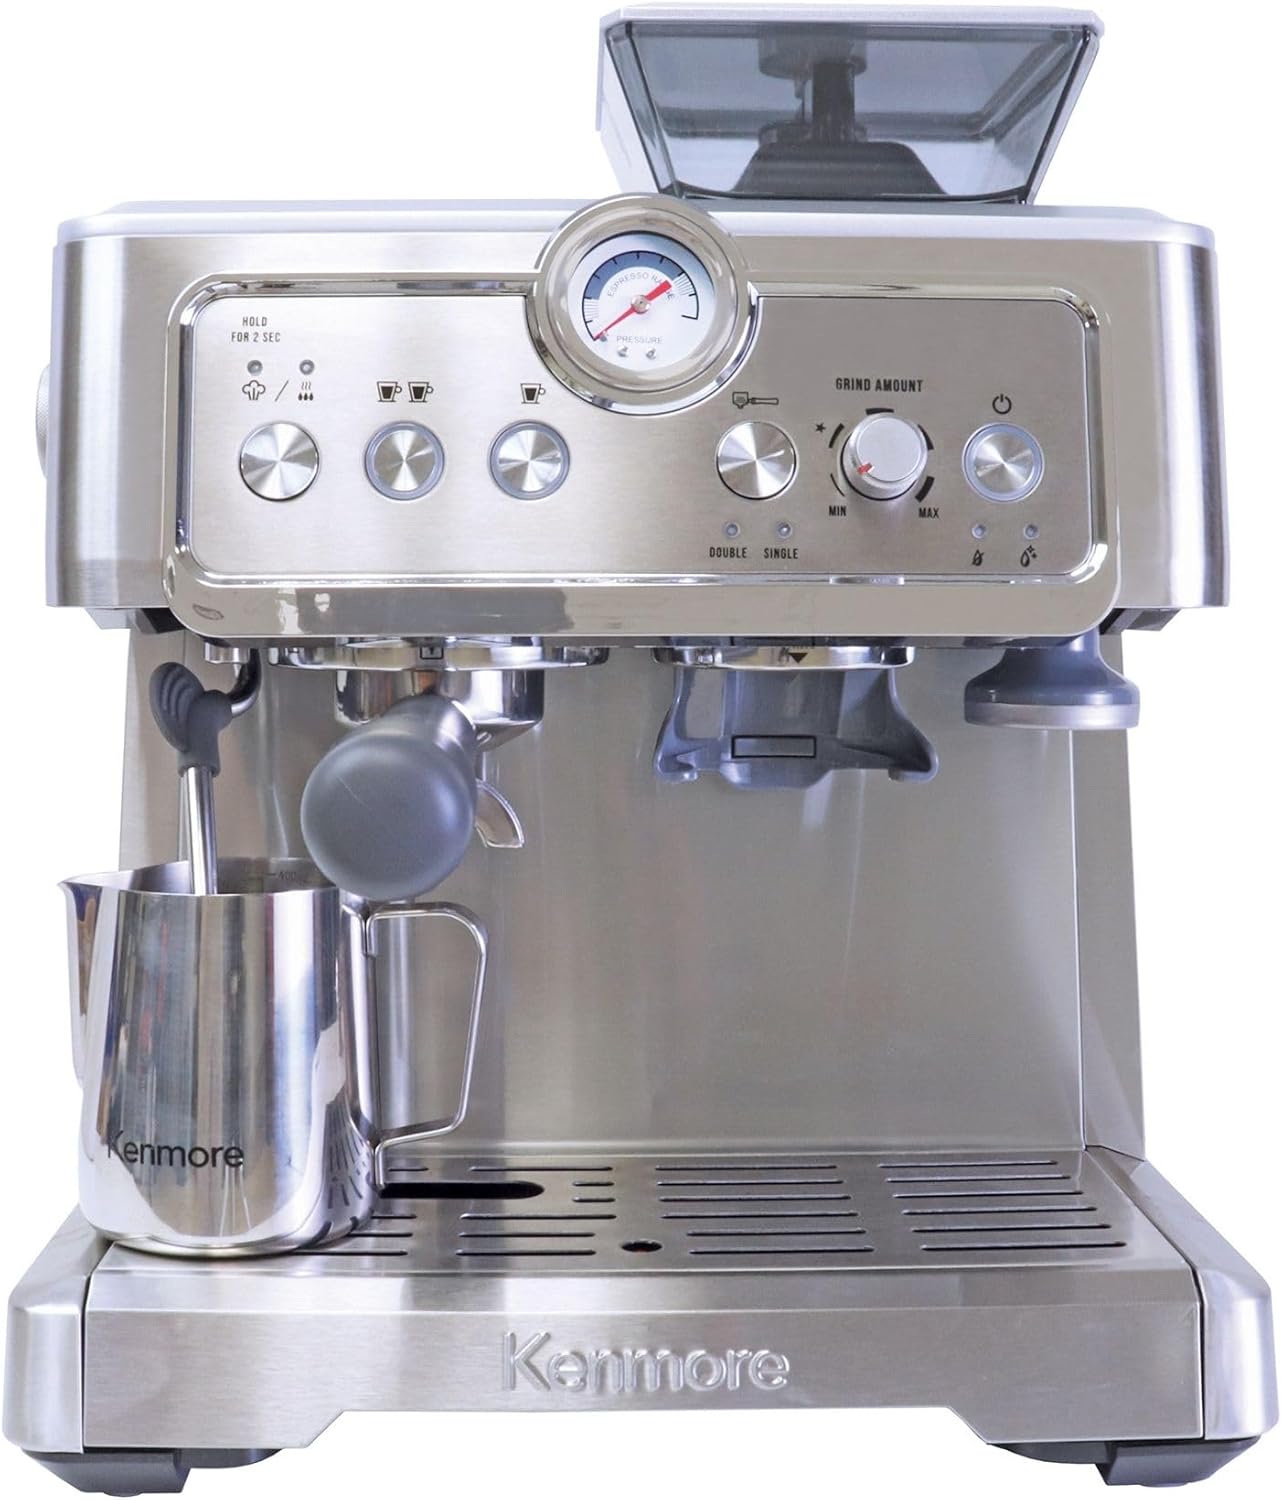
Front view of the Kenmore Espresso Machine, showcasing its stainless steel finish and control panel.

The Kenmore Espresso Machine displayed with all its included accessories, such as the portafilter, tamper, cleaning tools, and milk frothing jug.
Included Components:
- Espresso machine with integrated grinder
- 1-cup & 2-cup pressurized filter baskets
- Portafilter
- Coffee scoop
- Cleaning pin
- Steaming pitcher
- Cleaning brush
- Tamper
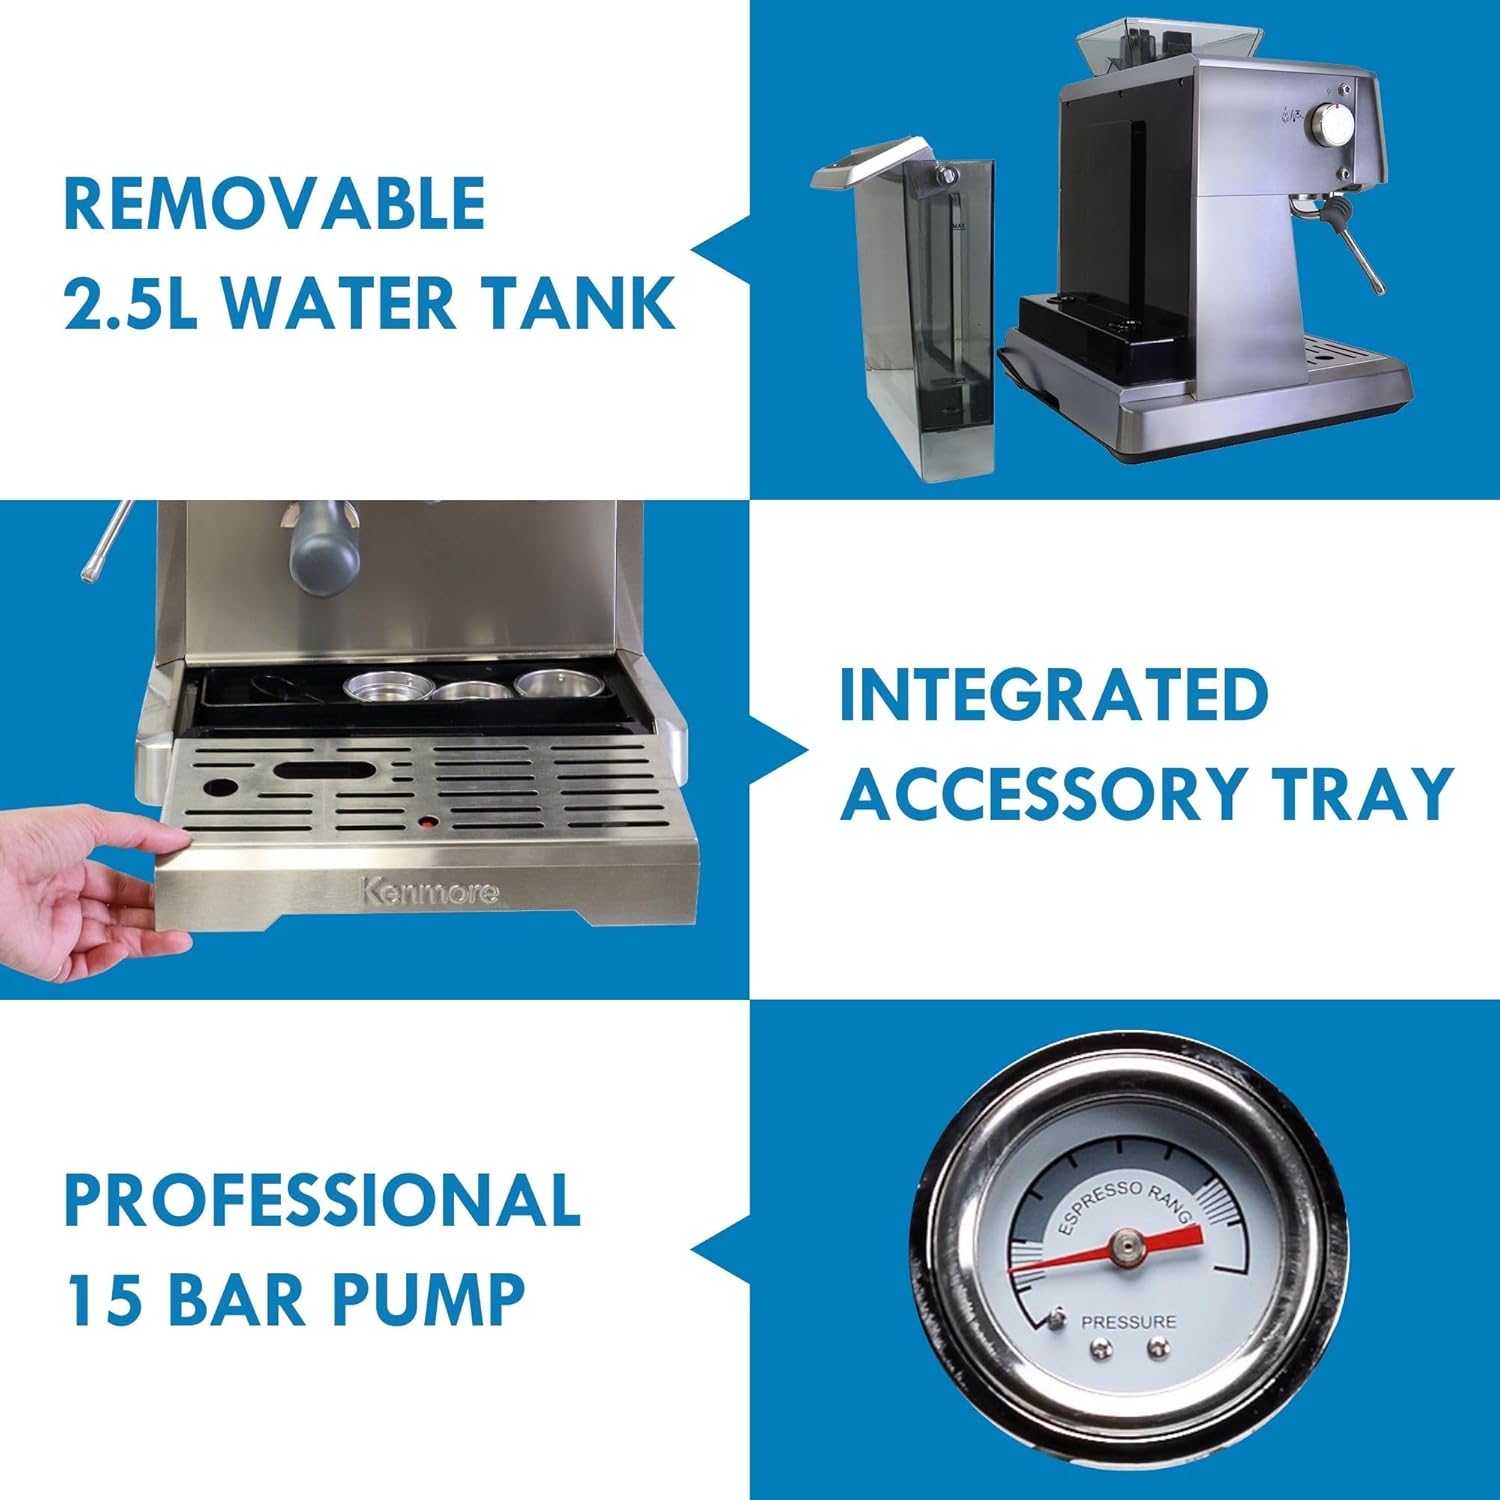
A visual representation of the removable 2.5L water tank and the integrated accessory tray located behind the drip tray.
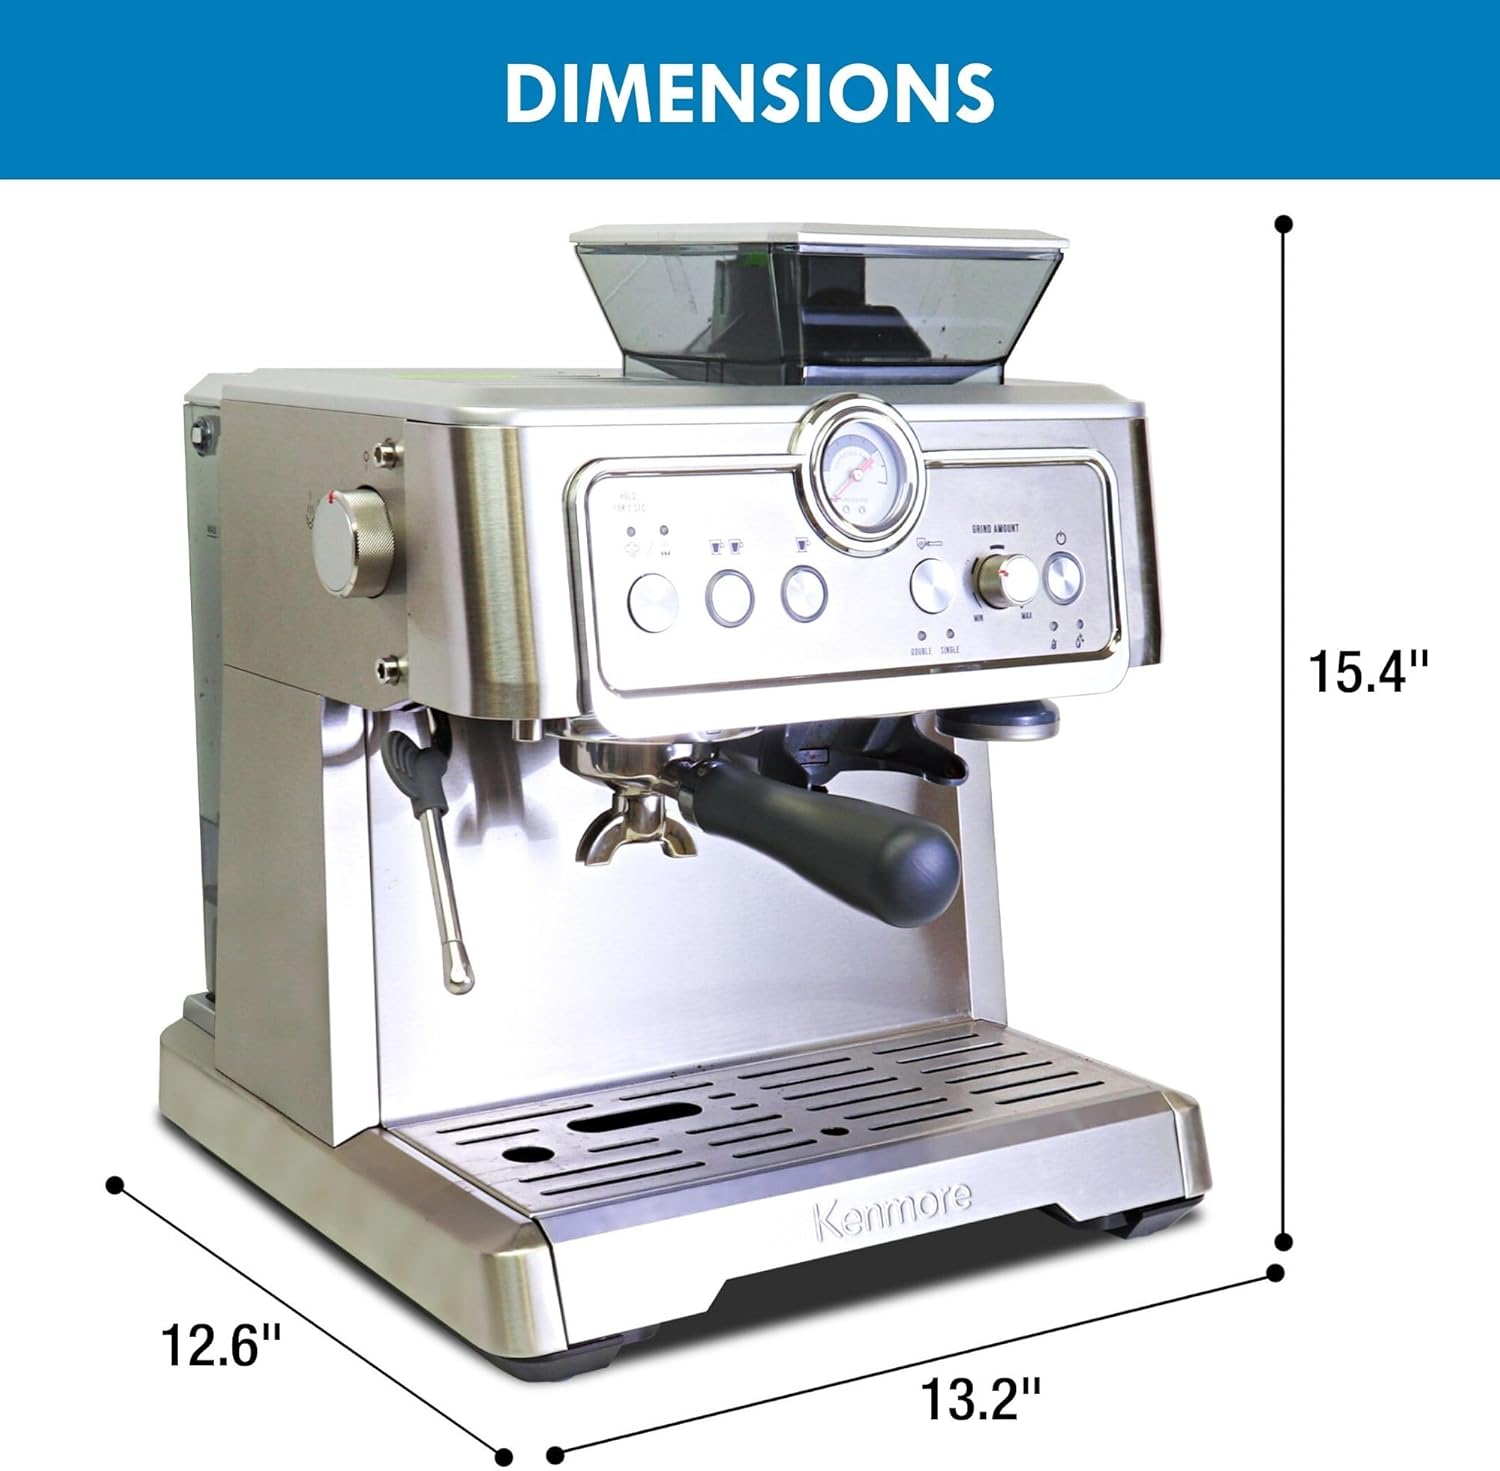
Diagram showing the dimensions of the Kenmore Espresso Machine: 12.6 inches deep, 13.15 inches wide, and 15.39 inches high.
2. Setup
Initial Unpacking and Accessory Retrieval:
Upon first unpacking your Kenmore Espresso Machine, pull the drip tray forward to reveal the accessory storage tray. The filter baskets and cleaning tools are stored here.
Installing the Bean Hopper:
Install the clear bean hopper onto the top of the machine, ensuring it is securely locked into place. This is where you will pour your fresh coffee beans.
Filling the Water Tank:
Remove the water tank from the back of the machine and fill it with fresh, cold water up to the maximum fill line. Securely lock the water tank back into its position.
Flushing the Machine:
Before first use, it is important to flush the machine to clean any manufacturing residues. Turn the machine on to pre-heat. Once the pre-heating cycle is complete (the button will stop flashing), place a cup underneath the group head and run a one-cup cycle of water to flush out the machine. Also, turn the dial to flush the steam wand to ensure it is clear of any water.
Official quick start guide video from Koolatron Corporation, demonstrating the initial setup and flushing process of the Kenmore Espresso Machine.
3. Operating Instructions
Warming Your Cups:
Next to the grinder is a warming tray. When you turn your machine on, place your cups on this warming tray to warm them up, which helps maintain the temperature of your espresso.
Preparing the Portafilter:
Select the appropriate filter basket for your desired shot size: use the double basket for a double shot (2 oz) or the single basket for a single shot (1 oz). Line up the raised dot on the basket to the notched groove in the portafilter, then slide in and twist to lock it into place.
Grinding Coffee:
Select your grind size using the dial on the bean hopper. Start at the medium point and adjust as needed. Turn clockwise for a finer grind, and counterclockwise for a coarser grind. A finer grind can increase pressure and give a fuller flavor. The grind amount dial sets how much coffee will be ground into your portafilter. Start in the 12 o'clock position and adjust later as needed. Place the portafilter into the cradle and push once to activate the grinder.
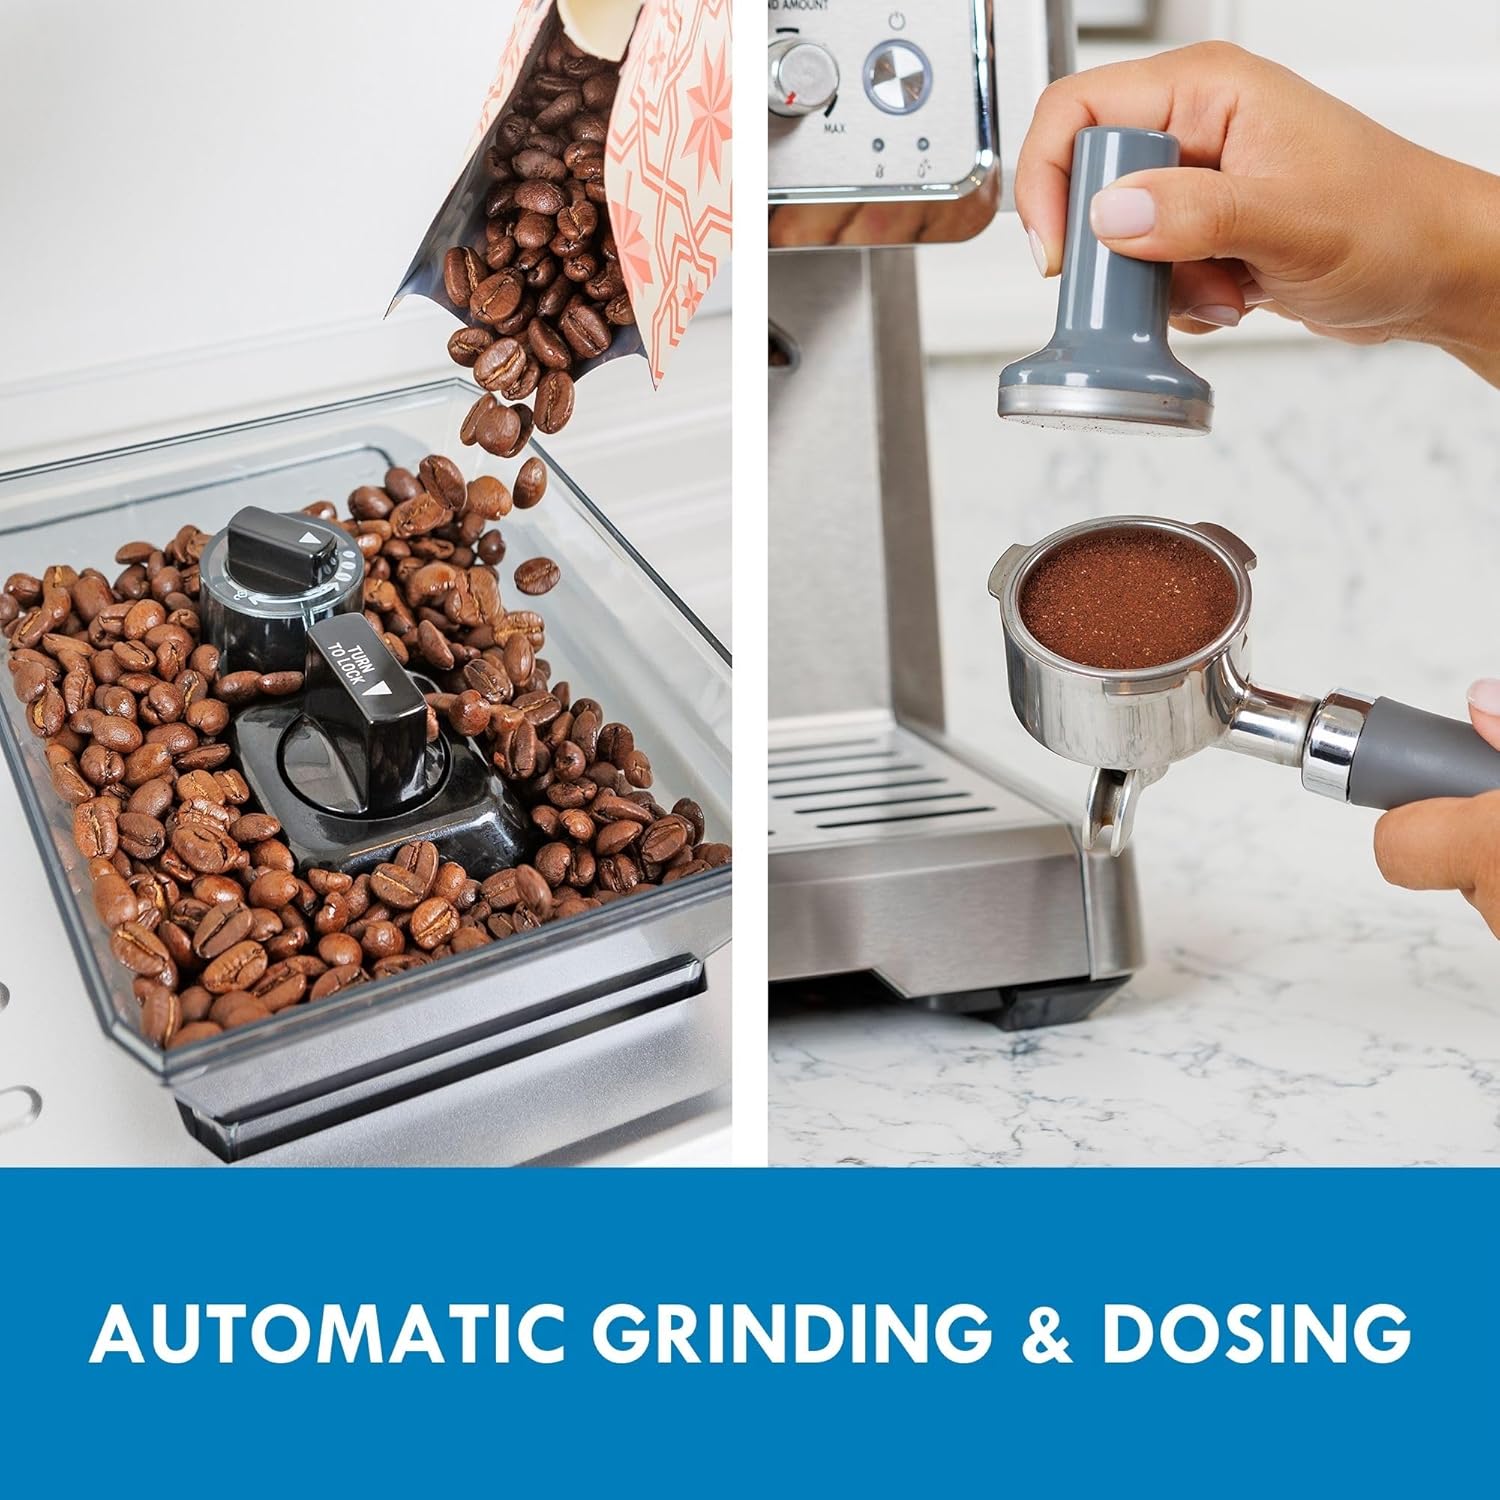
Close-up view of the machine automatically grinding and dosing coffee beans into the portafilter.
Tamping Coffee:
Take your tamper out from its storage spot. Press the tamper down firmly onto the ground coffee in the portafilter, using even pressure and twisting it at the end. Use the metal rim on the side of the tamper as a guide; it should line up with the edge of the portafilter.
Brewing Espresso:
Place the portafilter into the group head and lock it in place by twisting the handle to the right. Press the correct shot size button (single or double) to start brewing. For the best-tasting espresso, the pressure gauge needle should be in the gray zone during the brewing process. Note that grind size and grind amount can affect pressure. Too little coffee in your portafilter may result in low pressure, while too much coffee packed into the filter may result in pressure that is too high.

Two cups receiving freshly brewed espresso from the machine, illustrating the single or double shot capability.
Hot Water Dispensing:
If you need hot water for making an Americano or other hot beverages, turn the dial to the water icon. Place your cup under the steam wand to dispense hot water.
Steaming Milk:
To steam milk, pour cold milk into the stainless-steel jug. Do not fill over the halfway point. Press and hold the steam button for 2 seconds to vent the steam wand. Turn the dial to the steam/water setting for 5 seconds and then turn off. This will purge any water that may be in the wand. Insert the frothing nozzle into the milk and turn the dial to steam. Keep the steam wand just under the surface to introduce air into the milk. Use circular motions to give your milk that creamy texture. Once the milk reaches the desired consistency, turn the steam off and quickly wipe the wand with a wet cloth. The cleaning pin can also help remove any dried milk. Tap the milk jug and give it a quick swirl before pouring to get a nice glossy finish.

The powerful steam wand in action, frothing milk in the stainless steel jug to create a creamy texture for lattes and cappuccinos.
4. Maintenance
General Cleaning:
The detachable drip tray and water tank make cleaning the machine a breeze. Regularly empty and clean the drip tray and water tank to prevent mineral buildup and ensure optimal performance.
Cleaning the Steam Wand:
After each use, quickly wipe the steam wand with a wet cloth to remove any milk residue. Use the provided cleaning pin to clear any dried milk from the nozzle.
5. Troubleshooting
Espresso Pressure Issues:
- Low Pressure: If the pressure gauge indicates low pressure during brewing, it may be due to too little coffee in your portafilter or a grind that is too coarse. Adjust the grind amount or fineness accordingly.
- High Pressure: If the pressure gauge indicates high pressure, it could be caused by too much coffee packed into the filter or a grind that is too fine. Reduce the coffee amount or adjust to a coarser grind.
6. Specifications
| Feature | Detail |
|---|---|
| Brand | Koolatron |
| Model Name | Kenmore Espresso Machine 15 Bar | Grinder & Milk Frother | Stainless Steel |
| Item Model Number | KKCMEMT AZ |
| Color | Silver and Black |
| Product Dimensions | 12.6"D x 13.15"W x 15.39"H |
| Item Weight | 17.27 pounds |
| Special Feature | Integrated Coffee Grinder, Milk Frother, Pressure and Temperature control |
| Coffee Maker Type | Espresso Machine |
| Filter Type | Reusable |
| Specific Uses For Product | Espresso, Latte |
| Operation Mode | Semi-Automatic |
| Voltage | 120 Volts |
| Human Interface Input | Buttons |
| Coffee Input Type | whole_beans |
| UPC | 059586652271 |
7. Warranty and Support
The Kenmore Espresso Machine comes with a comprehensive 5-year warranty, providing peace of mind and assurance of its quality and durability. This extended warranty reflects the manufacturer's confidence in the product and ensures long-term satisfaction for the user.
For support, please refer to the contact information provided in your product packaging or visit the official Koolatron website.
Related documentsKKCMEMT AZ

Ask a question about this manual
Ask about setup, troubleshooting, compatibility, parts, safety, or missing instructions. Manuals+ will review the question and use this page’s manual context to help answer it.