
lighteu GL-C-008P(mini)
lighteu® GLEDOPTO Zigbee RGB+CCT LED Controller User Manual
Model: GL-C-008P(mini)
1. Product Overview
The lighteu® GLEDOPTO Zigbee RGB+CCT LED Controller (Model: GL-C-008P(mini)) is an ultra-thin, smart controller designed for RGB+CCT LED strip lights. It enables comprehensive control over color, brightness, and color temperature (2700K to 7000K) of compatible LED strips. This controller supports various control methods including voice control via smart assistants like Alexa, app control, and 2.4G RF remote control, offering versatile integration into smart home systems.

Figure 1: GLEDOPTO Zigbee Mini RGB+CCT Ultra Thin LED Controller (Model: GL-C-008P(mini)). This image shows the compact design of the controller with input and output terminals clearly visible, along with indicator light, reset, and opt buttons.
2. Key Features
- RGBCCT LED Strip Control: Manages RGB (Red, Green, Blue) and CCT (Correlated Color Temperature - warm white to cool white) LED strips.
- Voice Control: Compatible with Alexa Echo Plus and Google Home for hands-free operation (on/off, color change, dimming/brightening).
- APP Control: Control lights via a smartphone application, including music rhythm synchronization and group control for multiple controllers.
- RF Remote Control: Can be controlled by a GLEDOPTO 6-group RF remote (GL-RC-006Z, sold separately).
- Mesh Functionality: Each Pro controller acts as a signal repeater, extending the control distance within a network of lights.
- Wide Compatibility: Works with Zigbee Light Link, Philips Hue, Ikea Tradfri, Osram Lightify, Amazon Echo Plus, and other compatible systems.
- Ultra-Thin Design: Compact and lightweight, making it easy to integrate into various setups.

Figure 2: Diagram illustrating the key features of the GLEDOPTO controller, including 2.4G RF Remote control, Frequency settings, APP control, Power on status settings, Voice control, and Press design.
3. Setup and Installation
3.1 Wiring the Controller
Ensure all power is disconnected before wiring. Connect your DC power supply to the input terminals (V+ and V-) and your RGB+CCT LED strip to the output terminals (V+, R, G, B, C, W) as indicated on the controller. Observe polarity carefully.
Figure 3: Close-up view of the controller showing the input terminals (V+, V-) on the left and output terminals (V+, R, G, B, C, W) on the right for connecting the LED strip.
3.2 Connecting to a Smart Bridge (e.g., Zigbee Hub)
To enable smart control features, connect the controller to a compatible Zigbee smart bridge or hub. The general steps are as follows:
- Power On: Ensure your LED strip and controller are properly wired and powered on.
- Bridge Setup: Set up your smart bridge according to its manufacturer's instructions.
- App Connection: Download the corresponding app for your smart bridge and connect to your bridge within the app.
- Device Discovery: Initiate a device discovery or pairing process within your bridge's app. The controller should be detected.
- Pairing: Follow the app's prompts to complete the pairing process. Once paired, you can begin controlling your LED strip.
4. Operation
4.1 App Control
Once connected to a smart bridge, you can use the bridge's dedicated application to control your LED strip. This typically includes:
- Color Selection: Choose from 16 million colors.
- Color Temperature Adjustment: Adjust white light from warm (2700K) to cool (7000K).
- Brightness Control: Dim or brighten the lights from 1% to 100%.
- Scene Modes: Apply pre-set or custom lighting scenes.
- Music Sync: Synchronize light effects with music playing on your smartphone.
- Grouping: Control multiple controllers or LED strips simultaneously by creating groups within the app.

Figure 4: Screenshot of a mobile application interface demonstrating color selection for LED strips, allowing users to choose from a wide spectrum of colors.
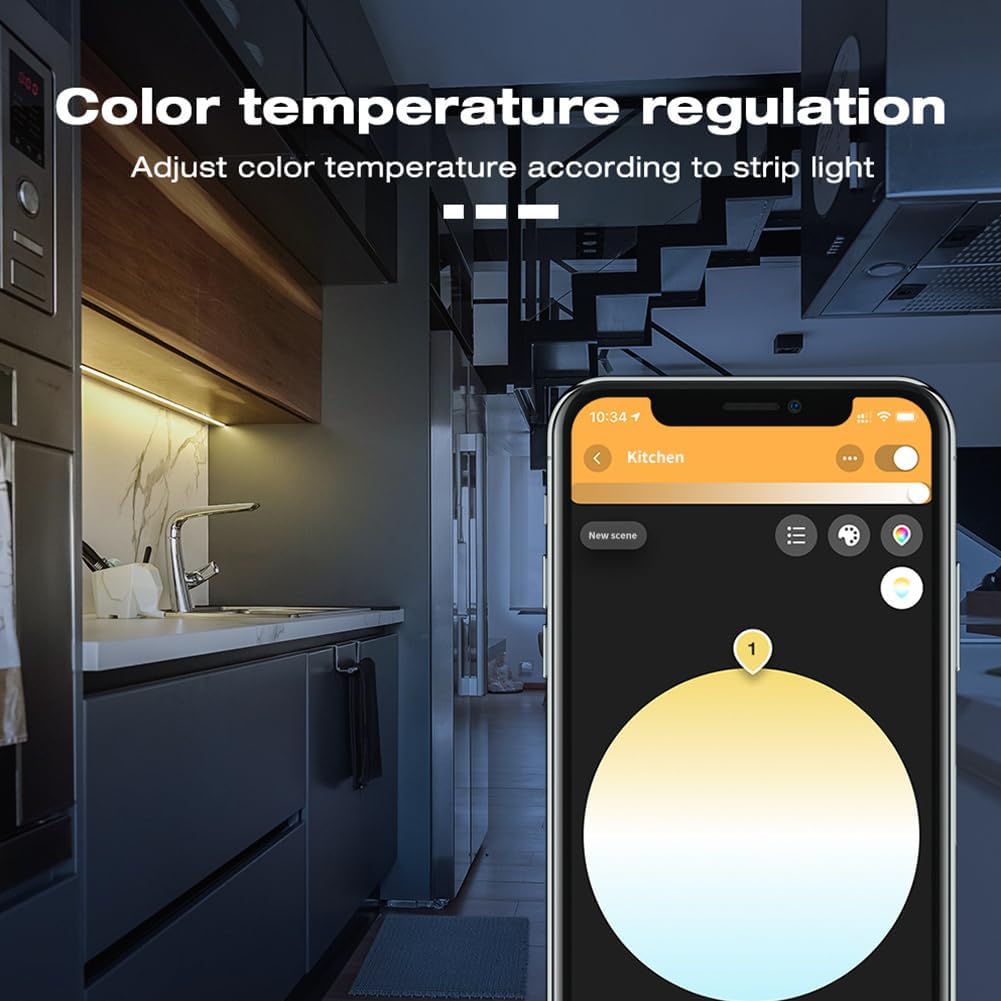
Figure 5: Screenshot of a mobile application interface showing controls for adjusting the color temperature of the LED strip, from warm to cool white.
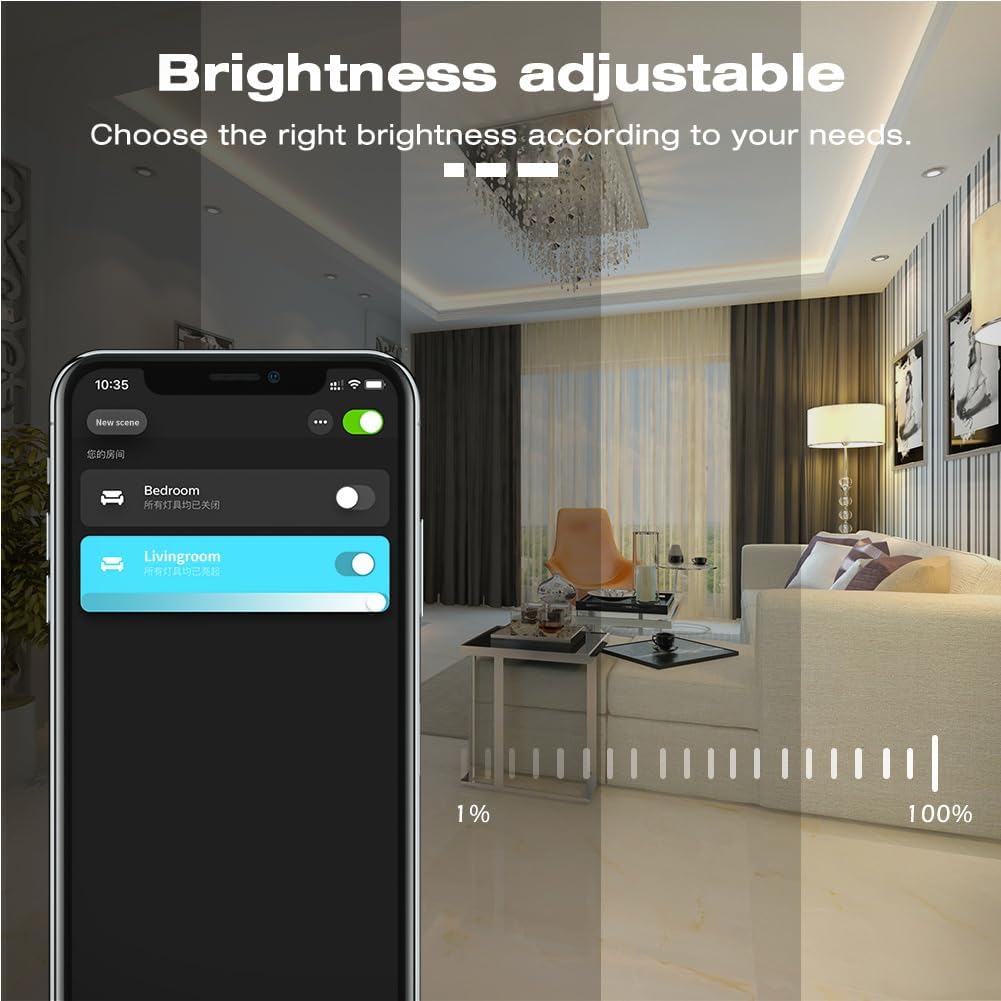
Figure 6: Screenshot of a mobile application interface displaying a slider for brightness adjustment, allowing users to set the light intensity from 1% to 100%.
4.2 Voice Control
For voice control, ensure your GLEDOPTO controller is successfully paired with a compatible smart hub (e.g., Amazon Echo Plus) that supports voice commands. Once set up, you can use commands such as:
- "Alexa, turn on [Light Name]"
- "Alexa, turn off [Light Name]"
- "Alexa, set [Light Name] to blue"
- "Alexa, dim [Light Name] to 50%"
- "Alexa, make [Light Name] warmer"

Figure 7: The GLEDOPTO controller shown alongside an Amazon Echo device and a smartphone displaying the control app, illustrating its compatibility with voice and app control systems.
4.3 Remote Control (Optional)
The controller can also be operated using a GLEDOPTO 2.4G RF remote control (GL-RC-006Z). Refer to the remote control's specific instructions for pairing and operation.

Figure 8: A hand holding a GLEDOPTO 2.4G RF remote control, demonstrating its use for controlling LED lighting in a closet setup.
4.4 Frequency Settings
The controller allows for frequency adjustments to optimize compatibility with various power supplies and reduce noise. This can typically be done via a button on the controller or through the app, cycling through different frequency options (e.g., 1000Hz, 2000Hz, 4000Hz, 8000Hz, 600Hz, 800Hz).

Figure 9: An illustration showing different frequency settings (600Hz, 800Hz, 1000Hz, 2000Hz, 4000Hz, 8000Hz) and their corresponding flashing times, with the controller's 'Opt' button highlighted for one-touch frequency switching.
5. Maintenance
The GLEDOPTO LED controller requires minimal maintenance. Keep the device clean and free from dust. Ensure it is installed in a dry environment with adequate ventilation to prevent overheating. Do not expose the controller to water or excessive humidity. For cleaning, use a dry, soft cloth. Avoid using harsh chemicals or abrasive cleaners.
6. Troubleshooting
6.1 Resetting the Controller
If you experience issues with connectivity or control, performing a factory reset may resolve the problem. To reset the controller:
- Power On: Ensure your device is powered on.
- Cycle Power: Switch the device off and then on again within 2 seconds.
- Repeat: Repeat the off/on cycle four times consecutively.
- Confirmation: The reset is complete when the device is switched on for the fifth time, and the light stays on after blinking 4 times.
6.2 Common Issues
- No Response: Check power connections to both the controller and the LED strip. Ensure the controller is properly paired with your smart bridge.
- Incorrect Colors/Brightness: Verify the LED strip type (RGB+CCT) is compatible. Recalibrate or re-pair the controller if necessary.
- Intermittent Connectivity: Ensure the controller is within range of your Zigbee bridge. Consider using the mesh function with other compatible devices to extend signal range.
7. Specifications
| Model Number | GL-C-008P(mini) |
| Input Voltage | DC 5-24V |
| Output Current (per channel) | 3A max |
| Total Output Current | 6A max |
| Total Power | 144W Max |
| Operating Temperature | -20°C to +45°C |
| Protection Rate | IP20 |
| Dimensions | Φ23.5*48*89mm (Ultra-thin: 10.0mm thickness, 24.3mm width) |
| Weight | 30g |
| Special Features | Adjustable cable, adjustable, voice activation |
| Indoor/Outdoor Use | Indoor |

Figure 10: Image illustrating the ultra-thin profile (10.0mm) and width (24.3mm) of the controller, emphasizing its lightweight design.
8. Warranty and Support
For warranty information and technical support, please refer to the official lighteu® or GLEDOPTO website, or contact your retailer. Keep your purchase receipt for warranty claims. Specific warranty terms and conditions may vary by region and retailer.
For further assistance, you may also consult online forums or communities dedicated to Zigbee smart home devices, as many common issues have documented solutions.
Related documentsGL-C-008P(mini)


Ask a question about this manual
Ask about setup, troubleshooting, compatibility, parts, safety, or missing instructions. Manuals+ will review the question and use this page’s manual context to help answer it.