
iFutniew T193
iFutniew T193 Mini Camera User Manual
Model: T193
1. Introduction
The iFutniew T193 Mini Camera is a compact, portable digital video recorder designed for discreet recording. It features Full HD 1080P video capture, motion detection capabilities, and supports external Micro SD cards up to 128GB. This manual provides detailed instructions for the proper setup, operation, and maintenance of your T193 Mini Camera.
2. Product Overview
Familiarize yourself with the components of your T193 Mini Camera.
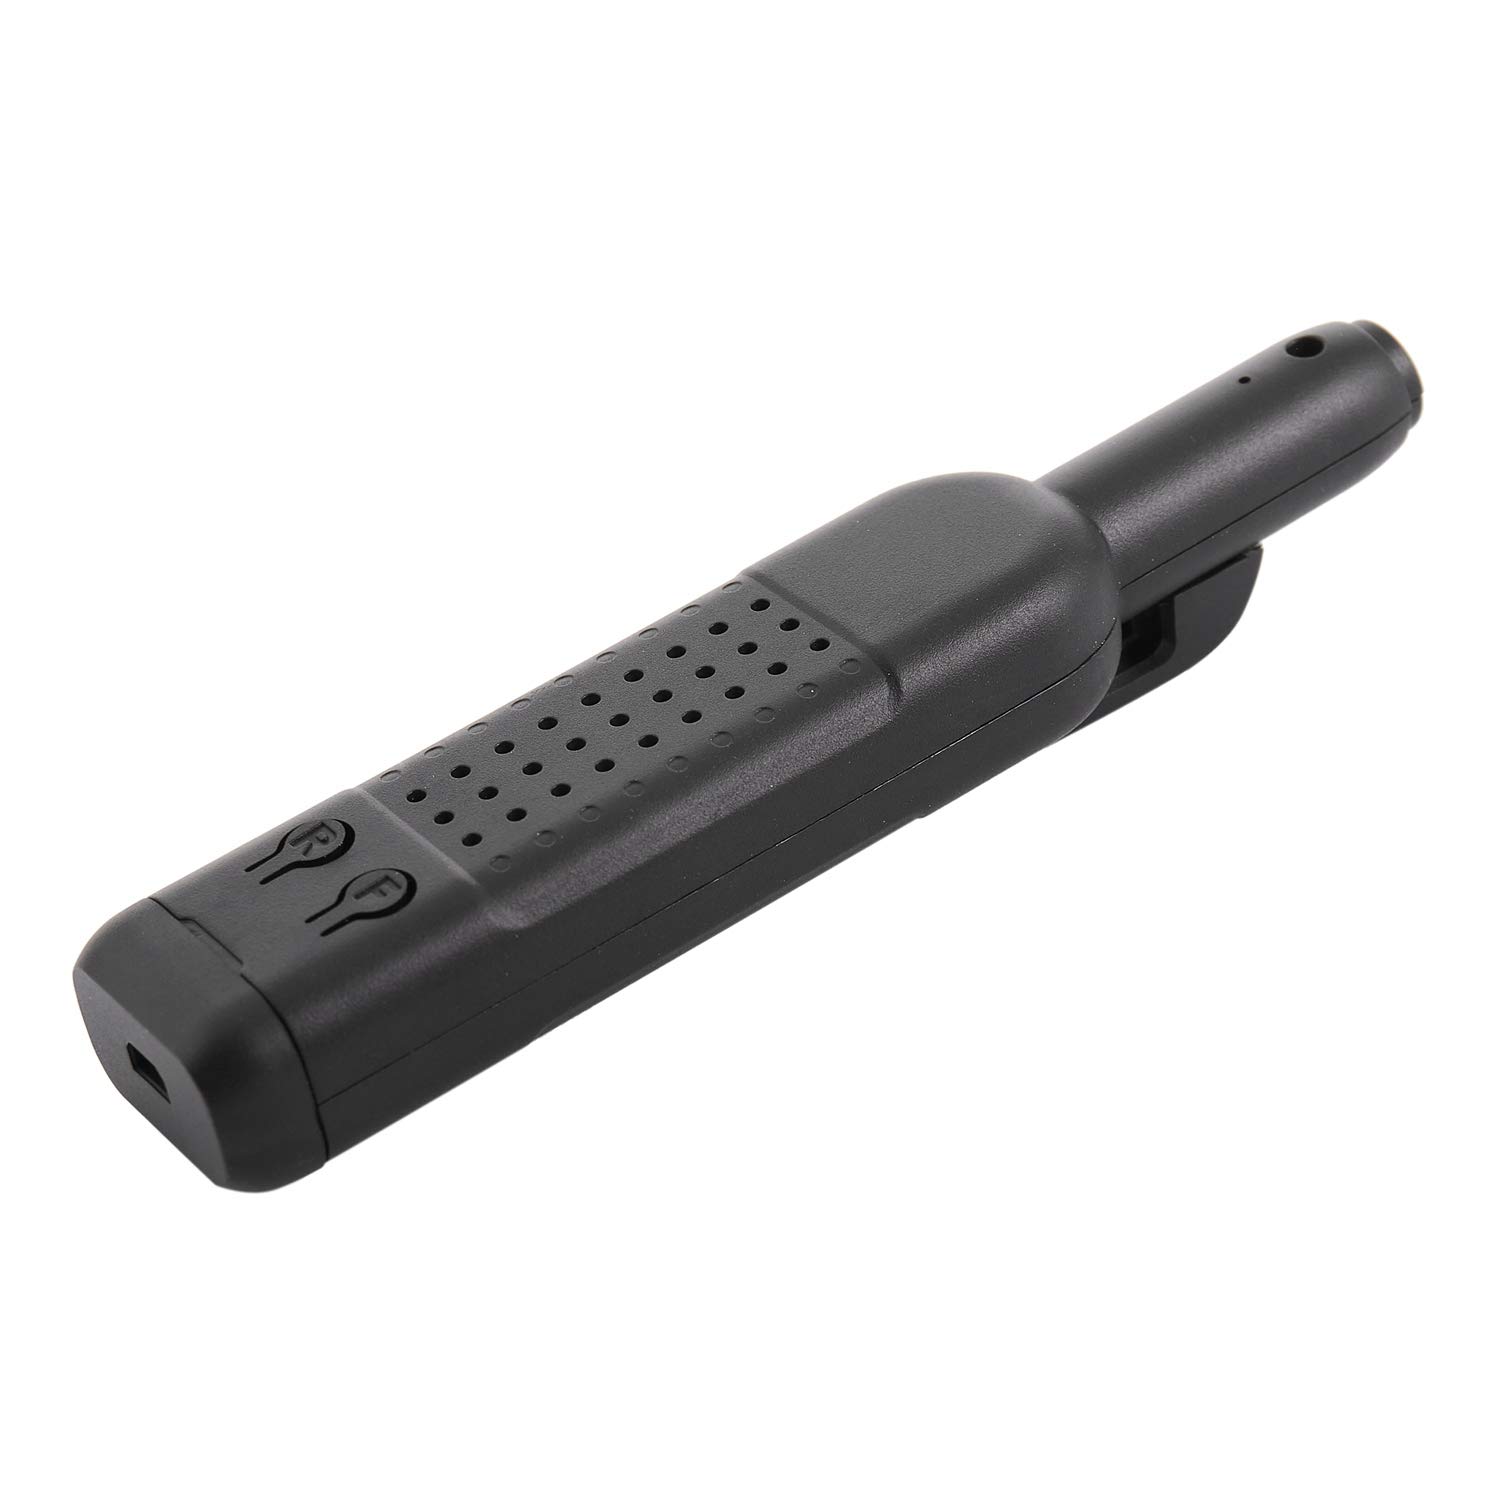


2.1 Package Contents
- 1 x T193 Mini DV Camera
- 1 x USB Cable
- 1 x User Manual (this document)
3. Setup
3.1 Charging the Battery
Before initial use, fully charge the camera's built-in lithium battery.
- Connect the camera to a 5V DC power source (e.g., computer USB port or USB wall adapter) using the provided USB cable.
- The indicator light will show the charging status. Refer to the camera's specific indicator light behavior for charging (typically red light on during charging, off when fully charged).
- A full charge takes approximately 3 hours. The camera can operate for up to 2.5 hours on a full charge.
3.2 Inserting a Micro SD Card
The camera requires a Micro SD (TF) card for storing recordings. It supports cards up to 128GB.
- Locate the external TF card slot on the camera.
- Gently insert the Micro SD card into the slot with the gold contacts facing down until it clicks into place.
- To remove the card, push it gently inward until it springs out.
4. Operating Instructions
4.1 Power On/Off
- Power On: Press and hold the Power button for a few seconds until the indicator light illuminates.
- Power Off: Press and hold the Power button again until the indicator light turns off. The camera will automatically save any ongoing recording before shutting down.
4.2 Video Recording (1080P)
To record video in Full HD 1080P resolution:
- Ensure the camera is powered on and a Micro SD card is inserted.
- Press the Mode button to select the 1080P video recording mode (refer to indicator light patterns for mode confirmation).
- Press the Record button to start recording. The indicator light will flash to indicate recording is in progress.
- Press the Record button again to stop recording. The video file will be saved to the Micro SD card.
4.3 Motion Detection Recording
The camera can automatically start recording when motion is detected.
- Ensure the camera is powered on.
- Press the Mode button to select the motion detection recording mode.
- The camera will enter standby mode. When motion is detected, it will automatically begin recording.
- Recording will stop automatically after a period of no motion, and the camera will return to motion detection standby.
4.4 Photo Capture
The camera can capture 8-megapixel still images.
- Ensure the camera is powered on.
- Press the Mode button to select the photo capture mode.
- Press the Record button to take a photo. The image will be saved to the Micro SD card in JPG format.
4.5 Connecting to a Computer
To access recorded files or charge the camera via a computer:
- Ensure the camera is powered off.
- Connect the camera to your computer using the provided USB cable.
- The camera will be recognized as a removable disk. You can then browse, copy, or delete files from the Micro SD card.
- The camera will also charge while connected to the computer.
5. Maintenance
- Keep the camera clean and free from dust and debris. Use a soft, dry cloth for cleaning.
- Avoid exposing the camera to extreme temperatures, direct sunlight, or high humidity.
- Do not attempt to disassemble or modify the camera, as this will void any potential warranty and may cause damage.
- Regularly back up important recordings from the Micro SD card to prevent data loss.
- Format the Micro SD card periodically to maintain optimal performance.
6. Troubleshooting
| Problem | Possible Cause | Solution |
|---|---|---|
| Camera does not power on. | Battery is depleted. | Charge the camera for at least 3 hours. |
| Cannot record video/photos. | No Micro SD card inserted or card is full/corrupted. | Insert a Micro SD card, ensure it has sufficient space, or format/replace the card. |
| Computer does not recognize the camera. | Loose USB connection or camera not powered off. | Ensure the USB cable is securely connected. Power off the camera before connecting to a computer. Try a different USB port or cable. |
| Poor video/image quality. | Insufficient lighting, dirty lens, or camera movement. | Ensure adequate lighting. Clean the camera lens gently. Minimize camera movement during recording. |
7. Specifications
- Model: T193
- Video Resolution: 1920 x 1080P
- Video Format: M-JPEG
- Image Resolution: 8 Megapixels
- Image Format: JPG
- Image Ratio: 4:3
- Battery Type: Polymer Lithium Battery
- Battery Capacity: 950 mAh
- Operating Time: Approximately 2.5 hours
- Charging Voltage: DC 5V
- Charging Time: Approximately 3 hours
- Interface: Mini 8 Pin USB, TF Card Slot
- Memory Support: Micro SD (TF Card) up to 128GB
- Motion Detection: Yes
- Microphone: Built-in
- Operating System Compatibility: Windows 2000/2003/XP/ME/Vista, Mac OS, Linux
- Dimensions: 10.8 x 2.3 x 2 cm
- Weight: 35g
- Color: Black
- Material: Plastic
- Night Vision Range: 8 Meters
Ask a question about this manual
Ask about setup, troubleshooting, compatibility, parts, safety, or missing instructions. Manuals+ will review the question and use this page’s manual context to help answer it.