1. Introduction
This manual provides essential information for the safe and effective operation, setup, and maintenance of your Reboot RBM2500 250Amp 6-in-1 Multi-Process Welding Machine. This versatile welder supports Gas/Solid Wire MIG (GMAW), Gasless Flux Core MIG (FCAW), Stick/MMA, Spot welding, and Lift TIG processes. Please read this manual thoroughly before use to ensure proper functionality and safety.
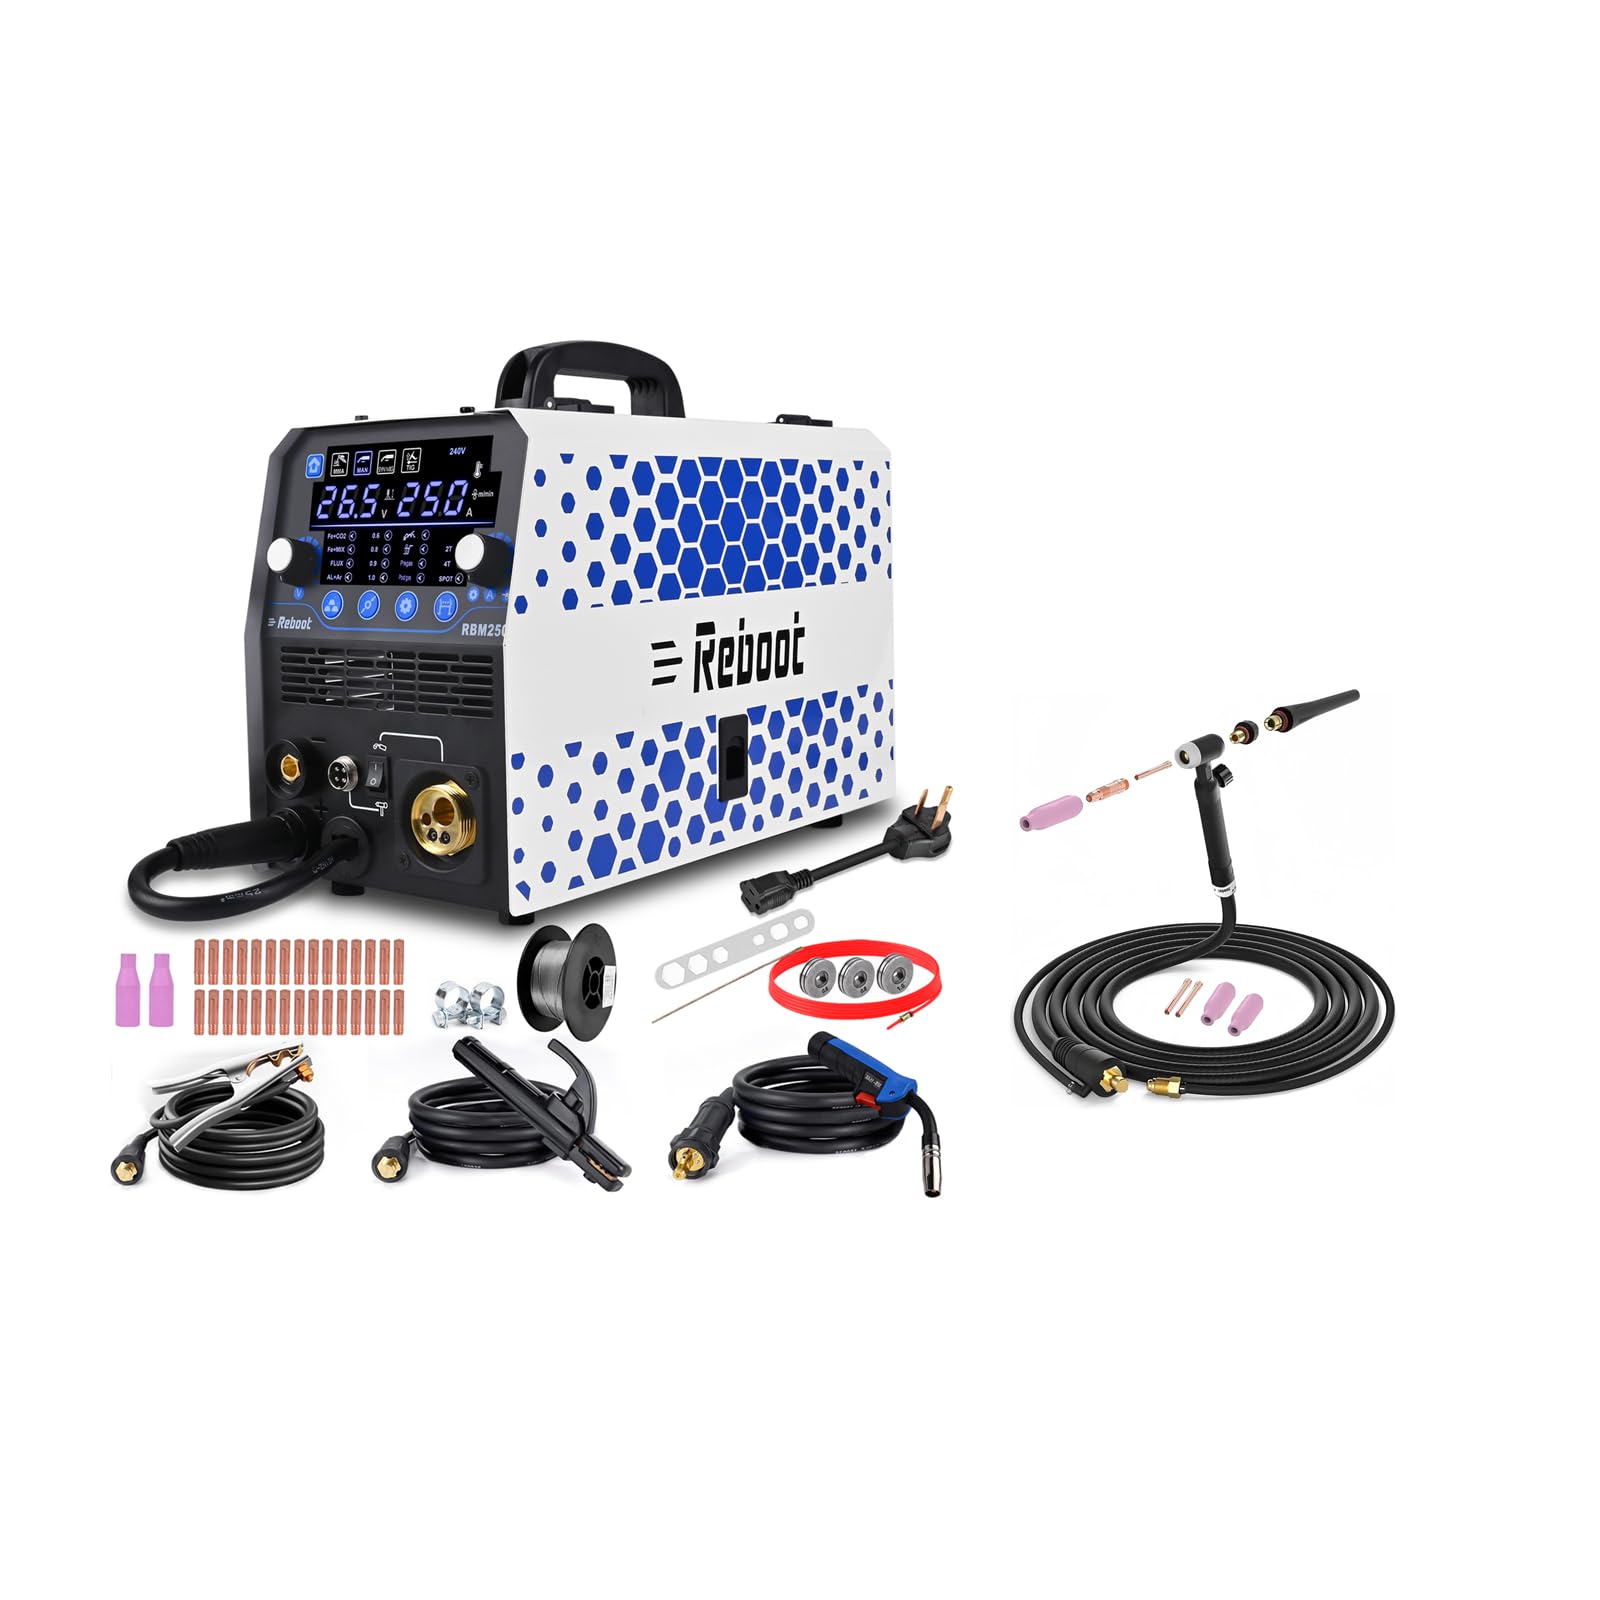
Figure 1: Reboot RBM2500 Multi-Process Welder and included accessories.
2. Safety Information
Welding operations involve significant risks. Always adhere to the following safety precautions:
- Electric Shock: Can kill. Ensure proper grounding. Do not touch live electrical parts. Wear dry welding gloves.
- Fumes and Gases: Can be hazardous. Work in a well-ventilated area. Use fume extractors if necessary.
- Arc Rays: Can burn eyes and skin. Wear a welding helmet with appropriate shade filter and protective clothing.
- Fire and Explosion: Welding sparks can cause fires. Keep flammable materials away from the welding area. Have a fire extinguisher readily available.
- Hot Parts: Can cause severe burns. Allow equipment and welded materials to cool before handling.
- Noise: Can damage hearing. Wear hearing protection.
3. Product Overview and Features
The Reboot RBM2500 is a versatile 6-in-1 welding machine designed for various welding tasks. Key features include:
- Multi-Process Capability: Supports Gas/Solid Wire MIG (GMAW), Gasless Flux Core MIG (FCAW), Stick/MMA, Spot welding, and Lift TIG.
- Large LED Digital Display: Provides clear and accurate data for easy monitoring of welding parameters.
- Synergic and Manual MIG Modes: Offers automatic parameter matching for ease of use (Synergic) or full manual control for experienced welders.
- Advanced Functions: Includes inductance adjustment, fast/slow wire feed adjustment, and pre-flow/post-flow settings to optimize welding performance.
- 2T/4T Welding Modes: Provides options for trigger control based on welding duration.
- Aluminum Welding: Capable of welding aluminum using either the included Teflon liner in the MIG gun or an optional spool gun.

Figure 2: The large LED display provides clear welding data and settings.

Figure 3: The RBM2500 is suitable for various materials including carbon steel, stainless steel, iron, and alloys.
4. Setup
4.1 Power Connection
The RBM2500 operates on both 120V and 240V power supplies. Ensure the correct power cord is used and connected to a suitable power outlet with proper grounding. Verify the voltage switch (if present) is set correctly for your power source.
4.2 Connecting Welding Accessories
Connect the appropriate welding torch or electrode holder and ground clamp to the designated terminals on the front panel of the machine. Ensure all connections are secure.
4.2.1 MIG Welding Setup
- Wire Installation: Open the wire feed compartment and install the welding wire spool. Thread the wire through the feeder mechanism and into the MIG gun liner.
- Gas Connection (for Gas MIG): Connect the gas hose from your shielding gas cylinder (e.g., CO2, Argon/CO2 mix) to the gas inlet on the machine. Ensure the gas regulator is properly installed and set to the recommended flow rate.
- Gasless Flux Core MIG: No external shielding gas is required for Flux Core welding. Ensure the polarity is set correctly for flux core wire (typically DCEN - electrode negative).
- Aluminum Welding: For aluminum wire, install the included Teflon liner into the 15AK MIG gun to prevent wire feeding issues. An optional spool gun can also be used for aluminum welding.
4.2.2 Lift TIG Welding Setup
The RBM2500 includes a WP-17FV Argon Air Cooled Lift TIG Torch.
- Torch Assembly: Assemble the TIG torch components including the collet, collet body, tungsten electrode, and ceramic nozzle.
- Gas Connection: Connect the TIG torch gas hose to the machine's gas outlet and ensure argon shielding gas is supplied.
- Torch Connection: Connect the TIG torch power cable to the appropriate terminal on the welder.

Figure 4: Exploded view of the WP-17FV TIG Torch components.

Figure 5: The WP-17FV TIG torch features multi-angle rotation for improved access.
5. Operating Instructions
5.1 Selecting Welding Mode
Use the control panel to select the desired welding process: MIG (Gas/Solid Wire), Flux Core, Stick/MMA, Spot, or Lift TIG. The large LED display will show the current mode and relevant parameters.
5.2 Parameter Adjustment
- Synergic MIG: Select the wire diameter and material type. The machine will automatically suggest optimal current and wire feed speed. You can fine-tune these settings based on your welding preference.
- Manual MIG: Manually adjust welding current (Amps) and wire feed speed (m/min) independently.
- Stick/MMA: Adjust the welding current (Amps) according to the electrode type and diameter.
- Lift TIG: Adjust the welding current (Amps). The Lift TIG function initiates the arc by briefly touching the tungsten to the workpiece and then lifting it.
- Special Functions: Utilize inductance adjustment for arc stiffness, fast/slow wire feed for specific applications (press and hold "Welding Wire Selection" button for fast wire feed), and pre-flow/post-flow for gas shielding control.
- 2T/4T Modes: 2T (Two-Touch) requires holding the trigger for the duration of the weld. 4T (Four-Touch) allows for continuous welding after an initial trigger press, releasing the trigger to stop.

Figure 6: Proper welding technique with the MIG torch.
6. Maintenance
Regular maintenance ensures the longevity and optimal performance of your welding machine.
- Cleaning: Periodically clean the machine's exterior and ventilation openings to prevent dust and debris buildup. Use compressed air to clear internal components if necessary, ensuring the machine is unplugged.
- Consumables: Regularly inspect and replace worn-out consumables such as MIG contact tips, nozzles, TIG collets, collet bodies, tungsten electrodes, and ceramic nozzles.
- Cables and Connections: Check all welding cables, power cords, and gas hoses for damage or wear. Replace any damaged components immediately. Ensure all connections remain tight.
- Wire Feeder: Clean the wire feeder rollers and guide tubes to ensure smooth wire feeding.
7. Troubleshooting
Refer to the following table for common issues and their solutions:
| Problem | Possible Cause | Solution |
|---|---|---|
| No power to machine | Power cord unplugged, circuit breaker tripped, faulty power switch | Check power connections, reset breaker, contact service if switch is faulty |
| No arc | Loose ground clamp, incorrect welding mode, worn consumables, incorrect parameters | Secure ground, verify mode, replace consumables, adjust settings |
| Poor wire feed (MIG) | Tangled wire, clogged liner, incorrect drive roller tension, worn contact tip | Untangle wire, clean/replace liner, adjust roller tension, replace contact tip |
| Inconsistent arc (TIG) | Contaminated tungsten, incorrect gas flow, faulty torch connection | Regrind/replace tungsten, check gas supply/flow, secure torch connection |
| Overheating indicator | Exceeded duty cycle, blocked ventilation | Allow machine to cool, clear ventilation openings |
8. Specifications
The following table outlines the key specifications for the Reboot RBM2500 250Amp 6-in-1 Multi-Process Welder:
| Specification | Value |
|---|---|
| Model | RBM2500 |
| Welding Processes | MIG (Gas/Solid Wire), Flux Core, Stick/MMA, Spot, Lift TIG |
| Amperage | 250Amp |
| Input Voltage | 120V/240V (Dual Voltage) |
| TIG Torch Included | WP-17FV Argon Air Cooled Lift TIG Torch (10FT Cable with Flexible Head) |
| Wire Compatibility | .023"/.030"/.035" solid wire, .023"/.030"/.035" flux core wire, .040" aluminum wire |
| Display | Large LED Digital Display |

Figure 7: WP-17FV TIG Torch cable specifications.
9. Warranty and Support
For warranty information, please refer to the documentation provided with your purchase or contact the seller directly. For technical support or service inquiries, please reach out to Reboot customer service through their official website or the retailer where the product was purchased.


