
1. Introduction
Thank you for choosing the Hereta SM20 1080p Spy Camera Glasses. This device is designed for discreet video recording and photo capture, offering a portable solution for various activities. Please read this manual carefully to ensure proper use, optimal performance, and longevity of your product.
2. Safety Information
- Do not expose the device to extreme temperatures, direct sunlight, or high humidity.
- Avoid dropping or subjecting the device to strong impacts.
- Keep out of reach of children.
- Use only the provided charging cable to prevent damage.
- Ensure the TF card is inserted correctly before operation.
- Do not attempt to disassemble or modify the device, as this will void the warranty.
3. Package Contents
Verify that all items are present in your package:
- Hereta SM20 Camera Glasses (x1)
- USB 2.0 Charging/Data Cable (x1)
- Cleaning Cloth (x1)
- 32GB TF Card (x1)
- User Manual (x1)
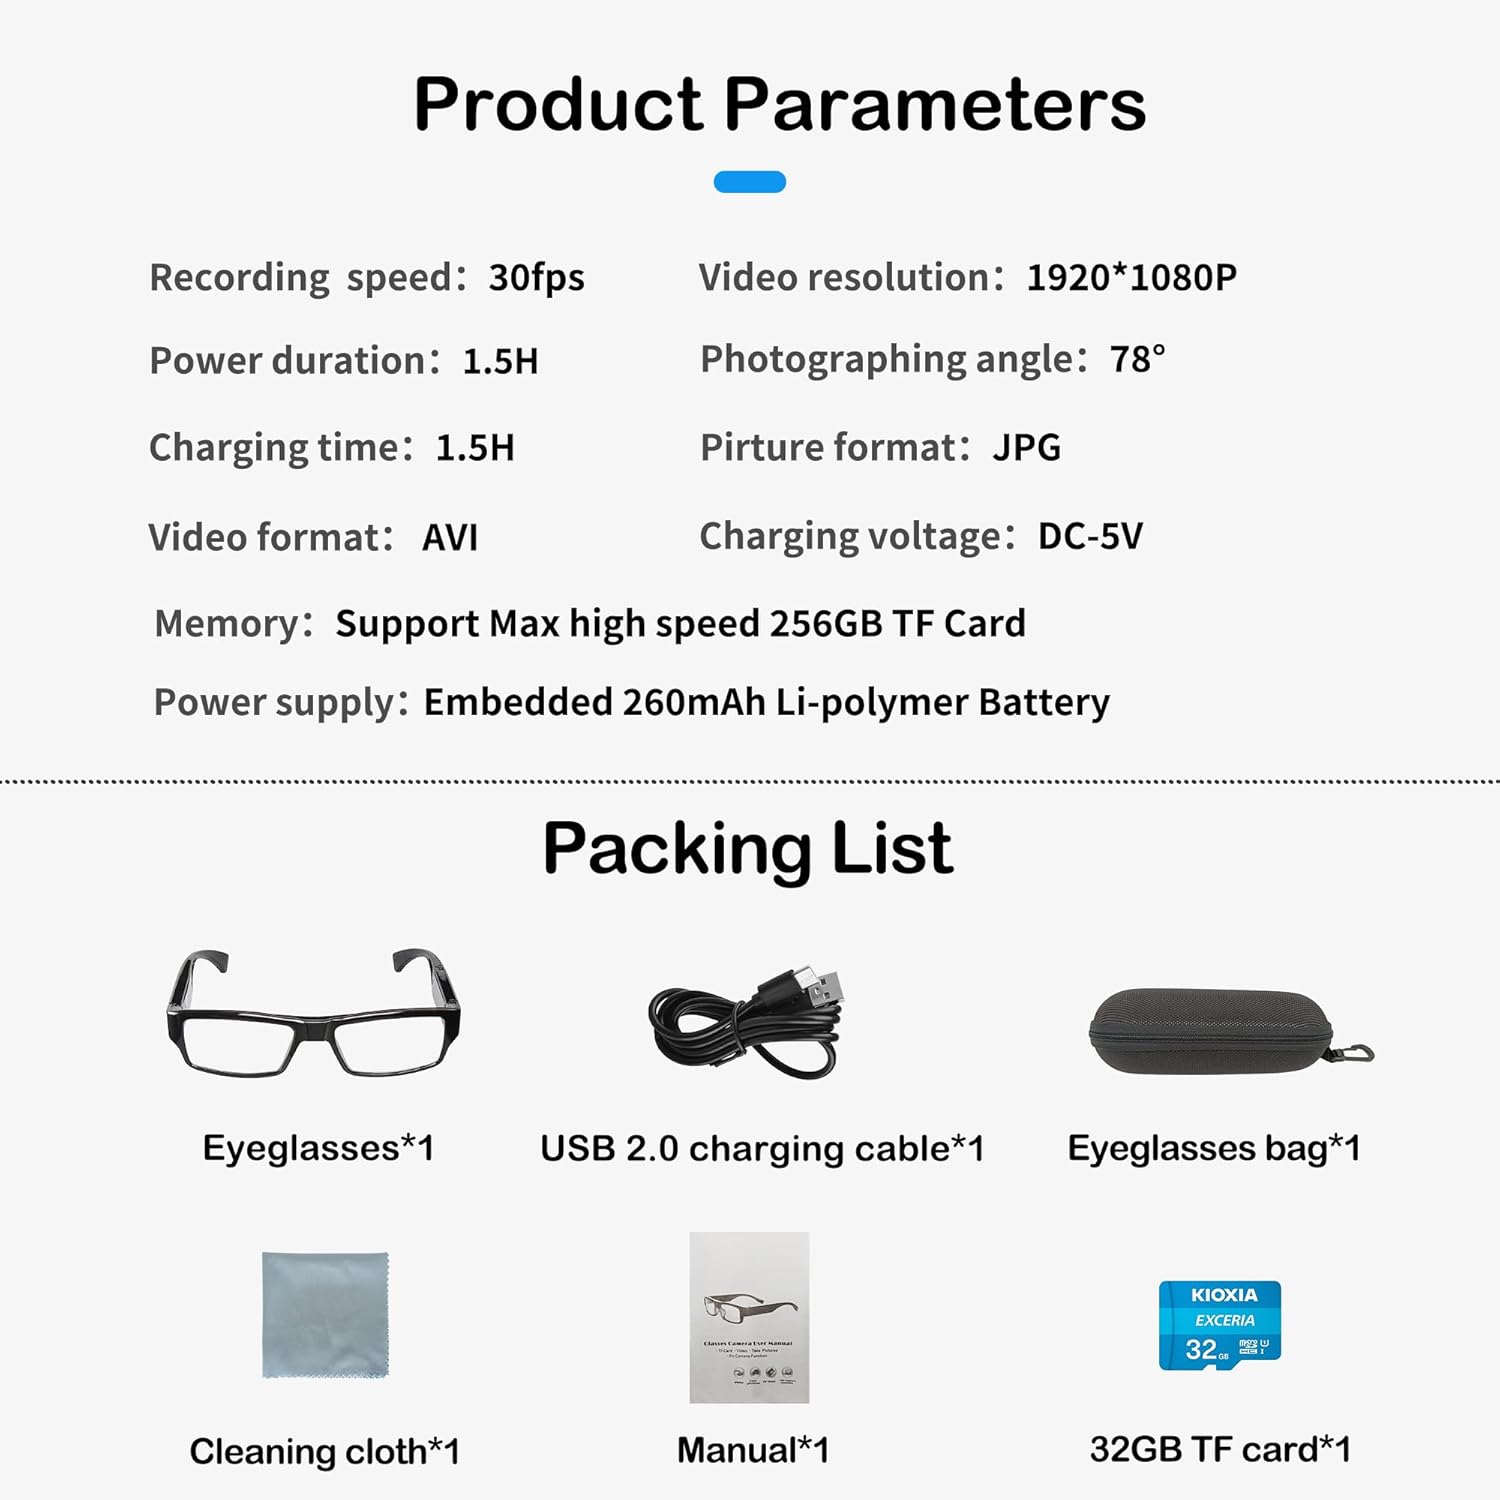
Figure 3.1: Package Contents and Product Parameters
4. Product Overview
Familiarize yourself with the various components of your Hereta SM20 Camera Glasses:
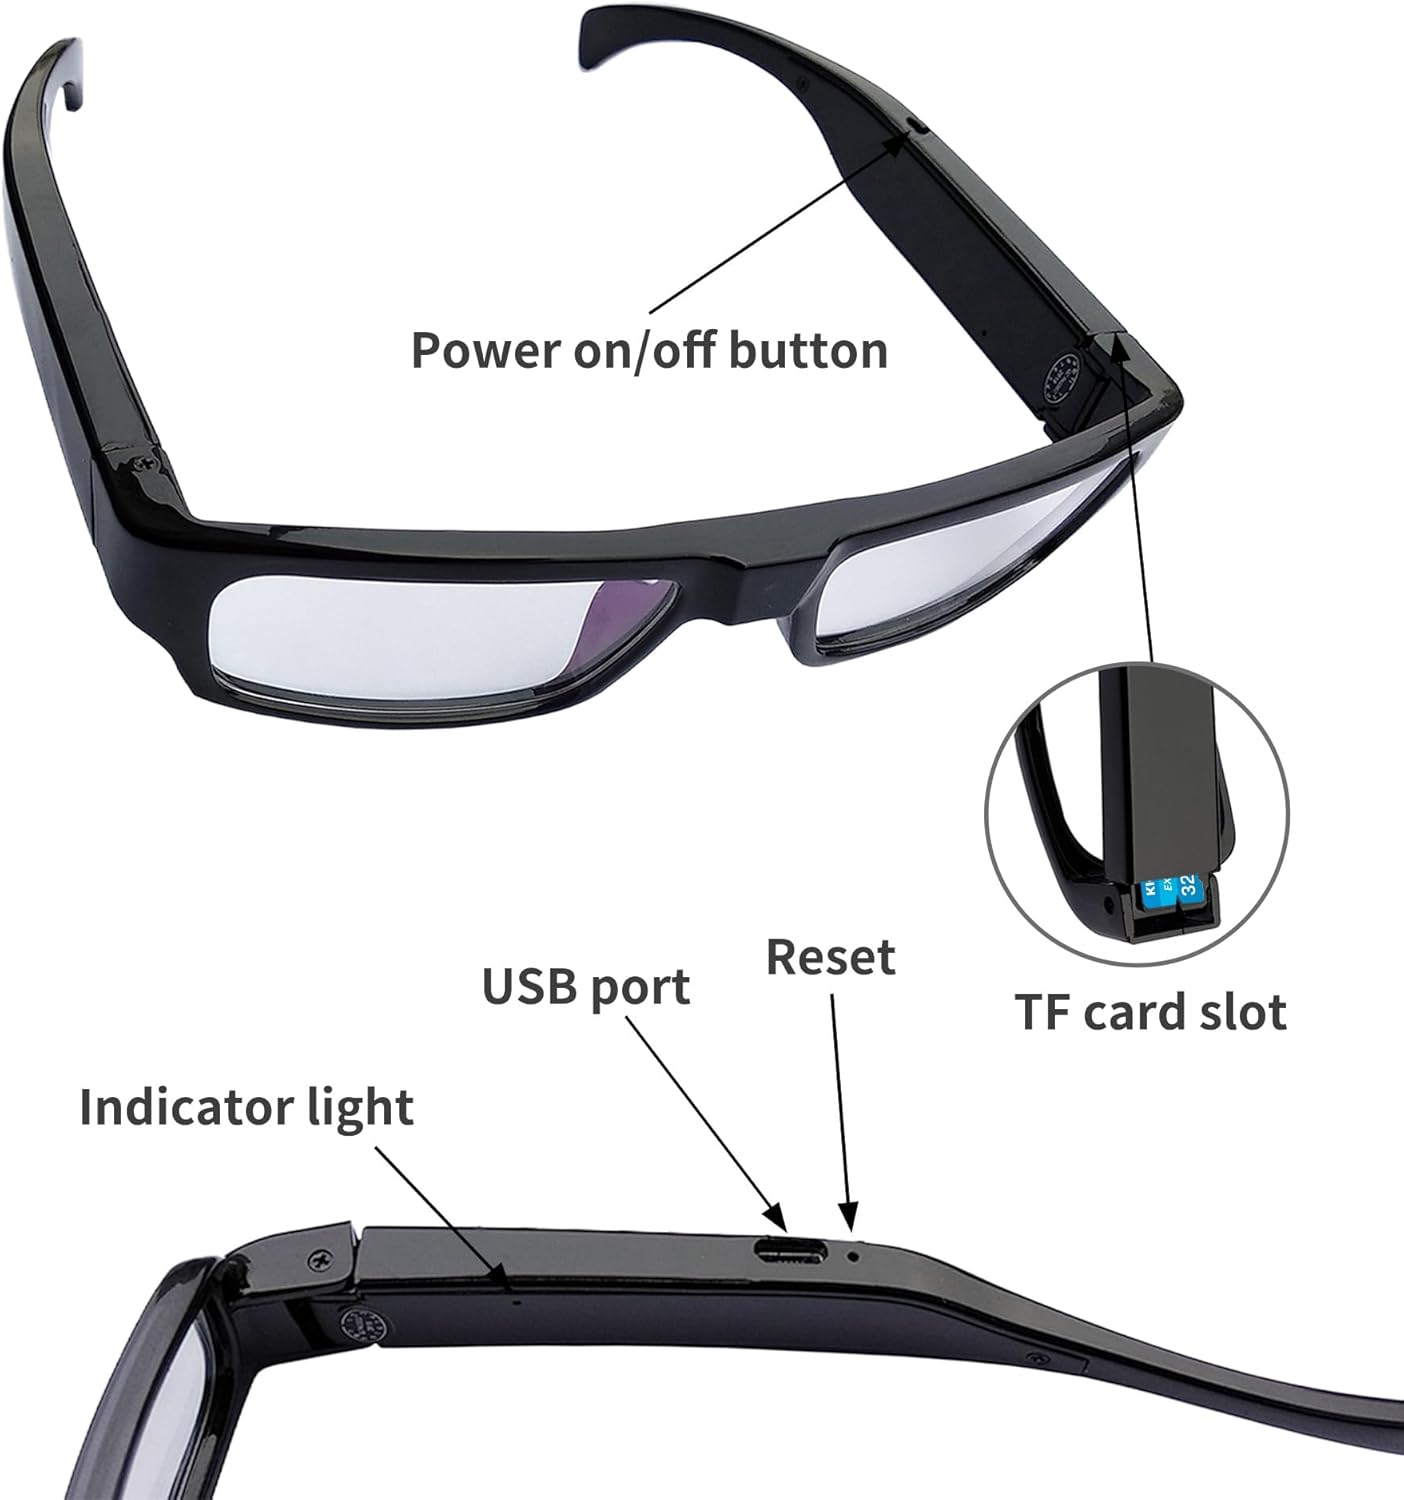
Figure 4.1: Hereta SM20 Camera Glasses Components
- Power On/Off Button: Used to power the device on/off and initiate recording/photo functions.
- USB Port: For charging the device and connecting to a computer for data transfer or webcam mode.
- Reset Button: Used to reset the device in case of malfunction.
- TF Card Slot: Insert your MicroSD (TF) card here for storage.
- Indicator Light: Provides status feedback (e.g., charging, recording, standby).
5. Setup
5.1 Charging the Device
- Connect the provided USB cable to the USB port on the glasses.
- Plug the other end of the USB cable into a computer's USB port or a 5V USB power adapter.
- The indicator light will show the charging status (refer to the indicator light section in operating instructions for details).
- A full charge takes approximately 1.5 hours.
5.2 Inserting the TF Card
Before any operation, ensure a TF card is inserted.
- Locate the TF card slot on the glasses (refer to Figure 4.1).
- Gently insert the TF card into the slot with the gold contacts facing down until it clicks into place.
- To remove, push the card in slightly until it springs out.
6. Operating Instructions
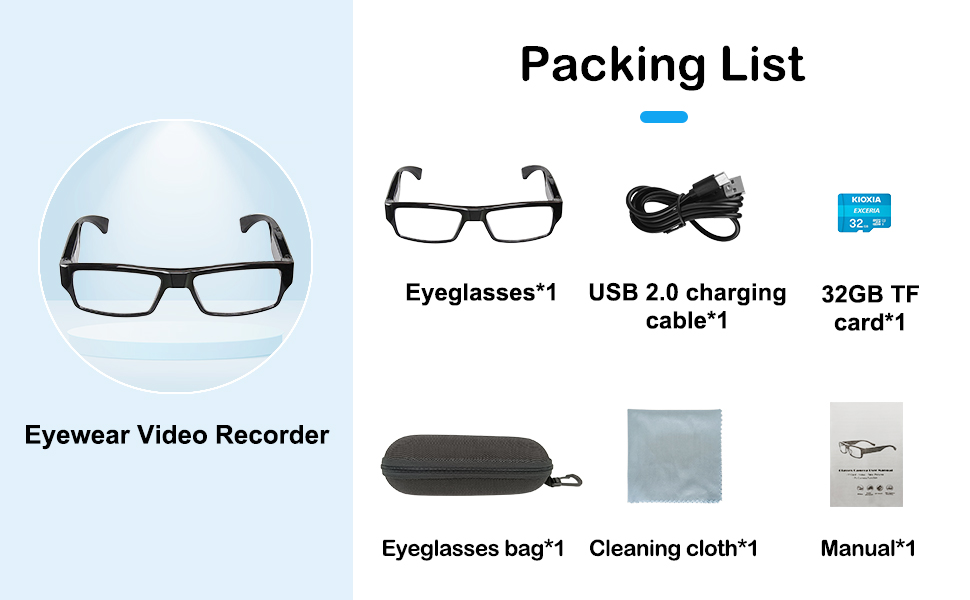
Figure 6.1: Photo Taking and Video Recording Operations
6.1 Power On/Off
- Power On: Press and hold the Power On/Off button for approximately 2-3 seconds. The indicator light will illuminate, indicating the device is in standby mode.
- Power Off: In any mode, press and hold the Power On/Off button for approximately 3-5 seconds until the indicator light turns off.
6.2 Video Recording
- Ensure the device is powered on and in standby mode.
- Short-press the Power On/Off button once.
- The blue indicator light will flash 3 times and then turn off, indicating that video recording has started.
- To stop recording, short-press the Power On/Off button once again. The blue light will turn on, saving the video file and returning to standby mode.
6.3 Photo Taking
- Ensure the device is powered on and in standby mode.
- Press the Power On/Off button twice continuously (double-click).
- The blue indicator light will flash once, indicating a photo has been taken and saved as a .JPG file. The device will return to standby mode.
6.4 Connecting to a PC
- Data Transfer: Connect the glasses to your computer using the USB cable. The device will be recognized as a removable disk, allowing you to access and transfer video (.AVI) and photo (.JPG) files.
- Webcam Mode: When connected to a PC via USB, the device can enter PC camera (webcam) mode. This allows you to use the glasses as a webcam for online video calls or other applications.
7. Maintenance
- Cleaning: Use the provided cleaning cloth to gently wipe the lenses and frame. Do not use harsh chemicals or abrasive materials.
- Storage: Store the glasses in a cool, dry place, away from direct sunlight and extreme temperatures. Use the eyeglasses bag for protection when not in use.
- Battery Care: For optimal battery life, charge the device regularly and avoid fully discharging it for extended periods.
8. Troubleshooting
| Problem | Possible Cause | Solution |
|---|---|---|
| Device does not power on. | Low battery; TF card not inserted or faulty. | Charge the device; Ensure TF card is correctly inserted or try a different card. |
| Cannot record video/take photos. | No TF card; TF card full; Device frozen. | Insert TF card; Delete old files or replace TF card; Press the reset button. |
| Computer does not recognize the device. | Faulty USB cable; Driver issue; Device not powered on. | Try a different USB cable/port; Restart computer; Ensure device is powered on. |
| Poor video/photo quality. | Dirty lens; Insufficient lighting. | Clean the lens with the provided cloth; Ensure adequate lighting conditions. |
9. Specifications
| Feature | Detail |
|---|---|
| Model Number | SM20 |
| Video Recording Resolution | 1920p (1080p) |
| Video Frame Rate | 30fps |
| Video Format | AVI |
| Photo Format | JPG |
| Lens Angle | 78 degrees |
| Optical Sensor Technology | CMOS |
| Memory Support | Max 256GB TF Card (MicroSD) |
| Battery Type | Embedded 260mAh Li-polymer Battery |
| Power Duration | Approx. 1.5 hours |
| Charging Time | Approx. 1.5 hours |
| Charging Voltage | DC-5V |
| Connectivity | Wired (Micro USB) |
| Dimensions (L x W x H) | 15.5 x 14.5 x 3.5 cm |
| Weight | 130 grams |
| IP Rating | IP54 |
10. Warranty and Support
Hereta products are designed for reliability and performance. This product comes with a standard manufacturer's warranty against defects in materials and workmanship. Please refer to the warranty card included in your package for specific terms and conditions.
For technical support, troubleshooting assistance, or warranty claims, please contact your retailer or visit the official Hereta website for contact information.