
1. Introduction
Thank you for purchasing the ELECTROPRIME HOCO BS59 Pearlescent Wireless Karaoke Bluetooth Speaker. This manual provides essential information for setting up, operating, and maintaining your device. Please read it carefully before use and retain it for future reference.
2. Safety Information
- Do not expose the device to extreme temperatures, humidity, or direct sunlight.
- Avoid dropping or subjecting the device to strong impacts.
- Do not disassemble or attempt to repair the device yourself. Contact qualified service personnel.
- Keep out of reach of children.
- Use only the provided or recommended charging cables and adapters.
- Ensure proper ventilation when operating the speaker.
3. Package Contents
Please check that all items are present in your package:
- 1 x HOCO BS59 Karaoke Bluetooth Speaker
- 2 x Wireless Microphones
- 1 x Charging Cable (USB-C)
- 1 x User Manual
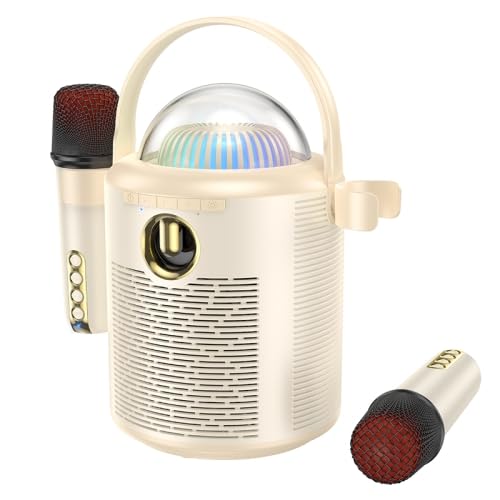
Image: The main unit of the HOCO BS59 speaker in beige, featuring a transparent dome with colorful lights, a handle, and two wireless microphones attached to its sides. Another microphone is shown separately at the bottom right.
4. Product Overview
Familiarize yourself with the main components of your karaoke speaker system.
- Main Speaker Unit: Houses the 8W full-range speaker and 2W tweeter, control buttons, and light dome.
- Wireless Microphones (x2): For vocal input during karaoke.
- Control Panel: Buttons for power, mode, volume, and light effects.
- Light Dome: Provides colorful light effects.
- Charging Ports: For speaker and microphones.
- AUX Input: For wired audio connection.
- TF Card Slot: For playing music directly from a memory card.
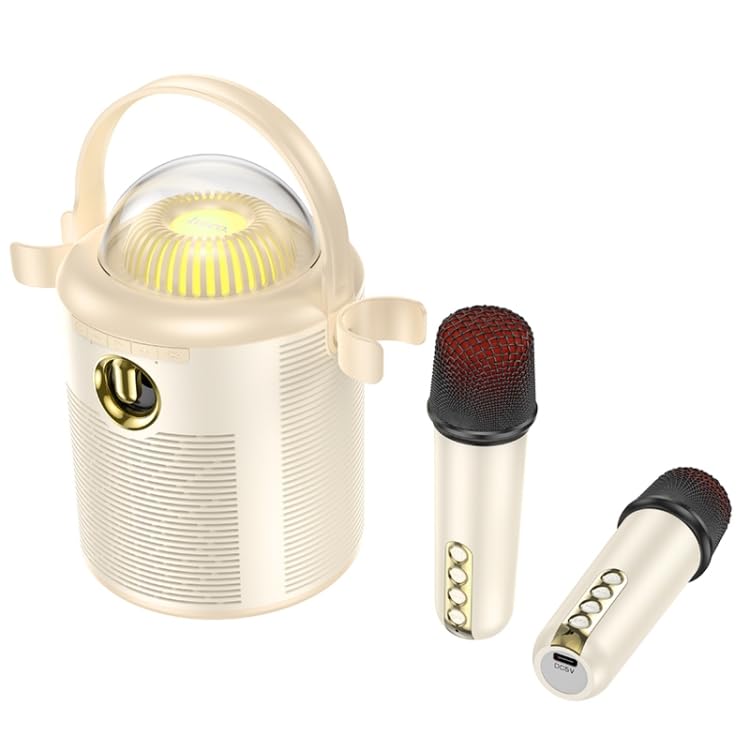
Image: A detailed view of the HOCO BS59 speaker and its two wireless microphones. The speaker's front panel with controls and the transparent light dome are clearly visible. One microphone is shown attached to the speaker, and the other is lying separately, showcasing its buttons and charging port.
5. Setup
5.1. Charging the Device
Before first use, fully charge the speaker and both microphones.
- Speaker: Connect the charging cable to the speaker's charging port and a suitable USB power adapter (not included). The charging indicator will show charging status. Full charge takes approximately 3 hours.
- Microphones: Connect the charging cable to each microphone's charging port. Full charge takes approximately 2 hours per microphone.
5.2. Powering On/Off
- Speaker: Press and hold the Power button on the speaker for a few seconds to turn it on or off.
- Microphones: Press and hold the Power button on each microphone to turn it on or off.
5.3. Bluetooth Pairing
- Ensure the speaker is powered on and in Bluetooth mode (indicated by a voice prompt or LED).
- Enable Bluetooth on your smartphone, tablet, or other audio device.
- Search for "HOCO BS59" or similar in your device's Bluetooth list.
- Select "HOCO BS59" to pair. A confirmation sound will indicate successful pairing.
- The microphones will automatically connect to the speaker when both are powered on.
5.4. Connecting via AUX Input
Use a 3.5mm audio cable (not included) to connect an external audio source to the speaker's AUX port. The speaker will automatically switch to AUX mode or you may need to press the Mode button.
5.5. Playing from TF Card
Insert a TF (microSD) card with MP3 audio files into the designated slot. The speaker will automatically switch to TF card mode and begin playback.
6. Operating Instructions
6.1. Music Playback
- Play/Pause: Press the Play/Pause button on the speaker.
- Volume Control: Use the volume buttons on the speaker or your connected device.
- Next/Previous Track: Use the track skip buttons on the speaker.
6.2. Karaoke Function
Once your music source is playing and microphones are connected:
- Microphone Volume: Adjust the volume on the microphones directly.
- One-Click Original Sound Cancellation: Press the dedicated button on the speaker or microphone (refer to device markings) to remove vocals from a song, allowing you to sing along. Press again to restore original vocals.
- Echo/Reverb: Some microphones may have controls for echo effects.
6.3. Colorful Lights
The speaker features colorful lights. Press the Light button on the speaker to cycle through different light modes or turn them off.
7. Maintenance
- Cleaning: Wipe the speaker and microphones with a soft, dry cloth. Do not use abrasive cleaners or solvents.
- Storage: Store the device in a cool, dry place away from direct sunlight when not in use for extended periods.
- Battery Care: To prolong battery life, avoid fully discharging the device frequently. Charge regularly, even if not in use.
8. Troubleshooting
| Problem | Possible Cause | Solution |
|---|---|---|
| No power | Battery is depleted | Charge the speaker/microphones fully. |
| No sound | Volume too low; Not paired; Incorrect mode | Increase volume; Ensure successful Bluetooth pairing; Switch to correct input mode (Bluetooth, AUX, TF). |
| Microphone not working | Microphone off; Battery low; Not paired with speaker | Turn on microphone; Charge microphone; Ensure speaker and microphone are both on and within range. |
| Bluetooth connection unstable | Too far from device; Interference | Move speaker closer to the paired device; Avoid obstacles and other wireless devices. |
9. Specifications
| Feature | Detail |
|---|---|
| Model | EDA006048701A |
| Bluetooth Version | 5.1 (Chip: JL AC6965E4) |
| Speaker Battery Capacity | 1800mAh |
| Microphone Battery Capacity | 500mAh |
| Speaker Charging Time | Approx. 3 hours |
| Microphone Charging Time | Approx. 2 hours |
| Speaker Usage Time | Approx. 5 hours |
| Microphone Usage Time | Approx. 16 hours |
| Speaker Unit | 8W full-range speaker + 2W tweeter |
| Total Power Output | 10W |
| Dimensions (Speaker) | 190 x 120 x 215mm |
| Weight (Speaker) | 774g |
| Supported Modes | Bluetooth, TF card, AUX |
| Special Features | Dual wireless microphones, One-click original sound cancellation, Colorful lights |
10. Warranty and Support
This product comes with a standard manufacturer's warranty. Please refer to the warranty card included in your package for specific terms and conditions. For technical support, troubleshooting assistance, or warranty claims, please contact ELECTROPRIME customer service through your retailer or the official brand website.
For more information, you may visit the ELECTROPRIME brand store.