
Introduction
Thank you for choosing the Ceptics TI-H100 Tyre Inflator. This compact and powerful device is designed to provide convenient and efficient inflation for various items, including car tires, motorcycle tires, bicycle tires, and sports balls. Featuring a digital pressure gauge, programmable inflation with auto-shutoff, and an emergency LED light, it ensures precise and safe operation. Please read this manual thoroughly before use to ensure proper operation and maintenance.
Safety Information
- Always read and understand all instructions before operating the device.
- Keep the inflator away from children and pets.
- Ensure the power source matches the device's requirements (12V DC).
- Do not over-inflate tires or other items. Always refer to the manufacturer's recommended pressure.
- Avoid continuous operation for more than 10 minutes to prevent overheating. Allow the device to cool down between uses.
- Do not expose the device to rain or extreme temperatures.
- Disconnect the power source when not in use or before cleaning.
Package Contents
Please check the package for the following items:
- 1 x Ceptics TI-H100 Tyre Inflator
- 1 x Air Hose
- 1 x DC Power Cord (for 12V car cigarette lighter)
- 1 x Type-C Charging Cord
- 1 x Set of Inflation Needles/Nozzles
- 1 x User Manual (this document)
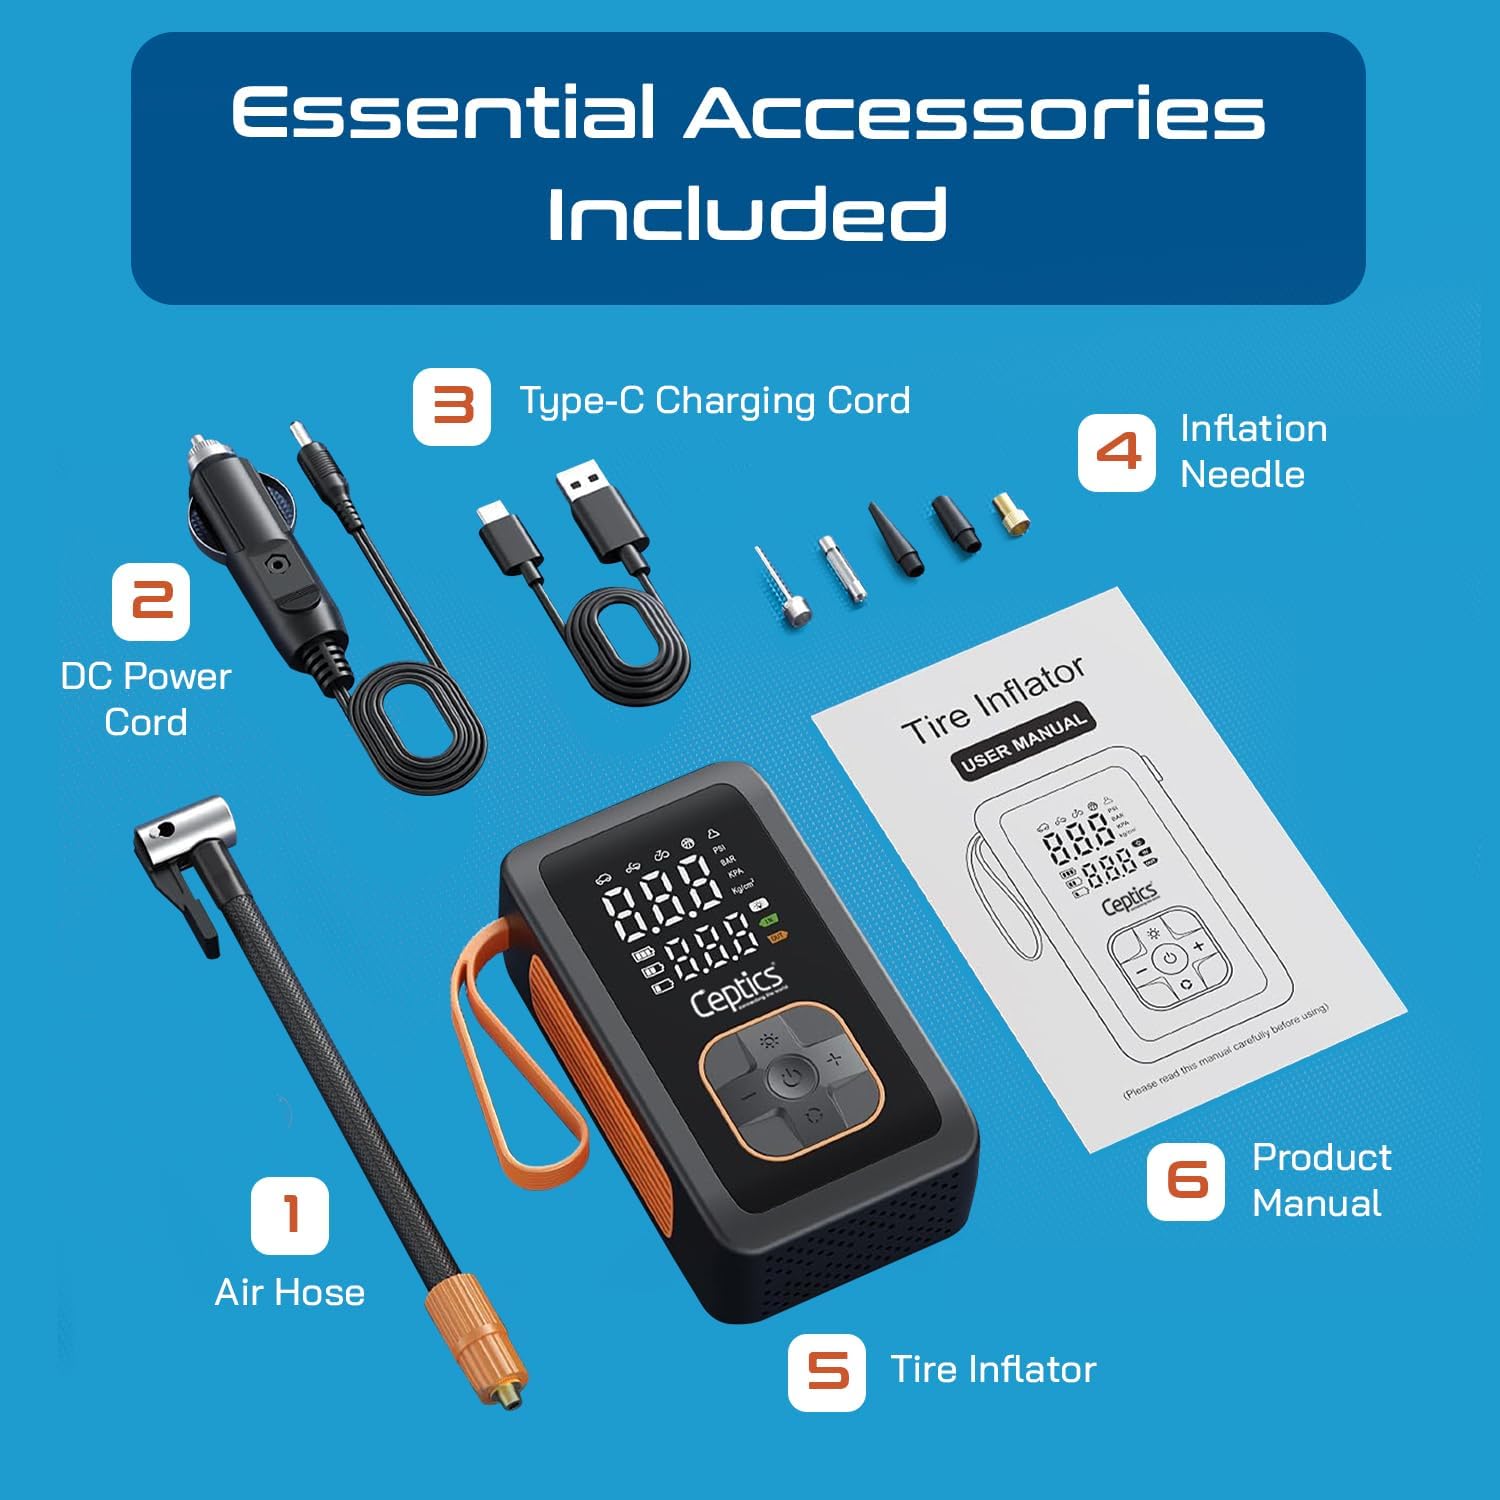
Image: The Ceptics TI-H100 Tyre Inflator shown with its essential accessories, including the air hose, DC power cord, Type-C charging cord, inflation needles, and product manual.
Product Overview and Features
The Ceptics TI-H100 Tyre Inflator is engineered for durability, convenience, and precision. Key features include:
- Enhanced Durability: Built with ToughUltra technology, its core components like the cylinder, motor gears, and connection rod utilize a powder metallurgy integrated molding technique, increasing service life by 30%.
- Programmable Inflation with Auto-Off: Features a digital screen with clear readouts and offers a choice of 4 pressure units (PSI, BAR, KPA, Kg/cm²). Set your desired pressure, and the inflator will automatically shut off once the target is reached, preventing over-inflation.
- Compact and Portable Design: Its lightweight and small size allow for easy storage in glove compartments, under seats, or in trunks, making it ideal for on-the-go use.
- Emergency LED Light: Equipped with a built-in backlit screen and an independent LED flashlight button for easy operation and safety in low-light conditions or during nighttime emergencies.
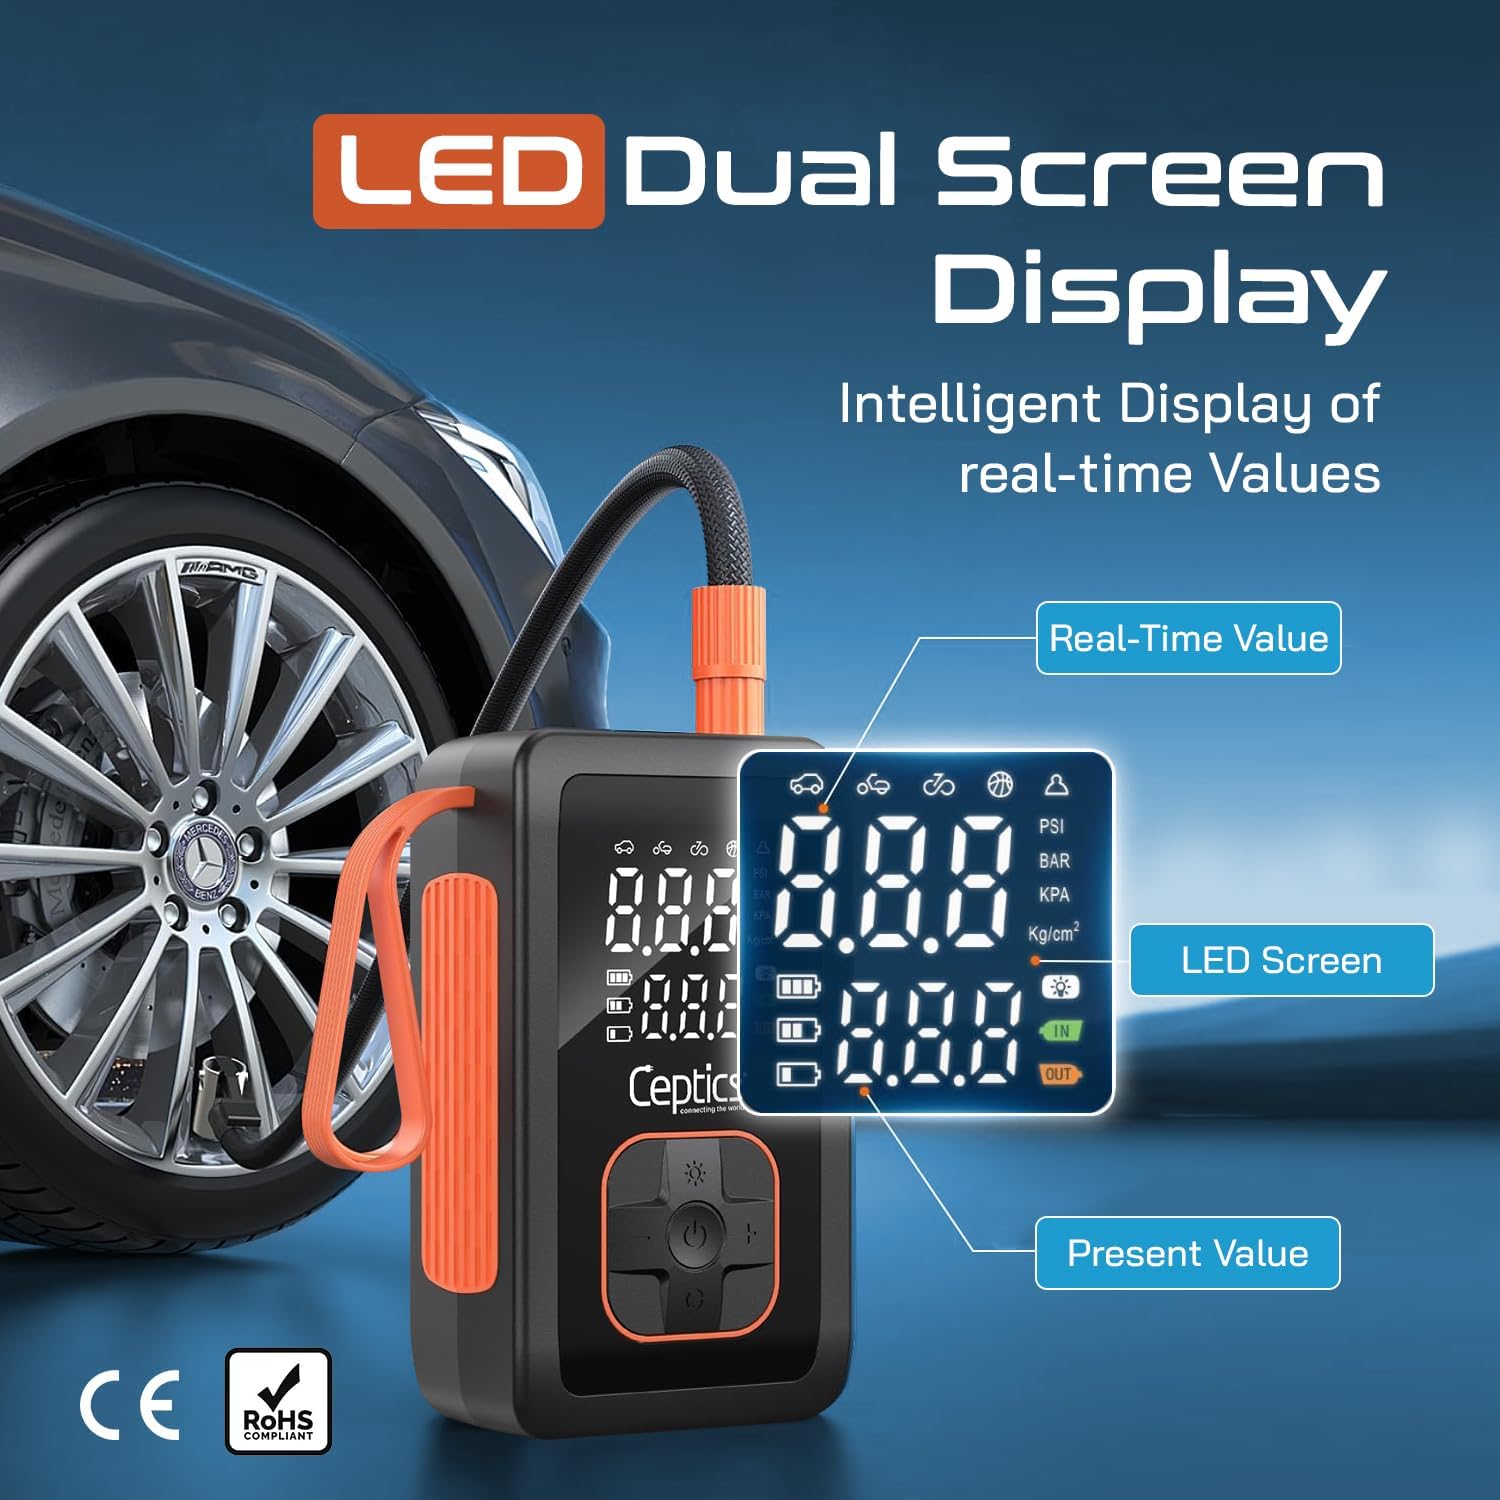
Image: The inflator's LED dual screen display showing real-time and preset pressure values, along with selectable pressure units (PSI, BAR, KPA, Kg/cm²).

Image: The multi-functional capabilities of the inflator, including its use as a power bank for charging devices and its integrated flashlight for illumination.

Image: Demonstrating the ultra-portable design of the inflator, showing it fitting effortlessly into a backpack, pocket, and car interior.
Setup
Charging the Inflator
Before first use, or when the battery is low, charge the inflator using the provided Type-C charging cord. Connect the Type-C end to the inflator's charging port and the other end to a suitable USB power adapter (not included) or a power source.
Connecting to 12V DC Power (Optional)
For continuous power or if the internal battery is depleted, connect the provided DC Power Cord to the inflator and plug the other end into your vehicle's 12V cigarette lighter socket.
Attaching the Air Hose
Screw the air hose securely onto the inflator's air outlet. Ensure a tight connection to prevent air leakage.

Image: Illustration of the two power supply types: cordless operation with the extended air hose and corded operation via a 12V DC cigarette lighter for continuous use.
Operating Instructions
1. Power On
Press the power button to turn on the inflator. The digital display will illuminate, showing the current pressure.
2. Select Pressure Unit
Press the 'M' button to cycle through the available pressure units: PSI, BAR, KPA, and Kg/cm².
3. Set Target Pressure
Use the '+' and '-' buttons to adjust the desired target pressure. The display will show the preset value.
4. Connect to Valve
Screw the air hose nozzle onto the tire valve stem. For other inflatables, select the appropriate inflation needle and attach it to the air hose before connecting.
5. Start Inflation
Press the start button (often indicated by a play/pause icon) to begin inflation. The inflator will automatically stop once the preset pressure is reached.
6. Disconnect
Once inflation is complete and the device has stopped, quickly disconnect the air hose from the valve stem to minimize air loss.
7. Using the LED Light
Press the dedicated LED button to turn the flashlight on or off for illumination in dark environments.

Image: Visual guide for the inflator's versatility, showing its application for cars (30-42PSI), motorcycles (26-43PSI), bikes (30-145PSI), balls (7-14PSI), and a manual mode (3-180PSI).
Maintenance
Cleaning
Wipe the exterior of the inflator with a soft, damp cloth. Do not use harsh chemicals or abrasive cleaners. Ensure the device is completely dry before storage.
Storage
Store the inflator in a cool, dry place, away from direct sunlight and extreme temperatures. Keep the air hose and accessories neatly stored to prevent damage.
Troubleshooting
- Inflator does not turn on: Ensure the battery is charged or the 12V DC power cord is securely connected.
- Inflator runs but no air comes out: Check if the air hose is securely attached to both the inflator and the valve stem. Ensure the valve stem is not obstructed.
- Inaccurate pressure reading: Ensure the air hose is properly connected to the valve stem without leaks.
- Device overheats and shuts off: This is a safety feature. Allow the inflator to cool down for at least 15-20 minutes before resuming operation. Avoid continuous use for extended periods.
Specifications
| Brand | Ceptics |
| Model Number | TI-H100 |
| Item Weight | 919 g |
| Power Source | Corded Electric (12V DC) / Internal Battery |
| Maximum Pressure | 100 psi |
| Operation Mode | Automatic |
| Voltage | 12 volts |
| Included Components | Pressure Gauge, Air Hose, DC Power Cord, Type-C Charging Cord, Inflation Needles |
Warranty and Support
Ceptics products are designed for reliability and performance. For any questions, technical support, or warranty inquiries, please contact Ceptics customer service. Refer to the product packaging or the official Ceptics website for the most current contact information.

Image: Information regarding Ceptics' commitment to customer support, highlighting their USA-based operations, local customer assistance, and over 10 years of expertise.