
1. Introduction
Thank you for choosing the BRAINGAIN Adjustable Weight Bench. This manual provides essential information for the safe assembly, operation, and maintenance of your new fitness equipment. Designed for versatility and durability, this bench supports a wide range of exercises, from incline and decline presses to flat bench workouts, accommodating various fitness levels and routines. Please read this manual thoroughly before assembly and use, and retain it for future reference.

Image: The BRAINGAIN Adjustable Weight Bench shown from the side, illustrating its multiple backrest and seat adjustment positions, from flat to various incline and decline angles.
2. Safety Information
WARNING: Failure to follow these safety instructions may result in serious injury or death.
- Always consult with a physician before starting any exercise program.
- Ensure all bolts, nuts, and other connections are securely tightened before each use. Regularly inspect the bench for any signs of wear or damage.
- The maximum weight capacity for this bench is 450 kg (user weight + weights). Do not exceed this limit.
- Use the bench on a flat, stable surface. Ensure adequate space around the bench for safe operation.
- Keep children and pets away from the equipment during use.
- Do not make any modifications to the bench. Use only manufacturer-approved replacement parts.
- Always use proper lifting techniques and controlled movements during exercises.
- If you experience pain, dizziness, or discomfort, stop exercising immediately.
3. Package Contents
Please verify that all components are present and undamaged before proceeding with assembly. If any parts are missing or damaged, do not assemble the bench and contact customer support.
- Main Frame Components
- Backrest Pad
- Seat Pad
- Footrest Assembly
- Adjustment Pins/Levers
- Hardware (bolts, washers, nuts, tools)
- User Manual
4. Assembly Instructions
Assembly is designed to be straightforward and typically takes around 10 minutes. It is recommended to have two people for easier assembly. Ensure you have enough clear space to work.
- Unpack Components: Carefully remove all parts from the packaging and lay them out on a clean, soft surface to prevent scratches. Check against the package contents list.
- Attach Stabilizer Bars: Secure the front and rear stabilizer bars to the main frame using the provided bolts and nuts. Ensure they are tightly fastened.
- Install Backrest Support: Connect the backrest support frame to the main frame. This typically involves aligning holes and inserting a pivot bolt, secured with a nut.
- Mount Backrest Pad: Attach the backrest pad to its support frame using the screws provided.
- Mount Seat Pad: Attach the seat pad to the main frame using the screws provided.
- Assemble Footrest: Attach the footrest assembly to the designated slot on the main frame. Ensure it can be adjusted and secured with its pin.
- Insert Adjustment Pins: Insert the adjustment pins for the backrest and seat into their respective mechanisms. Test their functionality.
- Final Check: Double-check all bolts, nuts, and pins to ensure they are fully tightened and secured. Ensure the bench is stable and does not wobble.

Image: Overview of the BRAINGAIN Adjustable Weight Bench, highlighting its high-strength alloy steel frame, 450 kg weight support, integrated handle, multi-position backrest, and double-wheel stabilizers. This image illustrates the key structural components.
5. Operating Instructions
5.1 Adjusting the Backrest
The BRAINGAIN Adjustable Weight Bench features 9 distinct backrest positions, allowing for flat, incline, and decline workouts.
- Locate the backrest adjustment pin/lever, typically found at the base of the backrest support.
- Pull the pin outwards or lift the lever to disengage it from its current position.
- Carefully move the backrest to your desired angle.
- Release the pin/lever, ensuring it fully engages into one of the adjustment holes. Wiggle the backrest slightly to confirm it is securely locked in place before use.
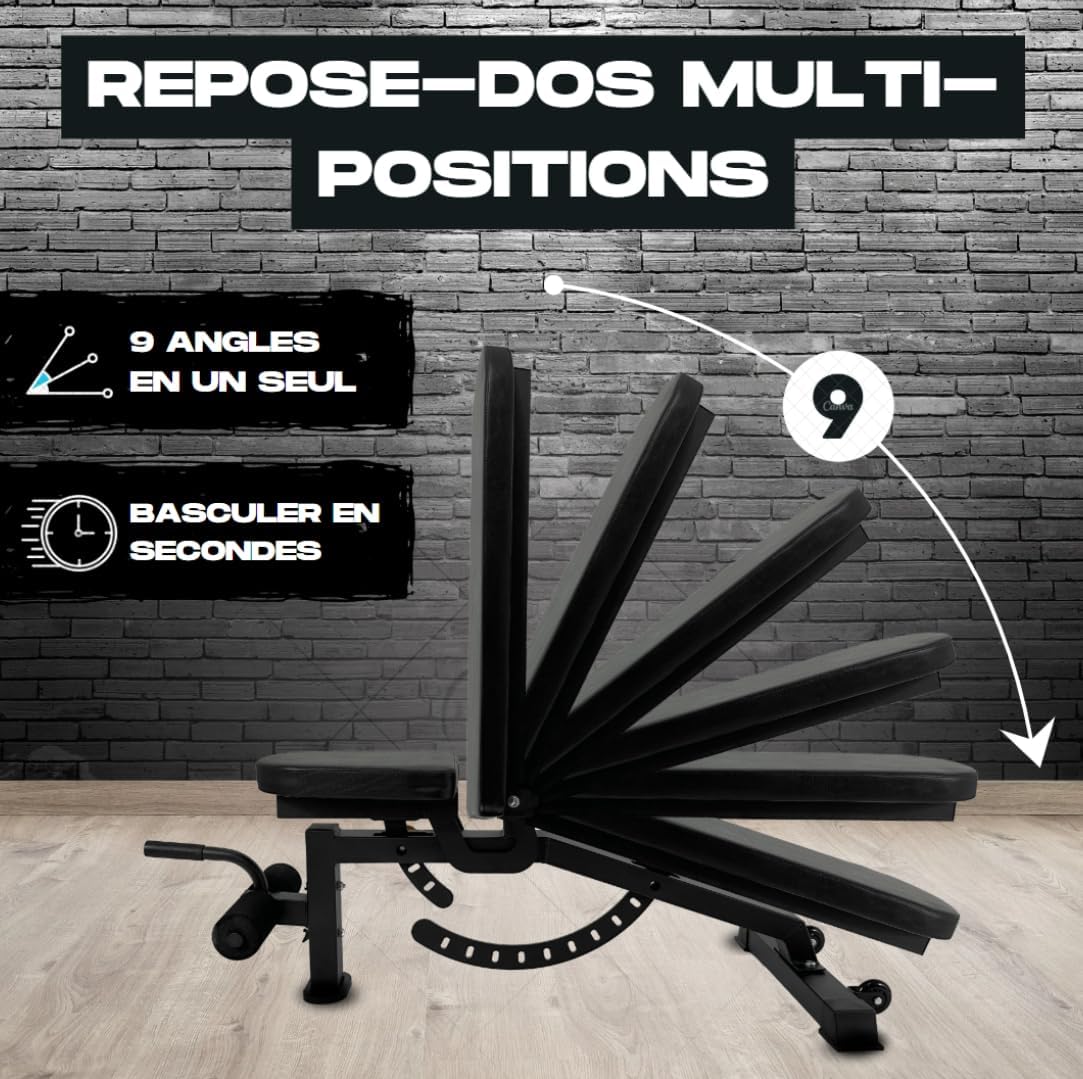
Image: The BRAINGAIN Adjustable Weight Bench demonstrating its 9 multi-position backrest angles, illustrating how the backrest can be quickly adjusted from flat to various incline and decline settings.
5.2 Adjusting the Seat
The seat pad can also be adjusted to complement the backrest angle, providing optimal support and comfort during different exercises.
- Locate the seat adjustment pin/lever, usually beneath the seat pad.
- Pull the pin outwards or lift the lever to disengage it.
- Adjust the seat to one of its 4 available positions.
- Release the pin/lever, ensuring it fully engages into the desired hole. Confirm the seat is stable before use.
5.3 Using the Footrest
The removable footrest provides additional stability and support, particularly useful for decline exercises or sit-ups.
- To attach, slide the footrest assembly into the designated receiver on the front of the bench.
- Secure it with the provided adjustment pin.
- The footrest offers 3 positions for varied support. Adjust by pulling the pin and sliding the footrest to the desired position, then re-engaging the pin.
- To remove, disengage the pin and slide the footrest out.

Image: Close-up view of the BRAINGAIN Adjustable Weight Bench's footrest and adjustment pins. This image highlights the integrated handle, the padded foot rollers, and the yellow adjustment pins for securing the backrest and seat positions.
6. Maintenance
- Cleaning: Wipe down the bench pads and frame with a damp cloth after each use to remove sweat and dirt. Use a mild soap solution for deeper cleaning, then wipe dry. Avoid abrasive cleaners.
- Inspection: Periodically inspect all bolts, nuts, and moving parts for tightness and wear. Tighten any loose fasteners. Check the upholstery for tears or excessive wear.
- Storage: Store the bench in a dry, cool place away from direct sunlight and extreme temperatures.
7. Troubleshooting
- Bench Wobbles:
- Ensure the bench is on a flat, even surface.
- Check all assembly bolts and nuts for tightness. Retighten if necessary.
- Verify that the rubber feet are properly installed and making full contact with the floor.
- Adjustment Pin Does Not Engage Fully:
- Ensure the backrest/seat is aligned correctly with the adjustment holes.
- Check for any obstructions in the adjustment mechanism.
- Apply a small amount of silicone lubricant to the pin if it feels stiff.
- Squeaking Noises:
- Identify the source of the squeak.
- Tighten any loose bolts or connections in that area.
- Apply a small amount of silicone lubricant to pivot points if needed.
8. Specifications
| Attribute | Detail |
|---|---|
| Brand | BRAINGAIN |
| Model Number | B0D1YK93ML |
| UPC | 601947067271 |
| Color | Black |
| Style | 9-in-1 Adjustable |
| Frame Material | Alloy Steel |
| Max Weight Capacity | 450 Kilograms |
| Product Dimensions (L x W x H) | 120 x 55 x 90 cm |
| Item Weight | 16 Kilograms |
| Date First Available | April 17, 2024 |
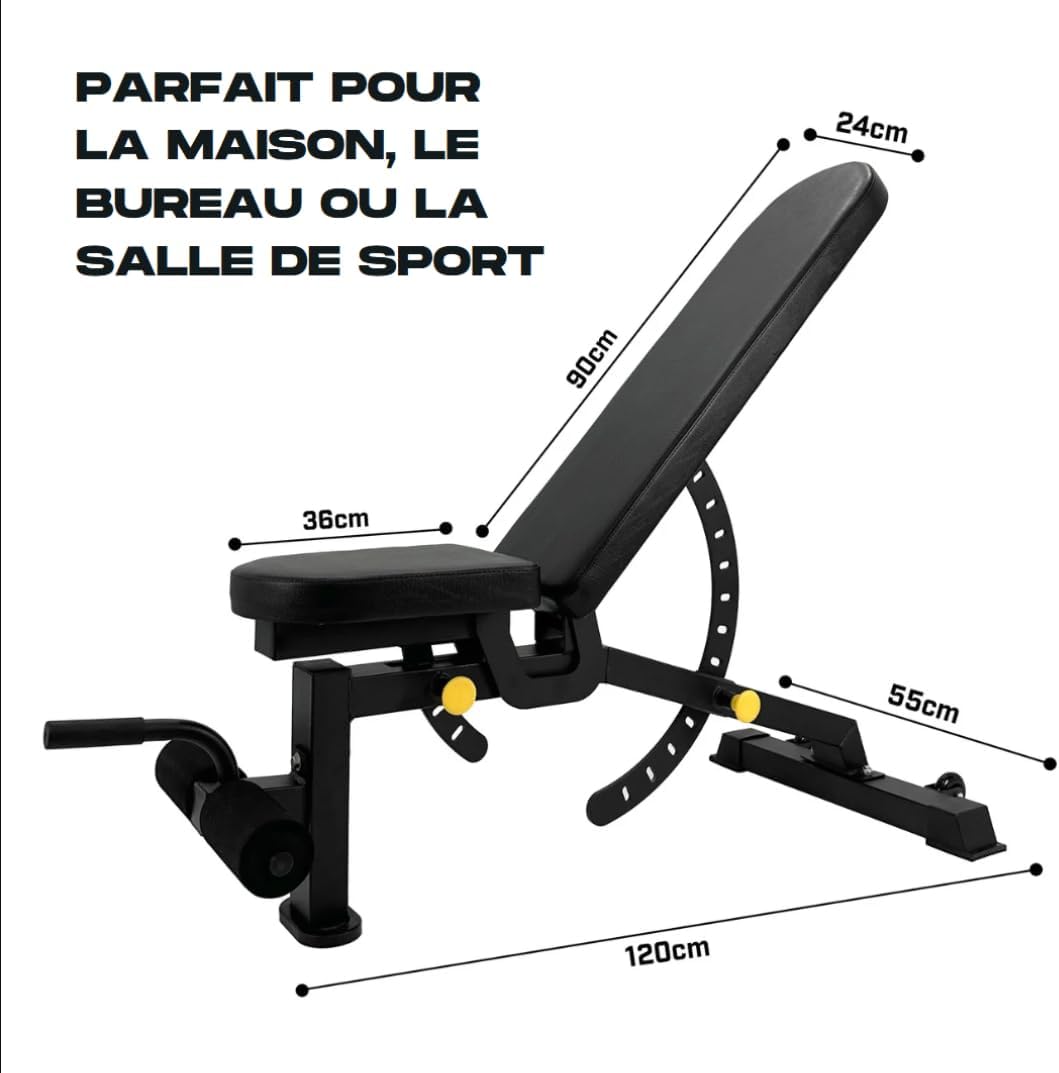
Image: The BRAINGAIN Adjustable Weight Bench with its key dimensions (length, width, height) clearly labeled, indicating its compact size suitable for home gyms or commercial spaces.
9. Warranty and Support
BRAINGAIN products are manufactured to high-quality standards. For information regarding warranty coverage, please refer to the warranty card included with your purchase or visit the official BRAINGAIN website. If you have any questions, require assistance with assembly, or need replacement parts, please contact BRAINGAIN customer support through their official channels.
For further assistance, please visit: www.braingain.com