
1. Introduction
Thank you for choosing the Machenike G6 Pro Wireless Gaming Controller. This manual provides detailed instructions on how to set up, operate, and maintain your controller to ensure optimal performance and longevity. Please read this manual thoroughly before using the product.
2. Package Contents
- Machenike G6 Pro Wireless Gaming Controller
- USB Charging Cable
- Wireless Receiver (if applicable)
- User Manual
3. Product Overview

Front view of the Machenike G6 Pro Wireless Gaming Controller, showcasing its ergonomic design, dual analog sticks, D-pad, action buttons (A, B, X, Y), shoulder buttons, and central function buttons.
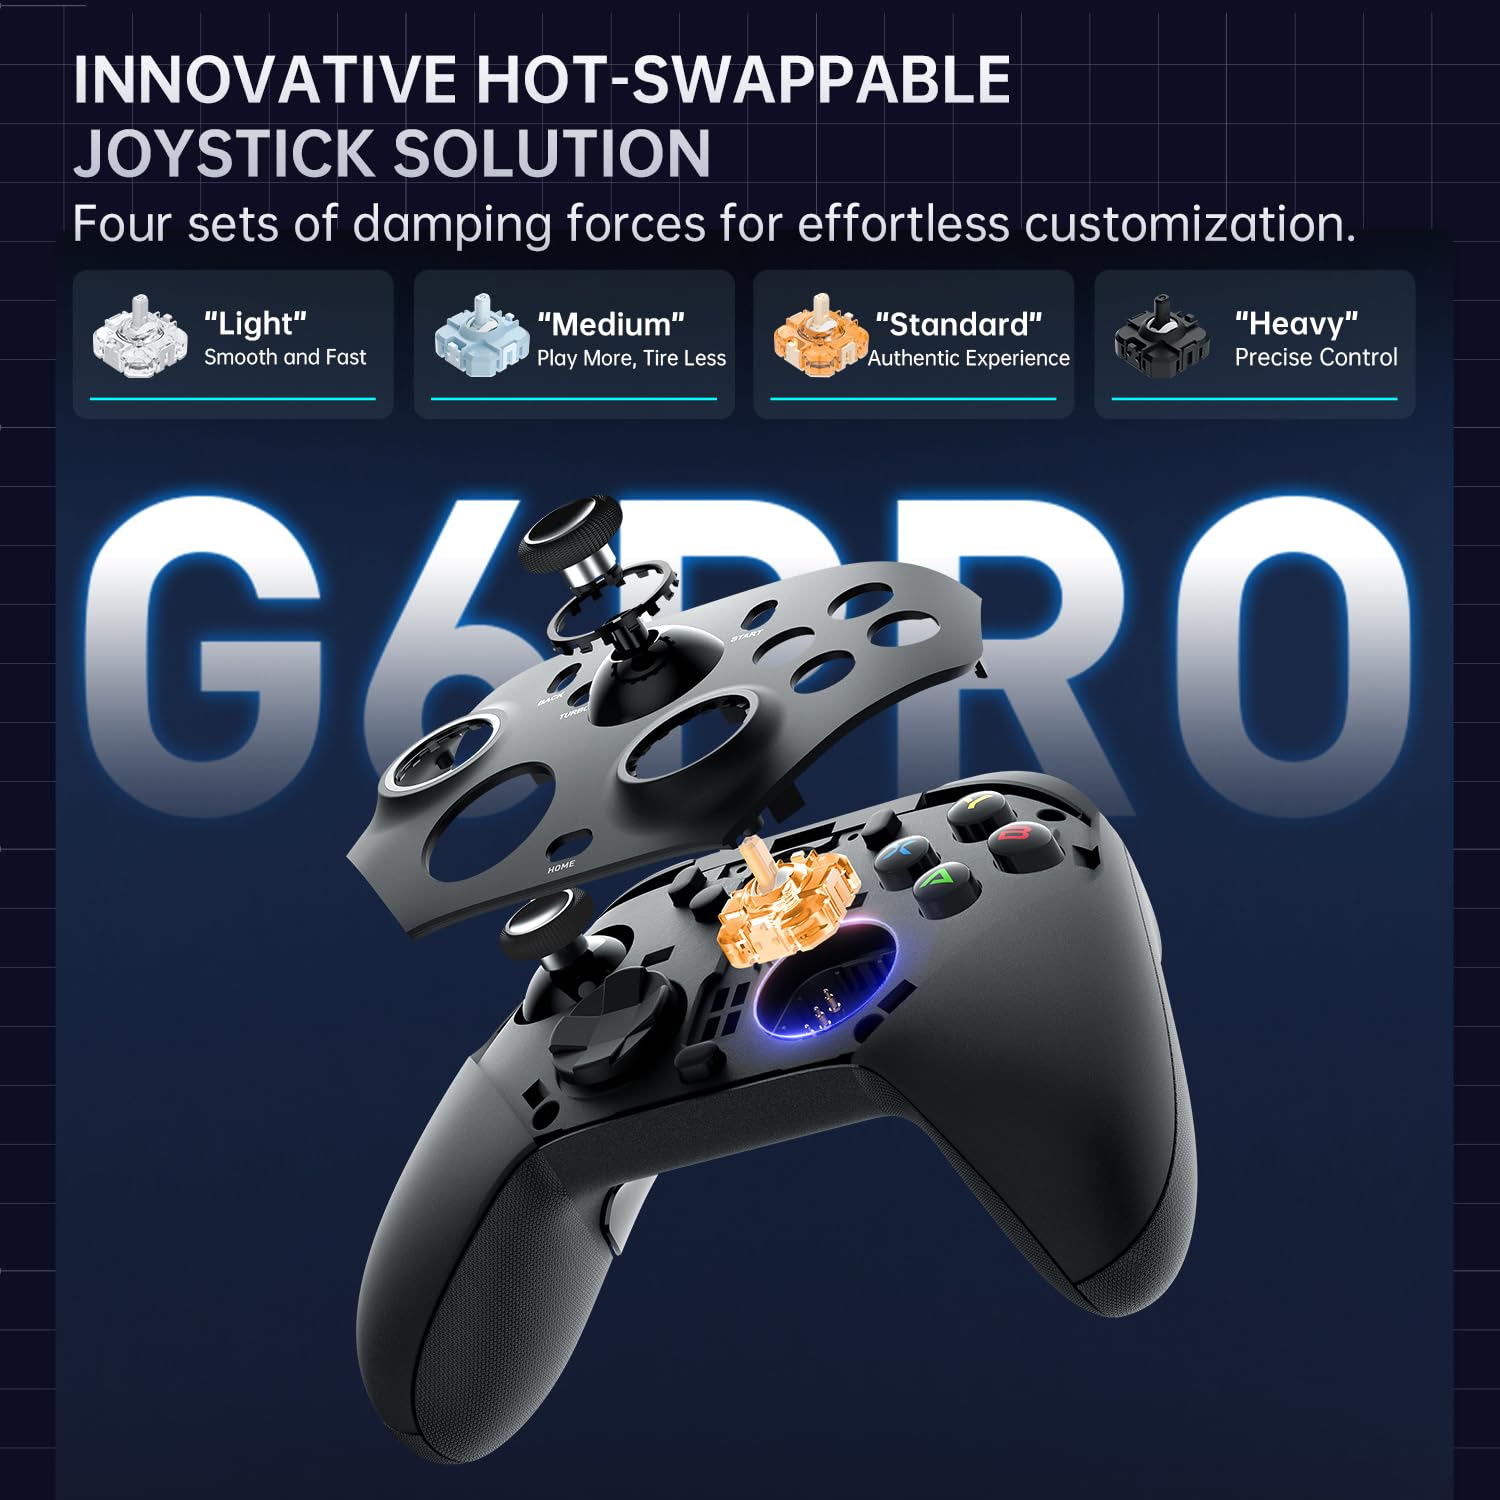
Diagram illustrating the innovative hot-swappable joystick solution of the G6 Pro controller, with four sets of damping forces: Light, Medium, Standard, and Heavy, allowing for customized control feel.
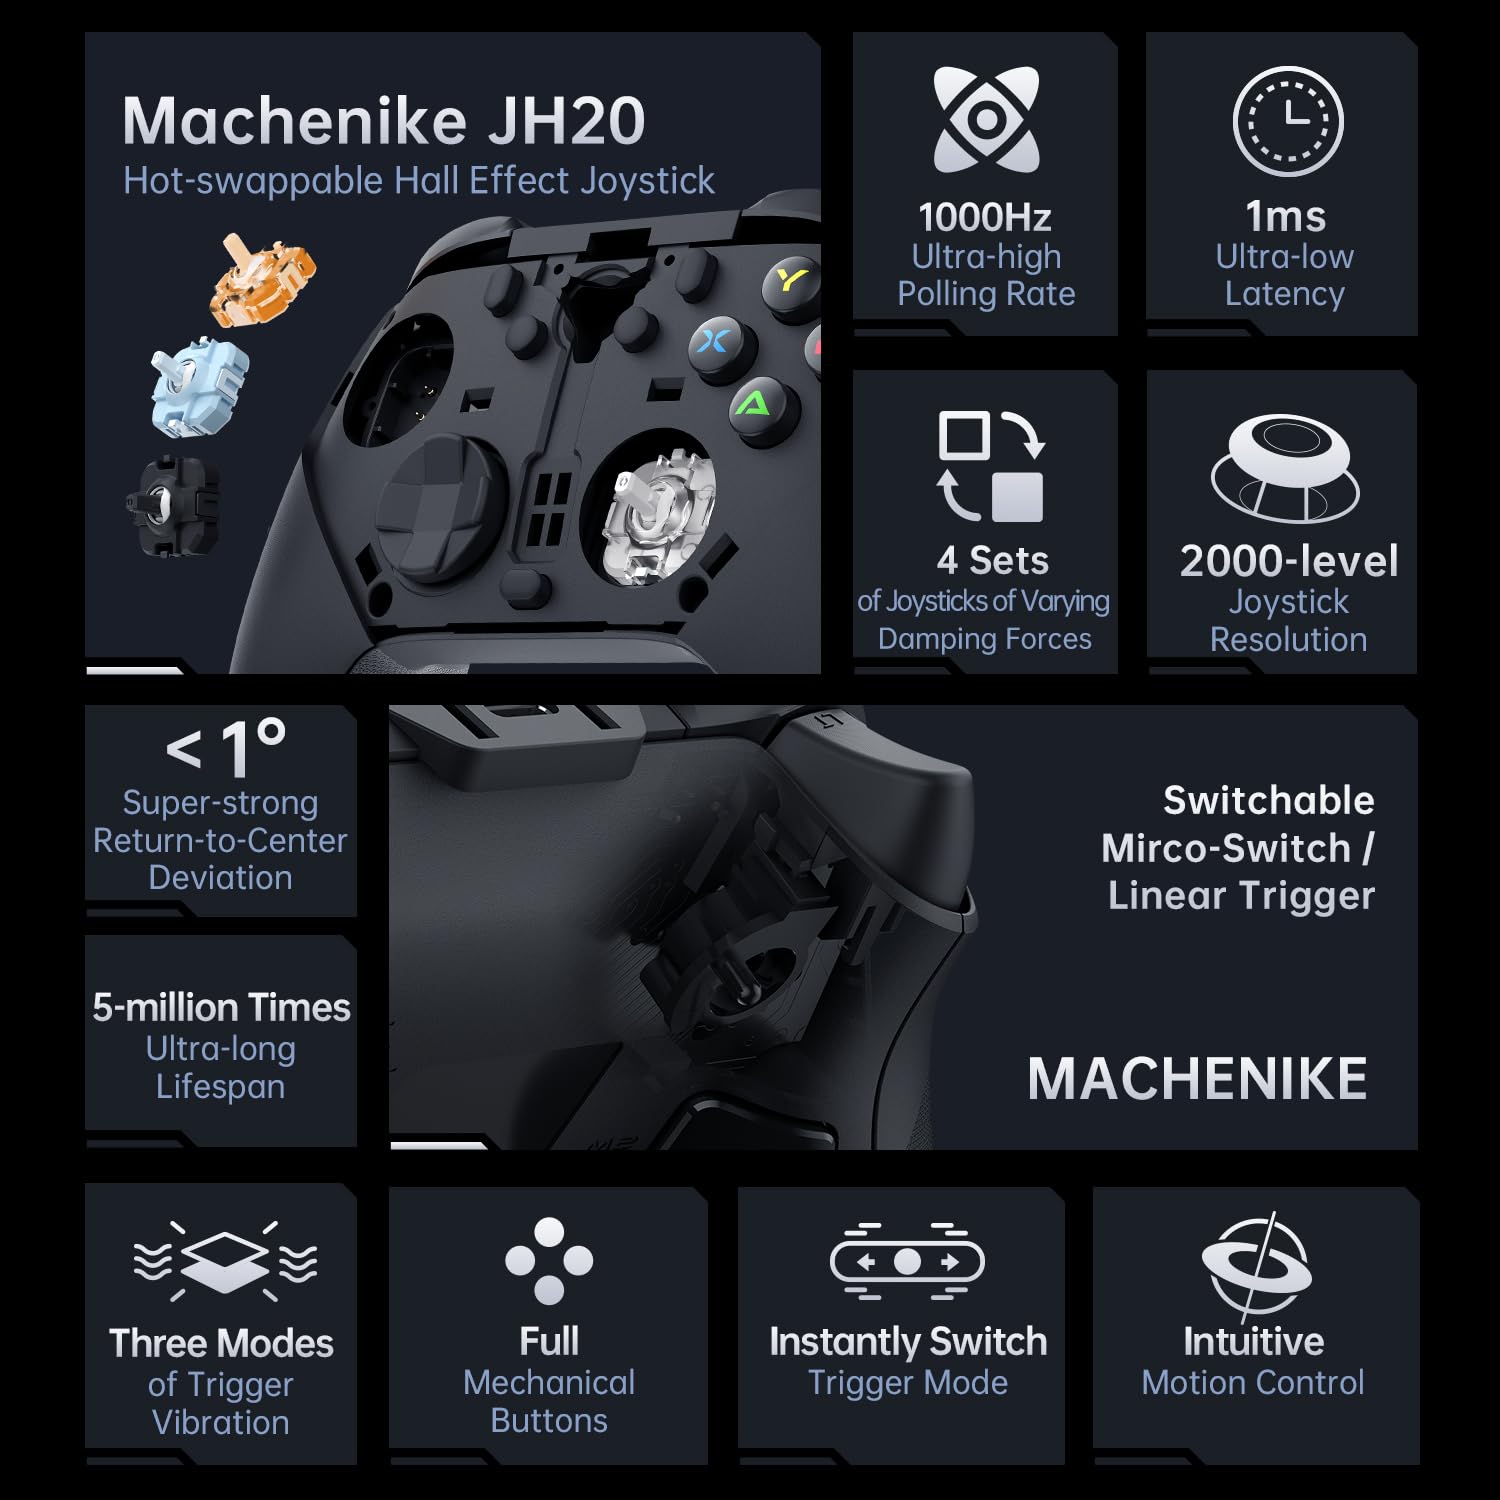
Detailed breakdown of the Machenike JH20 Hot-swappable Hall Effect Joystick features, including 1000Hz ultra-high polling rate, 1ms ultra-low latency, 4 sets of varying damping forces, 2000-level joystick resolution, super-strong return-to-center deviation, 5-million times ultra-long lifespan, switchable micro-switch/linear trigger, three modes of trigger vibration, full mechanical buttons, instant trigger mode switch, and intuitive motion control.

Close-up view of the JH20 Hot-swappable Hall Effect Joystick, highlighting its true 1000Hz polling rate, 2000 levels of joystick resolution, less than 1 degree return-to-center deviation, 500,000 times rotational lifespan, 90 +/- 1 degree centering offset, and 30 degree rotation angle.
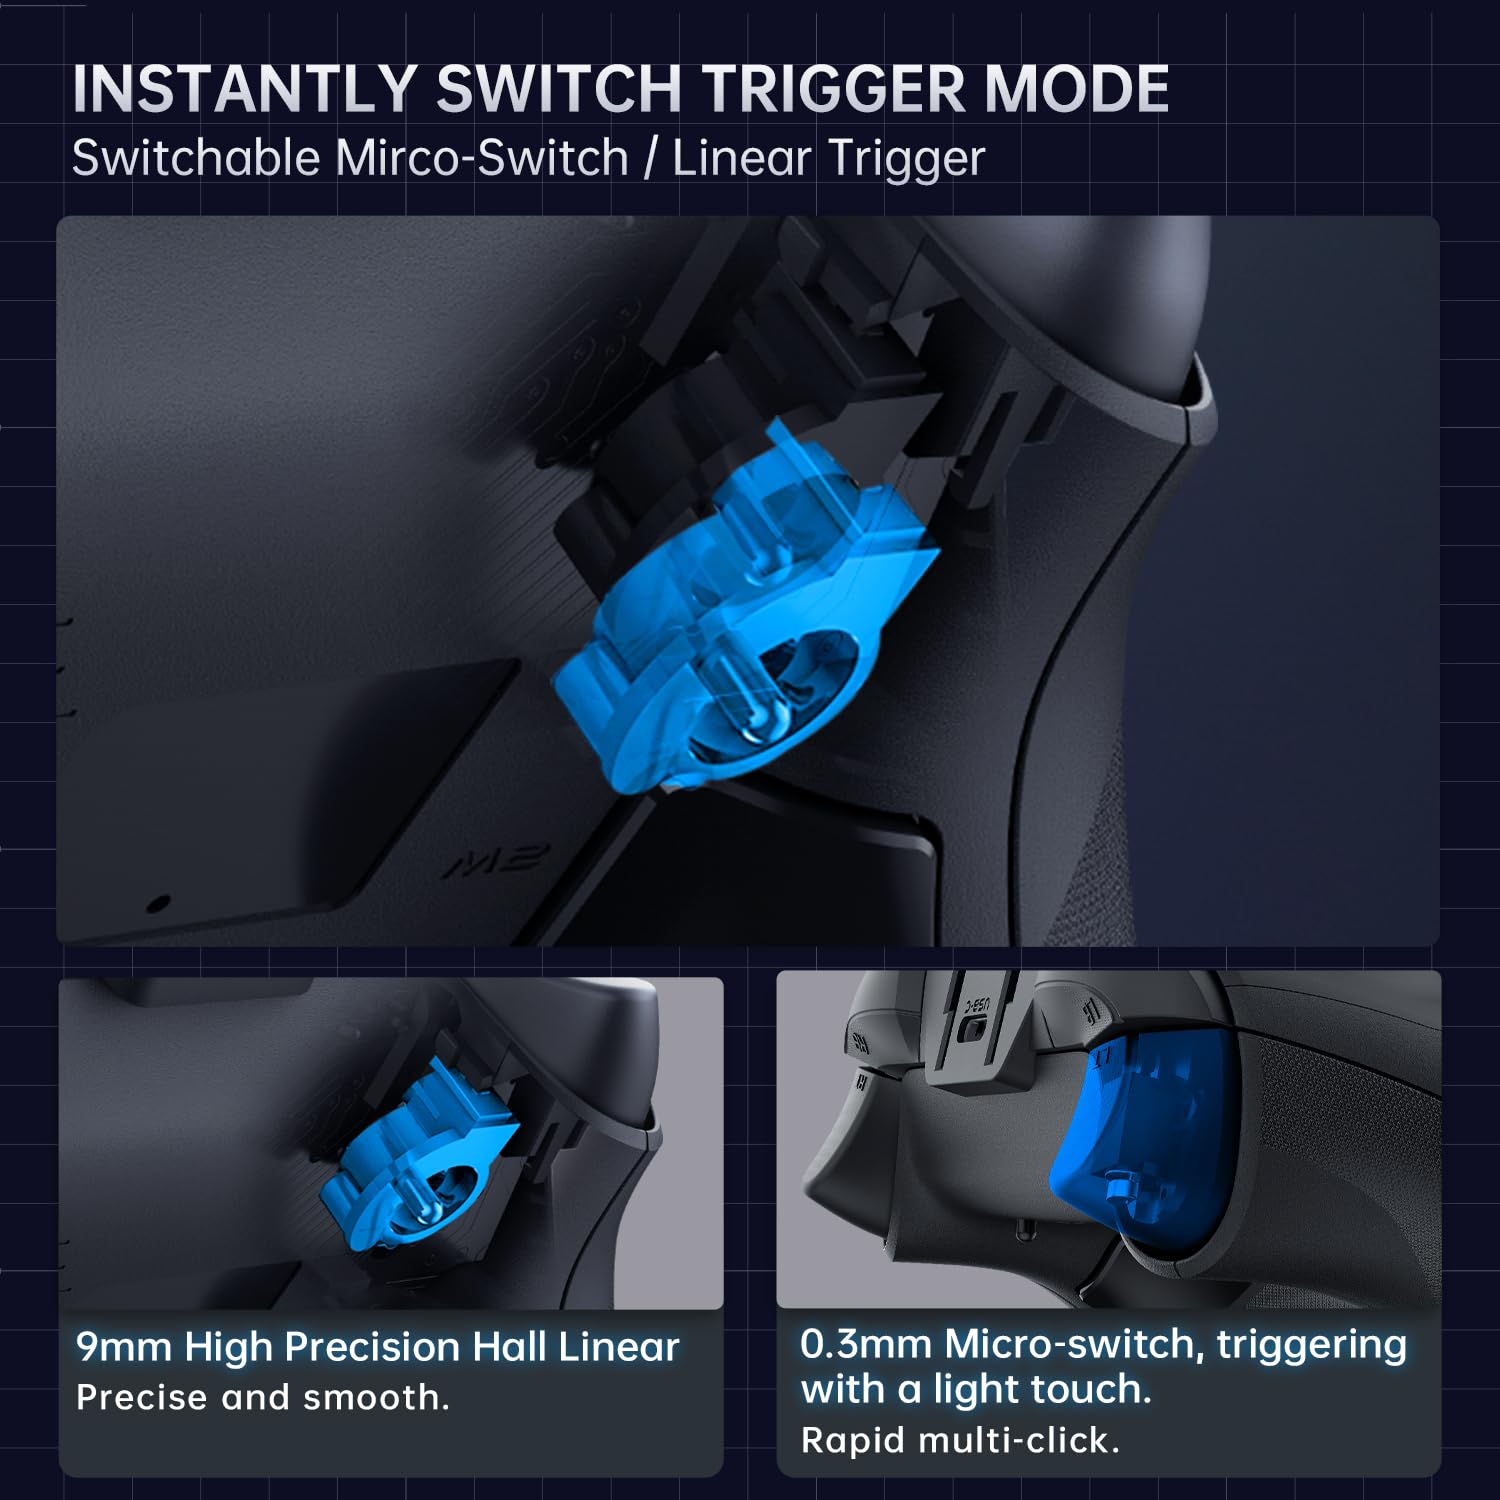
Illustration of the instantly switchable trigger mode, showing both 9mm high precision Hall Linear for precise and smooth input, and 0.3mm Micro-switch for rapid multi-click with a light touch.

Diagram explaining the immersive rumble triggers with high-frequency, multi-mode vibration, including Linear Response Mode, Game-native Trigger Rumble Mode, and Linked Rumble Mode, providing enhanced haptic feedback.
4. Setup
4.1 Charging the Controller
Before first use, fully charge the controller using the provided USB cable. Connect the small end of the USB cable to the controller's charging port and the other end to a USB power source (e.g., computer USB port, USB wall adapter). The indicator light will show charging status and turn off when fully charged.
4.2 Connecting to Your Device
The Machenike G6 Pro supports multiple connection modes. Refer to the specific instructions below for your desired platform:
- Wireless Connection (2.4GHz): Insert the wireless receiver into an available USB port on your PC or compatible device. Press and hold the pairing button on the controller until the indicator light flashes rapidly. The controller will automatically connect to the receiver.
- Wired Connection: Connect the controller directly to your PC or device using the USB cable. The controller will be recognized automatically.
- Bluetooth Connection: (If supported by your model) Put the controller into Bluetooth pairing mode (refer to specific button combination in quick start guide). On your device, search for Bluetooth devices and select "Machenike G6 Pro" to pair.
5. Operating Instructions
5.1 Basic Button Functions
Familiarize yourself with the controller's layout:
- Analog Sticks: For precise movement and camera control.
- D-Pad: For directional input, typically in menus or for specific game actions.
- Action Buttons (A, B, X, Y): For in-game actions.
- Shoulder Buttons (LB, RB) & Triggers (LT, RT): For various in-game functions like shooting, aiming, or menu navigation.
- BACK/VIEW Button: Typically for accessing in-game maps or menus.
- START/MENU Button: Typically for pausing games or accessing main menus.
- HOME Button: For accessing the system dashboard or main menu.
- TURBO Button: Activates rapid fire for selected buttons.
- FN Button: Function button for advanced settings or mode switching.
5.2 Customizing Joysticks and Triggers
The G6 Pro features hot-swappable joysticks and switchable triggers for personalized control:
- Joystick Damping: The controller comes with four sets of damping forces (Light, Medium, Standard, Heavy). To change, carefully remove the existing joystick module and insert the desired one. Ensure it clicks into place.
- Trigger Mode: Switch between Hall Linear (9mm precision) and Micro-switch (0.3mm rapid click) trigger modes. Use the dedicated switch or combination of buttons as indicated in the quick start guide to toggle between modes.
5.3 Rumble Triggers
Experience enhanced immersion with multi-mode rumble triggers. The controller supports Linear Response, Game-native, and Linked Rumble modes, providing varied haptic feedback based on game events.
6. Maintenance
To ensure the longevity of your Machenike G6 Pro controller, follow these maintenance guidelines:
- Cleaning: Use a soft, dry cloth to wipe the controller. For stubborn dirt, slightly dampen the cloth with water. Avoid using harsh chemicals or abrasive cleaners.
- Storage: Store the controller in a cool, dry place away from direct sunlight and extreme temperatures.
- Battery Care: Do not expose the battery to high temperatures or disassemble it. If the controller will not be used for an extended period, charge it periodically to maintain battery health.
7. Troubleshooting
7.1 Controller Not Connecting
- Ensure the controller is charged.
- Verify the wireless receiver is properly inserted into a working USB port.
- Try re-pairing the controller by holding the pairing button.
- If using a wired connection, try a different USB port or cable.
7.2 Buttons or Joysticks Not Responding
- Restart the controller and your device.
- Ensure no debris is lodged around the buttons or joysticks.
- If using hot-swappable joysticks, ensure they are fully seated.
- Update controller drivers on your PC if available.
7.3 Input Lag or Disconnections
- Ensure the controller is within range of the wireless receiver.
- Minimize interference from other wireless devices.
- Ensure the controller is fully charged.
8. Specifications
| Feature | Detail |
|---|---|
| Model Number | G6 Pro |
| Manufacturer | Machenike |
| Joystick Type | JH20 Hot-swappable Hall Effect Joystick |
| Polling Rate | 1000Hz Ultra-high |
| Latency | 1ms Ultra-low |
| Joystick Resolution | 2000-level |
| Trigger Type | Switchable Micro-switch / Linear Trigger |
| Battery Type | Lithium Polymer |
| Connectivity | Wireless (2.4GHz), Wired (USB) |
9. Warranty and Support
The Machenike G6 Pro Wireless Gaming Controller comes with a standard manufacturer's warranty. Please refer to the warranty card included in your package for specific terms and conditions. For technical support, troubleshooting assistance, or warranty claims, please contact Machenike customer service through their official website or the retailer where you purchased the product. Keep your proof of purchase for warranty validation.


