1. Introduction
This manual provides detailed instructions for the installation, operation, and maintenance of your RAINPOINT WiFi Water Timer. This smart device allows for automated and precise watering of your lawn or garden, controllable via a mobile application, voice commands, and manual buttons. Its dual-zone design and various watering modes offer flexible irrigation solutions.
2. Product Components
The RAINPOINT WiFi Water Timer package includes the following items:
- RAINPOINT 2-Zone WiFi Water Timer (with Brass Inlet & Outlet)
- WiFi Hub (with Smart Outlet functionality)
- User Manual (this document)
- Teflon Tape
- Rubber Washers
- Required AA Batteries (4x, typically not included but good to mention for user preparation)

Image: The RAINPOINT 2-Zone WiFi Water Timer (yellow unit) and the accompanying WiFi Hub (grey unit with power outlet) are shown alongside a smartphone displaying the control application. This illustrates the main components of the smart watering system.
3. Setup Guide
3.1. Battery Installation
The water timer requires 4 AA alkaline batteries for operation. Ensure correct polarity when inserting the batteries.

Image: A hand is shown inserting AA batteries into the battery compartment of the RAINPOINT WiFi Water Timer. This step is crucial for powering the device.
3.2. Physical Installation
- Connect the brass inlet of the water timer to your outdoor faucet. Hand tighten to secure. Use the provided Teflon tape and rubber washers to ensure a leak-proof seal.
- Attach your garden hoses to the two reinforced metal outlets at the bottom of the water timer. Ensure these connections are also tight to prevent leaks.
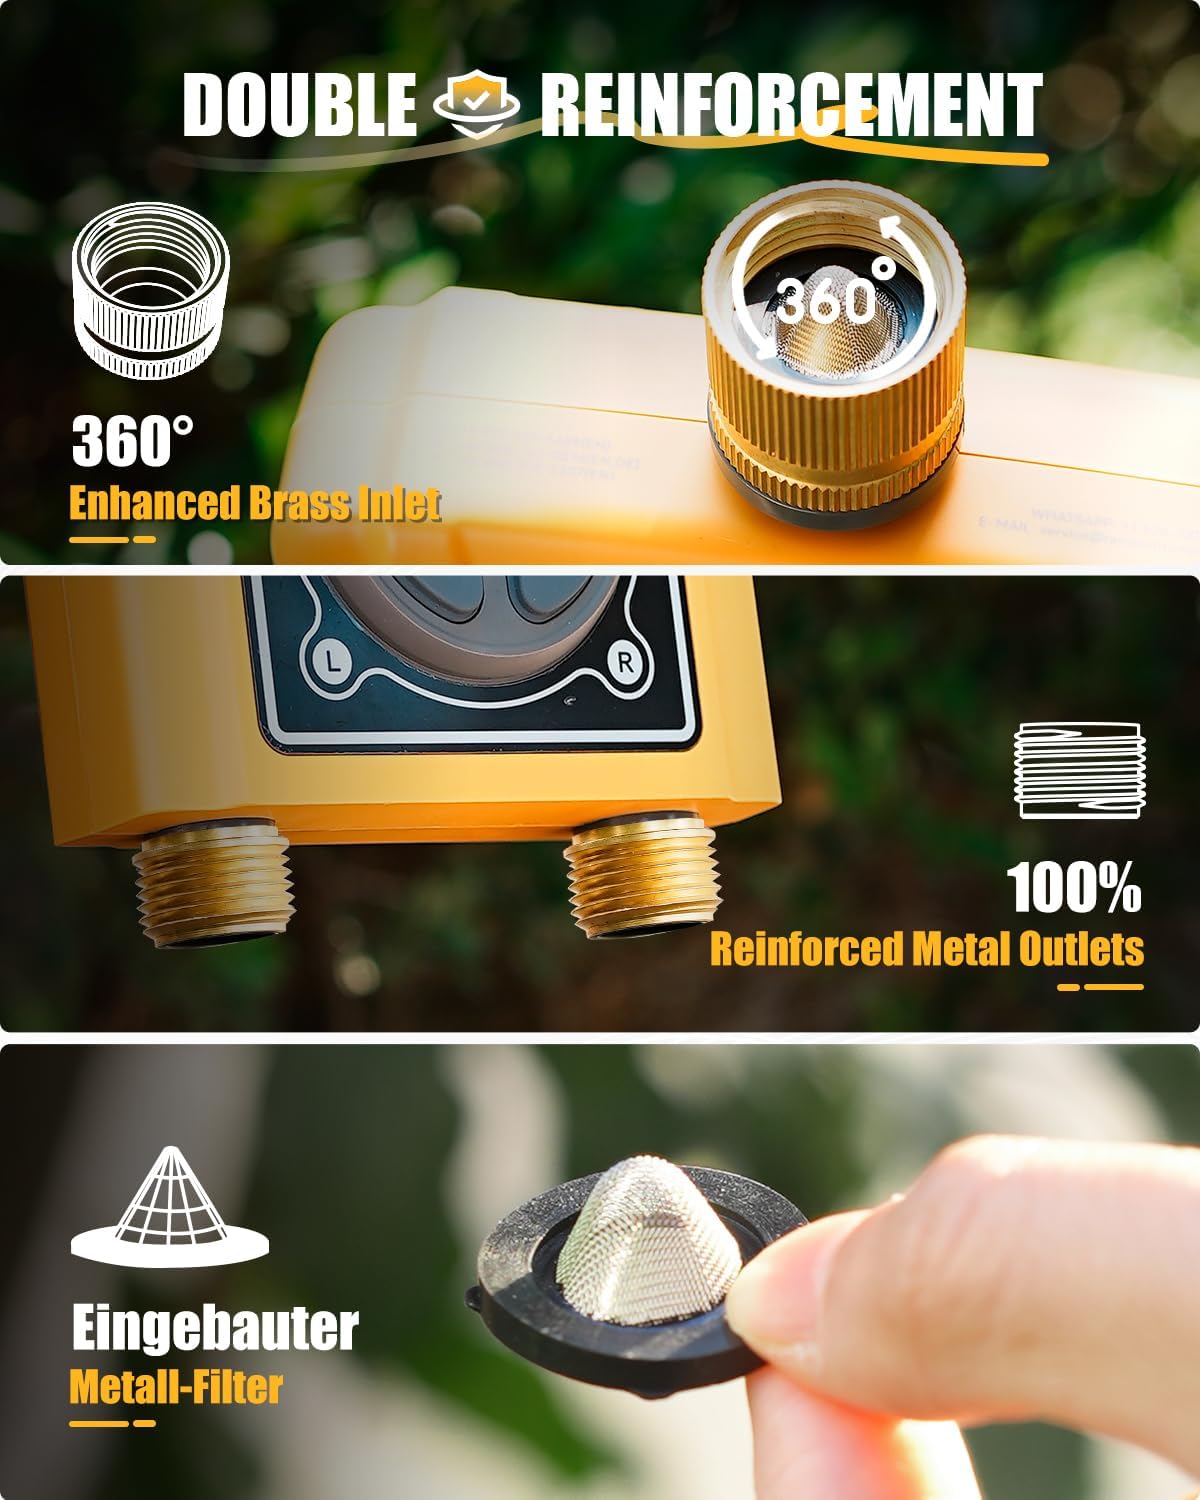
Image: A close-up view of the RAINPOINT WiFi Water Timer highlighting its 360-degree enhanced brass inlet and 100% reinforced metal outlets, emphasizing the durable construction and connection points.

Image: A visual guide demonstrating the four quick installation steps: installing batteries, connecting the water inlet to the faucet, connecting the outlet to the hose, and setting up the watering schedule via the app.
3.3. App Installation and Wi-Fi Hub Connection
- Download the RainPoint APP from your smartphone's app store (iOS or Android).
- Create an account and log in.
- Plug the WiFi Hub into an indoor power outlet. The hub's indicator light will begin blinking.
- In the RainPoint APP, select "Add Device" and choose the WiFi Hub. Follow the on-screen prompts to connect the hub to your 2.4GHz WiFi network. (Note: Only 2.4GHz WiFi is supported).
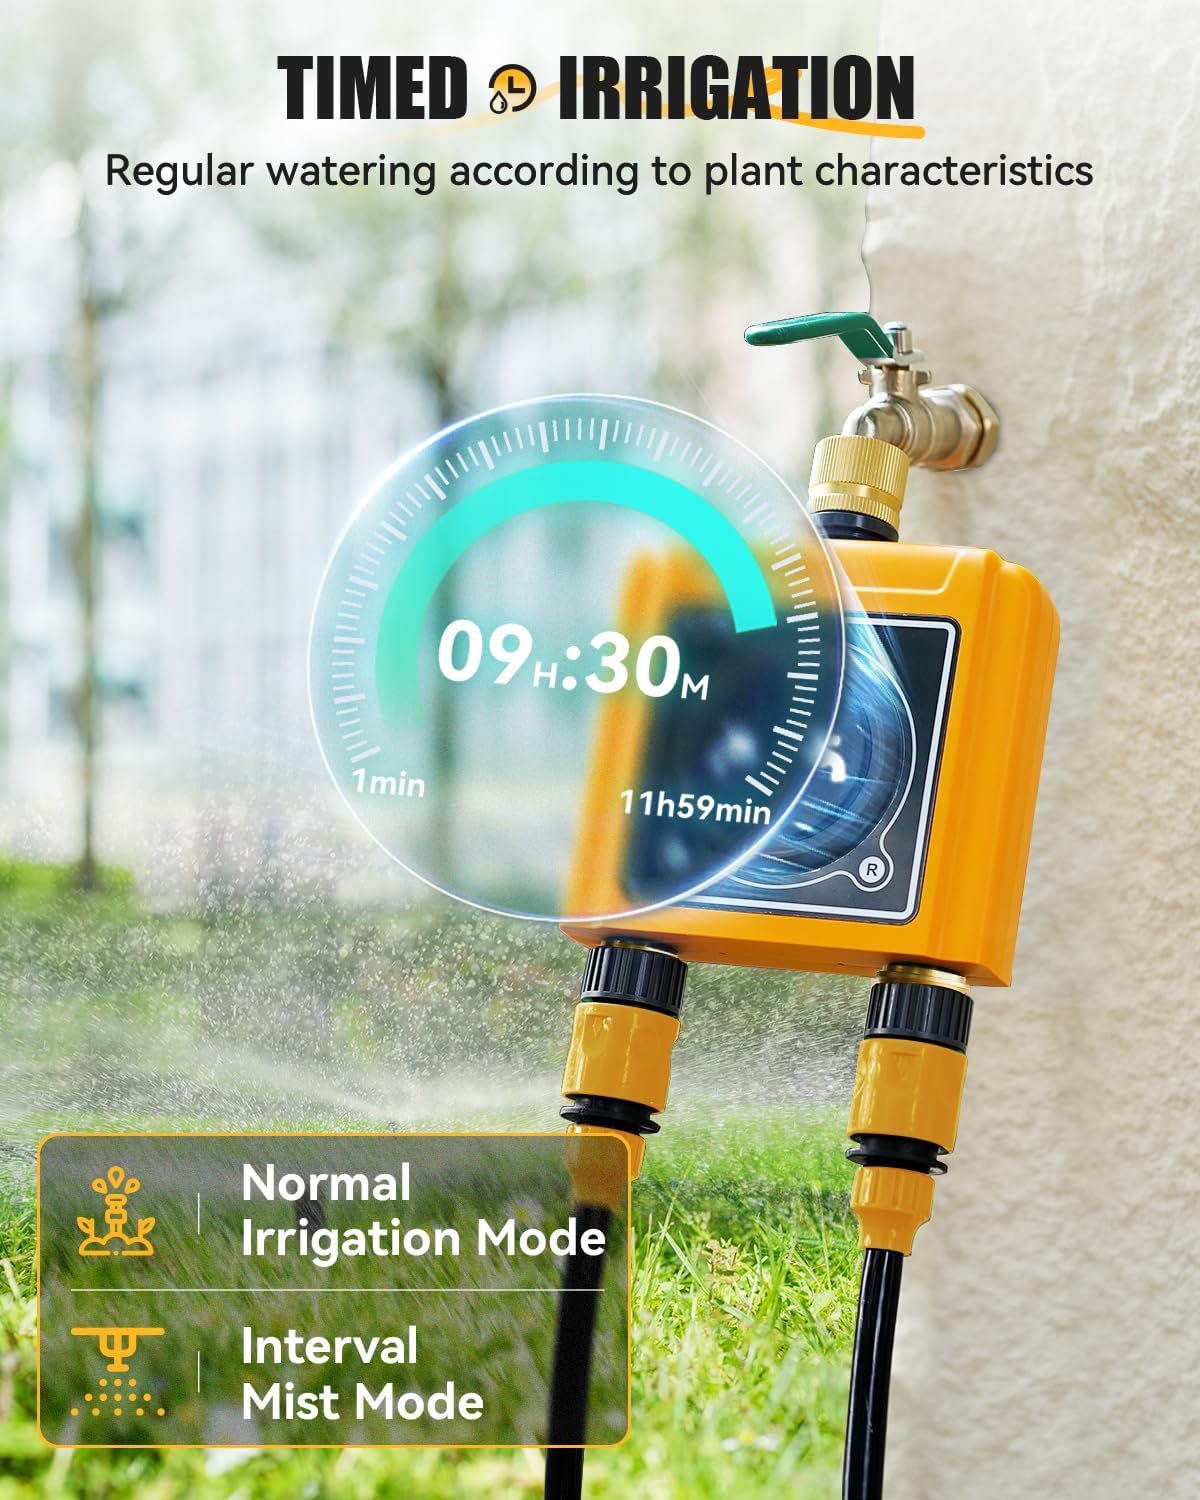
Image: A woman is shown relaxing outdoors while controlling the water timer via her smartphone, with an overlay illustrating the WiFi Hub's connection to the timer and the home's WiFi network. This highlights the remote control capability.
Video: This video demonstrates the process of connecting the WiFi Hub and the WiFi Water Timer to the RainPoint application. It guides users through the pairing steps for a successful setup.
3.4. Water Timer Pairing
Once the WiFi Hub is connected, use the app to pair the water timer to the hub. The app will automatically detect the timer when it's in pairing mode (usually activated by inserting batteries or pressing a button on the timer).
4. Operating Instructions
4.1. App Control and Watering Modes
The RainPoint APP offers comprehensive control over your watering schedules. You can set up to 6 watering plans and choose between two primary watering modes:
- Irrigation Mode: For regular watering at longer intervals. Customize start time, duration (1 min - 11h 59 min), and frequency (Mon-Sun).
- Mist Mode: For shorter, more frequent watering intervals, ideal for misting.

Image: A visual representation of the timed irrigation feature, showing a digital clock overlayed on the water timer indicating a set time of 09:30. It also displays options for "Normal Irrigation Mode" and "Interval Mist Mode."
4.2. Advanced Watering Features
- Weather-Based Watering: The timer can automatically adjust or skip watering based on local weather conditions (temperature, humidity, weather forecast, PM2.5, air quality, sunset/sunrise, wind speed). You can also manually set a rain delay for 24, 48, or 72 hours.
- Quantity-Based Watering: Each zone has a built-in water flow meter to measure water usage in gallons or liters. You can set watering schedules based on a specific quantity of water. The app records usage for up to 10 days.
- Soil-Based Watering: (Requires optional WiFi soil sensor, not included). Pair a soil sensor to the WiFi Hub to set watering schedules based on real-time soil moisture levels.
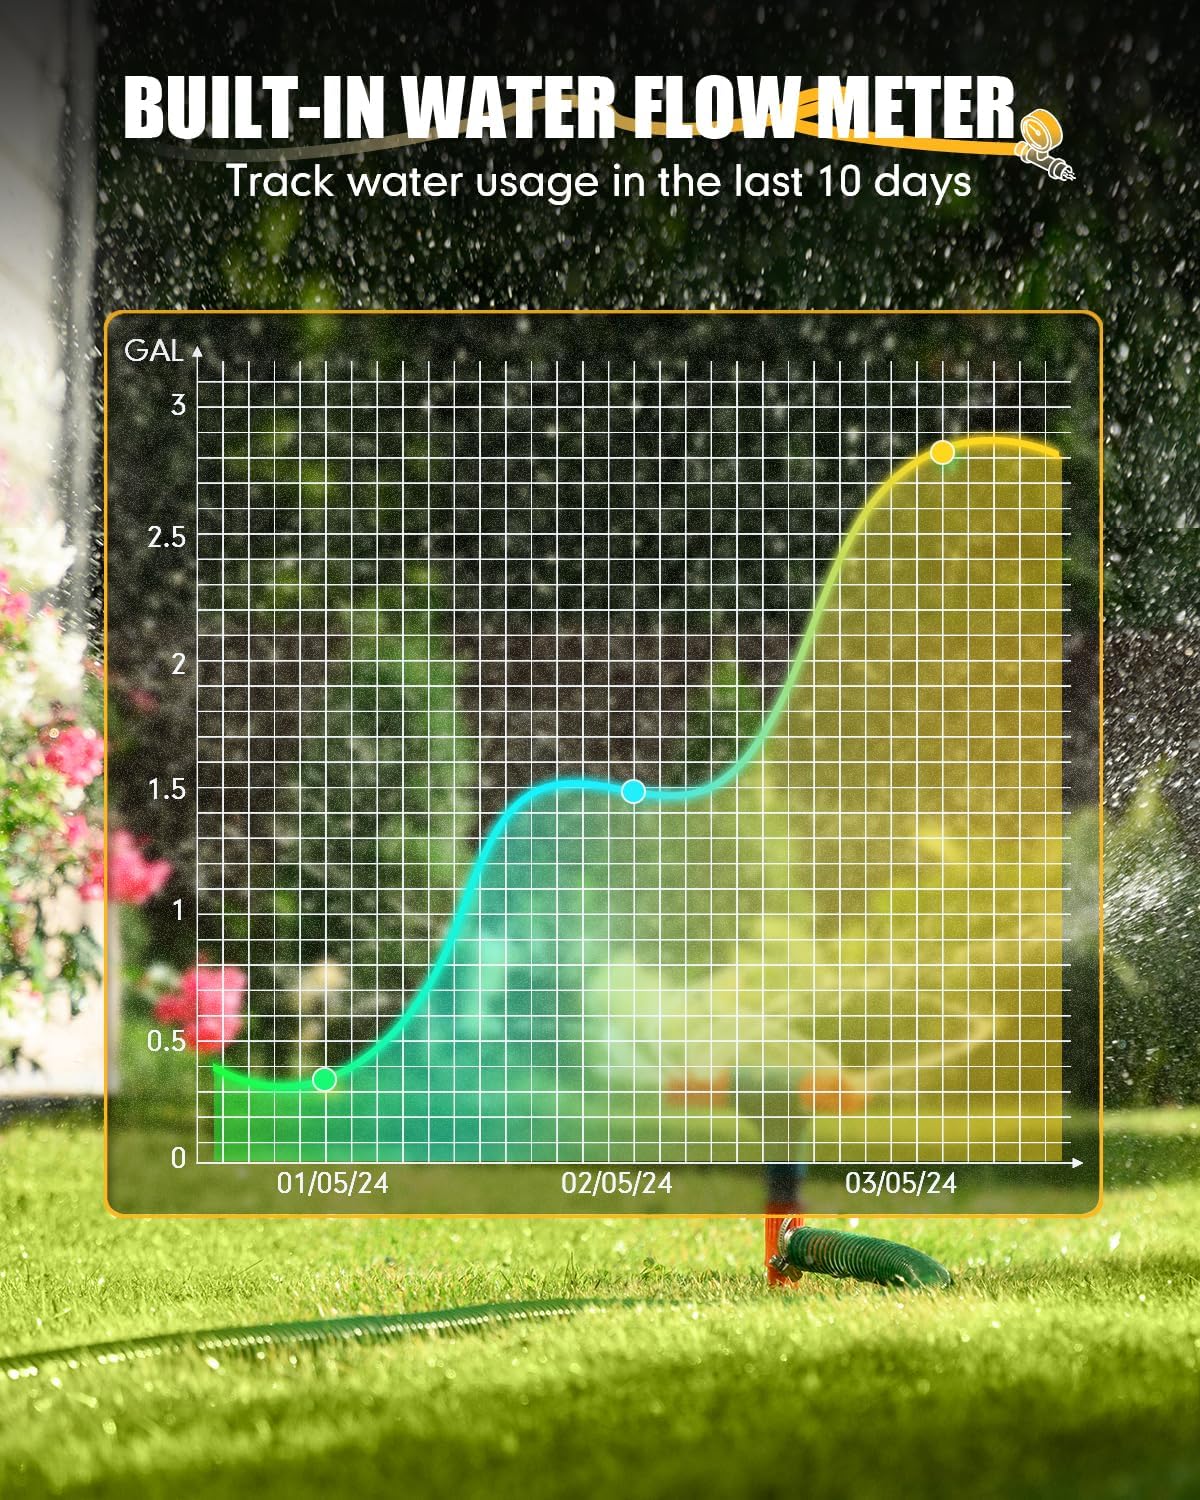
Image: This image illustrates the quantitative watering feature, showing water droplets with volume indicators (1L, 1.5L, 1.8L) near plants, and a bar at the bottom indicating water usage ranges from 1L (1 Gal) to 10000L (2641 Gals).

Image: A graph showing water usage over 10 days, demonstrating the built-in water flow meter's ability to track and record consumption. The graph displays usage in gallons over time.
4.3. Manual Watering
You can initiate manual watering directly from the app, using the buttons on the water timer, or via voice commands. Manual watering duration can be set from 1 to 59 minutes for individual zones (left/right) or both simultaneously. This feature does not disrupt your pre-set automatic schedules.

Image: A child is shown watering plants with a hose, illustrating the flexible manual watering feature. An overlay shows the "Watering Time" slider from 1 to 60 minutes and options to select Zone 1, Zone 2, or Both for manual operation.
4.4. Voice Control
The RAINPOINT WiFi Water Timer is compatible with Alexa and Google Assistant. Link your device through the respective voice assistant apps to control watering with simple voice commands, such as "Alexa, turn on the WiFi Water Timer Zone Left."

Image: A man is shown interacting with an Alexa device, with a speech bubble indicating the command "Alexa, Turn on the WiFi Water Timer Zone Left." This demonstrates the voice control capability of the system.
Video: This video provides instructions on how to connect your water timer to Alexa via the Tuya APP on an Android device, enabling voice control functionality.
4.5. Independent Dual Zones
The timer features two independent zones, allowing you to set up to 3 distinct watering programs (Plan A, B, C) for each zone. This is ideal for managing different watering needs in various areas of your garden or lawn.

Image: An aerial view of a property divided into two zones, with icons indicating "Zone 1" and "Zone 2," each capable of having three independent watering plans (Plan A, B, C). This illustrates the independent dual-zone functionality.
5. Maintenance
5.1. Battery Replacement
Monitor the battery status in the RainPoint APP. When the battery level is low, replace all 4 AA alkaline batteries promptly to ensure continuous operation.
5.2. Cleaning the Filter
The water timer has a built-in metal filter at the inlet to prevent debris from entering the system. Periodically inspect and clean this filter to maintain optimal water flow and prevent blockages.

Image: A close-up showing the built-in metal filter within the brass inlet of the water timer, with a hand holding the filter for inspection or cleaning. This highlights a key maintenance component.
5.3. Winterization
Before the first frost, disconnect the water timer from the faucet and hoses. Drain any remaining water from the unit and store it indoors in a dry, protected area to prevent damage from freezing temperatures.
6. Troubleshooting
- Connection Issues (Wi-Fi/App):
Ensure your WiFi network is 2.4GHz. Verify the WiFi Hub is plugged in and its indicator light is active. Restart the app and the WiFi Hub. If issues persist, try re-pairing the devices as per the setup guide.
- Leaks:
Check all connections (faucet to timer, timer to hoses) for tightness. Ensure rubber washers and Teflon tape are properly used. Inspect the brass inlet and metal outlets for any visible damage.
- Rain Delay Override:
If the rain delay is active and you need to water, you can temporarily disable it within the app's "Plan" settings. This allows for manual watering even during a rain delay period.
- No Notifications:
Check your phone's notification settings for the RainPoint APP to ensure notifications are enabled. Also, verify that the app is running in the background or has appropriate permissions.
- Timer Not Responding:
Check battery levels and replace if necessary. Ensure the timer is within range of the WiFi Hub. If the issue persists, try resetting the timer (refer to app for specific reset instructions if available) and re-pairing.
7. Specifications
| Feature | Detail |
|---|---|
| Brand | RAINPOINT |
| Model Numbers | TTV203WRF, TWG004WRF |
| Color | Yellow |
| Material | Metal (Brass Inlet, Reinforced Metal Outlets) |
| Product Dimensions | 1"D x 2"W x 1"H |
| Item Weight | 1 Pound |
| Number of Settings | 8 (referring to watering plans/modes) |
| Connectivity | 2.4GHz WiFi (via WiFi Hub) |
| Voice Control Compatibility | Alexa, Google Assistant |
| Power Source | 4 AA Batteries (Water Timer), AC Power (WiFi Hub) |
8. Warranty and Support
RAINPOINT offers a 5-year warranty for this product, as mentioned in customer reviews. For any support inquiries, troubleshooting assistance, or warranty claims, please contact RAINPOINT customer service.
To contact customer support:
- Login to your Amazon account.
- Navigate to "Your Orders".
- Find the order ID for your RAINPOINT WiFi Water Timer.
- Click "Contact Seller" to reach RAINPOINT's support team.

Image: A graphic illustrating the steps to contact customer support via Amazon: "Login your account," "Choose 'Your orders'," "Find the order ID," and "Click 'Contact Seller'."


