
1. Introduction
This manual provides comprehensive instructions for the assembly, setup, operation, and maintenance of your Huuger Night Stand with an integrated charging station and LED lights. Please read this manual carefully before assembly and use to ensure proper function and safety. Keep this manual for future reference.
2. Safety Information
- Always follow the assembly instructions provided.
- Do not exceed the maximum weight recommendation of 22 pounds (10 kg) for the tabletop.
- Ensure the night stand is placed on a stable, level surface. Use the adjustable feet to prevent wobbling.
- Do not overload the electrical outlets or USB ports.
- Keep all electrical components away from water or damp environments.
- Periodically check all connections and fasteners to ensure they remain tight.
- Keep small parts and packaging materials away from children to prevent choking hazards.
3. Package Contents
Verify that all components are present before beginning assembly. If any parts are missing or damaged, please contact customer support.
- Metal Frame Components
- Engineered Wood Panels (Top, Middle Shelf)
- 3 Fabric Drawers
- Integrated Charging Station (pre-installed in top panel)
- LED Light Strip with Smart Controller
- Assembly Hardware (screws, bolts, hex keys)
- Screwdriver
- Instruction Manual
4. Assembly Instructions
Assembly typically requires one person and the included tools. Follow the step-by-step diagrams provided in the separate assembly guide included in your package.
- Unpack and Identify Parts: Lay out all components and hardware on a clean, soft surface to prevent scratches. Refer to the parts list in your assembly guide.
- Assemble the Metal Frame: Connect the metal frame components using the provided screws and hex keys. Do not overtighten until all parts are aligned.
- Attach Wood Panels: Secure the engineered wood top and middle shelf panels to the metal frame.
- Install Fabric Drawers: Fold and insert the fabric drawers into their designated slots within the frame. Ensure the handles are facing outwards.
- Install LED Light Strip: Adhere the LED light strip to the underside of the top shelf using its adhesive backing. Connect the LED strip to the smart controller.
- Adjust Feet: Once assembled, place the night stand in its desired location and adjust the leveling feet at the bottom of the metal frame to ensure stability.


5. Setup
5.1 Charging Station Setup
The charging station is integrated into the top panel. Simply plug the night stand's power cord into a standard wall outlet (120V AC, 60Hz). The AC outlets, USB ports, and Type-C port will then be ready for use.
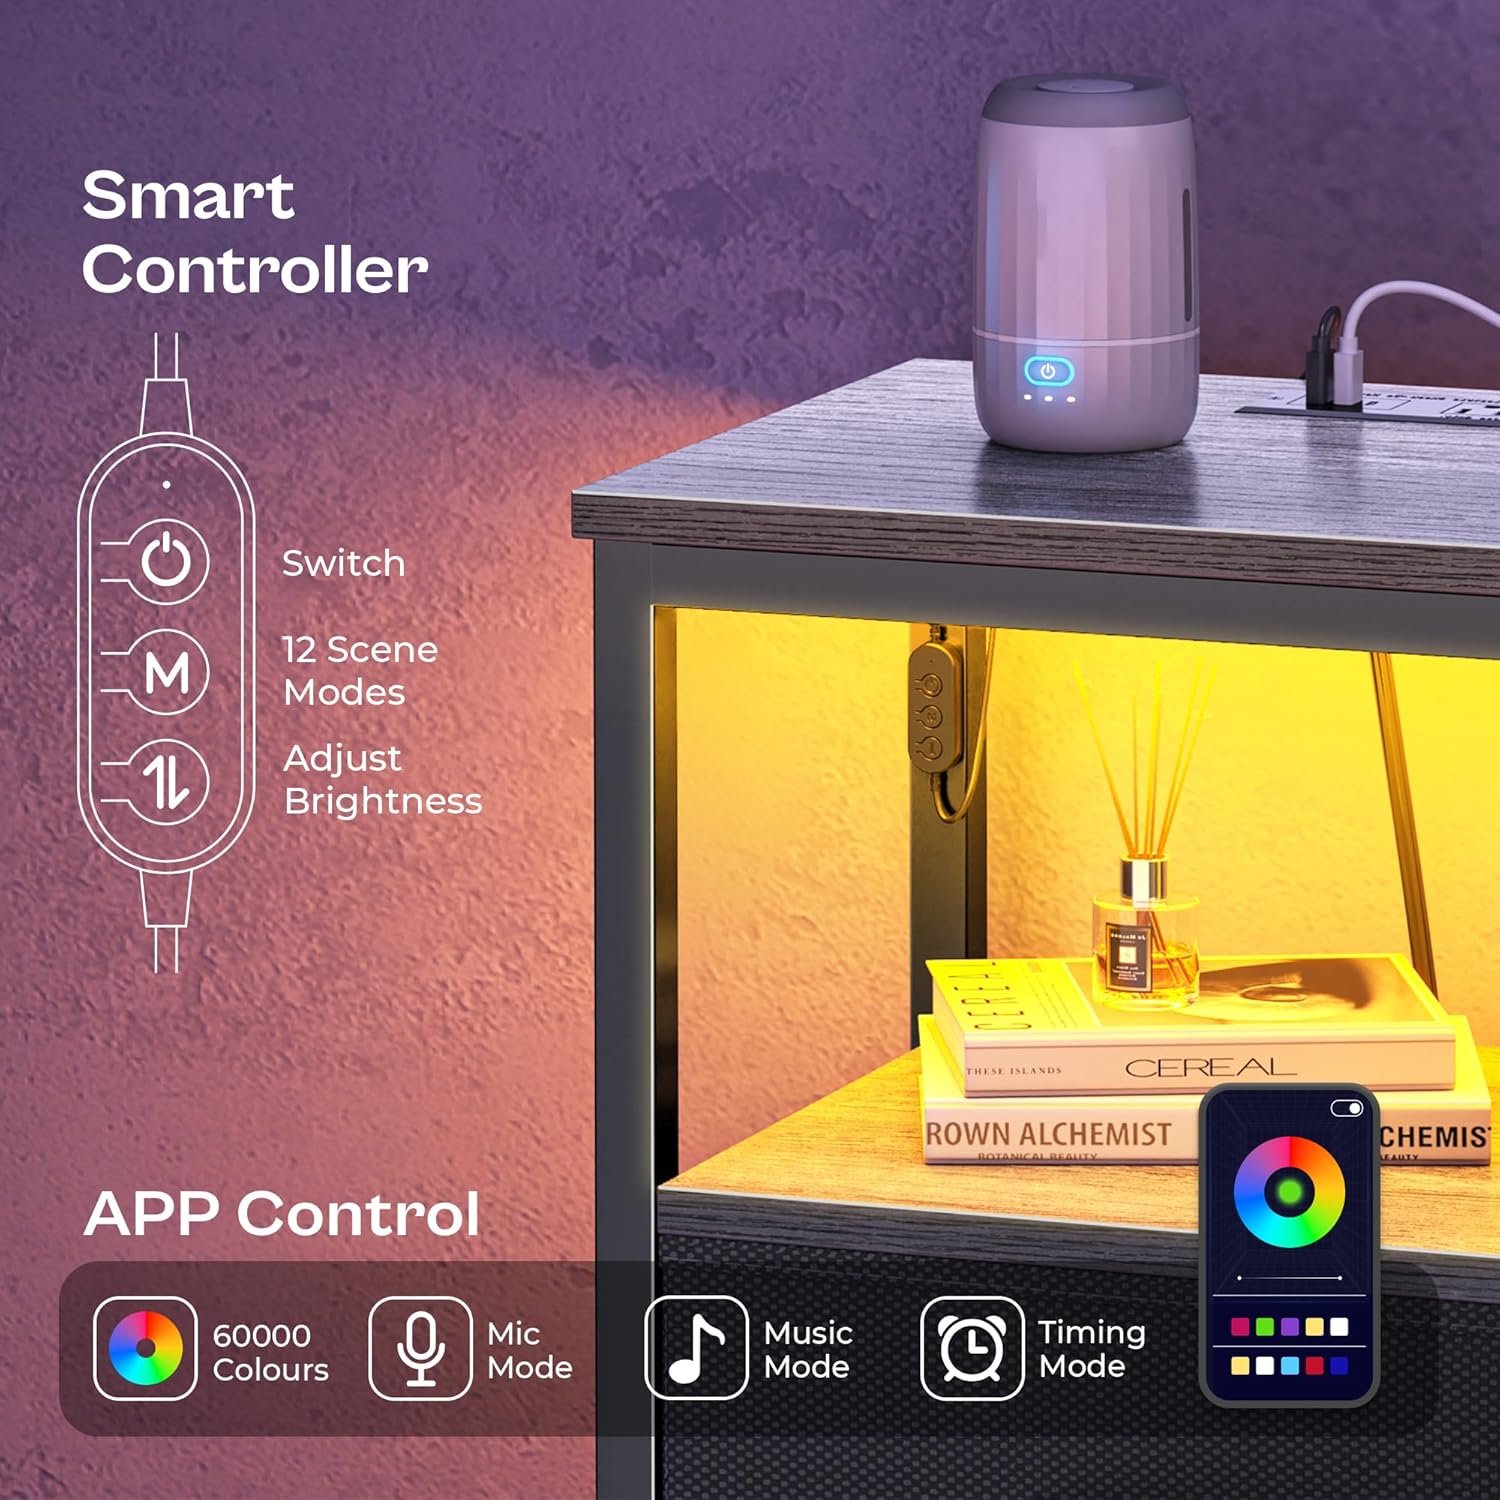
5.2 LED Lights Setup
After adhering the LED strip and connecting it to the smart controller (as per assembly step 5), ensure the controller is connected to a power source (typically one of the USB ports on the charging station or a separate USB adapter).
- Manual Control: Use the buttons on the smart controller to cycle through modes, adjust speed, and brightness.
- App Control: For advanced features, download the "Lotus Lantern" app on your smartphone. Follow the app's instructions to pair it with your LED lights via Bluetooth. This allows access to 60,000 colors, timer functions, music mode, and mic mode.

6. Operating Instructions
6.1 Using the Charging Station
- AC Outlets: Plug in standard electronic devices (e.g., lamps, laptops) into the two 125V/12A AC outlets.
- USB Ports: Connect USB-A compatible devices (e.g., smartphones, tablets) to the two 5V/3A USB ports for charging.
- Type-C Port: Connect USB-C compatible devices to the 5V/3A Type-C port for charging.
Ensure devices are compatible with the output specifications to prevent damage.
6.2 Controlling the LED Lights
- Power Button: Press to turn the LED lights On/Off.
- Mode Button (M): Cycle through 12 pre-set scene modes.
- Speed/Brightness Adjustment: Use the up/down arrows to adjust the speed of dynamic modes or the brightness of static colors (3 brightness settings, 5 speed levels).
- App Control: Use the "Lotus Lantern" app for full customization, including a spectrum of 60,000 colors, setting timers, and activating music or microphone synchronization modes.

7. Maintenance
- Cleaning: Wipe the engineered wood surfaces and metal frame with a soft, damp cloth. Avoid harsh chemicals or abrasive cleaners.
- Fabric Drawers: The fabric drawers can be spot cleaned with a mild detergent and water. Allow to air dry completely. Do not machine wash.
- Electrical Components: Ensure the charging station and LED lights remain dry. Disconnect from power before cleaning.
- Regular Checks: Periodically inspect all screws and connections to ensure they are secure. Tighten if necessary.
8. Troubleshooting
- Night Stand is Wobbly: Adjust the leveling feet at the bottom of the metal frame until the night stand is stable on the floor.
- Charging Station Not Working:
- Ensure the night stand's main power cord is securely plugged into a functional wall outlet.
- Check if the device you are trying to charge is properly connected and compatible with the port.
- Try a different device or cable to rule out device-specific issues.
- LED Lights Not Turning On/Responding:
- Verify that the LED strip is correctly connected to the smart controller and the controller is receiving power (e.g., from a USB port).
- If using the app, ensure Bluetooth is enabled on your phone and the app is properly paired with the lights.
- Check for any physical damage to the LED strip or controller.
- Drawers Not Sliding Smoothly: Ensure the fabric drawers are correctly assembled and inserted. Check for any obstructions within the drawer slots.
9. Specifications
| Feature | Specification |
|---|---|
| Brand | Huuger |
| Model | B0D1Q72RV8 |
| Product Dimensions (D x W x H) | 11.8" x 15.7" x 27.6" (30cm x 40cm x 70cm) |
| Item Weight | 14.1 pounds (6.4 kg) |
| Maximum Weight Recommendation | 22 pounds (10 kg) |
| Frame Material | Metal (Powder-coated steel) |
| Top Material Type | Engineered Wood (P2 Particle Board) |
| Color | Grey |
| Number of Drawers | 3 (Fabric) |
| Number of Shelves | 1 (Open Shelf) |
| Charging Station | 2 AC Outlets (125V/12A), 2 USB Ports (5V/3A), 1 Type-C Port (5V/3A) |
| LED Lights | 12 Scene Modes, 5 Speed Levels, 3 Brightness Settings, 60,000 Colors (via App) |
| Special Features | Fabric Drawers, Adjustable Feet |

10. Warranty and Support
For information regarding product warranty, returns, or technical assistance, please refer to the documentation included with your purchase or contact Huuger customer service directly through their official website or the retailer from whom you purchased the product. Please have your model number (B0D1Q72RV8) and purchase date available when contacting support.