1. Introduction
Welcome to the db-tronic Raspberry Pi 4 4GB Starter Kit user manual. This kit provides a complete solution for getting started with the Raspberry Pi 4, a versatile single-board computer. It includes the Raspberry Pi 4 board, an official USB-C power supply, an official case, a 64GB microSD card, a USB card reader, a 4K Micro HDMI cable, and a heatsink set. This manual will guide you through the setup, operation, and maintenance of your new Raspberry Pi kit.

Figure 1: Overview of the Raspberry Pi 4 Starter Kit and its applications.
2. What's Included
Your db-tronic Raspberry Pi 4 4GB Starter Kit contains the following components:
- Raspberry Pi 4 Board (4GB RAM): The core single-board computer.
- Official USB-C Power Supply (15W): Provides stable power to the Raspberry Pi.
- Official Case (Red/White): Protects the Raspberry Pi board and aids in cooling.
- 64GB MicroSD Card: For operating system storage and data.
- USB Card Reader: For easy transfer of data to and from the microSD card.
- 4K Micro HDMI Cable (1 meter): Connects the Raspberry Pi to a display.
- Aluminum Heatsink Set (4 pieces): For efficient heat dissipation from key components.

Figure 2: All components of the db-tronic Raspberry Pi 4 Starter Kit.
3. Setup Instructions
Follow these steps to assemble and prepare your Raspberry Pi 4 for first use.
3.1. Case Assembly and Heatsink Installation
- Carefully place the Raspberry Pi 4 board into the bottom half of the official case. Ensure all ports align correctly with the case openings.
- Peel the protective backing from the adhesive on each aluminum heatsink.
- Attach the heatsinks to the designated chips on the Raspberry Pi 4 board. The largest heatsink typically goes on the main processor (SoC), and smaller ones on other heat-generating components like the RAM and USB controller.
- Place the top half of the case onto the assembled Raspberry Pi board, ensuring it snaps securely into place.
Video 1: Visual guide for assembling the Raspberry Pi 4 into its case and installing heatsinks.

Figure 3: The official Raspberry Pi 4 case and heatsinks.
3.2. Operating System Installation
The 64GB microSD card included in your kit requires an operating system.
- Insert the 64GB microSD card into the provided USB card reader.
- Connect the USB card reader to your computer.
- Download the official Raspberry Pi Imager software from the Raspberry Pi website (www.raspberrypi.com/software/).
- Use the Raspberry Pi Imager to select your desired operating system (e.g., Raspberry Pi OS) and write it to the microSD card.
- Once the imaging process is complete, safely eject the USB card reader from your computer.
- Insert the prepared microSD card into the microSD card slot on your Raspberry Pi 4 board.
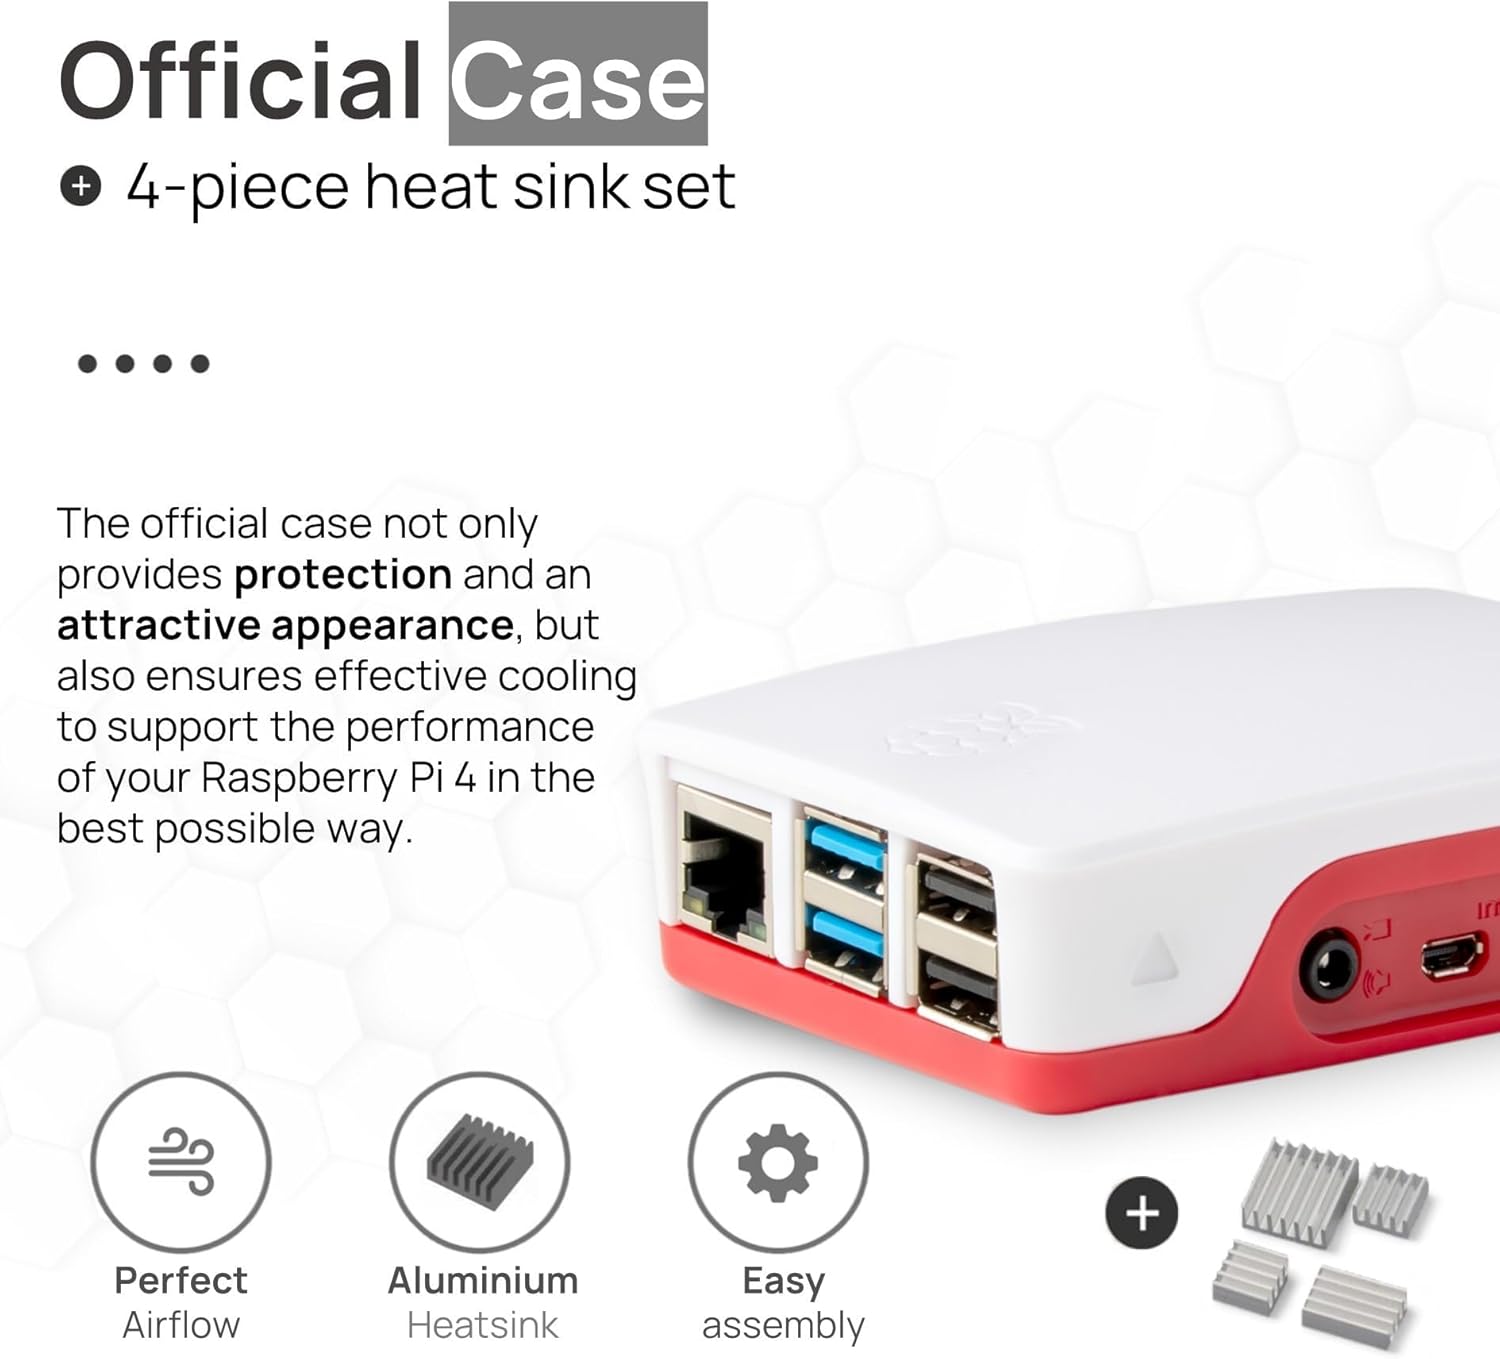
Figure 4: 64GB microSD card and USB card reader.
3.3. Connecting Peripherals
Before powering on, connect your display, keyboard, and mouse.
- Connect one end of the 4K Micro HDMI cable to one of the Micro HDMI ports on your Raspberry Pi 4.
- Connect the other end of the Micro HDMI cable to an HDMI input on your monitor or TV.
- Connect your USB keyboard and mouse to the USB 2.0 or USB 3.0 ports on the Raspberry Pi 4.
- Finally, connect the official USB-C power supply to the USB-C power input port on the Raspberry Pi 4.
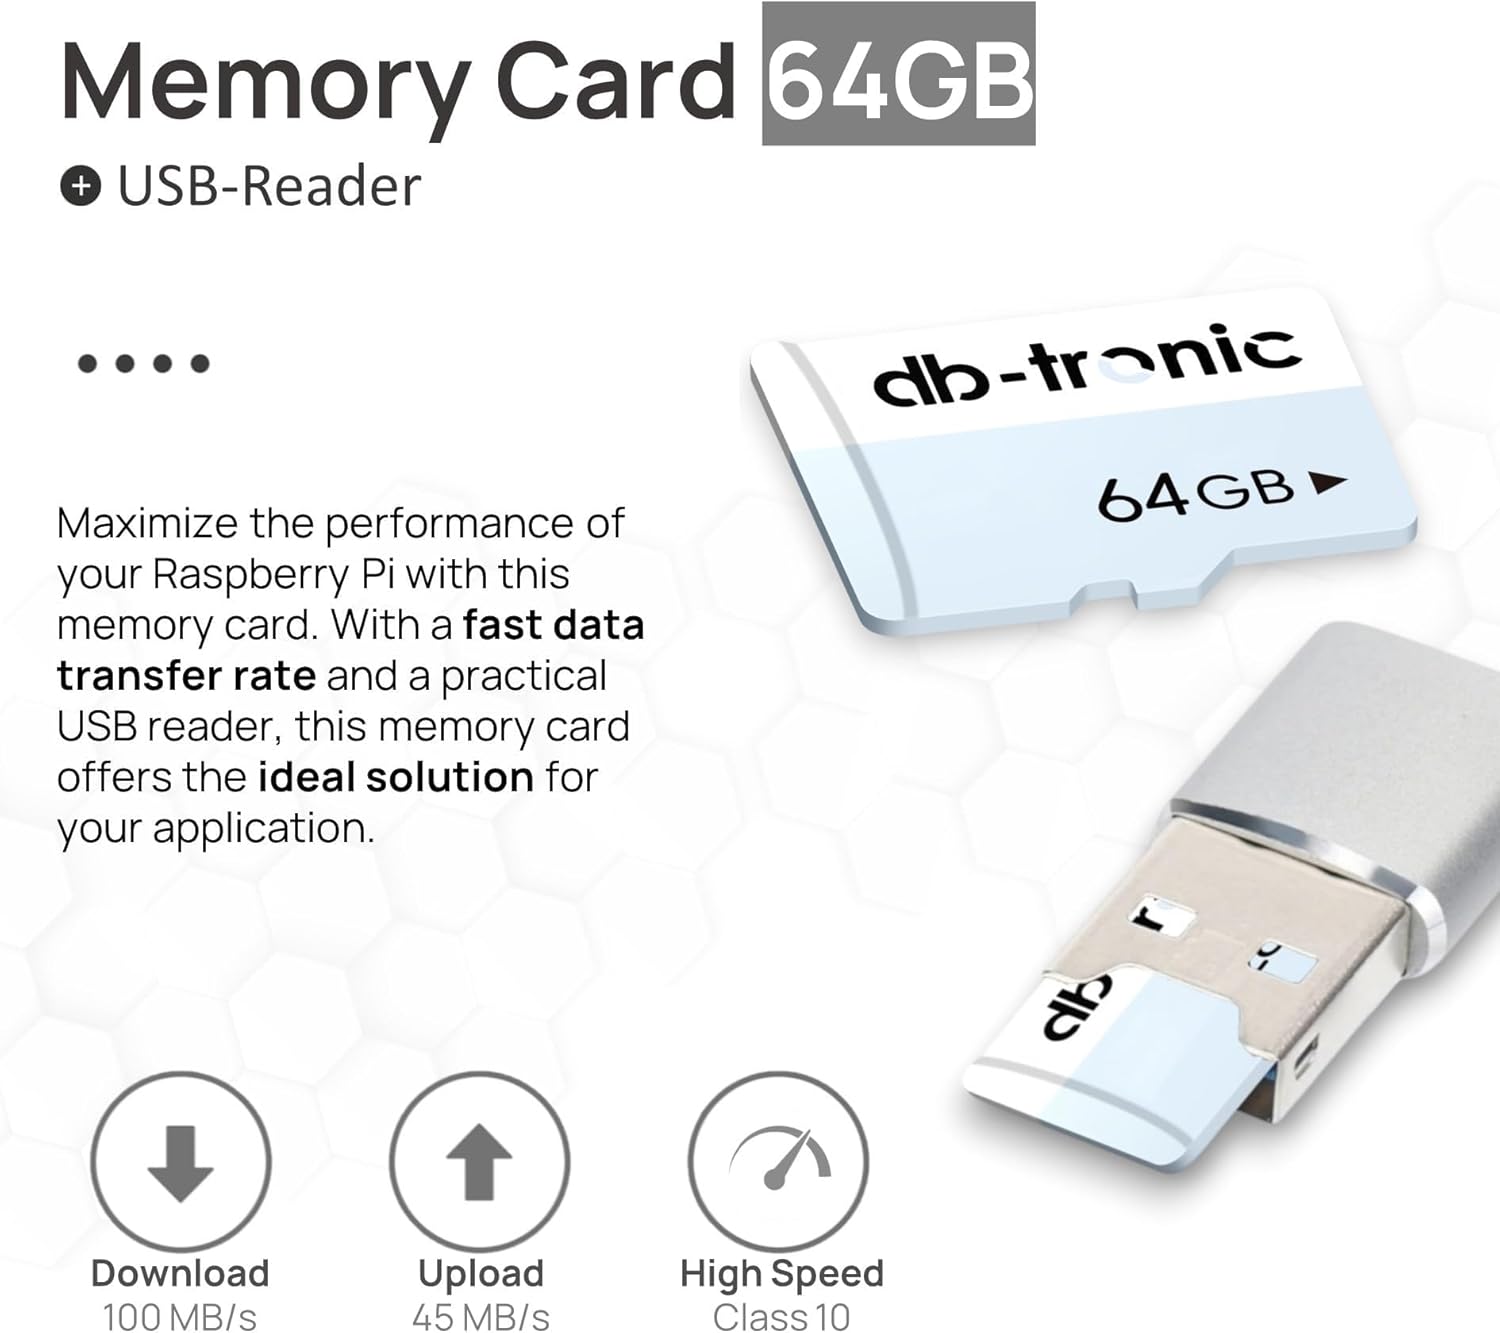
Figure 5: 4K Micro HDMI Cable.
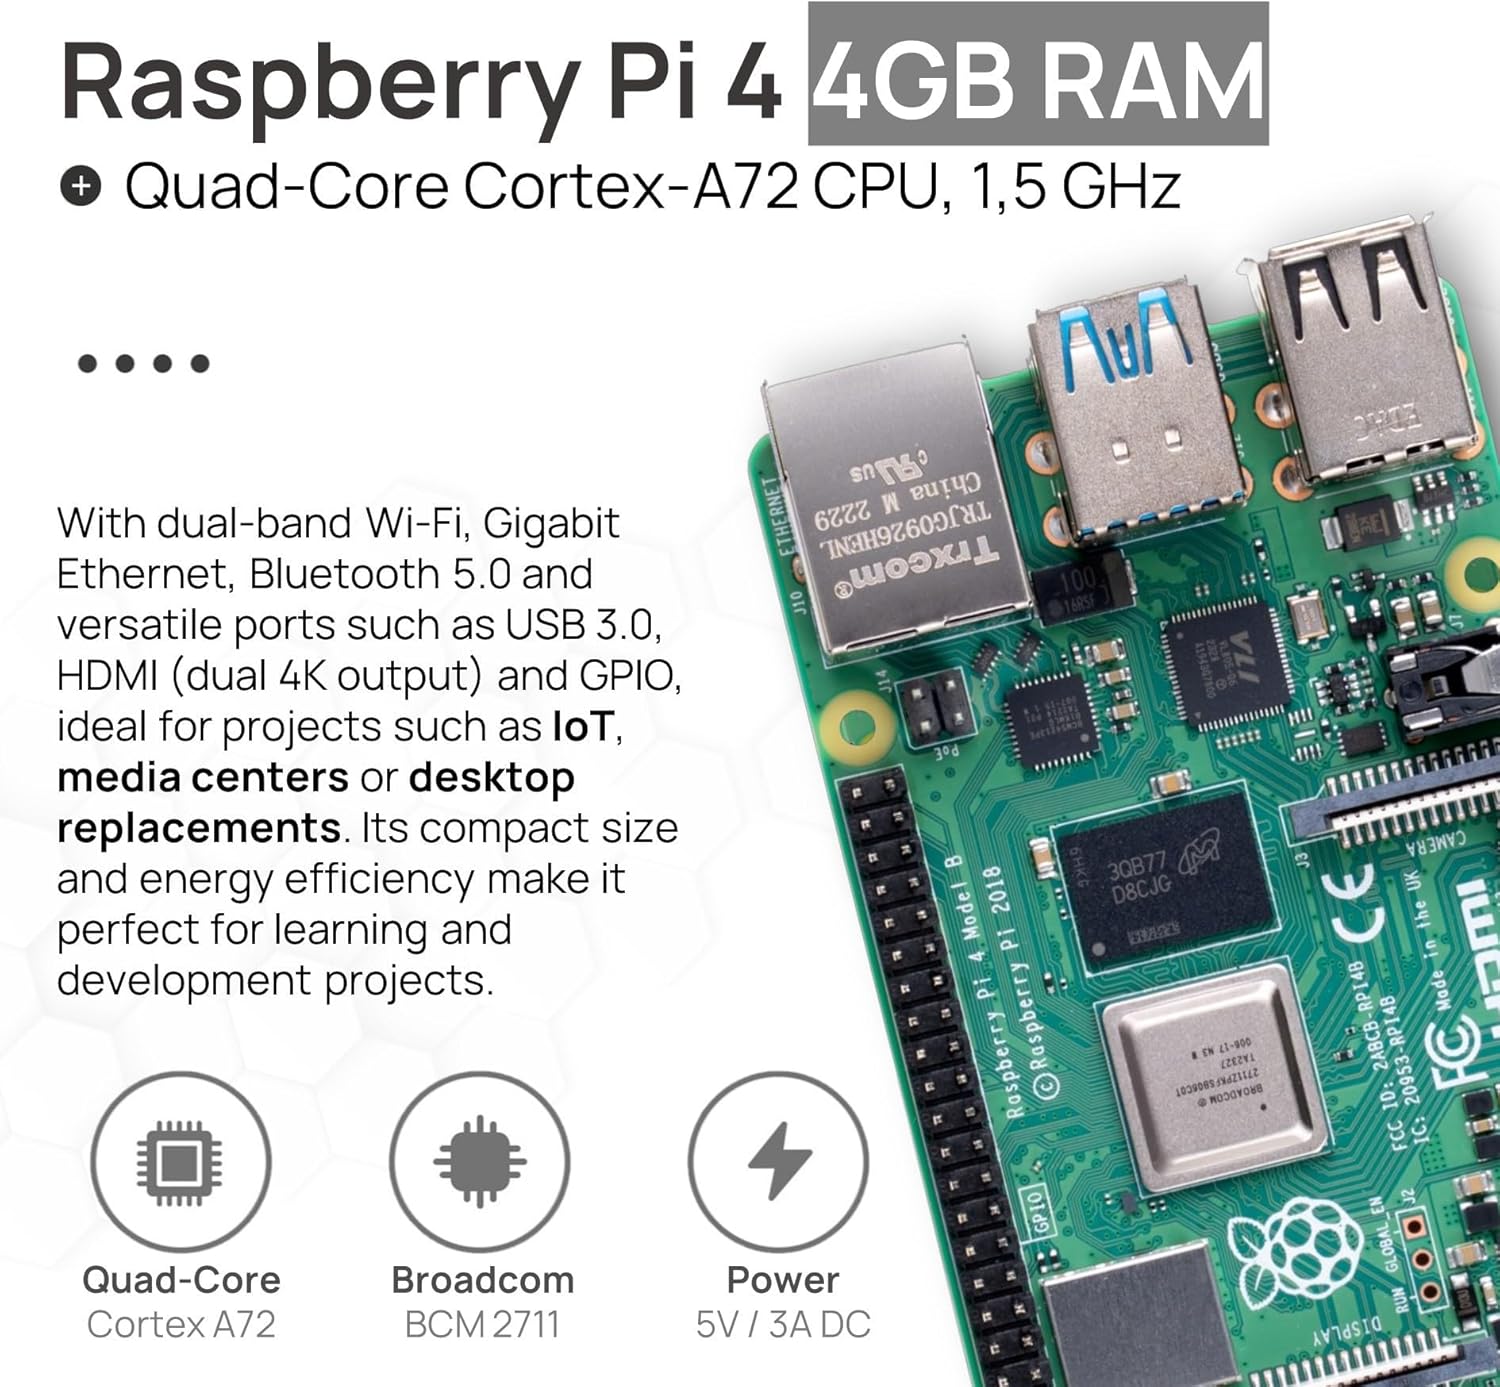
Figure 6: Official USB-C Power Supply.
4. Operating Your Raspberry Pi 4
4.1. First Boot
Once all peripherals are connected and the microSD card is inserted, plug the power supply into a wall outlet. The Raspberry Pi 4 will automatically power on and begin the boot process. Follow the on-screen instructions for initial setup, which may include setting your locale, keyboard layout, and Wi-Fi connection.
4.2. Network Connectivity
The Raspberry Pi 4 supports both Wi-Fi and Ethernet connectivity.
- Wi-Fi: During initial setup, you will be prompted to connect to a Wi-Fi network. You can also manage Wi-Fi settings through the desktop environment's network icon.
- Ethernet: For a wired connection, simply connect an Ethernet cable from your router or network switch to the Ethernet port on the Raspberry Pi 4. It will automatically obtain an IP address via DHCP.
4.3. Shutting Down Safely
Always shut down your Raspberry Pi 4 safely to prevent data corruption on the microSD card. Do not simply unplug the power.
- From the desktop environment, click the Raspberry Pi icon (menu) and select "Shutdown" or "Reboot".
- Alternatively, open a terminal and type
sudo shutdown -h nowto shut down immediately, orsudo rebootto restart.
5. Maintenance
5.1. Software Updates
Regularly update your operating system and installed software to ensure optimal performance and security.
- Open a terminal and run:
sudo apt update - Then run:
sudo apt full-upgrade - Finally, run:
sudo apt clean
5.2. Cooling
The included heatsinks help manage the temperature of your Raspberry Pi 4. Ensure the case has adequate airflow and is not obstructed. For intensive tasks, monitoring the CPU temperature is recommended.
5.3. Cleaning
Keep the Raspberry Pi and its case free from dust. Use a soft, dry cloth for cleaning. Avoid using liquid cleaners directly on the board.
6. Troubleshooting
| Problem | Possible Cause | Solution |
|---|---|---|
| Raspberry Pi does not power on. | Incorrect power supply, loose connection, faulty power supply. | Ensure the official 15W USB-C power supply is used and securely connected. Check the power outlet. |
| No display output. | Incorrect HDMI port, faulty cable, monitor input not selected. | Verify the Micro HDMI cable is connected to the correct port on both the Pi and the monitor. Ensure the monitor is set to the correct HDMI input. Try a different Micro HDMI port on the Pi. |
| Operating system not booting. | Corrupted SD card, incorrect OS image, improperly inserted SD card. | Re-image the microSD card using the Raspberry Pi Imager. Ensure the SD card is fully inserted into its slot. |
| Wi-Fi or Ethernet not connecting. | Incorrect network settings, router issues, hardware fault. | Check Wi-Fi password and network settings. Ensure Ethernet cable is properly connected. Restart your router. |
7. Specifications
Key technical specifications for the Raspberry Pi 4 4GB Starter Kit:
- Model: Raspberry Pi 4 Model B (4GB RAM)
- Processor: Broadcom BCM2711, Quad-core Cortex-A72 (ARM v8) 64-bit SoC @ 1.5GHz
- RAM: 4GB LPDDR4-3200 SDRAM
- Connectivity:
- 2.4 GHz and 5.0 GHz IEEE 802.11ac wireless
- Bluetooth 5.0, BLE
- Gigabit Ethernet
- 2 × USB 3.0 ports
- 2 × USB 2.0 ports
- Video & Sound:
- 2 × micro-HDMI ports (up to 4Kp60 supported)
- 2-lane MIPI DSI display port
- 2-lane MIPI CSI camera port
- 4-pole stereo audio and composite video port
- GPIO: 40-pin GPIO header (backward compatible with previous boards)
- Power: 5V DC via USB-C connector (minimum 3A), 5V DC via GPIO header, Power over Ethernet (PoE) enabled (requires separate PoE HAT)
- Operating System: Linux (e.g., Raspberry Pi OS)
- Storage: 64GB MicroSD card (included)
- Dimensions: 85mm × 56mm (Raspberry Pi board)
- Item Model Number: RPI-4-4GB-KIT
- Manufacturer: db-tronic
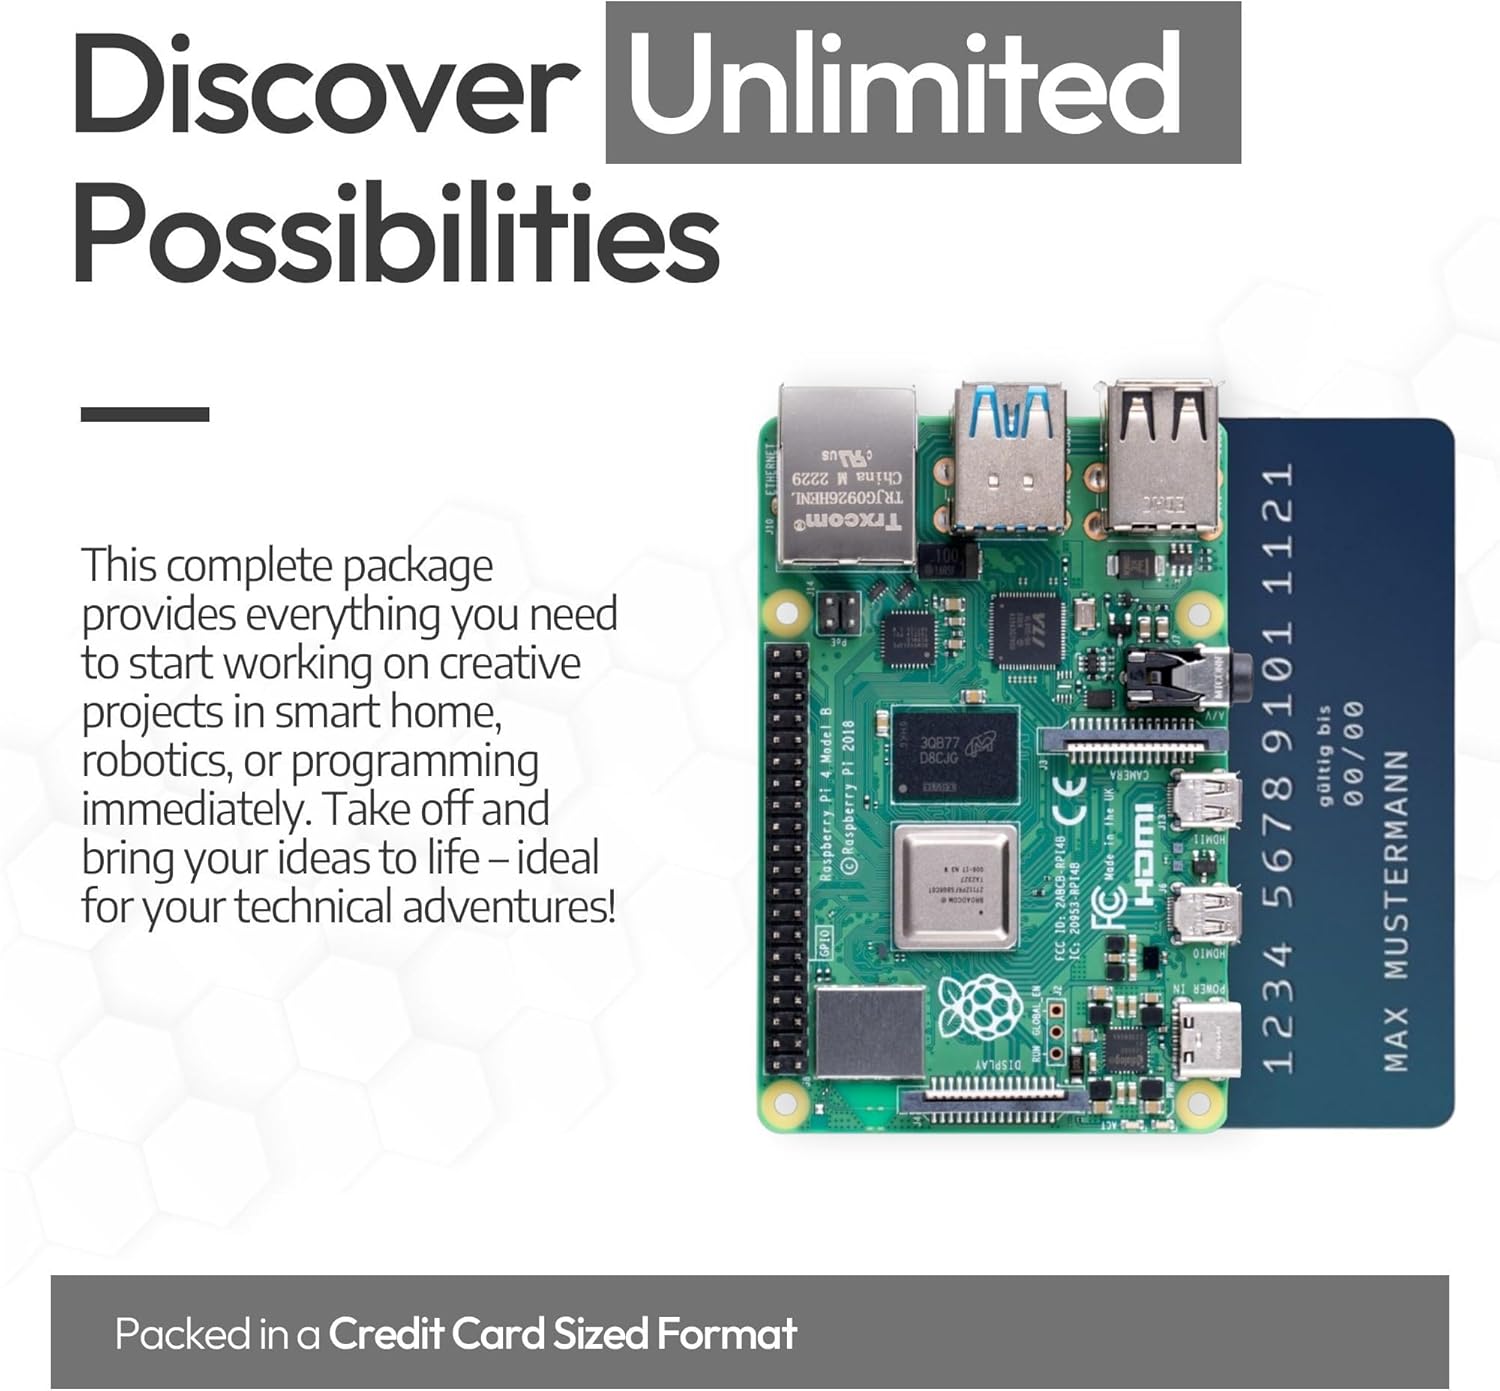
Figure 7: Raspberry Pi 4 board details.
8. Warranty and Support
8.1. Warranty Information
Your db-tronic Raspberry Pi 4 4GB Starter Kit comes with a standard manufacturer's warranty. Please refer to the packaging or contact db-tronic customer service for specific warranty terms and conditions. Keep your proof of purchase for warranty claims.
8.2. Customer Support
For technical assistance, troubleshooting, or general inquiries regarding your db-tronic Raspberry Pi 4 Starter Kit, please contact db-tronic customer support.
- Website: Visit the official db-tronic website for FAQs and support resources.
- Email: Refer to your product packaging or the db-tronic website for customer service email contact.


