1. Introduction
Thank you for choosing Sunco 8-Inch Canless Slim LED Recessed Lighting. This fixture offers a sleek design, high brightness, and adjustable color temperature to suit various environments. This manual provides essential information for safe installation, operation, and maintenance of your new lighting system.

Image: Sunco 8-inch canless slim LED recessed lighting fixture.

Image: Ultra-slim design of the LED recessed light, showcasing its brightness and power efficiency.
2. Safety Information
Please read all instructions carefully before installation. Failure to do so may result in electric shock or fire. Always consult a qualified electrician if you are unsure about any part of the installation process.
- Turn off power: Always disconnect power at the circuit breaker before installing or servicing the fixture.
- Qualified personnel: Installation should be performed by a qualified electrician or a person familiar with the construction and operation of the product and the hazards involved.
- IC Rated: This fixture is IC rated, meaning it is suitable for direct contact with insulation.
- Wiring: Ensure all electrical connections are made in accordance with local and national electrical codes.
- Grounding: Properly ground the fixture to avoid potential electrical hazards.
- Voltage: Operate only on 120V AC circuits.
- Dimmable: Use with compatible LED dimmers only.

Image: Uncompromised Quality - illustrating built-in safety features like short-circuit, over-voltage, and over-current protection.
3. Package Contents
Each Sunco 8-Inch Canless Slim LED Recessed Lighting package includes:
- LED Slim Recessed Light Fixture (12 units in a 12-pack)
- Junction Box (12 units in a 12-pack)
- Wire Nuts (included with junction box)
4. Installation Instructions
Follow these steps for a safe and proper installation of your Sunco recessed lighting.
4.1 Pre-Installation
- Turn off power: Locate the circuit breaker controlling the area where you will install the light and turn off the power. Verify the power is off using a voltage tester.
- Prepare opening: Cut a hole in the ceiling according to the fixture's size. For the 8-inch model, ensure the hole diameter is appropriate for the fixture to sit flush.
4.2 Junction Box Preparation
- Remove knockout: Use a flathead screwdriver or knockout punch to remove the appropriate knockout from the junction box for your electrical conduit.
- Connect conduit: Unscrew the locknut from your electrical conduit, insert the conduit into the junction box, and secure it in place with the locknut.
4.3 Wiring Connections
- Connect wires: Connect the white (neutral) wire from the supply to the white wire from the fixture using a wire nut. Connect the black (hot) wire from the supply to the black wire from the fixture using a wire nut. Ensure connections are secure.
- Grounding: Connect the ground wire from the supply to the ground wire from the fixture.
4.4 Color Temperature (CCT) Selection
- Select CCT: Before closing the junction box, locate the CCT selection switch on the side of the junction box. Choose your desired color temperature (2700K, 3000K, 4000K, 5000K, or 6000K).
- Close junction box: Carefully tuck all wires into the junction box and close the cover securely.

Image: Selectable CCT options for different room atmospheres.
4.5 Fixture Connection and Mounting
- Connect fixture: Connect the light fixture's plug to the receptacle on the junction box. Ensure a secure connection by twisting the locknut.
- Position junction box: Place the junction box into the ceiling opening. If installing into a joist, use the provided mounting screws to secure the junction box directly to the joist.
- Install fixture: Fold the spring-loaded clips on the light fixture upwards (at approximately 90 degrees). Push the fixture into the ceiling opening until the clips snap into place, holding the light flush against the ceiling.
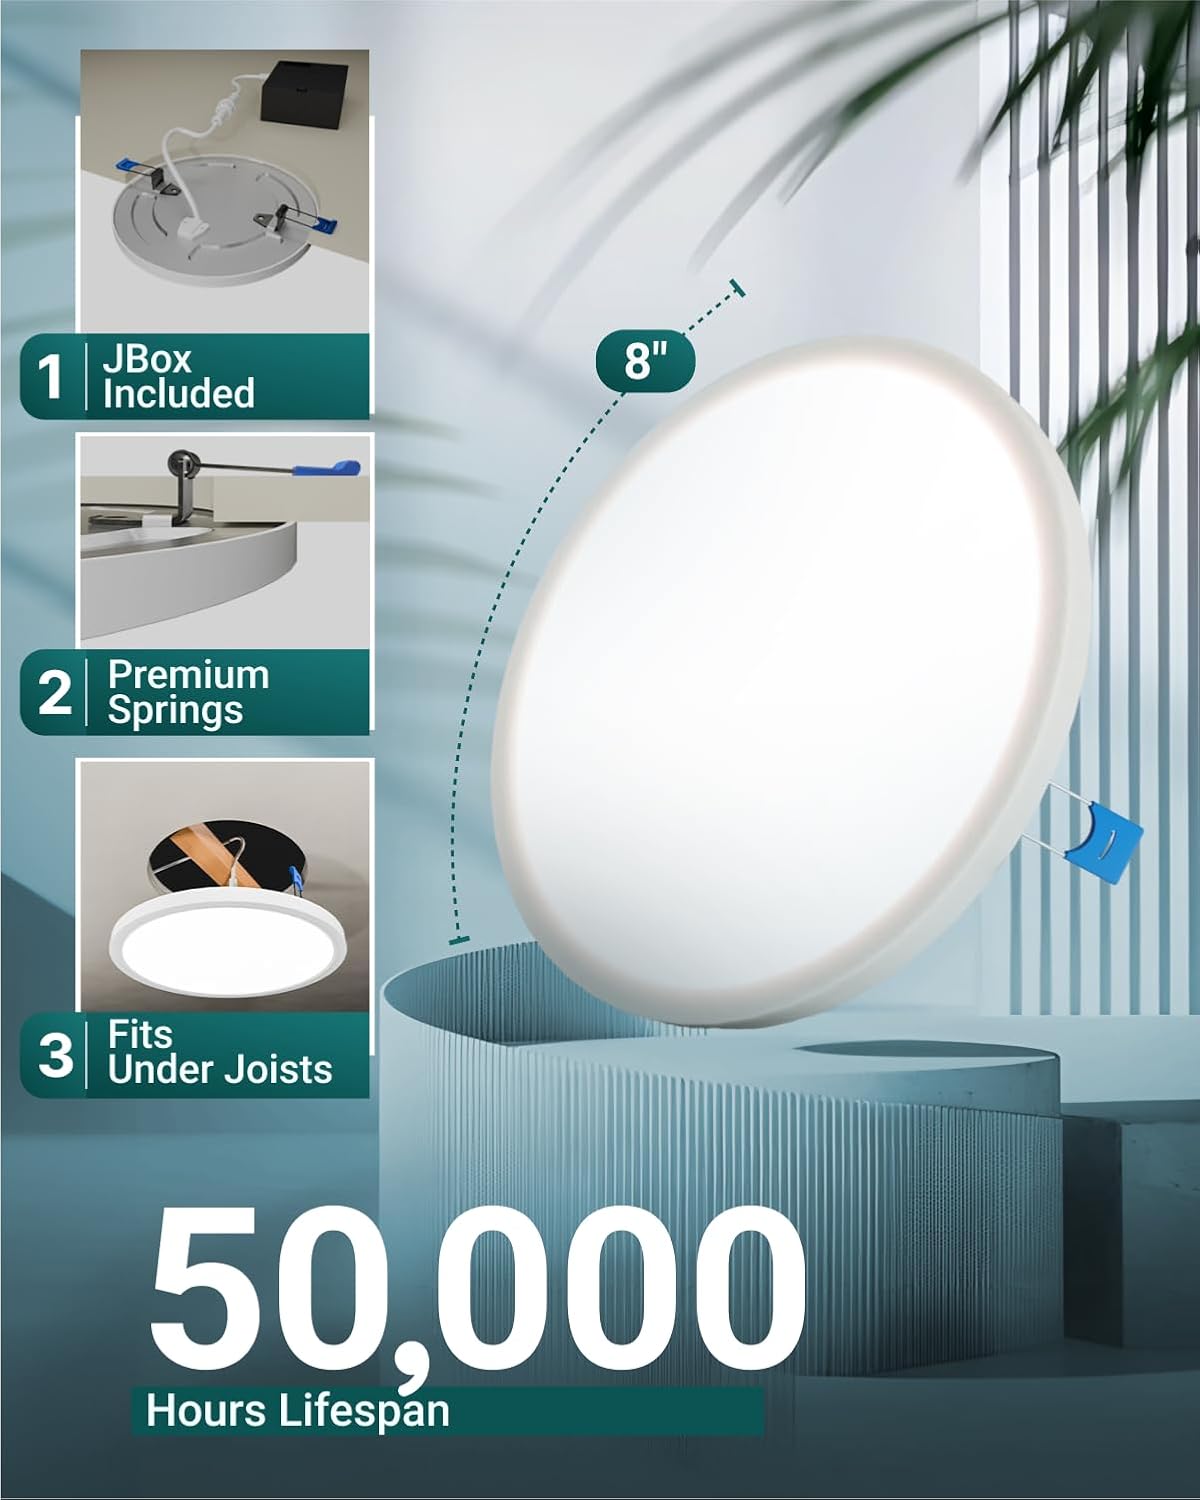
Image: Key features for easy installation, including the junction box and spring clips.

Image: Safe and Durable design with effective heat dissipation and reliable junction box.

Image: Sunco's commitment to product longevity with a 45-year lifespan.
4.6 Power Restoration and Testing
- Restore power: Turn the power back on at the circuit breaker.
- Test light: Turn on the light switch to ensure proper operation.
4.7 Installation Video Guide
Video: Expert Installation Guide for Sunco Recessed Slim Downlights. This video demonstrates the step-by-step process of safely installing the light fixture, including power disconnection, junction box wiring, and final mounting.
5. Operating Instructions
5.1 Color Temperature (CCT) Adjustment
The fixture features a selectable CCT switch located on the junction box. This switch allows you to choose from five color temperatures: 2700K (Soft White), 3000K (Warm White), 4000K (Cool White), 5000K (Daylight), and 6000K (Bright White). Adjust the switch to your preferred setting before final installation or by accessing the junction box if already installed.
5.2 Dimming Functionality
This LED recessed light is dimmable from 10% to 100%. To utilize the dimming feature, ensure you are using a compatible LED dimmer switch. Refer to your dimmer switch's instructions for proper operation.

Image: Dimmable feature, compatible with most dimmers, showing 10% to 100% brightness.
6. Maintenance
Sunco LED recessed lights require minimal maintenance.
- Cleaning: Ensure power is off before cleaning. Wipe the fixture with a soft, dry cloth. Do not use harsh chemicals or abrasive cleaners.
- Bulb replacement: The LED light source is integrated and not user-replaceable. The fixture has a long lifespan of approximately 50,000 hours.
7. Troubleshooting
If you experience issues with your light fixture, refer to the following common problems and solutions:
| Problem | Possible Cause | Solution |
|---|---|---|
| Light does not turn on | No power, loose wiring, faulty switch | Check circuit breaker. Verify all wire connections are secure. Test the switch. |
| Light flickers or dims inconsistently | Incompatible dimmer, loose wiring, power fluctuations | Ensure dimmer is LED compatible. Check wiring connections. Consult an electrician for power issues. |
| Incorrect color temperature | CCT switch set incorrectly | Access the junction box and adjust the CCT selection switch to the desired setting. |
8. Specifications
Detailed technical specifications for the Sunco 8-Inch Canless Slim LED Recessed Lighting:
- Product Dimensions: 2"L x 2"W x 2"H (Fixture body, actual visible diameter is 8 inches)
- Item Weight: 0.65 Pounds (per fixture)
- Light Output: 1800 Lumens
- Wattage: 15 Watts (equivalent to 100W incandescent)
- Voltage: 120 Volts
- Color Temperature (CCT): Selectable 2700K, 3000K, 4000K, 5000K, 6000K
- Dimmable: Yes (10%-100%)
- Material: Metal, Plastic
- Installation Type: Flush Mount, Canless
- Indoor/Outdoor Usage: Indoor
- Special Features: IC Rated, Junction Box Included
- Lifespan: Approximately 50,000 hours
- Certifications: ETL Listed
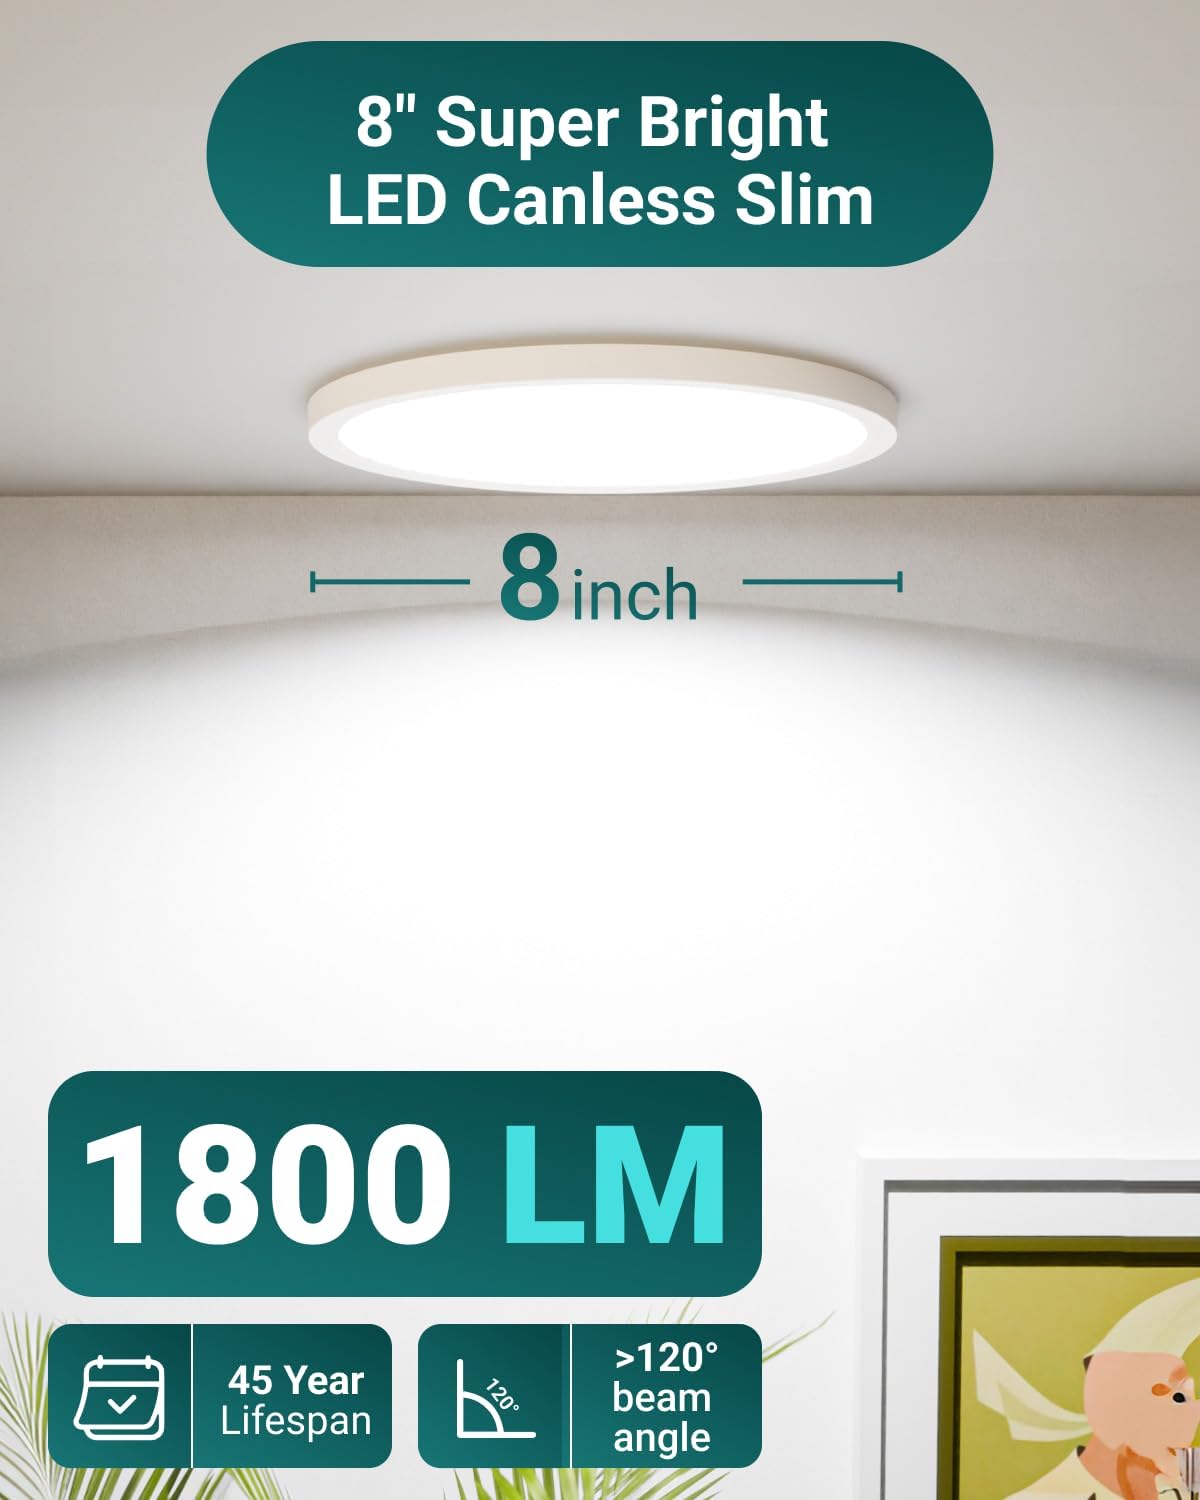
Image: Overview of the 8-inch slim LED light's brightness and features.

Image: Uniform lighting distribution with a wide beam angle.
9. Warranty and Support
Sunco Lighting products are backed by a 7-year warranty, ensuring quality and reliability. For any questions, technical assistance, or warranty claims, please contact Sunco Lighting customer support.
- Warranty: 7-year limited warranty.
- Contact: Refer to the official Sunco Lighting website or product packaging for the most current contact information.
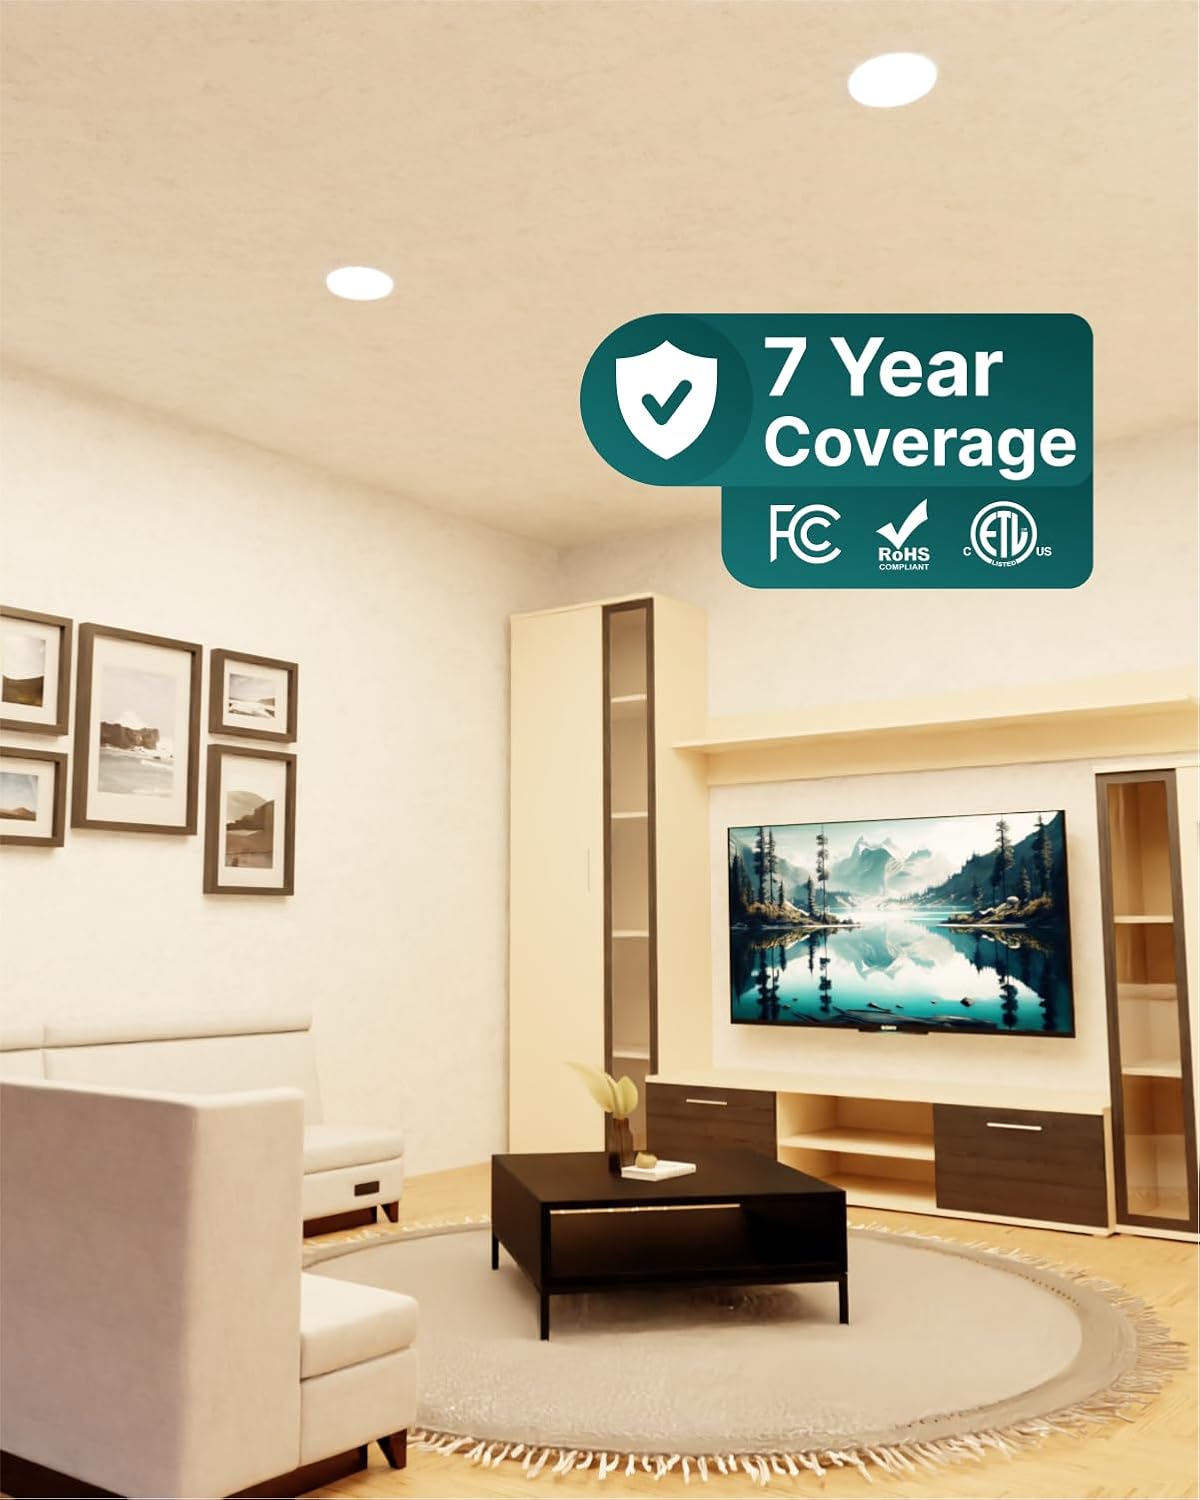
Image: 7-year warranty coverage and product certifications.
10. Manufacturer Information
Sunco Lighting is committed to providing high-quality lighting solutions and exceptional customer service. Learn more about Sunco's dedication to product development and customer satisfaction.
Video: Get to Know Sunco. This video provides an overview of Sunco Lighting's company values, product testing, and commitment to customer satisfaction.


