
GLOBO 15698D
Globo Gorley Ceiling Light User Manual
Model: 15698D | Brand: GLOBO
1. Introduction
Thank you for choosing the Globo Gorley Ceiling Light (Model 15698D). This elegant retro-style fixture is designed to enhance your living space with its unique aesthetic. Featuring a black metal body and a luxurious smoked glass shade composed of genuine glass rods, this ceiling light creates a welcoming and sophisticated ambiance. This manual provides essential information for the safe installation, operation, and maintenance of your new lighting fixture.
The light has a diameter of 32 cm and is equipped with five E14 sockets, suitable for bulbs up to 40W (bulbs are not included). It is dimmable when used with compatible E14 bulbs and an external home dimming system.

Front view of the Globo Gorley Ceiling Light, highlighting its black metal base and the arrangement of smoked glass rods.
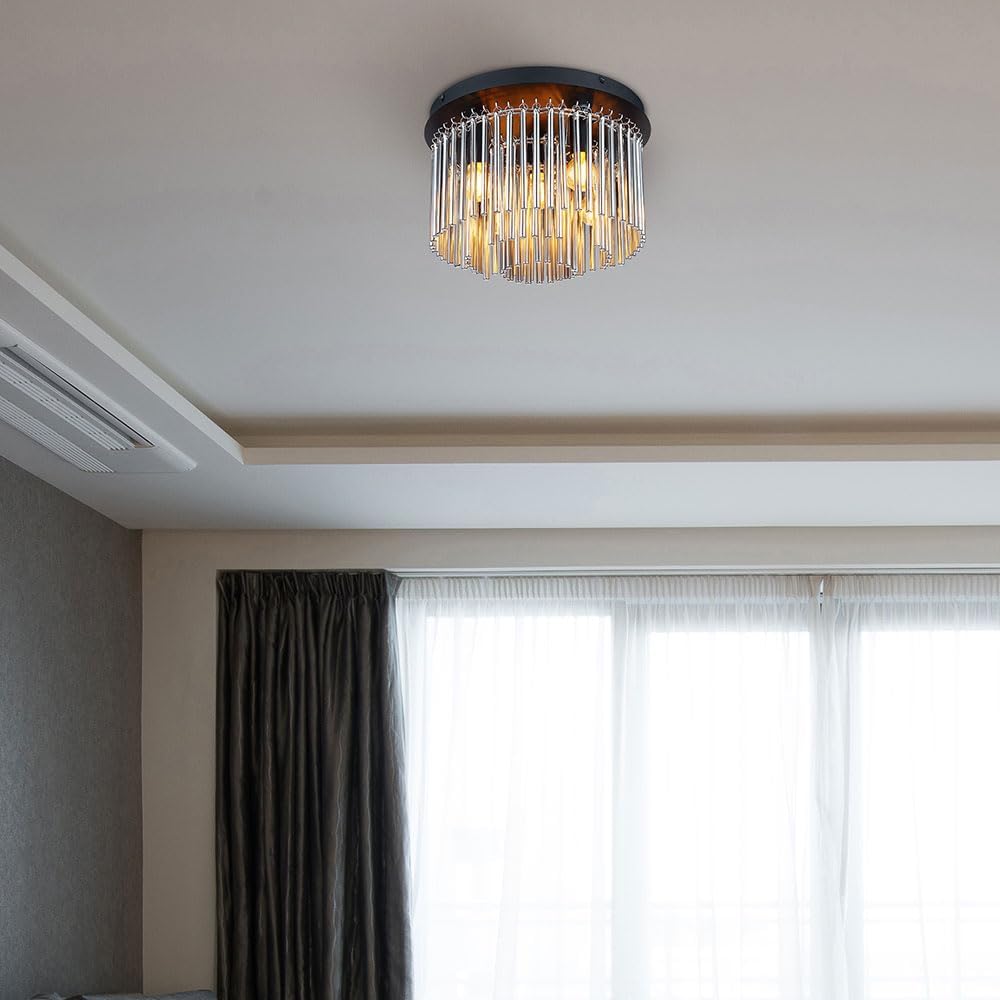
The Globo Gorley Ceiling Light as installed in a room, providing an overview of its size and style in a typical setting.
2. Important Safety Instructions
Please read these instructions carefully before installation and use. Failure to follow these instructions may result in electric shock, fire, or personal injury.
- Always disconnect power at the main circuit breaker or fuse box before attempting any installation, maintenance, or bulb replacement.
- Installation should be performed by a qualified electrician if you are unsure about electrical wiring.
- Ensure the mounting surface can support the weight of the fixture (3.39 kg).
- Do not exceed the maximum wattage of 40W per E14 bulb.
- This fixture is rated IP20, meaning it is protected against solid objects larger than 12.5mm but has no protection against water. It is intended for indoor use only and must be protected from moisture and direct water exposure.
- Ensure all electrical connections are secure and comply with local electrical codes.
- Do not modify the fixture in any way.
- Keep packaging materials out of reach of children.
3. Package Contents
Please check that all components are present and undamaged before beginning installation:
- Globo Gorley Ceiling Light Fixture (Black metal base with pre-attached glass rod chains)
- Smoked Glass Rods (Individual rods for assembly onto chains)
- Mounting Hardware (e.g., screws, wall anchors - typically included)
- User Manual (this document)
Note: E14 light bulbs are NOT included and must be purchased separately.
4. Setup and Installation
Follow these steps carefully to install your Globo Gorley Ceiling Light:
- Turn off Power: Before starting, ensure the power supply to the installation area is completely turned off at the main circuit breaker.
- Prepare Mounting Surface: Identify the desired location on the ceiling. Use the mounting bracket (usually attached to the fixture) as a template to mark the drilling points.
- Drill Holes: Drill holes at the marked points. Insert appropriate wall anchors if necessary (for drywall or plaster ceilings).
- Mount Bracket: Secure the mounting bracket to the ceiling using the provided screws. Ensure it is firmly attached.
- Connect Wiring: Carefully connect the electrical wires from the ceiling to the fixture's wires. Typically, this involves connecting Live (L), Neutral (N), and Ground (E/G) wires. Ensure all connections are secure using wire nuts or terminal blocks.
- Attach Fixture: Carefully lift the light fixture and attach it to the mounted bracket, securing it with the provided screws or fasteners.
- Install Bulbs: Screw five E14 light bulbs (max 40W each, not included) into the sockets.
- Attach Glass Rods: The smoked glass rods are designed to hang from the pre-attached chains on the fixture. Carefully attach each glass rod to its corresponding chain link. Ensure they are securely fastened.
- Restore Power: Once the fixture is securely installed and all glass rods are in place, restore power at the main circuit breaker.

Diagram showing the dimensions of the Globo Gorley Ceiling Light: 230mm height, 320mm shade diameter, and 300mm base diameter.
5. Operating Instructions
Operating your Globo Gorley Ceiling Light is straightforward:
- Turning On/Off: Use your standard wall switch to turn the light fixture on or off.
- Dimming Function: If you have installed dimmable E14 bulbs and connected the fixture to an external dimmer switch (not included), you can adjust the light intensity using the dimmer control. Ensure your dimmer switch is compatible with the type of dimmable bulbs you are using.
6. Maintenance and Care
To ensure the longevity and appearance of your ceiling light, follow these maintenance guidelines:
- Cleaning: Always turn off the power and allow the fixture to cool before cleaning. Wipe the metal parts and glass rods with a soft, dry, lint-free cloth. Do not use abrasive cleaners, solvents, or polishes, as these can damage the finish or glass.
- Bulb Replacement: Before replacing bulbs, ensure the power is turned off at the circuit breaker. Allow old bulbs to cool before removing. Replace with E14 bulbs, ensuring they do not exceed the maximum 40W rating per socket.
- Glass Rods: Periodically check that all glass rods are securely attached to their chains. If any become loose, re-secure them carefully.

Detailed view of the smoked glass rods and their attachment points, important for maintenance and cleaning.
7. Troubleshooting
If you encounter any issues with your ceiling light, refer to the following common problems and solutions:
| Problem | Possible Cause | Solution |
|---|---|---|
| Light does not turn on. | No power to the fixture, faulty bulb, loose wiring connection. | Check circuit breaker. Ensure wall switch is on. Replace bulb. Check wiring connections (with power off). |
| Light flickers. | Loose bulb, incompatible dimmer/bulb, faulty wiring. | Tighten bulb. Ensure dimmable bulbs are used with a compatible dimmer. Check wiring (with power off). |
| Glass rods are loose or fall off. | Improper attachment during installation, vibration. | Carefully re-attach the glass rods to their respective chain links, ensuring they are securely hooked. |
| Light is too dim/bright (without dimmer). | Incorrect bulb wattage. | Replace bulbs with appropriate wattage (up to 40W E14). |
If the problem persists after trying these solutions, please contact a qualified electrician or the retailer for assistance.
8. Specifications
| Brand | GLOBO |
| Model Number | 15698D |
| Dimensions (L x W x H) | 32 x 32 x 23 cm (Diameter x Height) |
| Weight | 3.39 Kilograms |
| Material | Metal, Glass |
| Color | Black (Fixture), Smoked (Glass Shade) |
| Number of Bulbs | 5 |
| Bulb Socket Type | E14 |
| Max Wattage per Bulb | 40W |
| Voltage | 230 Volts |
| IP Rating | IP20 (Indoor use only) |
| Dimmable | Yes (with compatible bulbs and external dimmer) |
| Installation Type | Ceiling Mount |
| Components Included | Shade (Glass Rods) |
9. Warranty and Support
Information regarding specific warranty terms, spare parts availability, and software updates for this product is not explicitly provided in the product details.
For technical support, warranty claims, or inquiries about spare parts, please contact your original retailer or the manufacturer, GLOBO, directly. Keep your purchase receipt as proof of purchase.
Related documents15698D


Ask a question about this manual
Ask about setup, troubleshooting, compatibility, parts, safety, or missing instructions. Manuals+ will review the question and use this page’s manual context to help answer it.