
1. Introduction
This manual provides comprehensive instructions for the installation of your ARSSLY Touchscreen Digitizer Replacement for the iPad 10 (10th Generation) 2022. Please read all instructions carefully before beginning the installation process to ensure proper function and to prevent damage to your device or the replacement part.

Image 1.1: ARSSLY Touchscreen Digitizer Replacement for iPad 10 2022.
2. Compatibility
This touchscreen digitizer replacement is specifically designed for the following iPad models:
- iPad 10 (10th Generation) 2022
- Model Numbers: A2696, A2757, A2777
Please verify your iPad's model number before proceeding with the installation. The model number is typically found on the back of your iPad.
3. Package Contents
The package includes the following items:
- 1 x Touch Screen Digitizer Replacement for iPad 10 2022 (LCD not included)
- 1 x Tempered Glass Screen Protector
- 1 x Repair Tool Kit (includes various screwdrivers, prying tools, suction cup, etc.)
- 1 x Adhesive Tape set
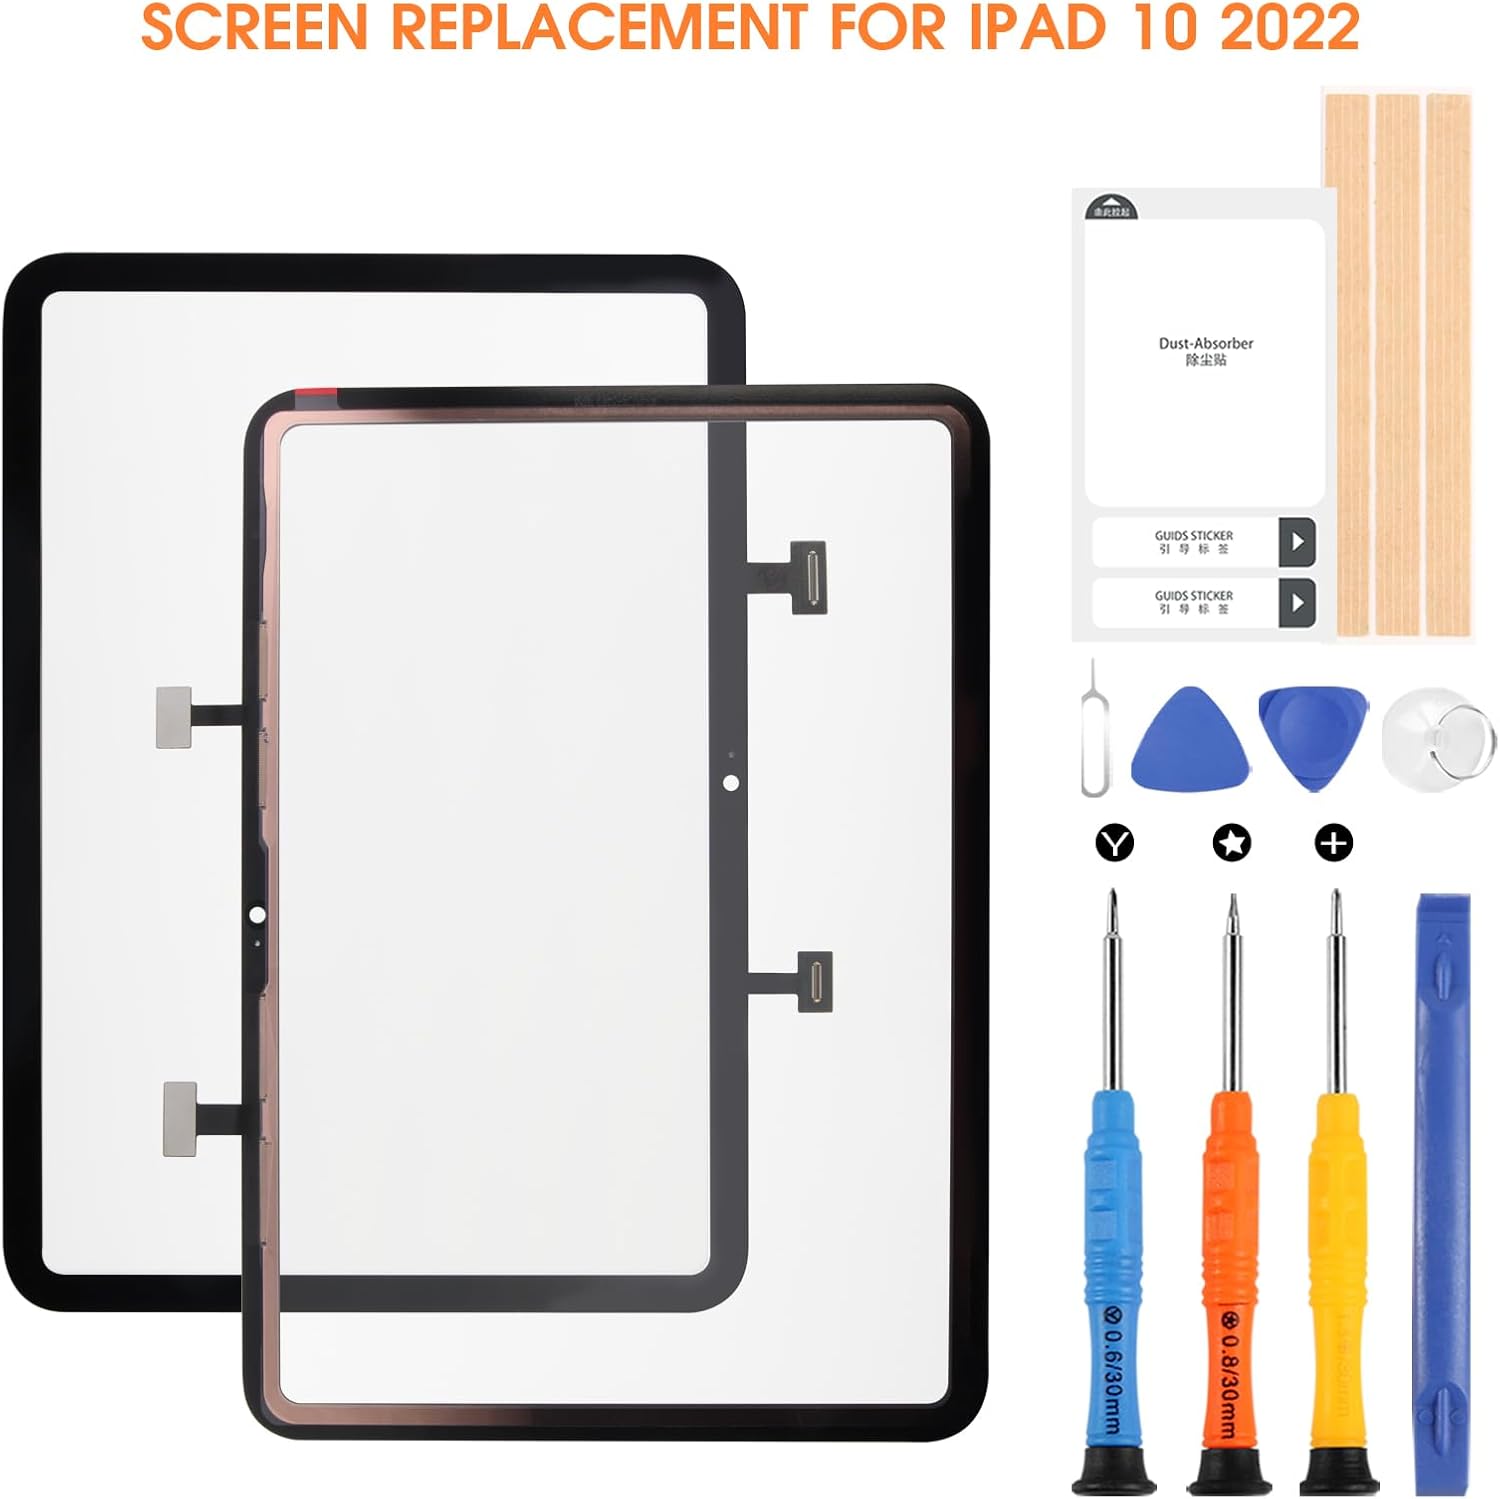
Image 3.1: Contents of the ARSSLY Touchscreen Digitizer Replacement package.
4. Important Safety Information and Precautions
- Professional Installation Recommended: The screen replacement process is delicate and requires specialized tools and knowledge. We strongly recommend seeking professional assistance or having prior experience with device repairs. Incorrect installation can lead to damage to your device or the replacement part.
- Watch Installation Videos: Before attempting installation, it is highly recommended to watch relevant installation videos on platforms like YouTube. Search for "iPad 10 (10th Gen) Digitizer Replacement" to familiarize yourself with the process.
- Power Off Device: Ensure your iPad is completely powered off before starting any repair work.
- Disconnect Battery: Always disconnect the battery connector before handling any internal components to prevent short circuits.
- Static Discharge: Take precautions against static electricity, which can damage electronic components. Use an anti-static wrist strap or frequently touch a grounded metal object.
- Handle with Care: The digitizer is made of glass and is fragile. Handle it with extreme care to avoid breakage.
- Keep Screws Organized: During disassembly, keep track of all screws and their original locations. They often vary in size and length.
5. Installation Guide
5.1. Pre-Installation Steps
- Backup Your Device: Before any repair, back up your iPad's data to iCloud or your computer.
- Power Down: Completely power off your iPad.
- Gather Tools: Ensure you have all necessary tools from the repair kit and a clean, well-lit workspace.
- Heat Application (Optional but Recommended): Gently heat the edges of the original screen with a heat gun or hairdryer to soften the adhesive. This makes removal easier.
5.2. Digitizer Removal and Installation
The following steps are a general overview. Refer to a detailed video guide for visual assistance.
- Remove Old Digitizer: Carefully pry open the old digitizer from the iPad frame using the provided prying tools and suction cup. Be cautious of the flex cables connecting the digitizer to the logic board.
- Disconnect Cables: Once the old digitizer is lifted, carefully disconnect its flex cables from the logic board.
- Clean Frame: Thoroughly clean any remaining adhesive or glass fragments from the iPad's frame. A clean surface is crucial for proper adhesion of the new digitizer.
- Transfer Home Button: Important: The replacement digitizer does not include the home button. You must carefully transfer your original home button from the old digitizer to the new one. This is essential for Touch ID functionality.
- Connect New Digitizer: Carefully connect the flex cables of the new digitizer to the corresponding connectors on the iPad's logic board. Ensure they are seated correctly and securely.
- Test Functionality: Before fully sealing the new digitizer, temporarily power on the iPad and test the touch functionality across the entire screen. Ensure there are no dead spots or unresponsive areas.
- Apply Adhesive: Apply the new adhesive tape around the edges of the iPad frame.
- Secure New Digitizer: Carefully align and press the new digitizer onto the iPad frame, ensuring it sits flush and the adhesive creates a strong seal.

Image 5.1: The digitizer showing its flex cables for connection to the logic board.

Image 5.2: The digitizer replacement, illustrating its design for integration into the iPad frame.

Image 5.3: Detail of the digitizer's edges, highlighting the precision fit.

Image 5.4: Close-up view of the digitizer's top section, showing cutouts for the front camera and sensors.
6. Maintenance
To ensure the longevity and optimal performance of your new touchscreen digitizer:
- Cleaning: Use a soft, lint-free cloth slightly dampened with water or a screen cleaner specifically designed for electronics. Avoid harsh chemicals or abrasive materials.
- Protection: Apply the included tempered glass screen protector to add an extra layer of defense against scratches and minor impacts.
- Handling: Avoid dropping your iPad or subjecting it to excessive pressure, which can damage the digitizer.
7. Troubleshooting
If you encounter issues after installation, consider the following:
- No Touch Response:
- Ensure all flex cables are securely connected to the logic board.
- Check for any debris or damage to the connectors.
- Perform a hard reset on your iPad.
- Partial Touch Response:
- This often indicates a loose or improperly seated flex cable. Re-open the device and re-seat the digitizer cables.
- Inspect the digitizer for any physical damage that may have occurred during installation.
- Home Button Not Working:
- Verify that the original home button was correctly transferred and its flex cable is properly connected.
If troubleshooting steps do not resolve the issue, please contact customer support.
8. Specifications
| Feature | Detail |
|---|---|
| Compatibility | iPad 10 (10th Generation) 2022 (A2696, A2757, A2777) |
| Type | Touchscreen Digitizer (Glass Touch Screen) |
| Display Type | Not LCD Screen (Digitizer only) |
| Package Dimensions | 10.91 x 8.54 x 1.18 inches |
| Item Weight | 10.2 ounces |
| Manufacturer | ARSSLY |
9. Warranty and Support
Warranty: If any malfunction occurs that is not caused by user error, the product is eligible for a free replacement within 3 months of purchase.
Customer Support: If you encounter any issues with the product or have questions regarding installation, please do not hesitate to contact ARSSLY customer support. We aim to respond to all inquiries within 24 hours.
For support, please refer to the contact information provided with your purchase or on the ARSSLY official website.