
1. Introduction
This manual provides essential information for the safe and effective installation, operation, and maintenance of your CSCPEXCZ Hydraulic Solenoid Valve Coil. This coil is designed for use with hydraulic solenoid valves, featuring an inner hole of 14mm and a height of 50mm, operating at 24V. Please read this manual thoroughly before use and retain it for future reference.
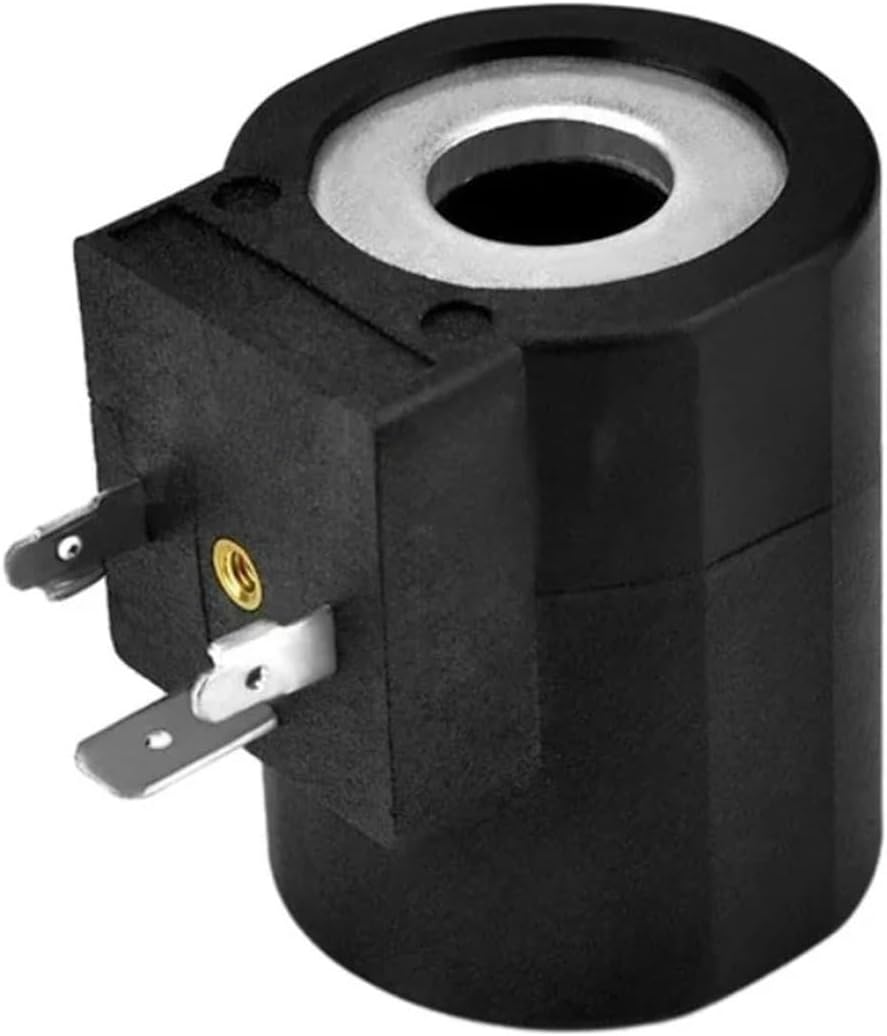
Figure 1: Front view of the CSCPEXCZ Hydraulic Solenoid Valve Coil. This image shows the main body of the coil with its electrical terminals visible on the side.
2. Safety Information
WARNING: Improper installation or use of this product can result in serious injury or damage to equipment. Always follow safety guidelines.
- Ensure power is disconnected before installation, maintenance, or troubleshooting.
- Only qualified personnel should perform installation and electrical connections.
- Verify the voltage rating of the coil (24V) matches the power supply.
- Avoid contact with live electrical components.
- Do not operate the coil in environments exceeding its specified temperature or pressure limits.
- Always wear appropriate personal protective equipment (PPE).
3. Product Components and Description
The CSCPEXCZ Hydraulic Solenoid Valve Coil is a critical component for converting electrical energy into mechanical force to actuate a hydraulic valve. Key features include:
- Inner Hole Diameter: 14mm, designed to fit specific valve stems.
- Height: 50mm, ensuring compatibility with various valve bodies.
- Voltage: 24V, suitable for standard industrial control systems.
- Construction: Durable housing for protection in industrial environments.

Figure 2: Side view of the solenoid coil, highlighting the electrical terminals for connection to a power source.
4. Setup and Installation
Follow these general steps for installing the solenoid coil. Specific valve instructions may vary.
- Disconnect Power: Ensure all power to the hydraulic system and control circuit is completely disconnected and locked out.
- Prepare Valve: If replacing an existing coil, carefully remove the old coil from the valve stem. Clean the valve stem area if necessary.
- Install Coil: Slide the new CSCPEXCZ coil onto the valve stem, ensuring it seats properly and securely. The inner hole of 14mm should fit snugly over the valve's core tube.
- Secure Coil: Depending on the valve design, secure the coil with any retaining nuts, clips, or screws provided with the valve. Do not overtighten.
- Electrical Connection: Connect the 24V power supply wires to the coil's terminals. Ensure correct polarity if specified by the valve manufacturer. Use appropriate connectors and ensure all connections are secure and insulated.
- Verify Installation: Double-check all connections and ensure the coil is firmly mounted.

Figure 3: Top-down view of the solenoid coil, showing the central bore where the valve stem would pass through.
5. Operating Instructions
Once properly installed, the solenoid coil operates by receiving an electrical signal:
- When 24V DC power is applied to the coil, it generates a magnetic field.
- This magnetic field pulls the armature (plunger) within the hydraulic valve, changing the valve's state (e.g., opening or closing a fluid path).
- When power is removed, the magnetic field collapses, and a spring typically returns the armature to its original position, returning the valve to its default state.
- Ensure the control system provides a stable 24V supply to prevent erratic operation or damage to the coil.
6. Maintenance
Regular maintenance helps ensure the longevity and reliable operation of your solenoid coil:
- Visual Inspection: Periodically inspect the coil for any signs of physical damage, discoloration (indicating overheating), or loose connections.
- Cleanliness: Keep the coil and surrounding area free from excessive dirt, dust, and moisture. Use a dry, soft cloth for cleaning. Do not use harsh chemicals.
- Connection Check: Ensure electrical connections remain tight and free from corrosion.
- Environmental Conditions: Ensure the operating environment remains within the specified temperature and humidity ranges for the coil.
7. Troubleshooting
If the solenoid coil is not functioning as expected, consider the following common issues:
| Problem | Possible Cause | Solution |
|---|---|---|
| Coil does not activate | No power supply Incorrect voltage Loose electrical connection Damaged coil | Check power source and circuit breaker Verify 24V supply Secure all connections Replace coil if damaged (after verifying power) |
| Coil overheats | Continuous energization (not rated for) Overvoltage Environmental temperature too high | Check duty cycle requirements Verify 24V supply Improve ventilation or relocate |
| Valve not actuating fully | Coil not seated correctly Valve mechanical issue Low voltage | Re-seat coil securely Inspect valve for obstructions or damage Verify 24V supply |
If troubleshooting steps do not resolve the issue, contact a qualified technician or the manufacturer for assistance.
8. Specifications
Detailed technical specifications for the CSCPEXCZ Hydraulic Solenoid Valve Coil (24V):
| Specification | Value |
|---|---|
| Manufacturer | CSCPEXCZ |
| Part Number | CSCPEXCZ |
| Item Model Number | CSCPEXCZ |
| Voltage | 24V |
| Inner Hole Diameter | 14mm |
| Height | 50mm |
| Item Weight | 1.76 ounces |
| Package Dimensions | 1.18 x 0.79 x 0.39 inches |
| Color | One Color |
| Item Package Quantity | 1 |
| ASIN | B0D1CB6J4R |
| Date First Available | April 10, 2024 |
9. Warranty and Support
Information regarding product warranty and customer support is not provided in the available product data. Please refer to the seller's or manufacturer's website, or contact your point of purchase for details on warranty coverage and technical assistance.