1. Introduction
The Chtoocy RV Carbon Monoxide and Propane Gas Detector Alarm is designed to provide dual protection against the silent dangers of carbon monoxide (CO) and the explosive risks of propane (LP) gas leaks in recreational vehicles. This device continuously monitors gas levels and alerts occupants with a loud audible alarm and visual indicators, ensuring a safer environment for camping and travel.

Image: The detector highlights its advanced precision sensor and dual LP/CO alarm capabilities, emphasizing protection against deadly threats and easy installation.
Product Overview Video
Video: This video provides a comprehensive overview of the Chtoocy RV Carbon Monoxide & Propane Gas Alarm Pro, demonstrating its features and benefits for RV safety.
2. Important Safety Information
Please read all instructions carefully before installation and use. Failure to follow these instructions may result in property damage, injury, or death. This alarm is designed for recreational vehicle use only and should not be used in residential homes or other applications.
- Do Not Paint: Never paint the alarm. Paint can clog the sensor openings and prevent the alarm from functioning properly.
- Regular Testing: Test the alarm weekly to ensure proper operation.
- Ventilation: Ensure proper ventilation in your RV, especially when using fuel-burning appliances.
- Alarm Response: If the alarm sounds, immediately move to fresh air, call emergency services, and do not re-enter the RV until it has been aired out and the source of the leak has been identified and corrected.
3. Package Contents
Verify that all items are present and in good condition:
- RV LP+CO Alarm (Model B03)
- Mounting Screws
- 3M Adhesive Strips
- User Manual
4. Setup and Installation
4.1 Choosing a Location
Install the alarm in a location that is at least 4 inches (10 cm) but not more than 20 inches (50 cm) above the ground. It should be placed near sleeping areas and where propane and carbon monoxide sources are present, such as near the kitchen or heating appliances. Avoid placing it directly next to windows, doors, or vents where air currents might affect sensor readings.

Image: The detector is shown installed vertically on an RV wall, indicating the recommended installation height of 4-20 inches (10-50 cm) above the ground.
4.2 Wiring Instructions
The alarm operates on 12V DC power. Connect the RED wire to the positive (+) 12V DC power source and the BLACK wire to the negative (-) or ground. Ensure connections are secure and insulated.
Video: This video demonstrates how to properly connect the 12V DC power wires to the alarm using wire connectors.
4.3 Mounting
You can mount the alarm using either the provided 3M adhesive strips or screws. For screw mounting, use the included template to mark drill points. Ensure the mounting surface is clean and dry before applying adhesive or screws.
5. Operating Your Detector
5.1 Initial Power-Up
Upon initial power-up, the detector will undergo a 180-second countdown for pre-heating and calibration. During this time, the digital display will show a countdown, and the green LED indicator will flash. Once the countdown reaches zero, the display will show '0' for both CO (PPM) and LP (LEL%), and the green LED will remain solid, indicating normal operation.
5.2 Performing a Self-Test
It is recommended to perform a self-test monthly or weekly to ensure the alarm is functioning correctly. To perform a self-test:
- Press and hold the 'Test' button on the front of the alarm.
- The display will show '888' and the alarm will sound, indicating the test is active.
- Release the 'Test' button. The alarm will return to normal operation after the test sequence.
Video: This video demonstrates the simple process of performing a self-test on the detector, showing the '888' display and alarm sound.
5.3 Alarm Indications
The detector provides distinct alarms and visual cues for CO and LP gas detection:
- CO Alarm: Sounds a loud 85dB alarm when CO levels reach 150 PPM. The red CO LED will flash, and the digital display will show the CO concentration.
- LP Alarm: Sounds a loud 85dB alarm when LP gas levels reach 5% LEL. The red LP LED will flash, and the digital display will show the LP concentration.
- Mute Function: Press the 'Mute' button to temporarily silence the alarm for a short period. The alarm will reactivate if gas levels remain high.
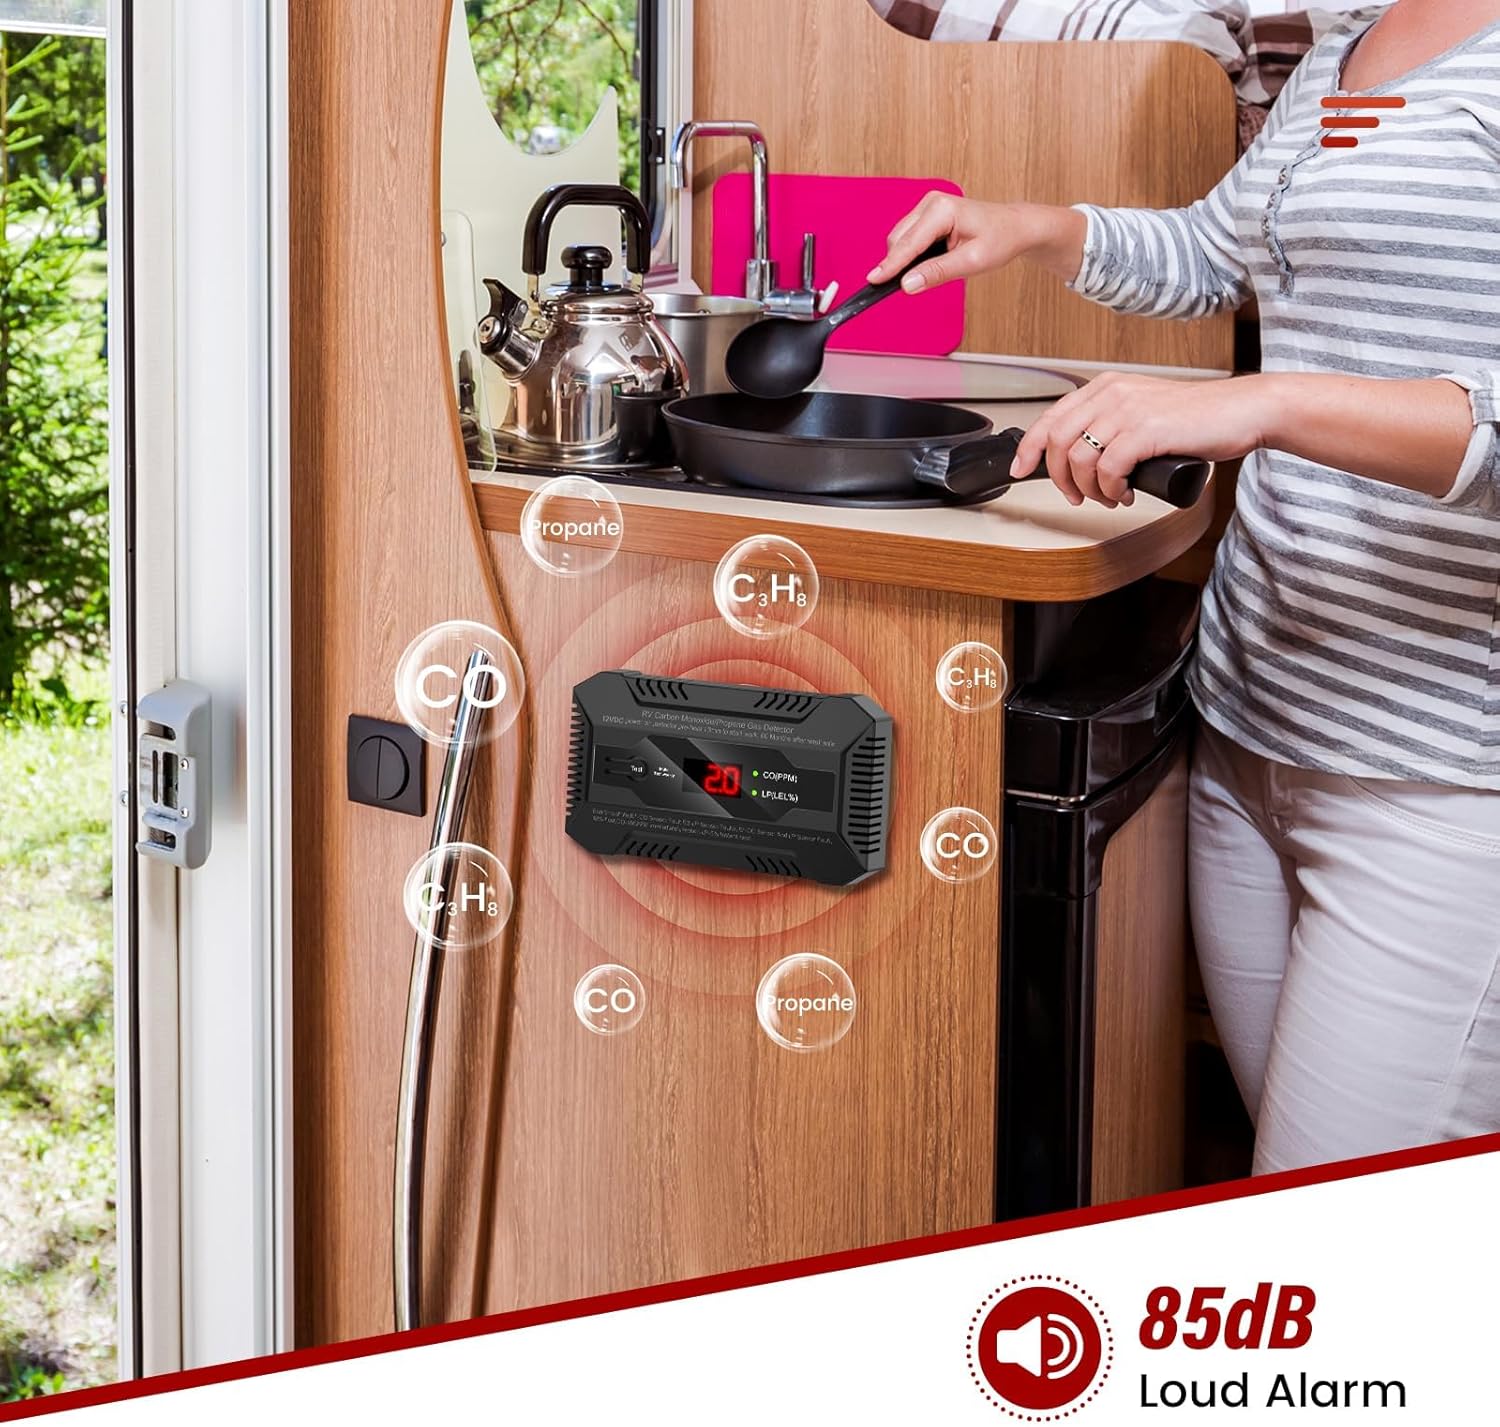
Image: The detector is shown in an RV kitchen environment, illustrating its function in detecting CO and propane gas, accompanied by an icon indicating an 85dB loud alarm.
6. Maintenance
6.1 Cleaning
Clean the detector regularly with a soft, damp cloth. Do not use cleaning agents, solvents, or abrasive materials, as these can damage the sensor or casing.
6.2 End-of-Life Indicator
The alarm has a lifespan of 5 years. When it reaches its expiration, a specific lifespan indicator light will illuminate, reminding you to replace the unit. This ensures continuous and reliable protection.
7. Troubleshooting
Refer to the table below for common issues and their solutions:
| Problem | Possible Cause | Solution |
|---|---|---|
| Alarm does not power on | No 12V DC power; incorrect wiring | Check 12V DC power supply; verify wiring connections (red to +, black to -). |
| Alarm sounds without gas presence | False alarm; sensor contamination | Ventilate the RV; clean the detector; ensure no strong odors or chemicals are nearby. |
| Display shows 'E1' (CO Sensor Fault) | CO sensor malfunction | Contact customer support for assistance or replacement. |
| Display shows 'E2' (LP Sensor Fault) | LP sensor malfunction | Contact customer support for assistance or replacement. |
| Display shows 'Er' (CO & LP Sensor Fault) | Both sensors malfunctioning | Contact customer support for assistance or replacement. |
| Alarm sounds continuously | Persistent gas leak | Evacuate immediately; contact emergency services; do not re-enter until safe. |
8. Product Specifications
| Feature | Detail |
|---|---|
| Brand | Chtoocy |
| Model Number | B03 |
| Power Source | 12V DC (Corded Electric) |
| Color | Black |
| Item Weight | 4 ounces |
| Alarm Loudness | 85dB |
| Material | Plastic |
| Manufacturer | Dongguan Chuangyuan Intelligent Equipment Co., Ltd |
| UPC | 786411740918 |
| Package Dimensions | 4.72 x 3.7 x 1.34 inches |
9. Warranty and Support
For warranty information, technical support, or any questions regarding your Chtoocy RV Carbon Monoxide and Propane Gas Detector Alarm, please contact the manufacturer directly through their official website or the contact information provided with your purchase. Keep your proof of purchase for warranty claims.


