
Emerson MWG1191SB
Emerson MWG1191SB Microwave with Built-in Grill Function Instruction Manual
Model: MWG1191SB | Brand: Emerson
1. Introduction
This instruction manual provides important information for the safe and efficient operation of your Emerson MWG1191SB Microwave with Built-in Grill Function. Please read this manual thoroughly before using the appliance and retain it for future reference.
Important Safety Instructions
When using electrical appliances, basic safety precautions should be followed, including the following:
- Read all instructions before using the appliance.
- Do not operate the microwave if the cord or plug is damaged, or if it is not working properly.
- Ensure proper ventilation around the appliance.
- Do not heat sealed containers, as they may explode.
- Always supervise children when the appliance is in use.
- Refer to the "Maintenance and Cleaning" section for proper cleaning procedures.
2. Product Overview
The Emerson MWG1191SB is a versatile countertop microwave oven featuring a built-in grill function, designed for efficient and convenient cooking.
Key Features
- Microwave & Grill in One: Combines microwave heating with grilling capabilities for versatile cooking.
- Powerful 1100W Microwave Performance: Offers rapid heating and cooking.
- 11 Adjustable Power Levels: Allows precise control over cooking intensity.
- Sleek Stainless Steel Design: Durable and modern aesthetic.
- User-Friendly Retro Controls: Chromed handle and vintage-style buttons for easy operation.
- Convenient Cooking Presets & Defrost Options: Includes 9 pre-programmed settings and time/weight defrost functions.
- 1.1 Cubic Foot Interior: Spacious enough for large plates.
- Child Lock: Enhances safety by preventing unintended operation.
Components

Figure 2.1: Front view of the Emerson MWG1191SB Microwave, showing the mirrored door, control panel, and LED display.

Figure 2.2: Side view of the Emerson MWG1191SB Microwave, highlighting its compact design.

Figure 2.3: Interior view of the microwave, showing the removable glass turntable and a dish of food.

Figure 2.4: Close-up of the control panel, detailing the auto cook menu options and function buttons.
3. Setup and Installation
Unpacking
- Carefully remove the microwave oven and all packing materials from the carton.
- Check the oven for any damage, such as dents or a broken door. Do not install if damaged.
- Ensure all accessories are present: glass turntable, turntable ring assembly, and grill rack.
Placement
- Place the microwave on a flat, stable surface that can support its weight and the heaviest food item likely to be cooked in it.
- Maintain a minimum clearance of 4 inches (10 cm) from the top, sides, and rear of the oven for proper ventilation.
- Do not block air vents.
- Avoid placing the oven near heat sources or in areas with high humidity.

Figure 3.1: Microwave dimensions: 20.3 inches wide, 16.4 inches deep, and 12.2 inches high, shown on a kitchen counter.
Electrical Connection
- Ensure the power outlet is properly grounded.
- Plug the microwave into a dedicated 120V, 60Hz AC outlet. Do not use extension cords or adapters.
4. Operating Instructions
Setting the Clock
- Press the CLOCK/KITCHEN TIMER button once.
- Use the number pad to enter the current time (e.g., 12:30 for 12:30 PM).
- Press the CLOCK/KITCHEN TIMER button again to confirm.
Microwave Cooking
- Place food in a microwave-safe container on the glass turntable.
- Close the door.
- Press the TIME COOK button.
- Enter the desired cooking time using the number pad.
- Press the POWER button to adjust power level (default is 100%). Use number pad for desired level (e.g., 5 for 50% power).
- Press START/+30SEC to begin cooking.
Note: For quick start, press START/+30SEC to cook at 100% power for 30 seconds. Each subsequent press adds 30 seconds.
Grill Function
The grill function is ideal for browning, toasting, and crisping food. Use the included grill rack for best results.

Figure 4.1: The grill function in action, browning a whole chicken inside the microwave.
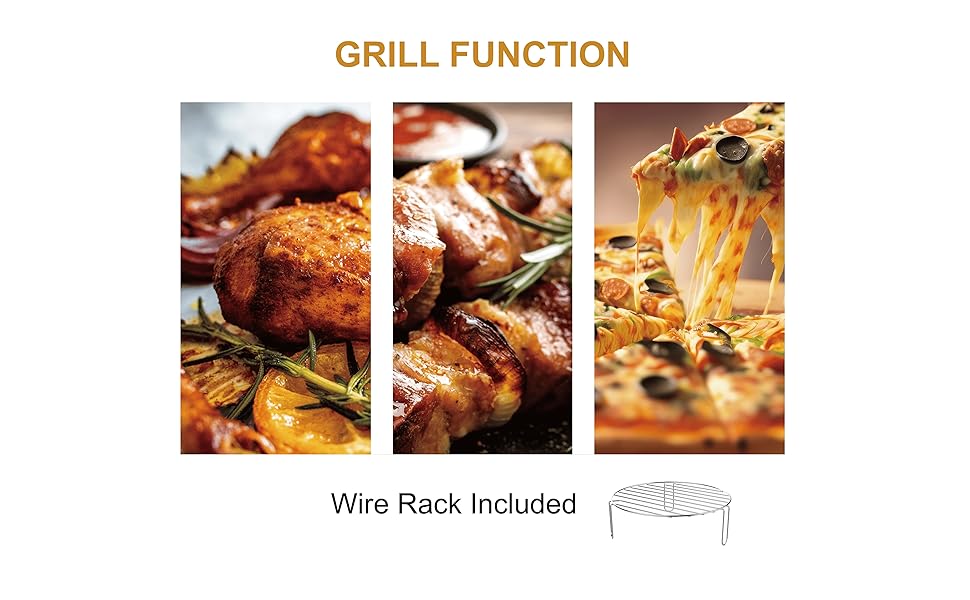
Figure 4.2: Examples of food prepared using the grill function, including crispy chicken, grilled skewers, and a perfectly browned pizza.
- Place food on the grill rack, then place the rack on the glass turntable.
- Press the GRILL/COMBO button once for pure grill function.
- Enter the desired grilling time using the number pad.
- Press START/+30SEC to begin grilling.
Combo Cooking (Microwave + Grill)
This function combines microwave power with grilling for faster cooking and browning. There are 2 combo power levels available.
- Place food in a suitable container on the grill rack.
- Press the GRILL/COMBO button multiple times to select Combo 1 or Combo 2.
- Enter the desired cooking time.
- Press START/+30SEC to begin.
Auto Cook Menus
The microwave features 9 pre-programmed auto cook menus for common food items.

Figure 4.3: A visual representation of the auto cook menu options available on the control panel.
| Menu Item | Description |
|---|---|
| Popcorn | For various sizes of popcorn bags. |
| Potato | Cooks potatoes based on quantity. |
| Frozen Pizza | Heats frozen pizza to perfection. |
| Meat | Cooks various types of meat. |
| Beverage | Heats beverages. |
| Frozen Vegetable | Cooks frozen vegetables. |
| Reheat | Reheats pre-cooked food. |
| Weight/Time Defrost | Defrosts food by weight or time. |
- Press the desired auto cook menu button (e.g., POPCORN).
- If applicable, select the weight or quantity using the number pad.
- Press START/+30SEC to begin.
Child Lock Function
To activate the child lock, press and hold the STOP/CLEAR button for 3 seconds. The display will show "LOCK". To deactivate, press and hold the STOP/CLEAR button again for 3 seconds.
5. Maintenance and Cleaning
Regular cleaning and maintenance will ensure the longevity and optimal performance of your microwave oven.
Cleaning the Exterior
- Wipe the exterior with a damp cloth and mild detergent.
- Avoid abrasive cleaners or scouring pads, which can damage the stainless steel finish.
- For the mirrored door, use a glass cleaner applied to a cloth, not directly to the door.
Cleaning the Interior
- Clean the interior cavity after each use to prevent food buildup.
- Wipe with a damp cloth and mild soap. For stubborn stains, place a bowl of water with lemon slices inside and microwave for 2-3 minutes to loosen residue, then wipe clean.
- Remove the glass turntable and turntable ring for separate cleaning with warm, soapy water.
Cleaning the Grill Rack
- The grill rack should be cleaned with warm, soapy water after each use.
- Ensure it is completely dry before storing or reusing.
6. Troubleshooting
If you encounter issues with your microwave, refer to the following table for common problems and solutions.
| Problem | Possible Cause | Solution |
|---|---|---|
| Oven will not start | Door not closed properly; Plug not securely inserted; Fuse blown or circuit breaker tripped. | Ensure door is firmly closed; Check plug connection; Check household fuse/circuit breaker. |
| Food not heating | Incorrect cooking time/power level; Door not closed properly. | Adjust time/power; Ensure door is firmly closed. |
| Turntable not rotating | Turntable not properly placed; Debris under turntable. | Reposition turntable and ring; Clean under turntable. |
| Unusual noise during operation | Food container touching oven walls; Turntable not seated correctly. | Ensure container is not touching walls; Re-seat turntable. |
| Buttons unresponsive | Child lock activated; Temporary electronic glitch. | Deactivate child lock (hold STOP/CLEAR for 3s); Unplug and re-plug the unit after 1 minute. |
7. Specifications
| Feature | Detail |
|---|---|
| Model Number | MWG1191SB |
| Capacity | 1.1 Cubic Feet |
| Wattage | 1100 watts |
| Voltage | 120V, 60Hz |
| Product Dimensions (W x D x H) | 20.3" x 16.4" x 12.2" |
| Item Weight | 34.4 Pounds |
| Color | Stainless Steel |
| Material | Stainless Steel |
| Installation Type | Countertop |
| Special Features | 3 Combo Power Levels, Auto Cook, Child Safety Lock, Grill Function, Pure Grill Power Level |
| Included Components | Grill, Removable Glass Turntable |
8. Warranty and Support
For warranty information and customer support, please refer to the warranty card included with your product or visit the official Emerson website.
Manufacturer: Emerson
Brand Store: Emerson Official Store on Amazon
For technical assistance or service inquiries, please contact Emerson customer service.
Related documentsMWG1191SB


Ask a question about this manual
Ask about setup, troubleshooting, compatibility, parts, safety, or missing instructions. Manuals+ will review the question and use this page’s manual context to help answer it.