
1. Introduction
Thank you for choosing the Voltas Floor Mounted Water Dispenser Minimagic Spring R V Plus. This appliance is designed to provide convenient access to hot, normal, and cold water, along with a refrigerated storage compartment. Please read this manual carefully before installation, operation, or maintenance to ensure safe and efficient use of your water dispenser. Keep this manual for future reference.
2. Safety Instructions
- Read all instructions before using the appliance.
- Ensure the power supply matches the voltage specified on the rating label.
- Do not operate the dispenser with a damaged cord or plug.
- Keep the dispenser away from direct sunlight and heat sources.
- Always unplug the dispenser before cleaning or performing any maintenance.
- Do not immerse the dispenser, cord, or plug in water or other liquids.
- Supervise children to ensure they do not play with the appliance. The hot water faucet has a child safety lock.
- Ensure proper ventilation around the unit.
- Only use bottled drinking water with this dispenser.
3. Product Overview
Familiarize yourself with the components of your Voltas water dispenser.
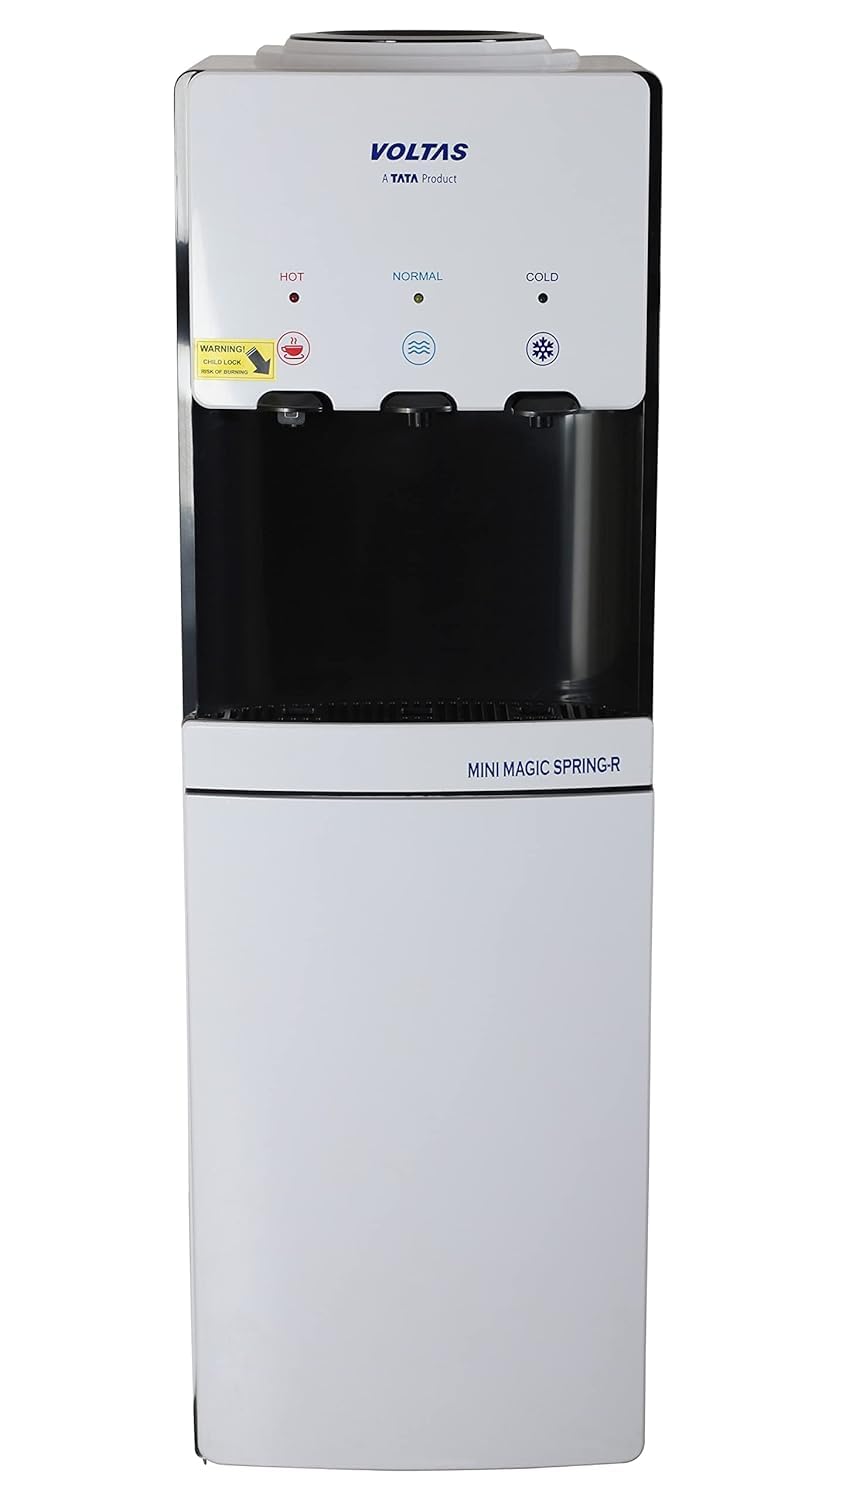
Figure 3.1: Front view of the Voltas Minimagic Spring R V Plus Water Dispenser.

Figure 3.2: Dispensing area with hot, normal, and cold water faucets and indicators. Note the child lock on the hot water faucet.

Figure 3.3: Rear view of the water dispenser, illustrating the power switches for heating and cooling, and important warning labels.

Figure 3.4: Top view of the water dispenser, showing the receptacle for placing the water bottle.
4. Setup Instructions
4.1 Unpacking
- Carefully remove the dispenser from its packaging.
- Inspect the unit for any damage incurred during transit. Contact your retailer immediately if damage is found.
- Remove all packing materials, including any protective films or tapes.
4.2 Placement
- Place the dispenser on a firm, level surface. This is a freestanding unit.
- Ensure there is adequate space (at least 10 cm) around the back and sides for proper ventilation.
- Avoid placing the dispenser in direct sunlight or near heat-generating appliances.
- The product dimensions are approximately 38.5D x 37W x 101H Centimeters.
4.3 Power Connection
- Ensure the dispenser's power switches (located at the back) are in the 'OFF' position.
- Plug the power cord into a grounded electrical outlet. The dispenser operates on Corded Electric power with a wattage of 105 Watts.
- Do not use extension cords or adapters.
4.4 Water Bottle Installation
- Remove the seal from a new 15-liter water bottle.
- Place the water bottle directly onto the top access receptacle of the dispenser. The probe inside the dispenser will puncture the bottle's cap.
- Allow water to fill the internal tanks for several minutes before turning on the heating or cooling functions.
4.5 Initial Flushing
- Before first use, dispense at least 1 liter of water from each faucet (hot, normal, cold) to flush the system. Discard this water.
- This helps remove any dust or impurities from the internal components.
5. Operating Instructions
5.1 Powering On
- After installing the water bottle and flushing the system, turn on the cooling switch (blue) and heating switch (red) located at the back of the unit.
- The indicator lights on the front panel will illuminate, signifying that the dispenser is operating.
5.2 Dispensing Water
- Cold Water: Place a cup under the cold water faucet (blue icon). Press the lever to dispense cold water. The cooling capacity is 2.5 liters per hour.
- Normal Water: Place a cup under the normal water faucet (wave icon). Press the lever to dispense room temperature water.
- Hot Water: For hot water (red icon), first push the child safety lock button inward, then press the lever to dispense hot water. Exercise caution as the water is very hot. The heating capacity is 5 liters per hour.
5.3 Refrigerated Compartment
- The dispenser features a 15-liter refrigerated compartment at the bottom.
- This compartment is suitable for cooling small beverages or food items.
- Ensure the cooling function is active for the compartment to operate.
6. Maintenance
6.1 Cleaning the Exterior
- Always unplug the dispenser before cleaning.
- Wipe the exterior surfaces with a soft, damp cloth. Do not use abrasive cleaners or solvents.
- Clean the drip tray regularly by removing it, emptying any water, washing with mild soap, rinsing, and drying before reinserting.
6.2 Draining and Internal Cleaning
- For thorough cleaning or if the dispenser will be unused for an extended period, drain the internal tanks.
- Unplug the unit and remove the water bottle.
- Locate the drain plug at the back of the dispenser (usually near the bottom). Place a bucket underneath and remove the plug to drain all water.
- Once drained, replace the plug securely.
- For internal cleaning, it is recommended to contact authorized service personnel.
6.3 Condenser Coil Cleaning
- Periodically clean the condenser coils at the back of the unit using a soft brush or vacuum cleaner.
- Ensure the dispenser is unplugged before cleaning the coils. This improves cooling efficiency.
7. Troubleshooting
| Problem | Possible Cause | Solution |
|---|---|---|
| No water dispensing | Empty water bottle; bottle not properly seated; airlock. | Replace water bottle; reseat bottle firmly; dispense water from all faucets to release air. |
| No hot or cold water | Heating/cooling switches off; power outage; thermostat issue. | Ensure switches at the back are ON; check power supply; if problem persists, contact service. |
| Water leakage | Cracked water bottle; loose drain plug; internal component damage. | Replace water bottle; ensure drain plug is tight; contact service for internal leaks. |
| Unusual noise | Compressor operation (normal); unit not level; loose parts. | Ensure unit is on a level surface; if noise is excessive or persistent, contact service. |
8. Specifications
| Brand | Voltas |
| Model Number | WDNEW2 |
| Colour | WHITE |
| Material | Steel |
| Dispensing Capacity | 3.2 Liters (internal storage) |
| Refrigerated Storage Capacity | 15 Liters |
| Product Dimensions (D x W x H) | 38.5D x 37W x 101H Centimeters |
| Wattage | 105 Watts (Cooling: 80/86W, Heating: 500W) |
| Installation Type | Freestanding |
| Access Location | Top |
| Power Source | Corded Electric |
| Item Weight | 10000 Grams |
9. Warranty and Support
Your Voltas Floor Mounted Water Dispenser Minimagic Spring R V Plus (Model WDNEW2) comes with a 1-year comprehensive warranty from the date of purchase. This warranty covers manufacturing defects and ensures reliable operation of your appliance.
For any queries, technical assistance, or to claim warranty service, please contact Voltas customer support. A toll-free support line is available for your convenience. Please refer to your purchase documentation for specific contact details or visit the official Voltas website.