
ORICO 9958C3
ORICO 5BIG 9958C3 External Hard Drive Enclosure User Manual
Model: 9958C3
1. Introduction
Thank you for choosing the ORICO 5BIG 9958C3 External Hard Drive Enclosure. This device is a high-performance Direct Attached Storage (DAS) solution designed for professionals and enthusiasts requiring massive storage capacity and high-speed data transfer. It supports up to five 2.5-inch or 3.5-inch SATA HDDs/SSDs, offering a total capacity of up to 110TB, with individual drive support up to 22TB.
This manual provides detailed instructions for setting up, operating, maintaining, and troubleshooting your ORICO 5BIG 9958C3 enclosure to ensure optimal performance and longevity.
2. Product Overview
The ORICO 5BIG 9958C3 is engineered for robust data management and efficient heat dissipation, making it ideal for demanding applications such as video editing, large-scale data backup, and professional storage solutions.
Key Features:
- Massive Capacity Expansion: Supports five 3.5-inch SATA HDDs/SSDs, with each bay accommodating up to 22TB, for a total capacity of 110TB.
- Daisy Chain Functionality: Connect up to three ORICO 5BIG enclosures in a daisy chain, expanding your total storage capacity to an impressive 330TB.
- High-Speed Data Transfer: Equipped with a USB-C 3.1 Gen 2 port, providing theoretical transfer speeds of up to 10 Gbps. Actual SATA III speeds can reach up to 6 Gbps.
- Individual Disk Management: Independent drive bays allow for quick ejection and replacement of individual disks without interrupting the workflow of other drives.
- Integrated 150W Power Supply: Ensures stable and smooth data transfer even when multiple hard drives are operating simultaneously.
- Superior Heat Dissipation: Constructed from aluminum alloy and featuring an 80mm silent cooling fan with rear ventilation holes to maintain optimal operating temperatures.
- Wide Compatibility: Compatible with Windows and Mac OS operating systems.

Figure 2.1: Front view of the ORICO 5BIG 9958C3 enclosure, showcasing its five drive bays.

Figure 2.2: Illustration of the daisy chain feature, demonstrating how multiple enclosures can be connected for expanded storage.

Figure 2.3: The enclosure connected to a computer setup, highlighting its 10Gbps transmission speed capability.

Figure 2.4: A close-up view showing a hard drive being inserted into a bay, illustrating the spring-loaded switch, HDD fixing screw hole, and LED indicator.

Figure 2.5: Front and rear views of the enclosure, emphasizing its massive storage capabilities and the 80mm cooling fan.

Figure 2.6: The enclosure connected to power, highlighting the built-in 150W power supply and its protection features (Overcurrent, Short circuit, Static, Overheat Protection).
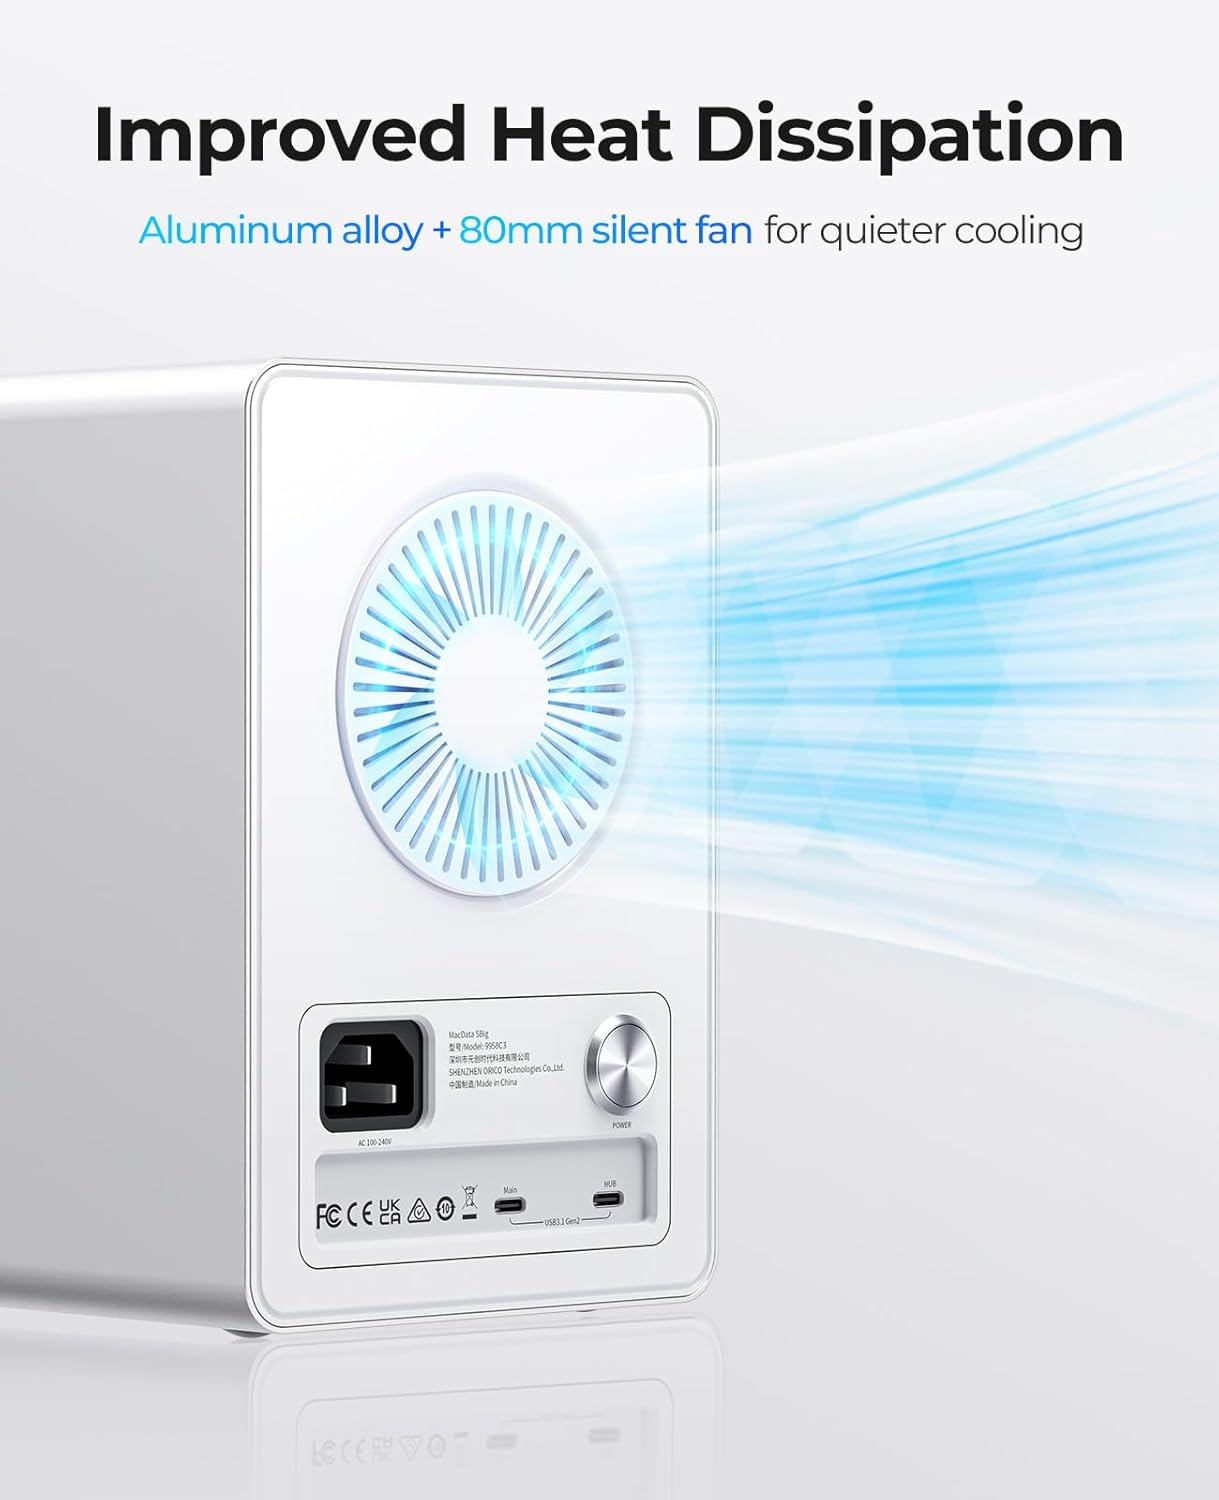
Figure 2.7: Rear view of the enclosure, showing the 80mm silent fan and ventilation holes for efficient heat dissipation.
3. Package Contents
Please verify that all items are present in the package before proceeding with the installation.

Figure 3.1: Contents of the ORICO 5BIG 9958C3 package.
- 1 x ORICO 5BIG DAS Studio (Main Unit)
- 1 x Screwdriver
- 1 x Power Cable
- 1 x Data Cable (USB-C to USB-C)
- 1 x Screw Pack (for HDD/SSD installation)
- 1 x User Manual
4. Setup Instructions
4.1 Installing Hard Drives/SSDs
- Gently pull the handle of an empty drive bay to slide out the drive tray.
- Place your 2.5-inch or 3.5-inch SATA HDD/SSD onto the drive tray. Ensure the SATA connector on the drive aligns with the connector on the tray.
- Secure the drive to the tray using the provided screws and screwdriver. For 3.5-inch drives, use the side mounting holes. For 2.5-inch drives/SSDs, use the bottom mounting holes.
- Carefully slide the loaded drive tray back into the enclosure until it clicks into place. Ensure it is fully seated.
- Repeat for all desired drive bays.
4.2 Connecting to Your Computer
- Connect one end of the provided USB-C data cable to the USB-C port on the rear of the ORICO 5BIG enclosure. This port is typically labeled "Main" or "USB3.1 Gen2".
- Connect the other end of the USB-C data cable to an available USB-C port on your computer (PC or Mac). For optimal performance, use a USB 3.1 Gen 2 compatible port.
- Connect the power cable to the power input on the rear of the enclosure, then plug the other end into a wall outlet.
- Press the power button on the rear of the enclosure to turn it on. The LED indicators on the front panel will illuminate, indicating power and drive activity.
- Your operating system should detect the new storage device. You may need to initialize and format new hard drives before use (refer to your OS documentation for details).
4.3 Daisy Chain Connection (Optional)
To expand storage further, you can connect up to two additional ORICO 5BIG enclosures in a daisy chain configuration.
- Ensure the first ORICO 5BIG enclosure is connected to your computer as described in Section 4.2.
- Connect a USB-C data cable from the "HUB" port on the rear of the first enclosure to the "Main" port on the rear of the second ORICO 5BIG enclosure.
- Connect the power cable to the second enclosure and power it on.
- Repeat for a third enclosure if desired, connecting from the "HUB" port of the second enclosure to the "Main" port of the third.
- Your computer should recognize the additional drives from the chained enclosures.
5. Operating Instructions
5.1 Drive Recognition and Access
Once connected and powered on, your operating system will recognize the installed hard drives as individual storage volumes. You can access them like any other connected drive.
- Windows: Drives will appear in "This PC" (or "My Computer"). New drives may require initialization and formatting via Disk Management.
- Mac OS: Drives will appear on the desktop or in Finder. New drives may require formatting via Disk Utility.
5.2 Hot-Swapping Drives
The ORICO 5BIG 9958C3 supports hot-swapping of individual drives. This means you can remove or insert a drive without powering down the entire enclosure or disconnecting it from your computer, provided the operating system supports it.
- Before removing a drive, ensure all data transfer to or from that specific drive has ceased.
- Safely eject the drive from your operating system (e.g., "Safely Remove Hardware" on Windows, "Eject" in Finder on Mac).
- Once ejected, gently pull the handle of the corresponding drive bay to slide out the drive tray.
- To insert a new drive, follow the installation steps in Section 4.1. The operating system should detect the new drive automatically.
Note: While hot-swapping is supported, it is always recommended to back up critical data before performing any drive removal or insertion.
6. Maintenance
Proper maintenance ensures the longevity and optimal performance of your ORICO 5BIG 9958C3 enclosure.
- Cleaning: Use a soft, dry cloth to wipe the exterior of the enclosure. Do not use liquid cleaners or aerosols, as they may damage the device.
- Ventilation: Ensure the cooling fan and ventilation holes on the rear of the enclosure are not obstructed. Maintain adequate space around the unit for proper airflow.
- Dust Accumulation: Periodically check for dust accumulation on the fan and vents. If necessary, use compressed air to gently clear dust, ensuring the device is powered off and unplugged first.
- Firmware Updates: Check the official ORICO website periodically for any available firmware updates for your model. Firmware updates can improve performance, stability, and compatibility.
- Cable Management: Keep cables neatly organized and avoid sharp bends or kinks, which can damage the cables over time.
7. Troubleshooting
This section addresses common issues you might encounter and provides solutions.
| Problem | Possible Cause | Solution |
|---|---|---|
| Enclosure not recognized by computer. |
|
|
| Hard drive not appearing in OS. |
|
|
| Slow transfer speeds. |
|
|
| Enclosure feels hot. |
|
|
8. Specifications
| Feature | Detail |
|---|---|
| Model | 9958C3 |
| Product Name | 5 Big DAS Solution |
| Material | Aluminum Alloy + ABS |
| Color | Silver |
| Output Interface | USB-C (USB 3.1 Gen 2) |
| Transfer Speed | 10 Gbps (USB 3.1 Gen 2), up to 6 Gbps (SATA III) |
| Dimensions | 268 mm x 135.6 mm x 196.6 mm |
| Power Supply | Built-in 150W |
| Max Single Bay Capacity | 22 TB |
| Max Total Capacity | 110 TB |
| Supported Drive Types | 2.5"/3.5" SATA HDD/SSD |
| Installation Type | Screw Mount |
| Supported Systems | Windows, Mac OS |
| Max Daisy Chain Devices | 3 |
| Manufacturer | SHENZHEN ORICO TECHNOLOGIES CO.,LTD |
9. Warranty and Support
ORICO products come with a standard manufacturer's warranty. Please refer to the warranty card included in your package or visit the official ORICO website for detailed warranty terms and conditions.
For technical support, product inquiries, or warranty claims, please contact ORICO customer service through their official website:
Please have your product model (9958C3) and purchase information ready when contacting support.
Related documents9958C3


Ask a question about this manual
Ask about setup, troubleshooting, compatibility, parts, safety, or missing instructions. Manuals+ will review the question and use this page’s manual context to help answer it.