
Introduction
This manual provides essential information for the safe and efficient operation of your Piko 59177 H0 Diesel G 1700 locomotive. Please read these instructions carefully before initial use and retain them for future reference. This model is a detailed replica of the G1700 diesel locomotive by Schweerbau GmbH and Co. KG, designed for H0 gauge railway systems, operating in Era VI.
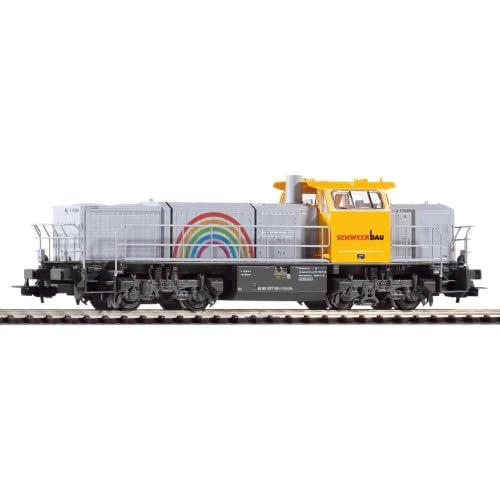
Figure 1: Piko 59177 H0 Diesel G 1700 Locomotive. This image illustrates the overall appearance of the model.
Safety Instructions
- Always operate the locomotive on a stable and clean railway track.
- Ensure the power supply is appropriate for H0 gauge models (DC system).
- Keep small parts away from children to prevent choking hazards.
- Avoid exposing the model to extreme temperatures or direct sunlight.
- Do not attempt to disassemble the locomotive beyond what is described in this manual.
Setup
1. Unpacking
Carefully remove the locomotive from its packaging. Inspect for any visible damage. Retain the original packaging for storage or transport.
2. Track Placement
Place the locomotive gently onto the H0 gauge track. Ensure all wheels are properly seated on the rails. The minimum recommended radius for operation is 358 mm.
3. Power Connection (DC System)
Connect your DC power supply to the track as per your railway system's instructions. This model operates on a DC (Direct Current) system.
4. Digital Decoder Installation (Optional)
The locomotive is equipped with a digital interface according to NEM 652 for easy decoder upgrade. To install a digital decoder (e.g., PIKO sound decoder), carefully open the locomotive body as instructed in the decoder's manual. Insert the decoder into the NEM 652 interface. Ensure correct orientation before closing the body.
Operating Instructions
1. Initial Movement
Gradually increase the power supply to initiate movement. Observe the locomotive's behavior. If it does not move, check track connections and power supply.
2. Directional Light Change
The locomotive features a white/white light change function that operates according to the direction of travel. This is automatic and does not require manual intervention.
3. Coupling
The model is equipped with a standard coupling bar. To attach wagons, align the coupling bar with the wagon's coupling and gently push them together until they connect securely.
Maintenance
1. Cleaning
Regularly clean the wheels and track to ensure optimal electrical contact and smooth operation. Use a soft, lint-free cloth for the locomotive body. For stubborn dirt on wheels, a specialized model railway cleaning fluid can be used sparingly.
2. Lubrication
Periodically apply a small amount of specialized model railway lubricant to moving parts such as gears and axles. Refer to a detailed model railway maintenance guide for specific lubrication points. Avoid over-lubrication.
3. Storage
When not in use, store the locomotive in its original packaging or a protective case, away from dust, moisture, and direct sunlight.
Troubleshooting
- Locomotive does not move:
- Check power supply connection to the track.
- Ensure all wheels are making proper contact with the rails.
- Clean wheels and track for any dirt or debris obstructing electrical contact.
- If a digital decoder is installed, verify its correct seating and configuration.
- Lights not working:
- Verify power supply.
- Check for any loose connections if the locomotive body was opened.
- If using a digital decoder, ensure light functions are enabled and configured correctly.
- Erratic movement:
- Clean wheels and track.
- Ensure track sections are properly joined and level.
- Check for any obstructions on the track.
Specifications
| Feature | Detail |
|---|---|
| Model Number | 59177 |
| Gauge | H0 |
| Era | VI |
| Railway Management | Private train |
| Minimum Radius | 358 mm |
| Length over Buffers | 180 mm |
| Power System | DC (Direct Current) |
| Digital Interface | NEM 652 |
| Light Change | White/white, directional |
| Sound (Optional) | PIKO sound decoder upgrade possible |
Warranty and Support
For warranty information and technical support, please refer to the documentation provided with your purchase or visit the official Piko website. Keep your proof of purchase for any warranty claims.
Manufacturer: Piko Spielwaren GmbH
Modellbahnshop Korn is the seller of this product. For specific purchase-related inquiries, please contact them directly.


