
Important Safety Instructions
- Read all instructions carefully before use.
- Keep this manual for future reference.
- Do not expose the device to water or excessive humidity.
- Avoid placing the device near heat sources or direct sunlight.
- Use only the specified power adapter (USB powered).
- Do not attempt to disassemble or repair the unit yourself. Contact qualified service personnel.
Package Contents
Verify that all items are present in the package:
- WE Radio Alarm Clock
- USB Power Cable
- User Manual

Image: The WE Radio Alarm Clock shown within its retail packaging, indicating the product and its box.
Product Overview
The WE Radio Alarm Clock features a large 1.8-inch display, FM radio, dual alarms, and displays indoor temperature and humidity. It also includes a USB port for charging external devices.
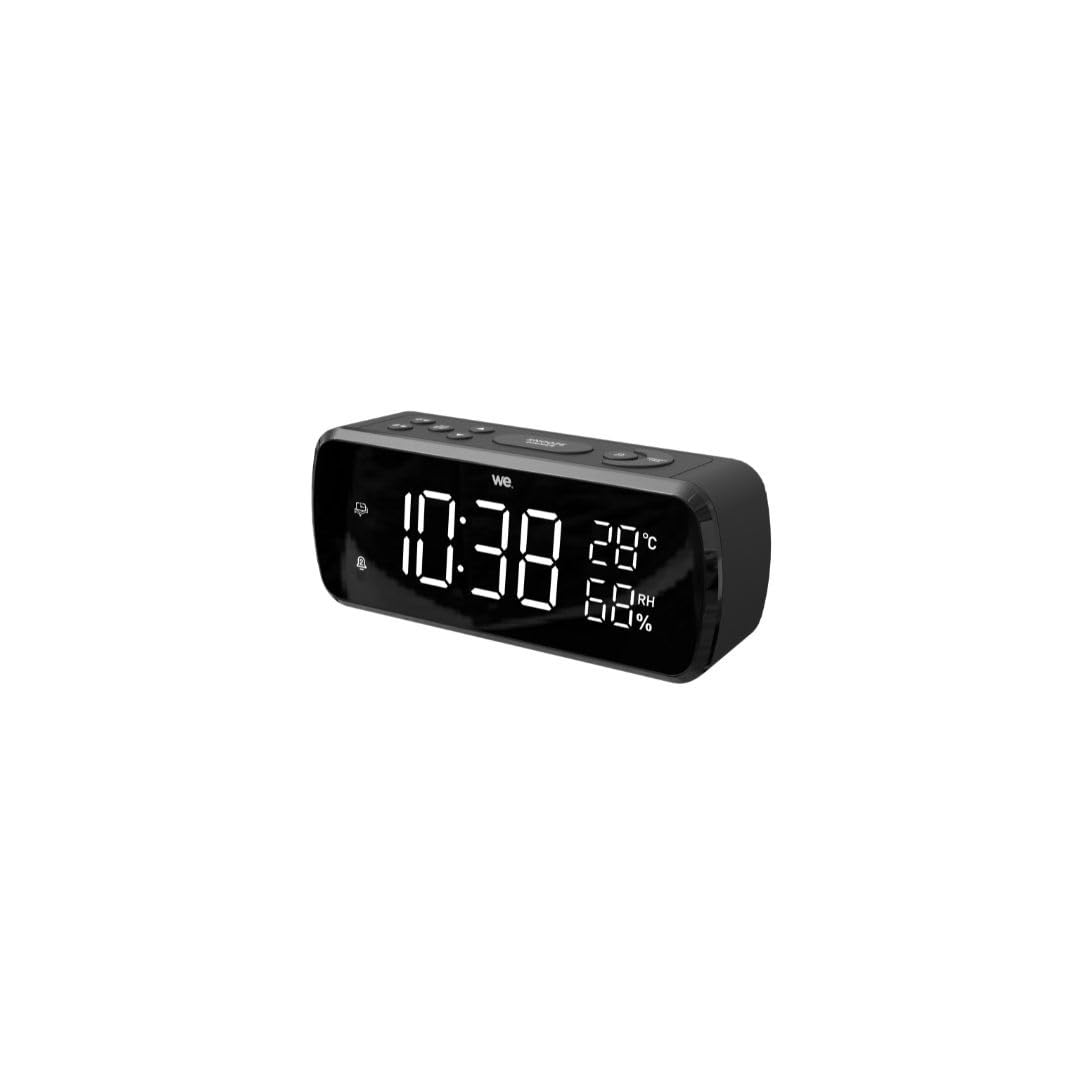
Image: Front view of the WE Radio Alarm Clock, showcasing its large digital display for time, temperature, and humidity.

Image: Top view of the WE Radio Alarm Clock, highlighting the control buttons for various functions such as alarm, scan, snooze, and time setting.
Control Buttons:
- ♢️ (Alarm 1) / ♢️ (Alarm 2) Buttons: To set and activate/deactivate alarms.
- ▲ (Up) / ▼ (Down) Buttons: To adjust time, alarm, and radio frequencies.
- SLP SCAN ℃/℉ Button: For sleep timer, FM radio scanning, and switching between Celsius/Fahrenheit.
- SNOOZE DIMMER Button: To activate snooze during an alarm or adjust display brightness.
- ON/OFF Button: To power the unit on or off.
- PRESET TIME Button: To set the current time and save FM radio presets.
Setup
1. Power Connection
- Connect the provided USB power cable to the DC 5V input port on the back of the alarm clock.
- Plug the other end of the USB cable into a standard USB power adapter (not included) or a powered USB port.
- The display will light up, indicating the device is powered on.
2. Initial Time Setting
- Press and hold the PRESET TIME button for 3 seconds to enter time setting mode. The hour digits will flash.
- Use the ▲ (Up) or ▼ (Down) buttons to adjust the hour.
- Press the PRESET TIME button again to confirm the hour and move to minute setting. The minute digits will flash.
- Use the ▲ (Up) or ▼ (Down) buttons to adjust the minutes.
- Press the PRESET TIME button once more to confirm and exit time setting mode.
Operating Instructions
1. Alarm Setting (Dual Alarm)
This device supports two independent alarms (Alarm 1 and Alarm 2).
- Press and hold the ♢️ (Alarm 1) button for 3 seconds to enter Alarm 1 setting mode. The alarm hour digits will flash.
- Use the ▲ (Up) or ▼ (Down) buttons to adjust the alarm hour.
- Press the ♢️ (Alarm 1) button again to confirm the hour and move to minute setting. The alarm minute digits will flash.
- Use the ▲ (Up) or ▼ (Down) buttons to adjust the alarm minutes.
- Press the ♢️ (Alarm 1) button once more to confirm and exit Alarm 1 setting mode.
- To activate/deactivate Alarm 1, short press the ♢️ (Alarm 1) button. An alarm icon will appear/disappear on the display.
- Repeat the process for Alarm 2 using the ♢️ (Alarm 2) button.
2. FM Radio Operation
- Press the ON/OFF button to turn on the radio.
- Short press the SLP SCAN ℃/℉ button to automatically scan and save available FM stations. The radio will scan and store stations with strong signals.
- Use the ▲ (Up) or ▼ (Down) buttons to manually tune the frequency or cycle through saved preset stations.
- To save a station as a preset: Tune to the desired station, then press and hold the PRESET TIME button until the preset number flashes. Use ▲ (Up) or ▼ (Down) to select a preset number, then press PRESET TIME again to confirm.
- Press the ON/OFF button to turn off the radio.
3. Temperature and Humidity Display
The alarm clock automatically displays the indoor temperature and humidity. No manual setting is required for this function.
- To switch between Celsius (℃) and Fahrenheit (℉), short press the SLP SCAN ℃/℉ button when the radio is off.
4. Snooze and Dimmer Function
- Snooze: When an alarm sounds, press the SNOOZE DIMMER button to temporarily silence the alarm for a few minutes (default snooze time). The alarm will sound again after the snooze period.
- Dimmer: When the alarm is not sounding, short press the SNOOZE DIMMER button to cycle through different display brightness levels.
5. USB Charging Port
An integrated USB port is available on the back of the unit for charging compatible external devices (e.g., smartphones). Connect your device's USB charging cable to this port.
Maintenance
- Clean the device with a soft, dry cloth. Do not use abrasive cleaners or solvents.
- Keep the device free from dust and debris.
- Ensure proper ventilation around the unit.
Troubleshooting
| Problem | Possible Cause | Solution |
|---|---|---|
| Display is blank. | No power. | Check USB power cable connection. Ensure the power adapter is working. |
| Alarm does not sound. | Alarm not activated or set incorrectly. | Verify alarm settings and ensure the alarm icon is displayed. |
| Poor FM radio reception. | Weak signal or interference. | Adjust the position of the unit. Try manual tuning. |
| USB charging not working. | Cable issue or device incompatibility. | Check the USB cable. Ensure the device is compatible with 5V USB charging. |
Specifications
- Brand: WE
- Model: WERADREVGDN4
- Display Type: Digital
- Display Size: 1.8 inches
- Color: Black
- Special Features: Temperature Display, Humidity Display, Dual Alarm, FM Radio, USB Charging Port
- Power Source: USB Powered (DC 5V)
- Mounting Type: Tabletop
- Material: Metal or Plastic
- Indoor/Outdoor Use: Indoor
- Batteries Included: No
Warranty and Support
For warranty information or technical support, please refer to the retailer where the product was purchased or visit the official WE brand website. Keep your purchase receipt as proof of purchase.

