
DWFSKZKV DWFSKZKV
DWFSKZKV LED Astral Pool Lights User Manual
Model: DWFSKZKV
1. Introduction
This manual provides essential information for the safe and efficient installation, operation, and maintenance of your DWFSKZKV LED Astral Pool Lights. Please read this manual thoroughly before use and retain it for future reference.
The DWFSKZKV LED Astral Pool Light is an underwater PAR56 spotlight designed for swimming pools. It features a durable plastic body, resin-filled technology for superior waterproofing, and energy-efficient LED lighting. Available in various wattages and color options, including Warm White, Pure White, and RGB with or without remote control.

Figure 1: Front view of the DWFSKZKV LED Astral Pool Light. This image shows the circular LED light with a clear protective cover, highlighting its flat, disc-like design and the array of small LED chips arranged in concentric circles.
2. Safety Information and Warnings
- Voltage Compatibility: Do not connect the lamp to AC110V, AC230V, or any voltage greater than 12V. This product is designed for 12V AC/DC input only. Connecting to higher voltages will cause irreparable damage and poses a safety risk.
- Underwater Operation: This lamp is designed for underwater use (IP68 waterproof grade). Do not operate the lamp out of water for more than 3 minutes. Prolonged operation out of water can lead to overheating and damage to the LED components.
- Professional Installation Recommended: Installation should be performed by a qualified electrician in accordance with local electrical codes and regulations.
- Transformer Requirement: A suitable 12V AC/DC transformer is required for operation. Ensure the transformer's wattage capacity meets or exceeds the total wattage of the connected lights.
- Damage Inspection: Before installation, inspect the lamp and power cable for any signs of damage. Do not install or operate a damaged product.
3. Product Features
- Input Voltage: 12V AC/DC
- Light Source: SMD 2835 LED
- Wattage Options: 18W, 24W, 30W, 35W, 42W
- Lumen Output:
- 18W: 1746lm
- 24W: 2328lm
- 30W: 2910lm
- 35W: 3395lm
- 42W: 4074lm
- Lamp Body Material: Plastic
- Dimensions: D176mm x H43mm
- Waterproof Grade: IP68 (suitable for direct immersion in water)
- Power Cable Length: 1.5 meters
- Life Span: 50,000 hours
- Color Versions: Warm White (2700-3500K), Pure White (5500-6300K), RGB with remote, RGB without remote (controlled by external controller)
- Resin Filled Technology: Enhanced waterproofing and durability compared to traditional PAR56 bulbs.
4. Setup and Installation
The DWFSKZKV LED Astral Pool Light is designed as a direct replacement for existing halogen PAR56 bulbs or other LED PAR56 bulbs. It can also be installed as a new fixture with appropriate accessories.
4.1 Wiring Diagram
Ensure proper connection to a 12V AC/DC transformer. Never connect directly to household AC110V or AC230V power supplies.

Figure 2: Wiring diagram for the LED pool light. This diagram illustrates the connection of the pool light to an AC/DC 12V output from a transformer, which in turn is connected to an AC110V or AC230V power source. It emphasizes the necessity of a transformer for safe operation.
4.2 Replacement Installation
This lamp is designed to fit existing PAR56 niches. You do not need to change the old niche, power cable, or transformer if they are compatible with 12V AC/DC input.

Figure 3: Diagram showing the replacement process for a pool light. This image depicts how the LED pool light can be inserted into an existing pool light housing, indicating a straightforward replacement of an older bulb type.
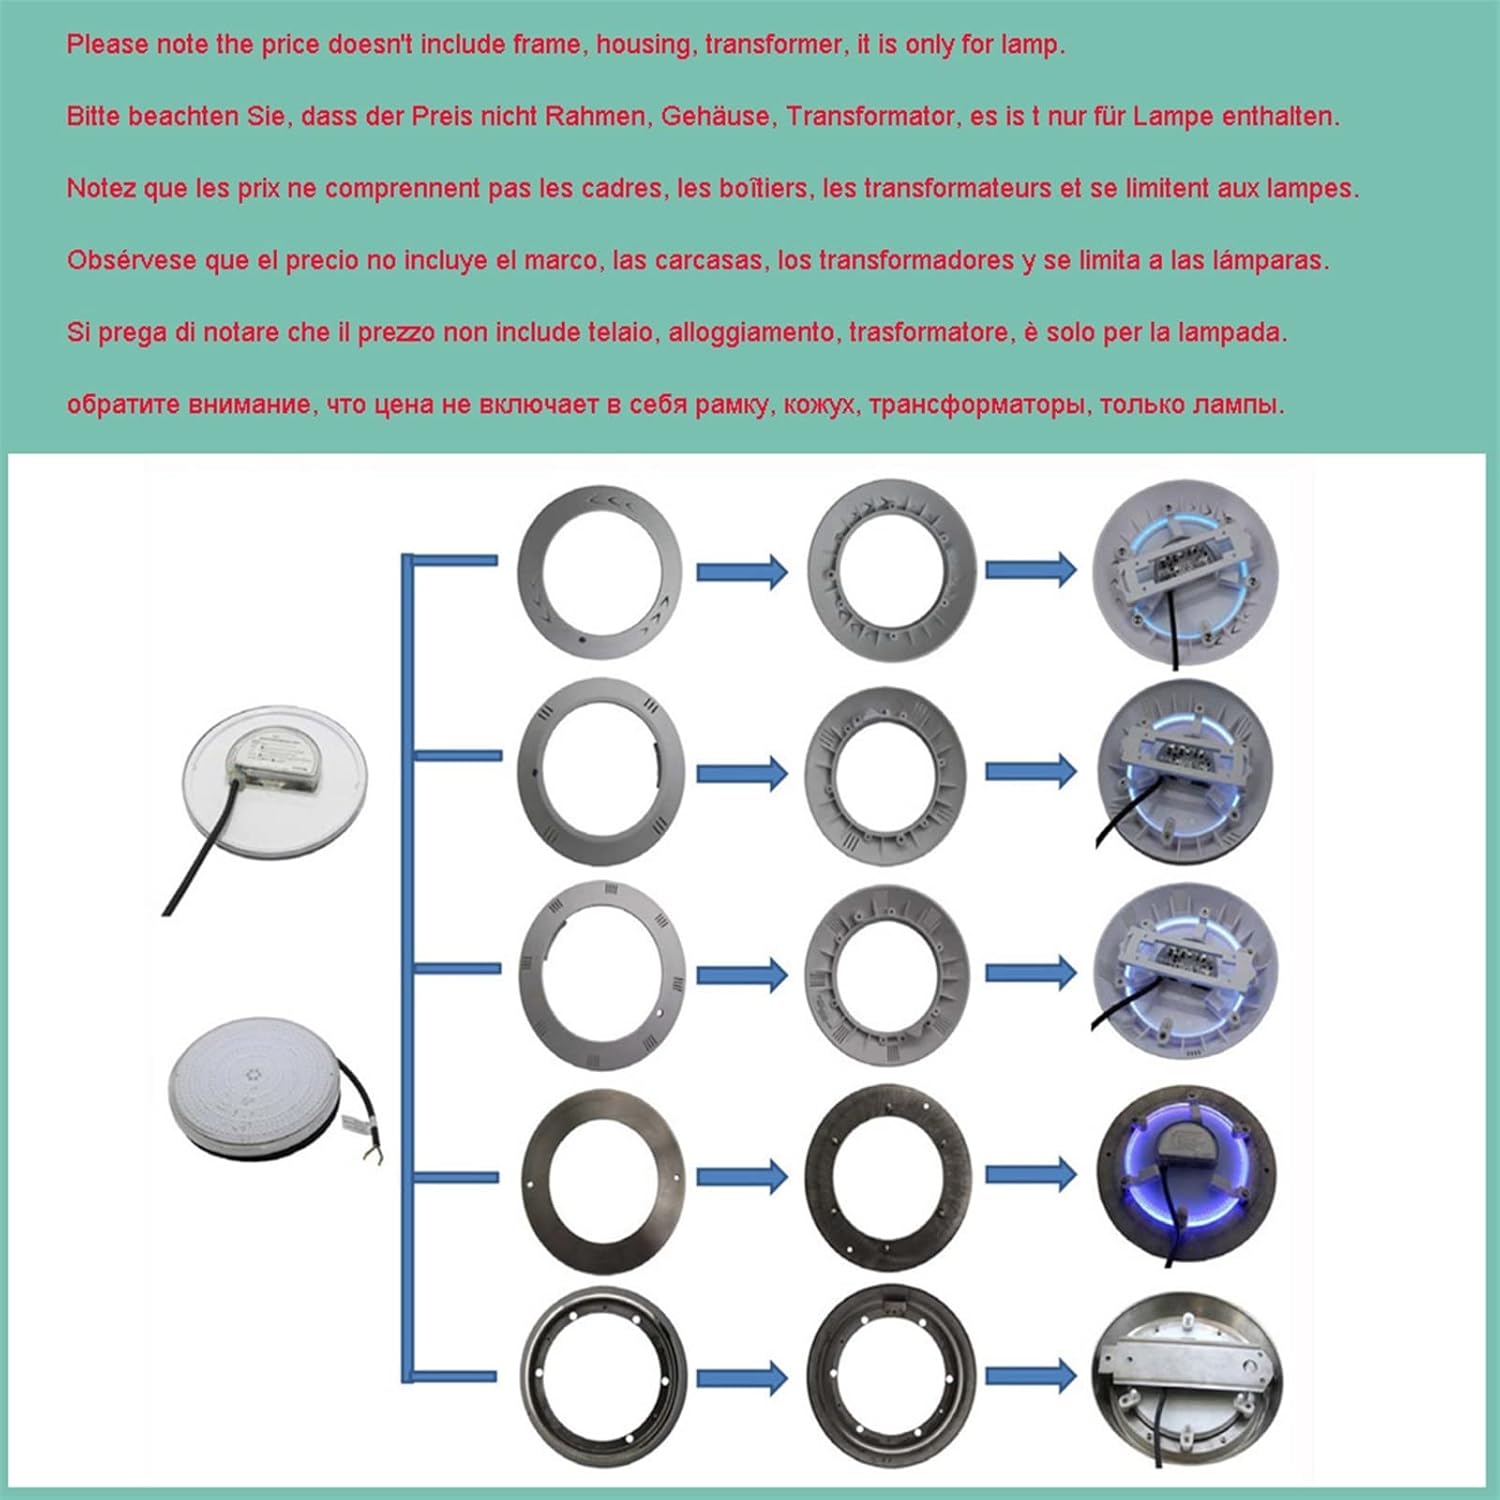
Figure 4: Diagram illustrating various installation methods and components for the pool light. This image shows different types of frames and housings that can be used to mount the LED pool light, demonstrating its adaptability to various pool light fixtures.
Note: The product price typically includes only the lamp. Frame, housing, and transformer are usually sold separately unless specified otherwise.
4.3 Wall Mounted Installation
The lamp can be installed as a flat, wall-mounted fixture if suitable accessories (frame/housing) are purchased separately. Refer to the accessory manufacturer's instructions for specific mounting procedures.
5. Operating Instructions
Once properly installed and connected to a 12V AC/DC power source via a transformer, the pool light will illuminate when power is supplied.
5.1 Color Versions and Power Supply
- Warm White / Pure White / RGB with Remote: These versions can operate with both AC12V and DC12V power supplies.
- RGB No Remote: This version only works with a DC12V power supply and requires an external controller for color changes.
5.2 RGB Color Modes (for RGB versions)
The RGB color versions offer a range of colors and dynamic modes:
- Static Colors: Red, Green, Blue, Cyan, Purple, Yellow, White.
- Dynamic Modes: Various color-changing sequences.

Figure 5: Examples of colors displayed by the RGB pool light. This image shows nine different colors (Red, Green, Blue, Yellow, Cyan, Purple, RGB=White, Pure White, Warm White) that the RGB version of the light can produce, demonstrating its versatility.
5.3 Remote Control Operation (for RGB with remote version)
The RGB version with remote control uses an RF (Radio Frequency) remote, offering a longer control range and easier operation compared to IR remotes.
- Battery: The remote requires a 12V, 23A/27A battery (not included).
- Multiple Lights: One remote can control two or more lamps. For synchronized color display, it is recommended to connect them to the same AC12V transformer for consistent operation.

Figure 6: Layout of the remote control for the RGB pool light. This image displays the various buttons and functions of the remote, including power on/off, brightness adjustment, color changing speed, and direct color selection buttons (Red, Green, Blue, Yellow, Cyan, Purple, White), as well as mode selection for gradual and jump changes.
Remote Control Functions: The remote typically includes buttons for power on/off, brightness adjustment, color changing speed, direct color selection (Red, Green, Blue, Yellow, Cyan, Purple, White), and various dynamic modes (e.g., RGB Gradual, 7 Colors Gradual, RGB Jump).
6. Maintenance
- Cleaning: Periodically clean the surface of the light to remove algae, mineral deposits, or debris that may obstruct light output. Use a soft brush or cloth and mild pool-safe cleaning solutions. Avoid abrasive cleaners.
- Inspection: Regularly inspect the power cable and connections for any signs of wear, damage, or corrosion. Ensure all seals are intact.
- Water Level: Ensure the light remains fully submerged during operation to prevent overheating.
- Professional Check: For any complex issues or electrical concerns, consult a qualified pool technician or electrician.
7. Troubleshooting
- Light Not Turning On:
- Check the power supply to the transformer.
- Verify the transformer is functioning and providing 12V output.
- Inspect the wiring connections for looseness or corrosion.
- Ensure the lamp is correctly connected to the 12V AC/DC output.
- Incorrect Color/Mode (RGB versions):
- For RGB with remote: Check the remote control battery. Ensure the remote is within range and pointed towards the light (if IR) or generally in the area (if RF).
- For RGB no remote: Verify the external controller is functioning correctly and set to the desired mode.
- If multiple lights are connected to different transformers, they may not synchronize. Connect them to a single AC12V transformer for synchronized operation.
- Dim Light Output:
- Clean the light surface to remove any buildup.
- Ensure the transformer is adequately sized for the total wattage of connected lights.
- Flickering Light:
- Check for loose wiring connections.
- Ensure stable 12V AC/DC power supply from the transformer.
If troubleshooting steps do not resolve the issue, contact customer support.
8. Specifications
| Parameter | Value |
|---|---|
| Input Voltage | 12V AC/DC |
| Light Source | SMD 2835 LED |
| Wattage Options | 18W / 24W / 30W / 35W / 42W |
| Lumen Output (approx.) | 18W=1746lm, 24W=2328lm, 30W=2910lm, 35W=3395lm, 42W=4074lm |
| Lamp Body Material | Plastic |
| Dimensions | D176mm x H43mm (Diameter 176mm, Height 43mm) |
| Waterproof Grade | IP68 (Can be put into water directly) |
| Power Cable Length | 1.5 meters |
| Life Span | 50,000 hours |
| Color Versions | Warm White (2700-3500K), Pure White (5500-6300K), RGB with remote, RGB no remote |
| Remote Battery (for RGB with remote) | 12V, 23A/27A (not included) |
| Product Dimensions (packaging) | 1.18 x 0.79 x 0.39 inches (Note: This likely refers to packaging or a small component, not the light itself.) |
| Item Weight | 1.76 ounces |
| Manufacturer | DWFSKZKV |
| Model Number | DWFSKZKV |

Figure 7: Dimensional drawing of the LED pool light. This technical drawing provides precise measurements of the light, including its diameter (176mm), inner diameter (167mm), and height (42.3mm, with a 20.3mm visible portion and 80.8mm base width), crucial for installation planning.
9. Warranty and Support
The DWFSKZKV LED Astral Pool Lights come with a 2-year warranty, ensuring quality and performance under normal use conditions. This warranty covers manufacturing defects and material flaws.
For technical assistance, warranty claims, or any questions regarding your product, please contact your retailer or the manufacturer directly. When contacting support, please have your product model number (DWFSKZKV) and purchase information available.
For further information, you may visit the DWFSKZKV brand page on Amazon.
Ask a question about this manual
Ask about setup, troubleshooting, compatibility, parts, safety, or missing instructions. Manuals+ will review the question and use this page’s manual context to help answer it.