1. Introduction
Welcome to the Genmitsu L8 Laser Engrave + MD18 Rotary Roller user manual. This guide provides essential information for the safe and effective operation of your new laser engraving and cutting machine. The Genmitsu L8 is a high-performance 20W laser cutter featuring a built-in acrylic enclosure, air assist pump, honeycomb table, and camera, designed for precision and versatility. The included MD18 Rotary Roller expands its capabilities to engrave cylindrical objects.
Please read this manual thoroughly before operating the device to ensure proper setup, safe usage, and optimal performance. Keep this manual for future reference.
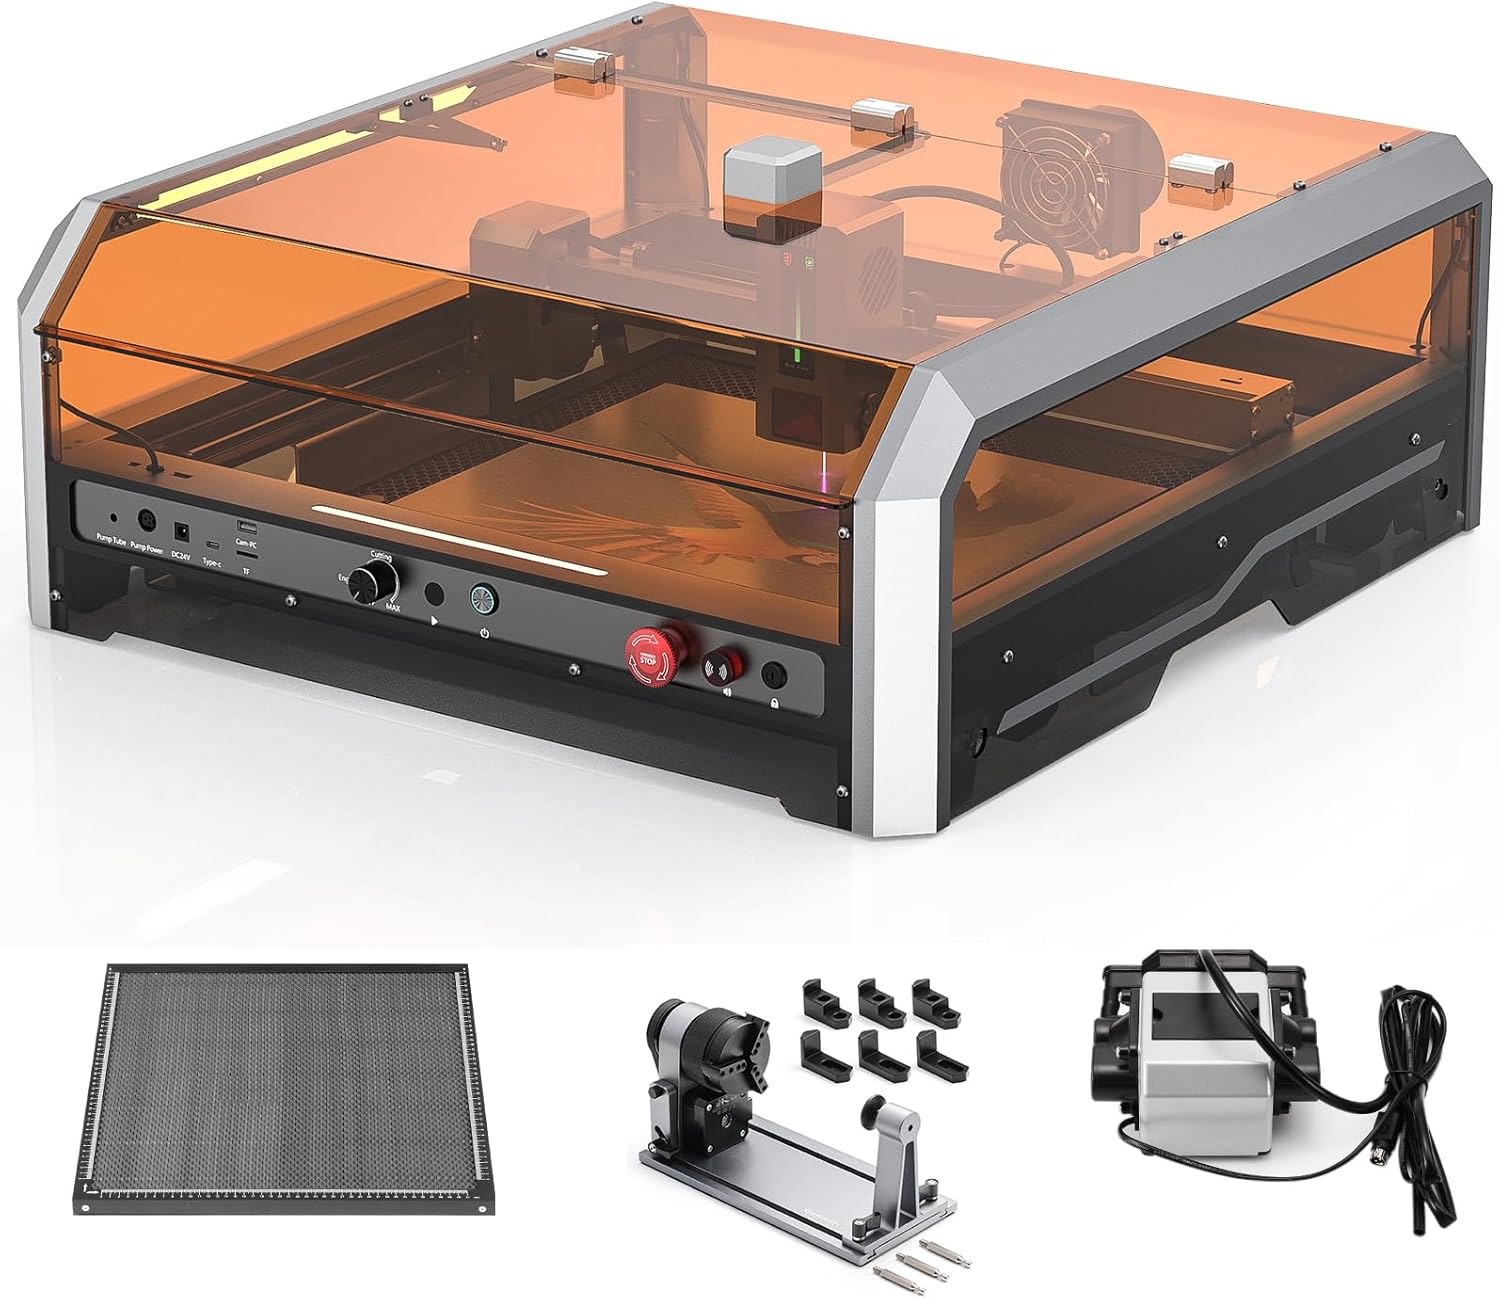
Figure 1.1: Genmitsu L8 Laser Engraver with included MD18 Rotary Roller, Air Assist Pump, and Honeycomb Table.
2. Safety Information
Your safety is paramount. The Genmitsu L8 is a Class 1 laser product, designed with multiple safety features. However, improper use can lead to serious injury. Always adhere to the following safety guidelines:
- Eye Protection: Although the enclosure provides protection, never look directly at the laser beam or its reflection. Always wear appropriate laser safety glasses when the enclosure is open or if there is any risk of laser exposure.
- Ventilation: Ensure adequate ventilation in your workspace. Laser engraving and cutting can produce fumes and particles that may be harmful if inhaled. The built-in vent and air assist system help, but additional room ventilation is recommended.
- Fire Hazard: Laser processing can ignite flammable materials. Never leave the machine unattended during operation. Keep a fire extinguisher nearby.
- Material Compatibility: Only engrave or cut materials approved for laser processing. Avoid materials that produce toxic fumes (e.g., PVC, vinyl) or are highly reflective.
- Emergency Stop: Familiarize yourself with the location and function of the emergency stop button. In case of an emergency, press it immediately.
- Enclosure Safety: The machine incorporates a door sensor that halts operation when the cover is open. Do not bypass this safety feature.
- Child Safety Lock: Utilize the child safety lock to prevent unauthorized operation.
- Stable Surface: Place the machine on a stable, level, and non-flammable surface.
- Power Supply: Use only the provided power adapter and ensure it is connected to a grounded outlet.

Figure 2.1: The Genmitsu L8 is Laser Safety Class 1 Certified, emphasizing user safety.

Figure 2.2: Overview of the Genmitsu L8's comprehensive safety features, including flame monitoring, active position protection, security lock, and emergency stop button.
3. Product Overview and Features
The Genmitsu L8 is an advanced laser engraving and cutting machine designed for precision and ease of use. Key features include:
- 20W Optical Power Output: Capable of cutting through materials like 12mm pinewood and 8mm black acrylic in a single pass.
- High Engraving Speed: Achieves up to 40,000 mm/min for efficient project completion.
- Built-in Acrylic Enclosure: Provides 360° anti-laser protection and allows for easy monitoring of your work.
- Smart Air Assist System: Improves cutting performance and reduces burn marks.
- Integrated Honeycomb Table: A 481 x 473 mm built-in honeycomb table ensures optimal airflow and support for materials.
- Built-in Camera: LightBurn-compatible for real-time preview and easy project positioning.
- MD18 Rotary Roller: Included for engraving cylindrical objects with adjustable angle (0-30 degrees) and various jaw types.
- Adjustable Z-axis: Built-in height adjustment provides up to 80mm vertical space for diverse material needs.
- Multiple Safety Features: Door sensor, tilted automatic stop, active flame monitor, position protection limit switches, emergency stop, and child safety lock.
- Pre-assembled Components: Most components come pre-assembled for quick setup.

Figure 3.1: Key features of the Genmitsu L8, highlighting its laser power, speed, and integrated components.

Figure 3.2: Demonstrates the 20W laser's cutting capability on various materials in a single pass.

Figure 3.3: Speed comparison of the Genmitsu L8, highlighting its efficiency at 40,000 mm/min.

Figure 3.4: The MD18 Rotary Roller offers adjustable rotation angles for versatile engraving.
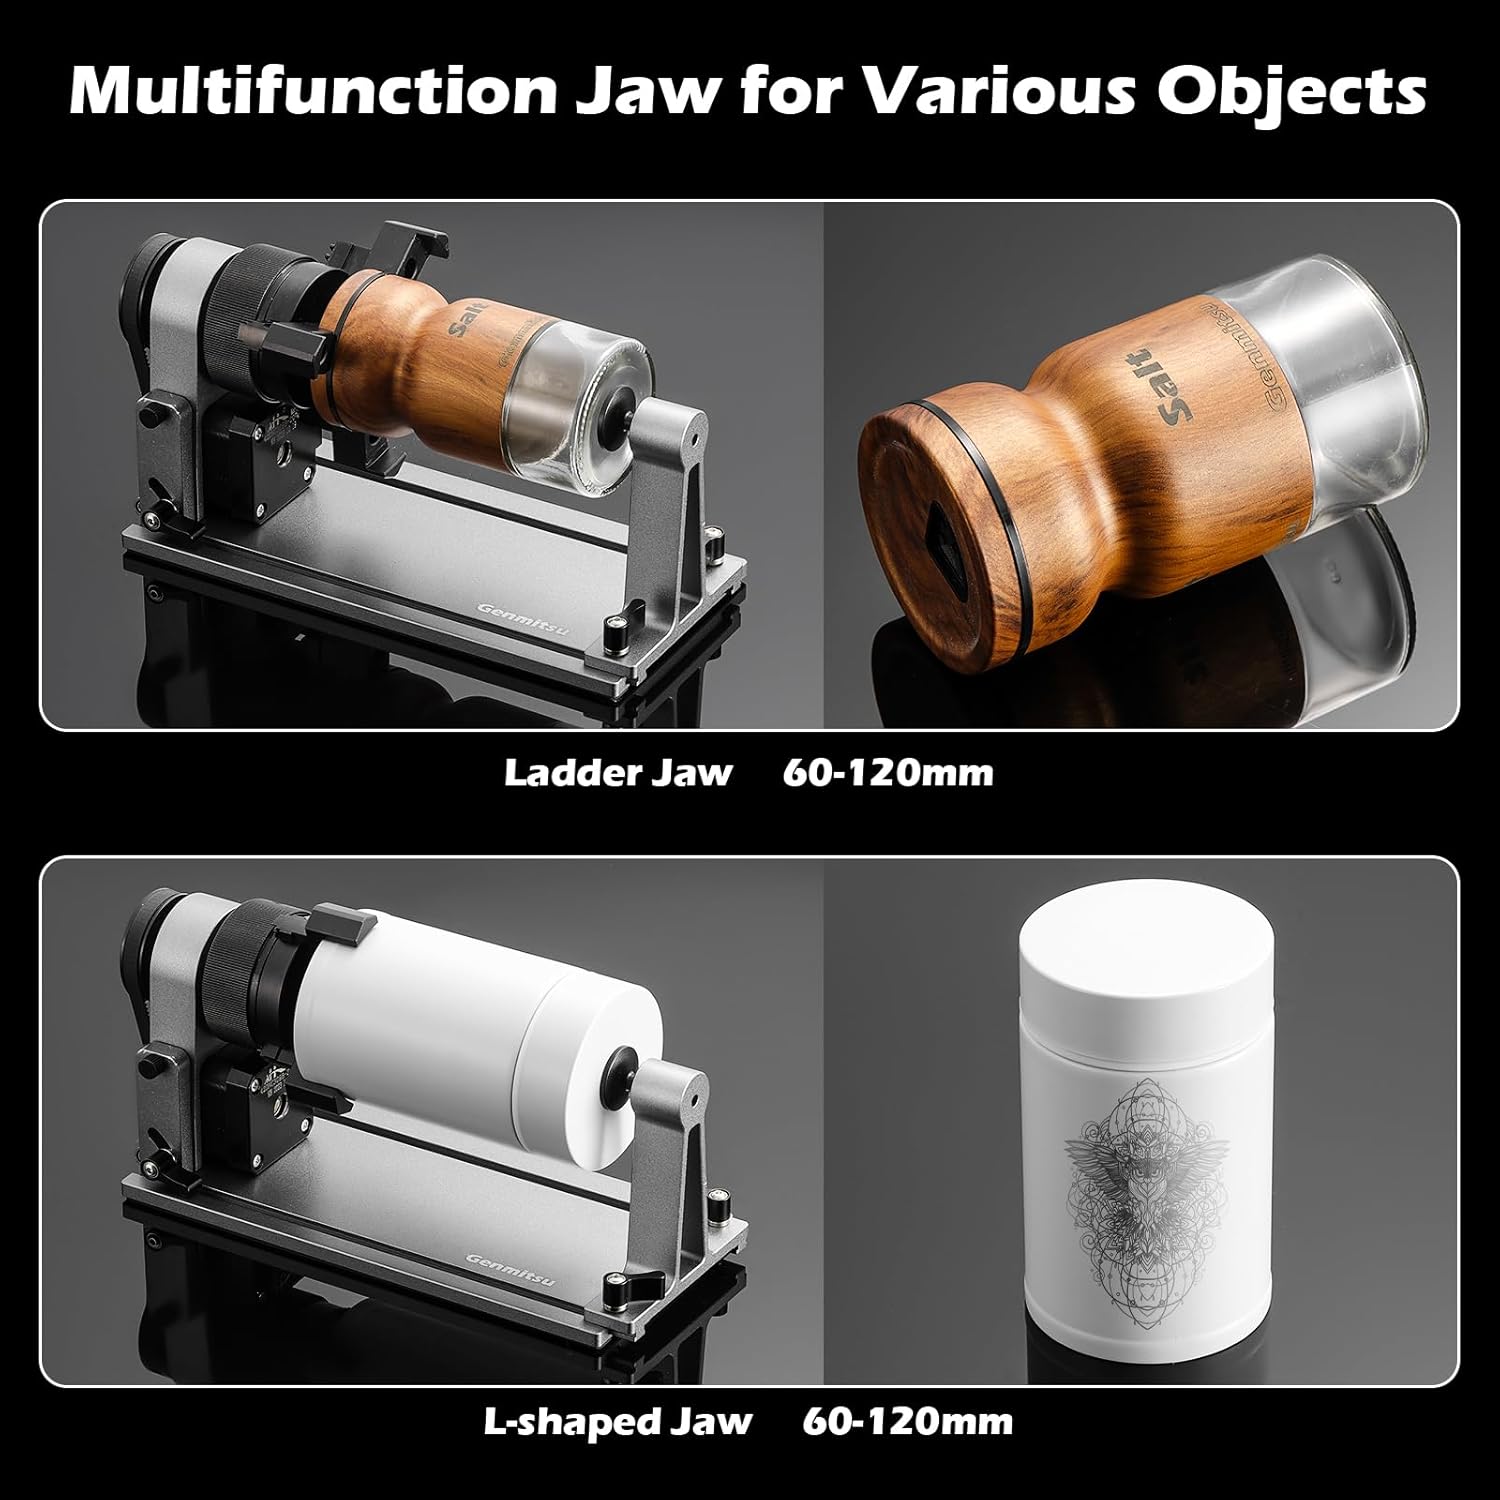
Figure 3.5: The MD18 Rotary Roller features various jaw types for different object shapes and sizes.

Figure 3.6: The MD18 Rotary Roller's multifunction jaw accommodates a wide range of object diameters.
4. Setup Guide
The Genmitsu L8 comes largely pre-assembled, simplifying the setup process. Follow these steps to get your machine ready for operation:
- Unpacking: Carefully remove all components from the packaging. Verify that all parts listed in the packing list are present.
- Placement: Place the Genmitsu L8 on a sturdy, level, and non-flammable surface in a well-ventilated area. Ensure there is enough space around the machine for safe operation and access.
- Connect Air Assist Pump: Connect the air assist pump to the designated port on the machine and plug it into a power source.
- Connect Power: Connect the power adapter to the machine's power input and then plug it into a grounded electrical outlet.
- Connect to Computer: Use the provided USB cable to connect the machine to your computer.
- Software Installation: Install the recommended laser control software (e.g., LightBurn) on your computer. Follow the software's installation instructions.
- MD18 Rotary Roller Setup (Optional): If using the MD18 Rotary Roller, connect it to the machine's rotary axis port. Refer to the MD18's specific instructions for mounting and adjusting the jaws for your object.
- Initial Focus Adjustment: The laser module features three preset focal lengths for effortless focusing. Select the appropriate focal length based on your material's thickness.

Figure 4.1: The Genmitsu L8 comes largely pre-assembled for quick and easy setup.

Figure 4.2: The laser module offers three preset focal lengths for easy material focusing.

Figure 4.3: The built-in adjustable Z-axis provides ample vertical space for various materials and the rotary roller.
5. Operating Instructions
Once the machine is set up and software is installed, you can begin your engraving or cutting projects. Always ensure the enclosure door is closed during operation.
- Prepare Material: Place your material securely on the honeycomb table. For cylindrical objects, mount them on the MD18 Rotary Roller.
- Software Setup: Open your laser control software (e.g., LightBurn). Import or create your design.
- Positioning: Use the built-in camera for real-time preview and precise positioning of your design on the material. Adjust the material or design as needed.
- Settings Adjustment: Configure laser power, speed, and passes based on your material type and desired outcome. Refer to material testing guides for optimal settings.
- Start Operation: Ensure the enclosure door is closed. Initiate the engraving or cutting process from the software.
- Monitoring: Continuously monitor the machine during operation. The transparent acrylic enclosure allows for easy observation. The flame monitor will alert you to any potential fire hazards.
- Completion: Once the process is complete, wait for the laser to stop and the machine to cool down before opening the enclosure and removing your material.

Figure 5.1: The built-in camera facilitates precise real-time preview and positioning of designs.

Figure 5.2: The Genmitsu L8 is capable of producing vibrant, multi-color engravings on various materials.
6. Maintenance
Regular maintenance ensures the longevity and optimal performance of your Genmitsu L8. Perform these tasks periodically:
- Clean Laser Lens: Regularly inspect and clean the laser lens using a lint-free cloth and lens cleaning solution. A dirty lens can reduce laser power and engraving quality.
- Clean Honeycomb Table: Remove debris and residue from the honeycomb table. A dirty honeycomb can affect airflow and cause back-reflection.
- Clean Enclosure: Wipe down the acrylic enclosure with a soft cloth and mild cleaner to maintain visibility.
- Lubricate Moving Parts: Periodically apply a small amount of lubricant to the guide rails and lead screws to ensure smooth movement.
- Check Air Assist Nozzle: Ensure the air assist nozzle is clear of any blockages.
- Firmware Updates: Check the Genmitsu website for any available firmware updates for your machine.

Figure 6.1: The integrated Smart Air Assist and Honeycomb Table require regular cleaning for optimal performance.
Figure 6.2: Proper focus adjustment and lens cleanliness are crucial for maintaining engraving quality.
7. Troubleshooting
This section addresses common issues you might encounter. If you experience problems not listed here, please contact Genmitsu support.
| Problem | Possible Cause | Solution |
|---|---|---|
| Laser not firing or weak output | Dirty laser lens; incorrect focus; low power setting; loose cable connection. | Clean the laser lens; adjust focus; increase power setting in software; check all cable connections. |
| Machine not connecting to computer | USB cable issue; driver not installed; incorrect COM port selected in software. | Try a different USB port/cable; install necessary drivers; select the correct COM port in your software. |
| Engraving/cutting quality is poor | Incorrect speed/power settings; material not flat; dirty lens; material not suitable. | Adjust settings; ensure material is flat and secured; clean lens; verify material compatibility. |
| Machine stops mid-operation | Enclosure door opened; emergency stop pressed; power interruption; software error. | Ensure door is closed; check emergency stop button; verify power supply; restart software and machine. |
| Rotary roller not rotating correctly | Incorrect connection; software settings for rotary axis not configured; object not properly secured. | Check rotary roller cable connection; configure rotary axis settings in software; ensure object is firmly mounted. |
8. Specifications
| Feature | Detail |
|---|---|
| Model | Genmitsu L8 Laser Engrave + MD18 Rotary Roller |
| Laser Power Output | 20W (20000mW) Optical Power |
| Engraving Speed | Max. 40,000 mm/min |
| Engraving Accuracy | Less than 0.01mm |
| Working Area | Built-in Honeycomb Table (481 x 473 mm) |
| Laser Safety Class | Class 1 Certified |
| Enclosure | Built-in Acrylic Protective Cover |
| Air Assist | Integrated Smart Air Assist Pump |
| Camera | Built-in, LightBurn-compatible |
| Rotary Roller (MD18) | Adjustable angle 0-30 degrees, various jaw types |
| Z-axis Adjustment | Built-in, up to 80mm vertical space |
| Connectivity | USB |
| Date First Available | March 29, 2024 |
9. Warranty and Support
Genmitsu products are backed by a manufacturer's warranty. For specific warranty terms and conditions, please refer to the warranty card included with your product or visit the official Genmitsu website.
For technical support, troubleshooting assistance, or spare parts, please contact Genmitsu customer service through their official website or the contact information provided in your product packaging. When contacting support, please have your product model number and purchase date ready.
Online Resources:
- Genmitsu Official Store on Amazon
- Visit the Genmitsu official website for software downloads, FAQs, and community forums.


