1. Introduction
This manual provides detailed instructions for the installation, operation, and maintenance of your EKAT Android 13 Touch Screen Car Radio, designed specifically for BMW X3 E83 models from 2004 to 2012. This unit integrates advanced features such as Android 13 OS, wired/wireless CarPlay and Android Auto, Bluetooth, Wi-Fi, GPS navigation, and a 9-inch 1080P touch screen display.
Ensure you read this manual thoroughly before installation and use to maximize your product experience and ensure proper functionality.
2. Product Overview and Features
The EKAT Car Radio is an advanced multimedia system offering a range of functionalities to enhance your driving experience.
- Operating System: Android 13
- Memory & Storage: 2GB RAM + 64GB ROM
- Display: 9-inch 2.5D Tempered Glass 1080P Touch Screen
- Smartphone Integration: Wired/Wireless CarPlay & Android Auto, Mirror Link
- Connectivity: Bluetooth (hands-free calls, music playback), Wi-Fi & Hotspot
- Navigation: Integrated GPS for accurate directions
- Audio: EQ Audio settings for customized sound
- Control: Steering Wheel Control (SWC) compatibility
- Camera Support: AHD Backup Camera input
- Radio: FM/AM Radio with real-time traffic and news broadcasts

Image: Overview of the Android system, showing 2GB RAM + 64GB storage and Wi-Fi/Hotspot connectivity.

Image: Demonstrates wired and wireless CarPlay/Android Auto functionality, including music, maps, and hands-free calls.
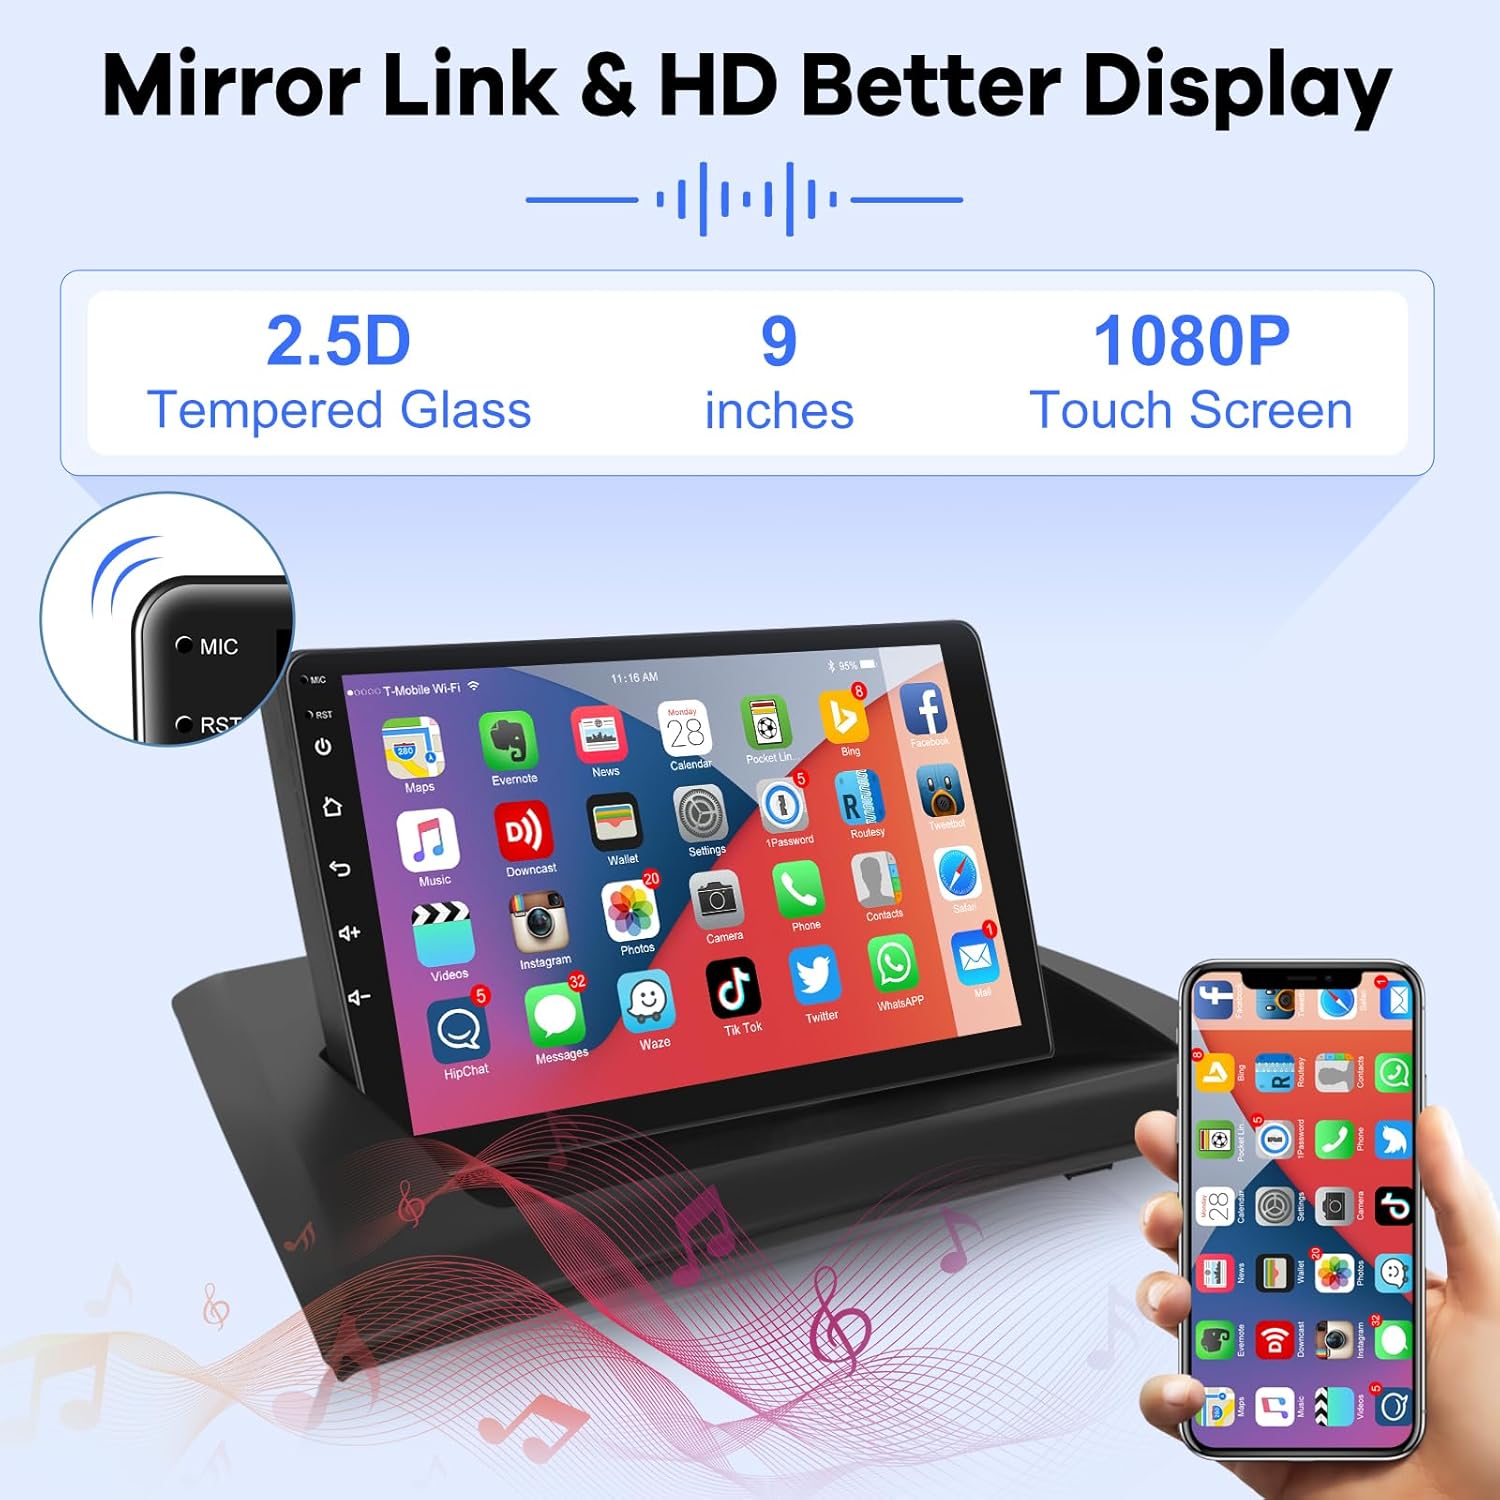
Image: Illustrates the Mirror Link feature and the high-definition 9-inch 1080P touch screen.
3. Package Contents
Verify that all items listed below are included in your package:

Image: Visual representation of the complete package contents.
- EKAT Car Radio Unit
- Canbus Decoder
- RCA Cable Set
- GPS Antenna
- 2x USB Cables
- External Microphone (MIC)
- AHD Camera (if included in your specific package)
- Camera Input Cable
- Installation Tool Kit
- Power Cable Harness
4. Installation Guide
Professional installation is recommended. Ensure the vehicle's power is disconnected before beginning installation. Refer to the following steps and videos for guidance.
4.1. Pre-Installation Check
Before starting, compare the shape of your car's center console with the installation photos to confirm compatibility with BMW X3 E83 models from 2004-2012.

Image: Comparison of the car's dashboard before and after the EKAT Car Radio installation.
4.2. Factory Radio Removal
Carefully remove the existing factory radio and associated trim pieces. Use appropriate tools to avoid damage.
Video: Demonstrates the process of removing the factory radio from a BMW dashboard. Note: This video is for BMW 3 and 5 Series, but the general removal process may be similar for X3 E83.
4.3. Harness Connection
Connect the provided wiring harness to the car's existing wiring and the new head unit. Ensure all connections are secure.
Note: If your car has a fiber optic cable (green color), please plug it into the power harness as indicated in the video.
Video: Illustrates the steps for connecting the wiring harness to the car radio and vehicle's electrical system. Note: This video is for BMW 3 and 5 Series, but the general harness connection process may be similar for X3 E83.
4.4. GPS and 4G Antenna Installation
Connect the GPS and optional 4G antennas to the head unit. Position them in a location that provides optimal signal reception, such as on the dashboard or under the windshield.
Video: Shows how to connect and position the GPS and 4G antennas. Note: This video is for BMW 3 and 5 Series, but the general antenna installation process may be similar for X3 E83.
4.5. Screen Resolution Settings
After initial power-up, you may need to adjust the screen resolution settings to match your vehicle's display. Access the settings menu on the head unit to configure the optimal resolution.
Video: Guides through the process of adjusting screen resolution settings on the head unit. Note: This video is for BMW 3 and 5 Series, but the general screen resolution settings process may be similar for X3 E83.
4.6. AUX Sound Settings
To ensure proper audio output, configure the AUX sound settings in your car's original system. This typically involves selecting "External audio source" or "AUX" from the vehicle's audio menu.
Video: Demonstrates how to adjust AUX sound settings in the car's original system. Note: This video is for BMW 3 and 5 Series, but the general AUX sound settings process may be similar for X3 E83.
4.7. Reinstall Panel
Once all connections are made and tested, carefully reinstall the dashboard panels and trim pieces. Ensure all screws are tightened and components are securely in place.
Video: Shows the process of reinstalling the car's dashboard panels after the head unit installation. Note: This video is for BMW 3 and 5 Series, but the general panel reinstallation process may be similar for X3 E83.
4.8. Aftermarket Backup Camera Installation (Optional)
If you are installing an aftermarket backup camera, connect its video and power cables to the designated inputs on the head unit and vehicle's reverse light circuit. Ensure the camera type is correctly selected in the unit's settings.

Image: Wiring diagram for connecting the backup camera.
Video: Details the optional installation process for an aftermarket backup camera. Note: This video is for BMW 3 and 5 Series, but the general backup camera installation process may be similar for X3 E83.

Image: Shows the AHD Backup Camera in action, along with other features.
Video: Demonstrates how to adjust backup camera screen resolution settings. Note: This video is for BMW 3 and 5 Series, but the general backup camera screen resolution settings process may be similar for X3 E83.
5. Operating Instructions
This section covers the basic operation of your EKAT Car Radio.
5.1. Basic Operations and User Interface
The unit features an intuitive Android 13 interface. Navigate through apps and settings using the touchscreen. You can customize the desktop themes and wallpapers.
Video: Provides a general overview of the M200S Series operating system, including navigation, app access, and basic functions like radio, music, and video playback.
5.2. CarPlay and Android Auto
Connect your smartphone via wired or wireless connection to access CarPlay or Android Auto. This allows for voice control of navigation, music, calls, and messages directly from the head unit.
Image: Demonstrates wired and wireless CarPlay/Android Auto functionality, including music, maps, and hands-free calls.
5.3. Bluetooth Functionality
Pair your smartphone via Bluetooth for hands-free calling and wireless music streaming. Access your phonebook and dial directly from the head unit.
Image: Highlights Bluetooth connectivity for hands-free calls.
5.4. GPS Navigation
Utilize the integrated GPS for accurate navigation. You can download offline maps from the Play Store for use without an internet connection.

Image: Shows the GPS navigation interface with map display.
5.5. Radio (FM/AM)
Tune into your favorite FM/AM radio stations. The unit supports RDS for enhanced radio information. Network radio is also available for a wider selection of stations.
Image: Illustrates the FM RDS Radio interface.
5.6. Media Playback (Music & Video)
Play music and videos from USB drives or other connected storage devices. The unit supports 1080P video format and Picture-in-Picture (PIP) functionality.
Video: Demonstrates music and video playback, including support for Picture-in-Picture (PIP).
5.7. Steering Wheel Control (SWC)
After connecting the Canbus correctly, you can configure the steering wheel controls to manage functions like calls, volume, and track changes. The procedure involves accessing 'Settings' -> 'Factory Setup' (password 1234) -> 'Car Settings', then choosing 'OuDi' and your car's year and model.

Image: Instructions for setting up steering wheel controls.
5.8. EQ Audio Settings
Customize your audio experience with the built-in equalizer (EQ). Adjust frequency bands, balance, and other sound parameters to achieve your preferred sound quality.
Video: Demonstrates how to access and adjust the equalizer (EQ) settings for audio customization.

Image: Illustrates the EQ audio settings for a concert-like listening experience.
6. Troubleshooting
If you encounter any issues with your EKAT Car Radio, refer to the following common troubleshooting steps:
- No Power: Check all power connections and fuses. Ensure the ignition is on.
- No Sound: Verify AUX input is selected on your car's original system. Check speaker connections and volume levels.
- Screen Not Responding: Try restarting the unit. If unresponsive, perform a soft reset (refer to device settings for reset options).
- GPS Signal Issues: Ensure the GPS antenna is correctly installed and has a clear view of the sky.
- CarPlay/Android Auto Connection Problems: Check USB cable connection (for wired) or Bluetooth/Wi-Fi connection (for wireless). Ensure your phone's software is up to date.
- Steering Wheel Controls Not Working: Recheck Canbus connections and ensure the SWC settings are correctly configured in the unit's factory settings (password 1234).
- Backup Camera Not Displaying: Verify camera connections and ensure the correct camera type (e.g., AHD) is selected in the unit's settings.
For persistent issues, please contact customer support.
7. Specifications
| Feature | Specification |
|---|---|
| Item Weight | 3.94 pounds |
| Package Dimensions | 13.23 x 9.92 x 5 inches |
| Display Size | 9 Inches |
| Resolution | 1920 x 1080 |
| Brand | EKAT |
| Vehicle Service Type | Car |
| Special Feature | Bluetooth |
| Connectivity Technology | Bluetooth |
| Map Type | Worldwide |
| Audio Output Mode | Stereo |
| Mounting Type | Dashboard Mount |
8. Warranty and Support
Your EKAT Car Radio comes with a 2-year warranty. We offer 30 days Money-Back Service and 24 months after-sales support.
For technical assistance, installation queries, or operational problems, please contact our customer service team via email. We are committed to helping you resolve any issues.

Image: Details of the warranty and support services provided.


