
1. Product Overview
The hygger Automatic Fish Pond Feeder HG-967 is designed to provide consistent and scheduled feeding for pond fish, including Koi. With a large 5.5-liter capacity, it can store up to 2.3 kg of fish food, ensuring your fish are fed even when you are away for extended periods. The feeder features an intelligent LCD display for easy programming of feeding times and quantities, and its waterproof design makes it suitable for outdoor pond environments.

Image 1.1: The hygger Automatic Fish Pond Feeder dispensing food into a pond.
Key features include:
- Large 5.5-liter (2.3 kg) food capacity.
- Programmable up to 6 feeds per day.
- Adjustable feeding quantity (up to 9 portions per feed, each lasting 8 seconds).
- Two interchangeable feed outlets for different food sizes and quantities.
- Waterproof casing and semi-protective controller for outdoor use.
- Memory function to retain settings during power outages.
- Manual feeding option.

Image 1.2: Overview of the hygger Automatic Fish Pond Feeder with its control panel.
2. Safety Information
Please read and understand all safety instructions before operating this device. Failure to follow these instructions may result in product damage or injury.
- Ensure the power adapter and cord are kept away from water to prevent electrical hazards.
- Do not immerse the controller or power adapter in water. The feeder unit itself is designed for outdoor exposure but the electrical components require protection.
- Always disconnect power before performing any maintenance or cleaning.
- Keep out of reach of children and pets to prevent accidental tampering or injury.
- Use only the provided power adapter. Using an incorrect adapter may damage the device.
- Ensure the feeder is securely installed to prevent it from falling into the pond.
3. Package Contents
Verify that all components are present in the package:

Image 3.1: All components included in the hygger Automatic Fish Pond Feeder kit.
- Feeder Unit (with food container)
- Controller (with LCD display)
- Stand
- Base
- Connecting Tube
- Angle Piece
- Power Cord
- Adapter
- Narrow Feed Outlet (screw stem)
- Wide Feed Outlet (screw stem)
- Mounting Screws and Tools
4. Setup and Installation
Follow these steps to assemble and install your automatic fish pond feeder:
- Assemble the Stand: Attach the stand to the base using the provided screws. Ensure it is stable.
- Attach the Controller: Secure the controller to the stand.
- Connect Feeder Unit: Attach the feeder unit to the angle piece, then connect the angle piece to the connecting tube, and finally to the controller assembly. Ensure all connections are firm.
- Mounting: Position the assembled feeder near your pond. The base can be secured to a stable surface (e.g., wooden deck, concrete slab) using a drill and screwdriver with the provided mounting screws. This ensures the feeder does not tip over.
- Choose Feed Outlet: Select either the narrow or wide feed outlet (screw stem) based on your fish food size and desired dispensing quantity. The narrow outlet dispenses less food per rotation, while the wide outlet dispenses more. Insert the chosen outlet into the feeder's dispensing mechanism.

Image 4.1: Comparison of narrow and wide feed outlets.
- Fill Food Container: Open the snap-on lid of the food container. Fill it with appropriate fish food. The feeder is suitable for 4-10mm pellets or sticks. Avoid using flakes as they may clog the mechanism.
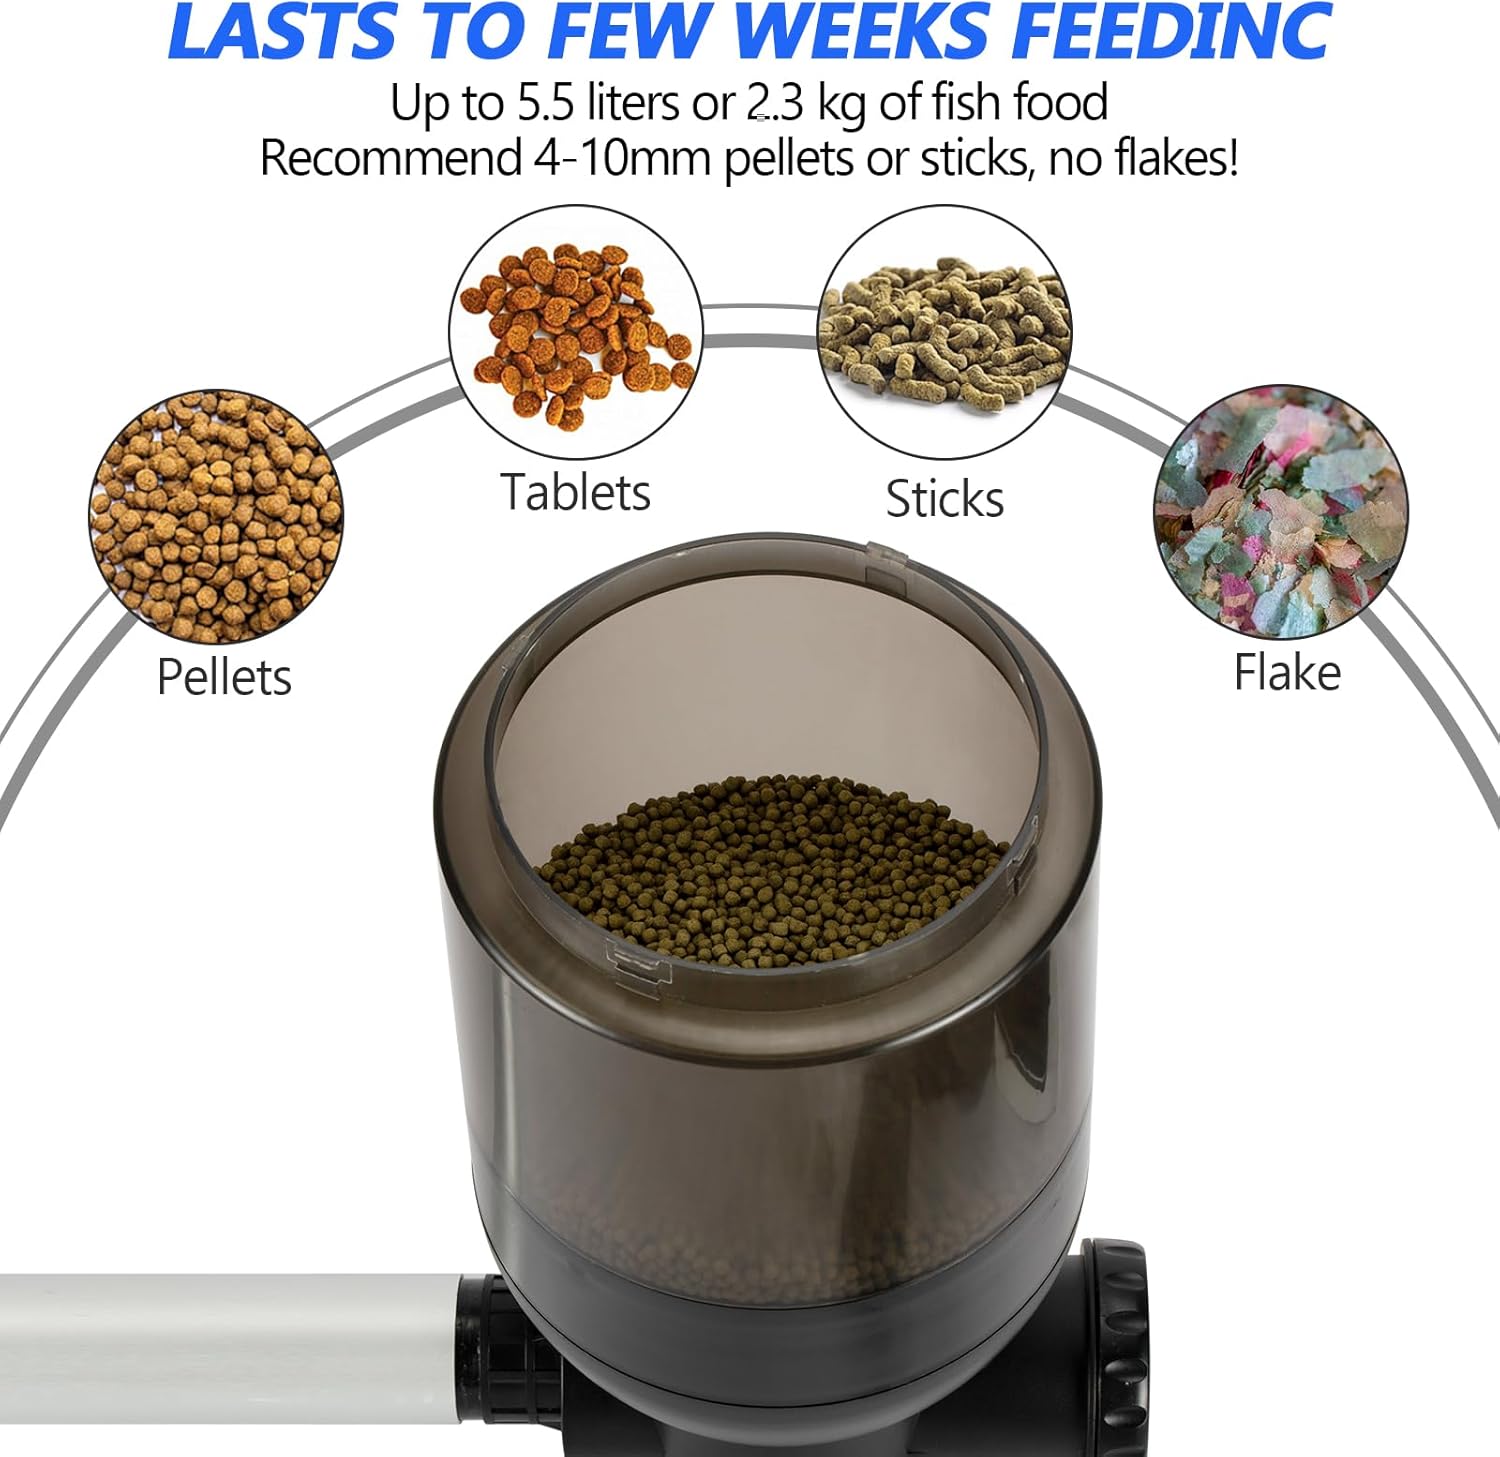
Image 4.2: Recommended food types for the feeder.
- Connect Power: Plug the power cord into the feeder's controller and then connect the adapter to a suitable outdoor power outlet. Ensure the outlet is protected from direct water exposure.
5. Operating Instructions
The LCD display and control buttons allow for easy programming of feeding schedules.
5.1 Setting the Current Time
Refer to the controller's LCD display and buttons. Typically, there will be a 'SET' or 'MODE' button to enter the time setting mode, and 'UP'/'DOWN' or number buttons to adjust hours and minutes. Confirm settings with 'SET' or 'OK'.
5.2 Programming Feeding Schedules
The feeder allows up to 6 feeding times per day. Each feeding time can have up to 9 quantities, with each quantity dispensing for 8 seconds.
- Enter Program Mode: Press the 'PROGRAM' or 'SET' button to cycle through feeding programs (P1, P2, P3, etc.).
- Set Feeding Time: For each program (P1-P6), use the 'UP'/'DOWN' buttons to set the desired hour and minute for feeding.
- Set Feeding Quantity: After setting the time, proceed to set the quantity. Use 'UP'/'DOWN' buttons to select the number of dispensing cycles (1-9). Each cycle rotates the screw stem for 8 seconds.
- Confirm and Save: Press 'SET' or 'OK' to confirm each setting and move to the next program or exit programming mode.
5.3 Manual Feeding
To dispense food manually, press the 'MANUAL' or 'FEED' button. The feeder will dispense one portion of food (8 seconds rotation). You can press it multiple times for additional portions.
5.4 Memory Function
The feeder is equipped with a memory function. In the event of a power outage, all programmed settings will be saved. When power is restored, the device will resume operation according to the last saved schedule.
6. Maintenance
Regular maintenance ensures the longevity and proper functioning of your feeder.
- Cleaning the Food Container: Periodically empty and clean the food container to prevent mold or bacterial growth. Use a damp cloth and mild detergent if necessary, then rinse thoroughly and ensure it is completely dry before refilling.
- Cleaning the Dispensing Mechanism: Check the dispensing screw stem and outlet for any food blockages. Use a small brush to clear any debris.
- Keeping Food Dry: The feeder's thick lid is designed to keep food dry. Always ensure the lid is securely closed after refilling. Avoid exposing the feeder to excessive moisture beyond normal rain.
- Power Cord Inspection: Regularly inspect the power cord and adapter for any signs of damage. Replace immediately if damaged.
7. Troubleshooting
If you encounter issues with your hygger Automatic Fish Pond Feeder, refer to the following common problems and solutions:
| Problem | Possible Cause | Solution |
|---|---|---|
| Feeder not dispensing food. |
|
|
| Food getting wet or moldy. |
|
|
| LCD display not working. |
|
|
8. Specifications
| Feature | Detail |
|---|---|
| Model Number | HG-967 |
| Brand | hygger |
| Container Capacity | 5.5 Liters (approx. 2.3 kg of food) |
| Feeding Times | 1 to 6 times per day |
| Feeding Quantity | 1 to 9 portions per feed |
| Each Feeding Portion Duration | Screw rotates for 8 seconds |
| Output Voltage | DC 12V |
| Dimensions (LxWxH) | 56.9 x 17.7 x 62.9 cm |
| Batteries Required | No |
9. Warranty and Support
This product comes with a standard manufacturer's warranty. For specific warranty details, please refer to the warranty card included in your package or contact hygger customer support. If you have any questions, require technical assistance, or need to report a defect, please contact hygger customer service through their official website or the contact information provided with your purchase.


