
1. Introduction
This manual provides essential information for the proper setup, operation, and maintenance of your FLYINSKY R2R AD1865 NOS Tube DAC Audio Converter. This device is designed to convert digital audio signals into high-fidelity analog audio using an R2R architecture with AD1865 chips and a tube output stage, enhancing your home stereo system's sound quality.
2. Safety Information
- Power Supply: Ensure the device is connected to an AC 115V power source. Using an incorrect voltage may damage the unit.
- Ventilation: Do not block ventilation openings. Ensure adequate airflow around the unit to prevent overheating.
- Moisture: Keep the device away from water, moisture, and high humidity environments.
- Handling Tubes: Vacuum tubes can become hot during operation. Allow the unit to cool before handling tubes. Exercise caution when installing or replacing tubes to avoid breakage or injury.
- Servicing: Do not attempt to service the unit yourself. Refer all servicing to qualified personnel. Opening the chassis exposes high voltage components.
- Placement: Place the unit on a stable, level surface away from direct sunlight, heat sources, and strong electromagnetic fields.
3. Package Contents
Verify that all items listed below are included in your package:
- FLYINSKY R2R AD1868R Tube DAC (with 6N11 and 6Z4 tubes pre-installed) x 1
- AC input cable x 1
4. Product Overview
4.1 Front Panel
The front panel features a minimalist design with a single power indicator/button.

Figure 4.1: Front view of the FLYINSKY R2R AD1865 NOS Tube DAC. The front panel displays the brand logo, model name, and a central power indicator light.
4.2 Rear Panel
The rear panel provides all necessary audio input and output connections, along with the power inlet.

Figure 4.2: Rear view of the DAC. It includes a coaxial digital input, stereo left and right RCA analog outputs, and an AC power inlet.
4.3 Internal Components
The internal design features a robust power supply and carefully laid out audio circuitry.

Figure 4.3: Internal view of the DAC, revealing the main circuit board, vacuum tubes (6N11 and 6Z4), and power transformer.
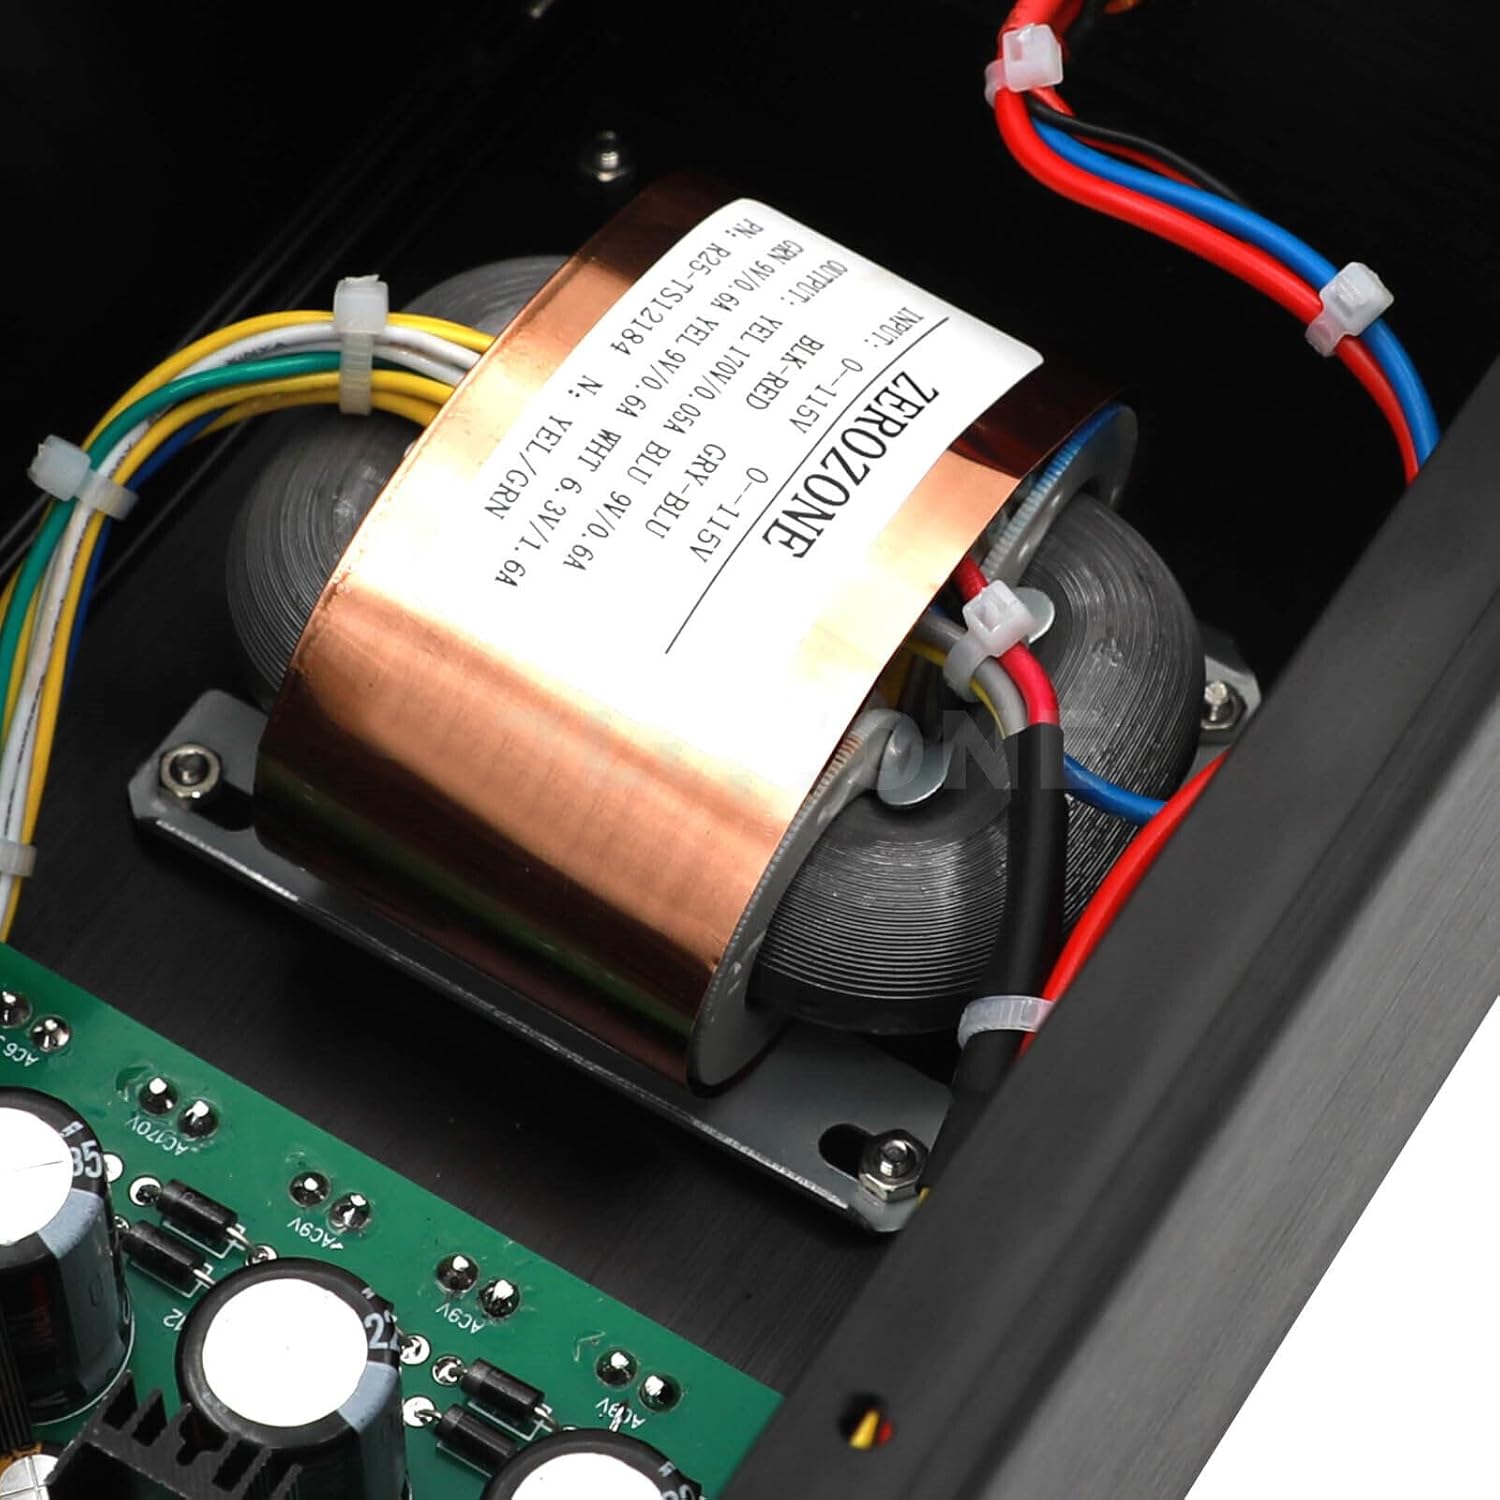
Figure 4.4: Close-up of the internal power transformer, labeled "ZEROZONE", indicating a dedicated power supply for stable operation.

Figure 4.5: Detailed view of the circuit board, highlighting the AD1865 R2R DAC chip and the CS8412 digital receiver chip, which are central to the unit's audio processing.

Figure 4.6: Comprehensive view of the printed circuit board (PCB) with all components, including the 6N11 and 6Z4 vacuum tubes, capacitors, and integrated circuits.
5. Setup
- Unpacking: Carefully remove the DAC from its packaging. Retain the packaging for future transport or storage.
- Tube Seating Verification: Before initial power-on, gently open the top cover (by removing the 6 screws on top and slightly loosening the top 2 screws on the front and rear panels) to verify that the 6N11 and 6Z4 vacuum tubes are securely seated in their sockets. If any tube appears loose, gently press it down until it is firm. Re-secure the top cover.
- Placement: Position the DAC on a stable, flat surface with adequate ventilation.
- Connect Digital Source: Connect your digital audio source (e.g., CD player, streamer) to the COAX input on the rear panel using a high-quality coaxial digital cable.
- Connect to Amplifier: Connect the L-OUT and R-OUT RCA analog outputs on the rear panel to the corresponding analog inputs (e.g., AUX, CD) on your amplifier or preamplifier using RCA cables.
- Power Connection: Connect the supplied AC input cable to the power inlet on the rear panel of the DAC, then plug the other end into a standard AC 115V wall outlet.
6. Operating Instructions
- Power On: Press the power button located on the front panel. The indicator light will illuminate.
- Warm-up Period: Allow the DAC to warm up for approximately 30-45 minutes for optimal sound performance. Vacuum tubes require time to reach their stable operating temperature.
- Source Selection: Ensure your connected digital audio source is playing and that your amplifier is set to the correct input connected to the DAC.
- Audio Playback: Begin playing audio from your digital source. Adjust the volume on your amplifier.
- Digital Audio Format: This DAC is designed for standard CD quality (16-bit/44.1kHz) and similar resolutions. It may not convert ultra high-resolution material (e.g., 24-bit/196kHz) and may result in no sound output. If using a streamer, ensure the playback quality is set to a compatible resolution.
- Power Off: Press the power button on the front panel to turn off the unit.
7. Maintenance
- Cleaning: Use a soft, dry cloth to clean the exterior of the unit. Do not use liquid cleaners or solvents.
- Tube Replacement: Vacuum tubes have a finite lifespan. If you notice a degradation in sound quality or tube failure, replacement may be necessary. Ensure the unit is unplugged and cooled down before attempting to replace tubes. Consult a qualified technician if unsure. Compatible tubes include 6N11 (or 6922) and 6Z4.
- Internal Inspection: Periodically, you may open the chassis (after unplugging and cooling) to inspect for dust accumulation. Use compressed air to gently clean the internal components.
8. Troubleshooting
| Problem | Possible Cause | Solution |
|---|---|---|
| No power | Power cable not connected; Power outlet fault; Internal fuse blown. | Check power cable connection; Try a different outlet; Contact support for fuse replacement. |
| No sound output | Incorrect input/output connections; Amplifier input not selected; Digital source not playing; Incompatible digital audio format; Loose tubes. | Verify all audio cable connections; Select correct input on amplifier; Ensure digital source is active; Check digital source playback quality (e.g., 16-bit/44.1kHz); Verify tubes are securely seated. |
| Distorted or poor sound quality | Faulty cables; Tubes nearing end of life; Interference. | Replace audio cables; Consider replacing vacuum tubes; Ensure unit is away from other electronic devices that may cause interference. |
9. Specifications
- Model: R2R-AD1868R-DAC
- Architecture: R2R AD1865 NOS Tube DAC
- Input: Coaxial (COAX)
- Output: Stereo RCA (L-OUT, R-OUT)
- Tubes: 6N11 (6922 equivalent) + 6Z4 rectifier
- Power Supply: AC 115V
- Dimensions (W x H x D): Approximately 140mm x 100mm x 308mm (5.51" x 3.94" x 12.13")
- Weight: Approximately 3 kg (6.6 lbs)
- Material: Aluminum chassis
- Channels: 2 (Stereo)
10. Warranty and Support
For warranty information or technical support, please contact FLYINSKY customer service through the retailer where the product was purchased. Please have your model number (R2R-AD1868R-DAC) and purchase details available when contacting support.
For additional resources and product information, you may visit the official FLYINSKY store page: FLYINSKY Audio Store