
1. Product Overview
This manual provides instructions for the Outvita 19.5x10 FT Large Metal Chicken House. This structure is designed to provide a secure and spacious enclosure for poultry and small animals, featuring a robust galvanized steel frame and PVC-coated wire mesh for durability and protection.

Image: Overall view of the Outvita 19.5x10 FT Large Metal Chicken House, illustrating its dimensions and suitability for various small animals like chickens, rabbits, geese, and ducks.
2. Safety Information
- Always wear appropriate safety gear, such as gloves, during assembly to prevent injury from wire mesh or metal edges.
- Ensure all connections are securely fastened to maintain structural integrity and prevent animal escape or predator entry.
- Regularly inspect the structure for any loose parts, damaged wire, or wear and tear, and address them promptly.
- Position the chicken house on level ground to ensure stability.
- Clear snow accumulation from the waterproof cover in winter to prevent structural damage.
3. Assembly Instructions
The Outvita Chicken House features a quick-connecting design for straightforward assembly. It is recommended that two people work together for installation, which typically takes 1-2 hours.
3.1 Components Check
Before beginning assembly, verify that all components listed in the packaging are present and undamaged. The main components include galvanized steel frame pipes, PVC-coated hexagonal steel wire mesh, and a 180g PE waterproof cover.
3.2 Frame Assembly
- Connect the galvanized steel frame pipes using the integrated spring bolts at each juncture. Ensure each connection clicks into place securely.
- Assemble the base frame first, then erect the vertical supports and roof structure.
- Attach the fixable metal feet to the bottom of the frame for ground stability.
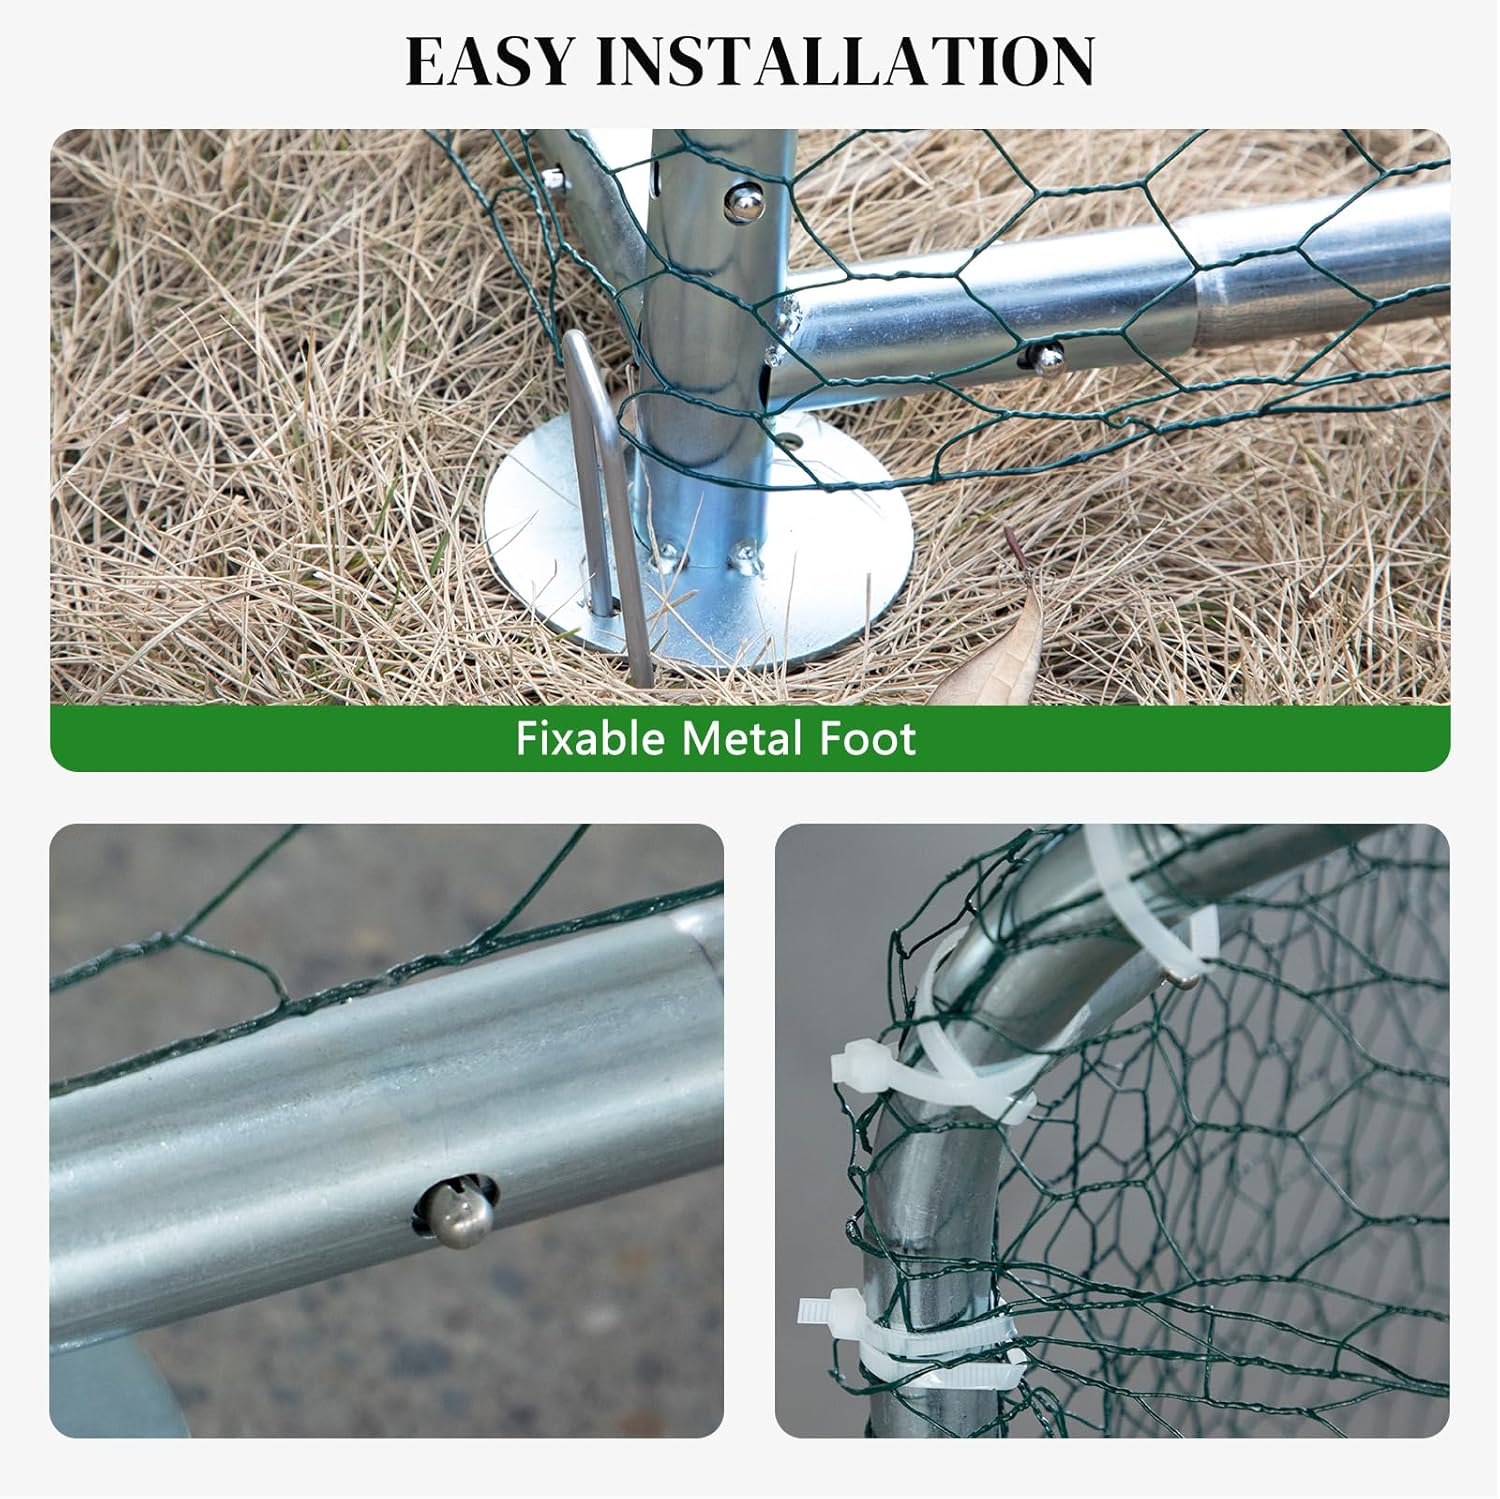
Image: Detailed view of the fixable metal foot for ground anchoring and the spring button clip mechanism for connecting frame pipes, highlighting the ease of installation.
3.3 Wire Mesh Installation
- Unroll the PVC-coated hexagonal steel wire mesh around the assembled frame.
- Secure the mesh to the frame using the provided zip ties or wire fasteners. Ensure the mesh is taut and covers all open areas to prevent gaps.
- Pay close attention to the door area, ensuring the mesh is properly aligned and secured to allow for smooth operation of the door.

Image: Illustrates the robust galvanized frame and the intensive PVC-coated wire mesh, designed to withstand harsh weather and protect against predators.
3.4 Waterproof Cover Attachment
- Drape the 180g PE waterproof cover over the roof section of the chicken house.
- Secure the cover to the frame using the elastic cords or ties provided, threading them through the grommets on the cover and around the frame pipes.
- Ensure the cover is stretched tightly to prevent water pooling and to maximize its protective capabilities against sun and rain. The sloped roof design aids in water runoff.

Image: Depicts the waterproof and UV-resistant cover providing shelter from rain and sun, demonstrating its comprehensive shielding capabilities.
3.5 Door Installation
Install the access door (24.8 x 68.9 inches) into the designated opening. Ensure the hinges are properly aligned and the door swings freely. Attach the secure latch mechanism to prevent unauthorized access and keep animals safely contained.

Image: Shows the convenient gate with its dimensions and a close-up of the locking system, emphasizing secure access.
3.6 Assembly Video
Video: An official Outvita video demonstrating the assembly process and features of the chicken run. This video provides a visual guide to assist with installation.
4. Operating Instructions
The Outvita Chicken House provides a spacious and secure environment for your poultry. Follow these guidelines for optimal use:
- Placement: Choose a level, well-drained area for the chicken house. Consider proximity to water sources and protection from strong winds.
- Animal Capacity: The 19.5x10 FT dimensions offer expansive living quarters. Ensure the number of animals housed is appropriate for the space to prevent overcrowding and stress.
- Access: Use the large access door for easy entry and exit. Always ensure the door is securely latched after entering or exiting to prevent animals from escaping and to deter predators.
- Enrichment: Provide adequate food, water, and enrichment items (e.g., roosts, dust baths) within the enclosure to promote animal well-being.

Image: Shows chickens comfortably occupying the spacious interior of the Outvita chicken coop, demonstrating ample room for movement.
5. Maintenance
Regular maintenance ensures the longevity and safety of your Outvita Chicken House:
- Cleaning: Periodically clean the interior of the chicken house to maintain hygiene for your animals. Remove bedding and waste regularly.
- Frame Inspection: Check the galvanized steel frame for any signs of rust, bending, or damage. Tighten any loose connections.
- Wire Mesh Inspection: Examine the PVC-coated wire mesh for tears, holes, or loose sections. Repair or replace damaged mesh promptly to maintain predator protection.
- Waterproof Cover Care: Inspect the 180g PE waterproof cover for rips or punctures. Clean the cover as needed. During winter, remove accumulated snow to prevent stress on the frame and cover.
- Door Latch: Ensure the door latch mechanism is functioning correctly and provides a secure closure.
6. Troubleshooting
This section addresses common issues you might encounter:
| Problem | Possible Cause | Solution |
|---|---|---|
| Structure feels unstable. | Uneven ground; loose frame connections; insufficient anchoring. | Ensure the chicken house is on level ground. Check and tighten all spring bolt connections. Verify that the metal feet are securely fixed to the ground. |
| Wire mesh is sagging or has gaps. | Insufficient fastening during assembly; damage from animals or external factors. | Re-secure the mesh with additional zip ties or wire fasteners. Repair small tears with wire or replace severely damaged sections. |
| Water pooling on the roof cover. | Cover not taut; excessive snow accumulation. | Re-adjust and tighten the waterproof cover using its elastic cords. Regularly clear snow from the roof during winter. |
| Door does not close securely. | Misaligned hinges; damaged latch mechanism. | Check hinge alignment and adjust if necessary. Inspect the latch for damage and replace if it is not functioning properly. |
7. Specifications
| Feature | Detail |
|---|---|
| Model | 19.5x10 FT Large Metal Chicken House (B0CZ3WHC7L) |
| Product Dimensions (L x W x H) | 234"L x 120"W x 78"H (19.5 ft L x 10 ft W x 6.5 ft H) |
| Material | Galvanized Steel Frame, PVC-Coated Hexagonal Steel Wire Mesh, 180g PE Waterproof Cover |
| Frame Diameter | 1 inch |
| Wire Mesh Gap Size | 0.98 inches |
| Access Door Dimensions | 24.8"W x 68.9"H |
| Number of Doors | 1 |
| Color | Silver |
| Target Species | Chicken, Turkey, Duck, Geese, Small Animals |
| Assembly Time (Approx.) | 1-2 hours (with two people) |
8. Warranty and Support
Outvita products are designed for durability and customer satisfaction. For specific warranty details, please refer to the documentation included with your purchase or contact Outvita customer support directly.
If you encounter any issues or require assistance with your Outvita Chicken House, please contact our customer support team. Provide your product model number (B0CZ3WHC7L) and a detailed description of the issue for efficient service.
Outvita Customer Support:
- Refer to your purchase documentation for contact information.
- Visit the official Outvita store on Amazon for additional resources: Outvita Store