
1. Introduction
This manual provides essential information for the proper setup, operation, and maintenance of your Sealan 24-inch Gaming Monitor (Model Z240B16). Please read this manual thoroughly before using the monitor to ensure correct usage and to prevent damage.

Image: The Sealan 24-inch Gaming Monitor, showcasing its 180Hz refresh rate, 3000:1 contrast, FHD 1920x1080 resolution, VA panel, VESA compatibility, 99% sRGB, Eye Care, and Adaptive-Sync features.
2. Package Contents
Verify that all items are present in the package:
- 24-inch Monitor
- DP Cable
- Bases and Bracket
- User Manual
- Power Adapter

Image: Contents of the monitor package, including the monitor, stand components, power adapter, and cables.
3. Setup Instructions
3.1. Monitor Assembly
- Insert the stand into the monitor base.
- Tighten the base screw to secure the stand.
- Install the display bracket onto the monitor.
- Insert the bracket into the uppermost notch on the monitor and press firmly until it clicks into place.

Image: Step-by-step guide for assembling the monitor stand and attaching it to the display.
3.2. Connecting the Monitor
The monitor features multiple port options for versatile connectivity:
- HDMI Port: Connects to devices such as PCs, game consoles, or media players.
- DP (DisplayPort) Port: Connects to PCs or graphics cards for high-resolution and high-refresh-rate output.
- DC IN Port: Connects the power adapter to the monitor.
- Audio Out Port: Connects to external speakers or headphones.
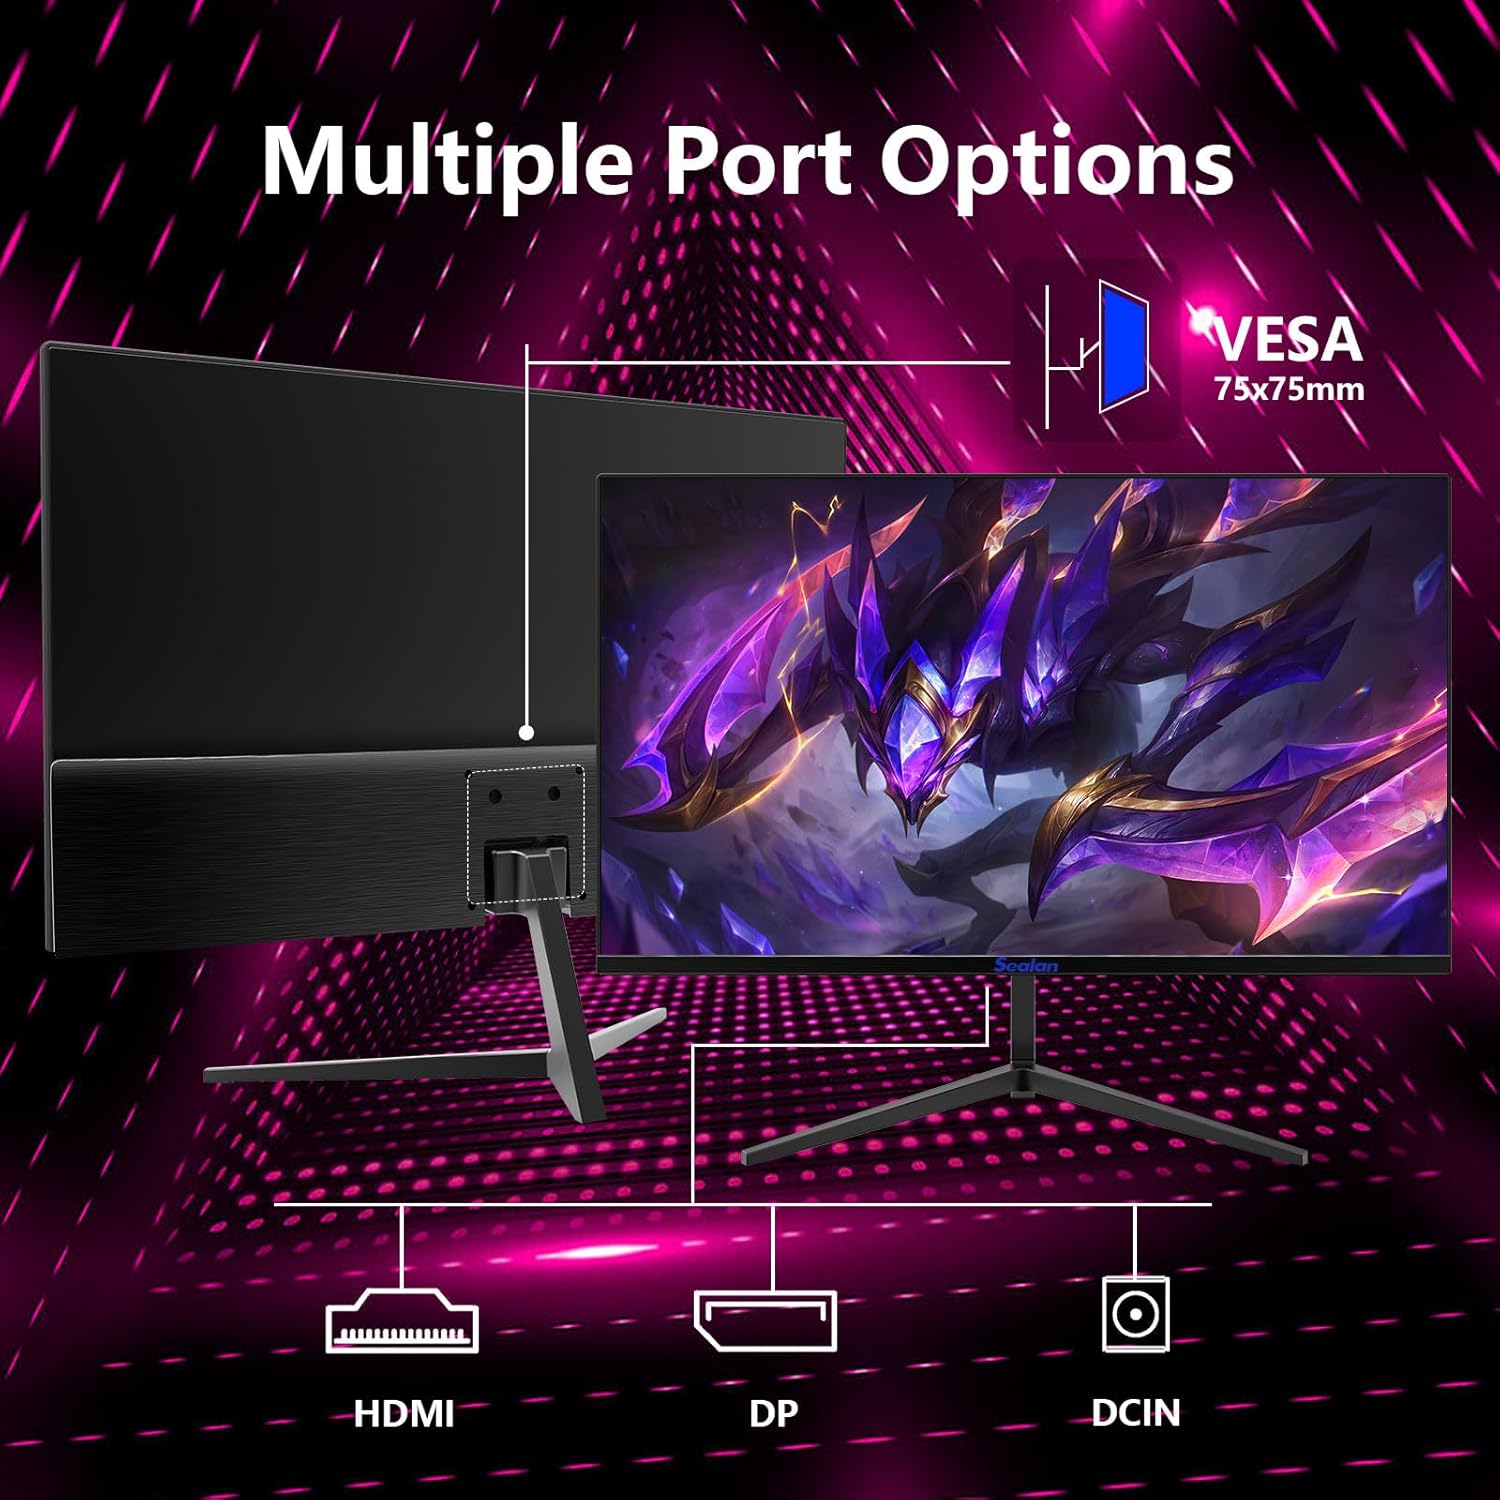
Image: Rear view of the monitor highlighting the HDMI, DisplayPort, DC IN, and Audio Out connections.
Ensure all cables are securely connected before powering on the monitor and your connected device.
4. Operating Instructions
4.1. Power On/Off
Press the power button, usually located on the back or bottom right of the monitor, to turn the monitor on or off. The power indicator light will illuminate when the monitor is active.
4.2. On-Screen Display (OSD) Menu
The OSD menu allows you to adjust various monitor settings. Use the control buttons (joystick or individual buttons) on the back or bottom of the monitor to navigate the menu. Common settings include brightness, contrast, color temperature, input source, and picture modes.
4.3. Refresh Rate
This monitor supports a 180Hz refresh rate for smoother visuals, especially in fast-paced content like gaming. Ensure your graphics card and connected cable (DisplayPort recommended) support this refresh rate, and configure it in your operating system's display settings.

Image: Visual representation of the difference between 100Hz and 180Hz refresh rates, demonstrating smoother motion at higher rates.
4.4. AMD FreeSync Premium
The monitor supports AMD FreeSync Premium technology, which synchronizes the monitor's refresh rate with your graphics card's frame rate. This helps eliminate screen tearing and stuttering for a fluid gaming experience. Enable FreeSync in your graphics card's control panel and the monitor's OSD menu.

Image: A visual comparison showing the effect of FreeSync on and off, highlighting the elimination of screen tearing when active.
4.5. Eye Care Technology
This monitor incorporates eye care features such as Flicker-Free technology and Low Blue Light mode to reduce eye strain during extended use. These features can be adjusted or enabled through the OSD menu.

Image: Illustration of the monitor's eye care features, including low blue light emission and flicker-free operation.
4.6. Gaming Modes and Crosshairs
The monitor offers exclusive gaming modes (e.g., FPS, RTS, Racing) optimized for different game genres. Additionally, a built-in crosshair feature can be activated or deactivated via the OSD menu for enhanced aiming in games.

Image: Examples of exclusive gaming modes (FPS, RTS, Racing) available on the monitor.
4.7. HDR (High Dynamic Range)
The monitor supports HDR-ready clarity, providing a wider range of colors and contrast for a more immersive visual experience. Enable HDR in your operating system's display settings and ensure the monitor's OSD menu has HDR enabled (if applicable, typically under picture modes or advanced settings).

Image: Side-by-side comparison demonstrating the visual enhancement with HDR enabled versus disabled.
5. Maintenance
To ensure the longevity and optimal performance of your monitor, follow these maintenance guidelines:
- Cleaning the Screen: Gently wipe the screen with a soft, lint-free cloth. For stubborn marks, use a monitor-specific cleaning solution applied to the cloth, not directly to the screen.
- Cleaning the Casing: Use a soft, dry cloth to clean the monitor casing. Avoid abrasive cleaners or solvents.
- Ventilation: Ensure the monitor's ventilation openings are clear and not obstructed to prevent overheating.
- Power Off When Not in Use: Turn off the monitor when not in use for extended periods to save energy and prolong its lifespan.
6. Troubleshooting
If you encounter issues with your monitor, refer to the following common problems and solutions:
- No Signal:
- Ensure all video cables (HDMI, DP) are securely connected to both the monitor and your computer/device.
- Verify the correct input source is selected in the monitor's OSD menu.
- Try a different port on the monitor or a different cable.
- Ensure your computer's graphics drivers are up to date.
- Display is Pixelated, Blurry, or Glitchy:
- Check the display resolution settings on your computer to ensure they match the monitor's native resolution (1920x1080).
- Ensure the refresh rate is set correctly (e.g., 180Hz).
- Try a different video cable.
- If using an adapter, ensure it is compatible and functioning correctly.
- HDR Not Working Correctly:
- Ensure HDR is enabled in both your operating system's display settings and the monitor's OSD menu.
- Some users have reported success by ensuring Gamma is off and Picture Mode is set to Standard in the OSD before enabling HDR.
- Green Dot in Center of Screen:
- This is typically a settings issue, not a dead pixel. Explore the monitor's OSD options, particularly under gaming or display settings, to deactivate any crosshair or aiming assistance features that might be enabled.
7. Specifications
| Feature | Specification |
|---|---|
| Product Dimensions | 1.45 x 21.2 x 16.2 inches |
| Item Weight | 5 pounds |
| Manufacturer | Sealan |
| Item Model Number | Z240B16 |
| Standing Screen Display Size | 24 Inches |
| Aspect Ratio | 1.70:1 |
| Voltage | 12 Volts |
| Resolution | 1920 x 1080 Pixels (FHD 1080p) |
| Image Brightness | 250 Candela |
| Screen Surface Description | Matte |
| Refresh Rate | 180Hz |
| Panel Type | VA |
| Color Coverage | 99% sRGB, 16.7M Colors |
| Adaptive Sync | AMD FreeSync Premium |
| VESA Mount Compatible | 75x75mm |
8. Warranty and Support
8.1. Warranty Information
Your Sealan 24-inch Gaming Monitor comes with a 1-year warranty. This warranty includes free returns and exchanges for eligible issues. Please retain your proof of purchase for warranty claims.
8.2. Return Policy
The product is subject to a 30-day return/replacement policy from the date of purchase. Please refer to the retailer's specific return guidelines for detailed instructions.
8.3. Customer Support
For any queries, concerns, or technical assistance, please contact our dedicated customer support team. Contact information can typically be found on the manufacturer's website or through your purchase platform.