
1. Introduction
This manual provides essential information for the safe and efficient operation, maintenance, and troubleshooting of your RYOBI USB Lithium Desktop Vacuum, model FVH67K. Please read this manual thoroughly before using the product and retain it for future reference.
The RYOBI USB Lithium Desktop Vacuum is designed for light-duty cleaning tasks on flat surfaces such as desks, office spaces, and computer equipment. It is powered by a 2.0 AH USB Lithium-ION battery, offering cordless convenience.
2. Safety Information
WARNING: To reduce the risk of injury, always follow basic safety precautions when using this product.
- Read all instructions before use.
- Do not pick up flammable or combustible liquids, such as gasoline, or use in areas where they may be present.
- Do not pick up anything that is burning or smoking, such as cigarettes, matches, or hot ashes.
- Do not use without the dust cup and filter in place.
- Keep hair, loose clothing, fingers, and all parts of body away from openings and moving parts.
- Use only as described in this manual. Use only manufacturer's recommended attachments.
- Do not handle charger or appliance with wet hands.
- Do not charge the battery outdoors.
- Store the vacuum indoors.
3. Package Contents
Verify that all items listed below are included in your package. If any items are missing or damaged, contact customer service.
- RYOBI USB Lithium Desktop Vacuum (FVH67K)
- 2.0 AH USB Lithium-ION Battery
- Charging Cable (USB)
- Crevice Tool

Image 3.1: Package contents including the vacuum, 2.0 AH USB Lithium-ION battery, and charging cable.
4. Product Overview
Familiarize yourself with the components of your RYOBI USB Lithium Desktop Vacuum.
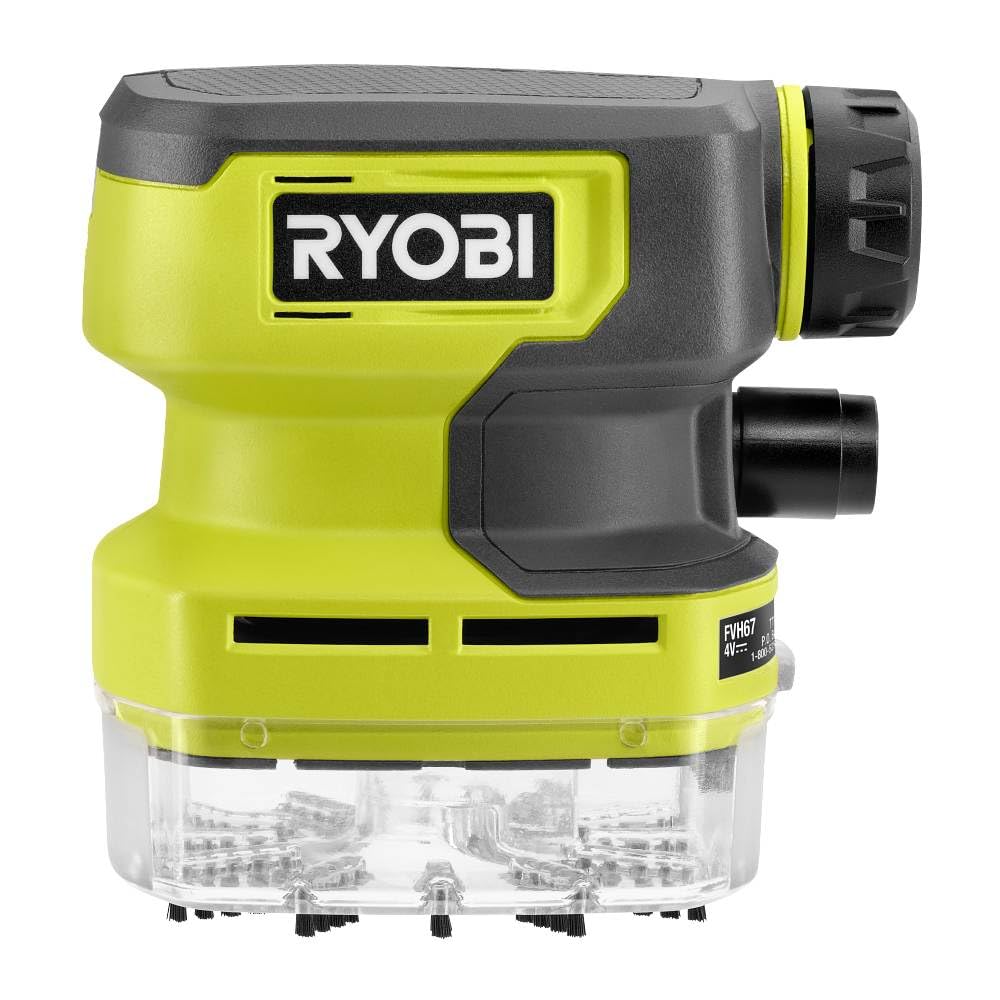
Image 4.1: Annotated diagram of the FVH67K Desktop Vacuum.
- ON/OFF Button: Activates and deactivates the vacuum.
- LED Indicator: Signals low battery status.
- Removable Filter: Captures dust and debris, designed for easy cleaning.
- Nylon Bristles: Located at the intake for effective debris collection.
- Ergonomic Overmold Grip: Provides comfortable handling.
- On-Board Storage: Conveniently stores the included crevice tool.
- Easy to Empty Clear Dust Cup: Transparent design allows visibility of debris level and simplifies emptying.
5. Setup
5.1 Charging the Battery
- Connect the USB charging cable to the 2.0 AH USB Lithium-ION Battery.
- Plug the other end of the USB charging cable into a compatible USB power source (e.g., computer, wall adapter).
- Allow the battery to charge fully before first use. The LED indicator on the battery will show charging status.
5.2 Inserting the Battery
- Ensure the vacuum is turned off.
- Align the charged 2.0 AH USB Lithium-ION Battery with the battery compartment on the vacuum.
- Slide the battery into place until it clicks securely.
5.3 Attaching Accessories
- The crevice tool can be attached to the vacuum's intake nozzle for reaching tight spaces.
- For storage, the crevice tool can be placed in the on-board storage slot.
6. Operating Instructions
6.1 Powering On/Off
- To turn on the vacuum, press the ON/OFF button.
- To turn off the vacuum, press the ON/OFF button again.
6.2 Using the Vacuum
- Hold the vacuum by the ergonomic overmold grip.
- Move the intake nozzle over the surface to be cleaned. The nylon bristles assist in sweeping debris into the vacuum.
- For narrow areas, attach the crevice tool.
- The vacuum is designed for dry pick-up only. Do not attempt to vacuum liquids.
6.3 Emptying the Dust Cup
- Ensure the vacuum is turned off.
- Detach the clear dust cup from the main body of the vacuum.
- Empty the contents of the dust cup into a waste receptacle.
- Reattach the dust cup securely to the vacuum.
7. Maintenance
7.1 Cleaning the Filter
Regular filter cleaning ensures optimal suction performance.
- Turn off the vacuum and remove the dust cup.
- Carefully remove the removable filter from the dust cup.
- Tap the filter gently over a waste bin to dislodge dust. For thorough cleaning, rinse the filter with water.
- Allow the filter to air dry completely before reinserting it into the dust cup. Do not use the vacuum with a wet filter.
7.2 General Cleaning
- Wipe the exterior of the vacuum with a soft, damp cloth. Do not use harsh chemicals or abrasive cleaners.
- Ensure the charging port on the battery is free from dust and debris.
7.3 Battery Care
- Store the battery in a cool, dry place away from direct sunlight and extreme temperatures.
- Do not expose the battery to water or moisture.
- If the vacuum will not be used for an extended period, charge the battery periodically to maintain its health.
8. Troubleshooting
If you encounter issues with your vacuum, refer to the following common problems and solutions.
| Problem | Possible Cause | Solution |
|---|---|---|
| Vacuum does not turn on. | Battery is not charged or not properly inserted. | Ensure battery is fully charged and securely inserted. |
| Low suction power. | Dust cup is full, filter is clogged, or nozzle is blocked. | Empty dust cup, clean filter, check for and remove any blockages in the nozzle. |
| Battery not charging. | Charging cable or power source issue. | Verify the charging cable is properly connected and the USB power source is functional. Try a different cable or power source. |
| Unusual noise during operation. | Debris caught in the fan or motor area. | Turn off and disconnect the battery. Inspect the intake and fan area for obstructions and carefully remove them. |
9. Specifications
Technical specifications for the RYOBI USB Lithium Desktop Vacuum FVH67K.
| Feature | Specification |
|---|---|
| Model Name | FVH67K |
| Brand | RYOBI |
| Power Source | Battery Powered (USB Lithium) |
| Battery Type | 2.0 AH Lithium-ION |
| Voltage | 4 volts |
| Runtime | Approximately 1 hour |
| Filter Type | Cloth |
| Capacity | 0.3 liters |
| Maximum Suction | 0.1 meters (approximate) |
| Recommended Use | Desk, Office, Computer (flat surfaces) |
| Form Factor | Handheld |
| Connectivity Technology | USB |
| Item Dimensions (L x W x H) | 2.5" x 7" x 7.5" |
| Item Weight | 1.12 ounces |
| Included Components | USB Lithium 2Ah Battery, Cable, Crevice Tool |
10. Warranty and Support
For warranty information and customer support, please refer to the documentation provided with your purchase or visit the official RYOBI website. Keep your proof of purchase for warranty claims.


