
1. Introduction
This manual provides detailed instructions for the installation, operation, maintenance, and troubleshooting of your ARSSLY LCD screen replacement for Blackview A80 Pro and Blackview A80 Plus mobile phones. Please read this manual carefully before proceeding with the installation to ensure a successful and safe replacement process.
1.1 Compatibility
This screen replacement is specifically designed and compatible only with the Blackview A80 Pro and Blackview A80 Plus models. Please verify your phone's model number before attempting installation.
1.2 Package Contents
Upon opening your package, please ensure all the following items are present:
- 1 x LCD Screen Replacement with Frame for Blackview A80 Pro / A80 Plus
- 1 x Repair Tool Kit (may include screwdrivers, pry tools, suction cup, etc.)
- 1 x HD Glass (Screen Protector)
- 1 x Dust Removal Sticker
- 1 x Double-sided Adhesive Tape
- 1 x Disassembly Tool Card

Image 1.1: Complete ARSSLY screen replacement kit for Blackview A80 Pro / A80 Plus, showing the LCD assembly, various repair tools, and a screen protector.

Image 1.2: Detailed view of the packing list, illustrating the screen replacement, removal tools, HD glass, dust absorber, double-sided tape, and disassembly card.
2. Setup and Installation
Replacing a phone screen is a delicate operation that requires careful attention. We strongly recommend watching professional screen replacement video guides on platforms like YouTube before beginning the installation process. This will provide a visual understanding of each step.
2.1 Pre-Installation Precautions
- Power Off: Ensure your phone is completely powered off before starting.
- Battery Disconnection: If possible, disconnect the battery to prevent short circuits during the repair.
- Static Electricity: Take precautions against static electricity, which can damage electronic components. Consider using an anti-static wrist strap.
- Organize Screws: Keep track of all screws and components, as they may vary in size and placement.
- Fragility Warning: The screen replacement is very fragile. Do not press the corners or flex cables too heavily, as this can cause damage and prevent the screen from working properly.
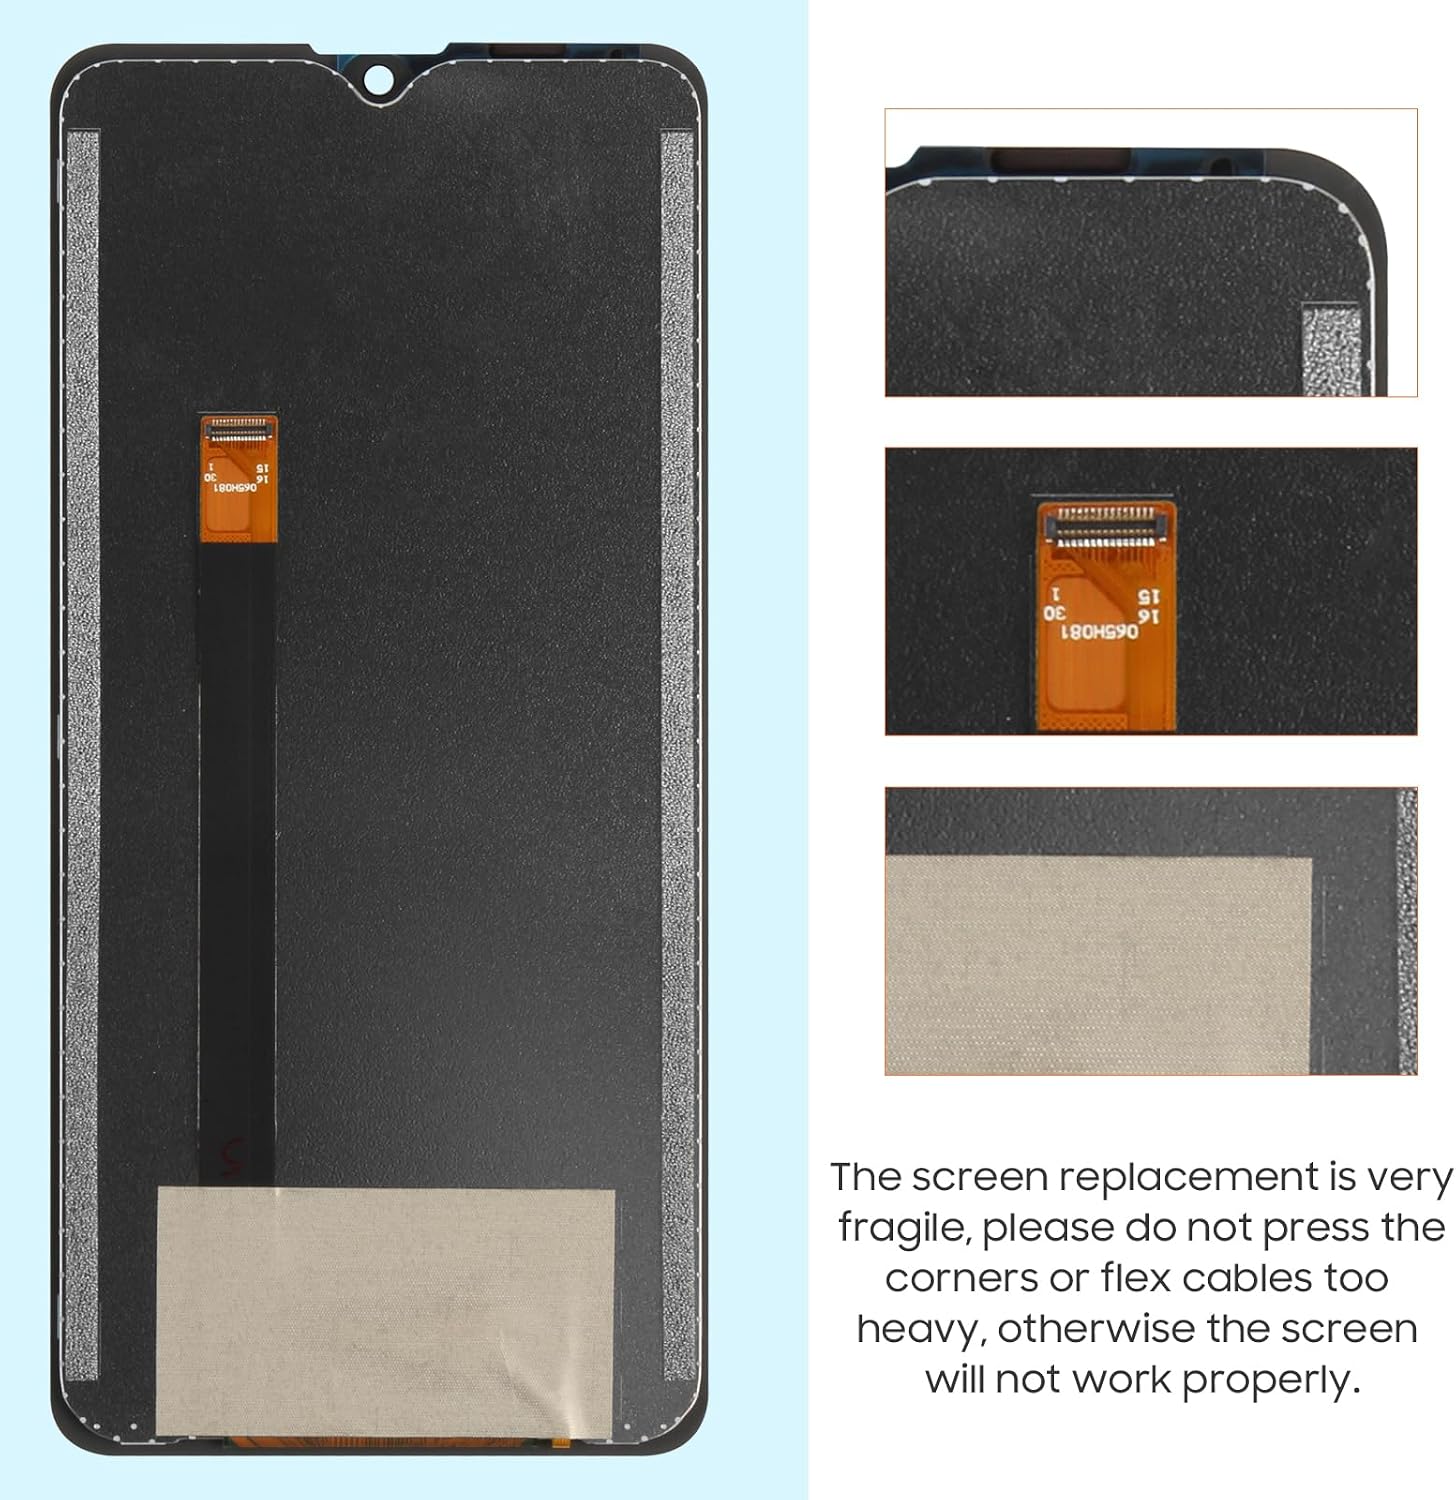
Image 2.1: This image highlights the delicate flex cables and edges of the screen, emphasizing the need for careful handling during installation to avoid damage.
2.2 General Installation Steps (Refer to video guides for detailed steps)
- Remove Back Cover: Carefully remove the phone's back cover and any internal shields.
- Disconnect Battery: Disconnect the battery connector from the motherboard.
- Remove Old Screen: Gently heat the edges of the old screen to loosen the adhesive. Use pry tools to carefully separate the old screen assembly from the phone frame. Disconnect its flex cables.
- Clean Frame: Clean any remaining adhesive or glass fragments from the phone frame.
- Connect New Screen (Test First): Before fully adhering the new screen, connect its flex cables to the motherboard. Reconnect the battery and power on the phone to test the display, touch functionality, and brightness.
- Power Off and Adhere: If the test is successful, power off the phone, disconnect the battery, and apply new adhesive (if not pre-applied to the new screen) to the frame. Carefully place the new screen assembly into the frame, ensuring proper alignment.
- Reconnect and Reassemble: Reconnect the battery, reattach any internal shields, and secure the back cover.
3. Operating and Post-Installation Checks
After installing the new screen, it is crucial to perform a series of tests to ensure full functionality.
3.1 Initial Power-On and Display Check
- Power on your phone.
- Observe the display for any abnormalities such as dead pixels, lines, or discoloration.
- Adjust the brightness settings to ensure the screen responds correctly.
3.2 Touch Functionality Test
- Navigate through different menus and applications.
- Test all areas of the screen for touch responsiveness.
- If available, use a touch screen test app to draw across the entire screen to check for unresponsive areas.

Image 3.1: The new screen displaying a vibrant, high-definition image, demonstrating its clarity and visual quality after successful installation.
4. Maintenance
Proper care can extend the lifespan and maintain the clarity of your new screen.
- Cleaning: Use a soft, lint-free cloth (microfiber is ideal) to gently wipe the screen. For stubborn smudges, slightly dampen the cloth with water or a screen-specific cleaner. Avoid harsh chemicals.
- Screen Protector: Utilize the included HD glass screen protector to guard against scratches and minor impacts.
- Avoid Pressure: Do not apply excessive pressure to the screen, especially around the edges or corners, as this can damage the LCD or digitizer.
- Temperature Extremes: Avoid exposing your phone to extreme temperatures, which can affect screen performance and longevity.
5. Troubleshooting
If you encounter issues after installation, refer to the following common problems and solutions.
5.1 Common Issues and Solutions
- Screen Not Turning On / Black Screen:
- Ensure all flex cables are securely connected to the motherboard. Disconnect and reconnect them carefully.
- Check if the battery is properly connected and charged. - Touch Not Working / Partial Touch:
- Recheck the digitizer flex cable connection. A loose connection is a common cause.
- Ensure no debris is obstructing the connection points. - Display Lines / Discoloration:
- This often indicates a damaged LCD flex cable or improper seating. Carefully inspect and reseat the LCD flex cable.
- Avoid applying pressure to the screen during installation. - Screen Flickering:
- Verify all connections are firm. Sometimes a loose connection can cause intermittent display issues.
If these steps do not resolve the issue, please contact customer support for further assistance.
6. Specifications
Key technical specifications for the ARSSLY Blackview A80 Pro / A80 Plus LCD Screen Replacement:
- Display Size: 6.49 inches
- Resolution: 720 x 1560 pixels
- Pixel Density: 269 ppi (pixels per inch)
- Display Type: IPS LCD
- Compatibility: Blackview A80 Pro, Blackview A80 Plus

Image 6.1: Visual representation of the screen's dimensions and key display specifications such as resolution and pixel density.
7. Warranty and Support
7.1 Product Warranty
ARSSLY offers a free replacement within three (3) months from the date of purchase for any product failures not caused by human damage. This warranty covers manufacturing defects and performance issues under normal use.
7.2 Customer Support
If you experience any problems with the product you have received, or if you require further assistance with installation or troubleshooting, please do not hesitate to contact our customer service team. We are committed to providing excellent support and will respond to your inquiries within 24 hours.
Please note that the repair tools included in the free kit may not be suitable for all specific repair scenarios, and some screen models might require specialized professional tools for optimal device maintenance.