1. Introduction
This manual provides detailed instructions for the installation, operation, and maintenance of your BQMAX Porcelain Steel Heat Plate and Burner Kit. These parts are designed to replace worn components in compatible Kenmore 3-burner gas grills, restoring optimal performance. Please read all instructions carefully before proceeding with installation.
2. Compatibility
This BQMAX replacement kit is compatible with various Kenmore grill models. Please verify your grill model number against the list below to ensure proper fitment:
- Kenmore 3 Burner Grill Models: PG-4030400L, PG-4030400LD, PG-A4030400LD, 146.16132110, 146.16133110, 146.23674310, 146.23673310, 146.23678310, 146.29162310, 146.23675310, 146.23679310, 146.29163310, 146.33586410, 640-05057345-0.
- Also compatible with specific Kenmore 2, 4, 5, and 6 Burner Grill Models:
- 2 Burner: 146.10038510
- 4 Burner: 146.23676310, 146.34611410, 146.34611411, 146.34461410, 146.46372610, 146.46366610, 146.46365610, 146.05349710, 146.10016510, 146.10017510, 146.16197211, 146.16142210, 146.16197210, 146.16198210, 146.16198211, 146.16222010, 146.23770310, 146.33577410, PG-40409SOLB, 640-06446338-3, 640-03982839-7.
- 5 Burner: 146.23770310, 146.23680310, 146.47469610, 146.30213510, 146.47468610, 640-05057375-7.
- 6 Burner: 146.23681310, 146.47223610, 146.23766310.
- Permasteel Grill Models: PG-40401SOL, PG-40407SOLB, PG-40407SOLF, PG-40522SOLB, PG-40612SOL, PG-40522SOLA, PG-40611SOL.
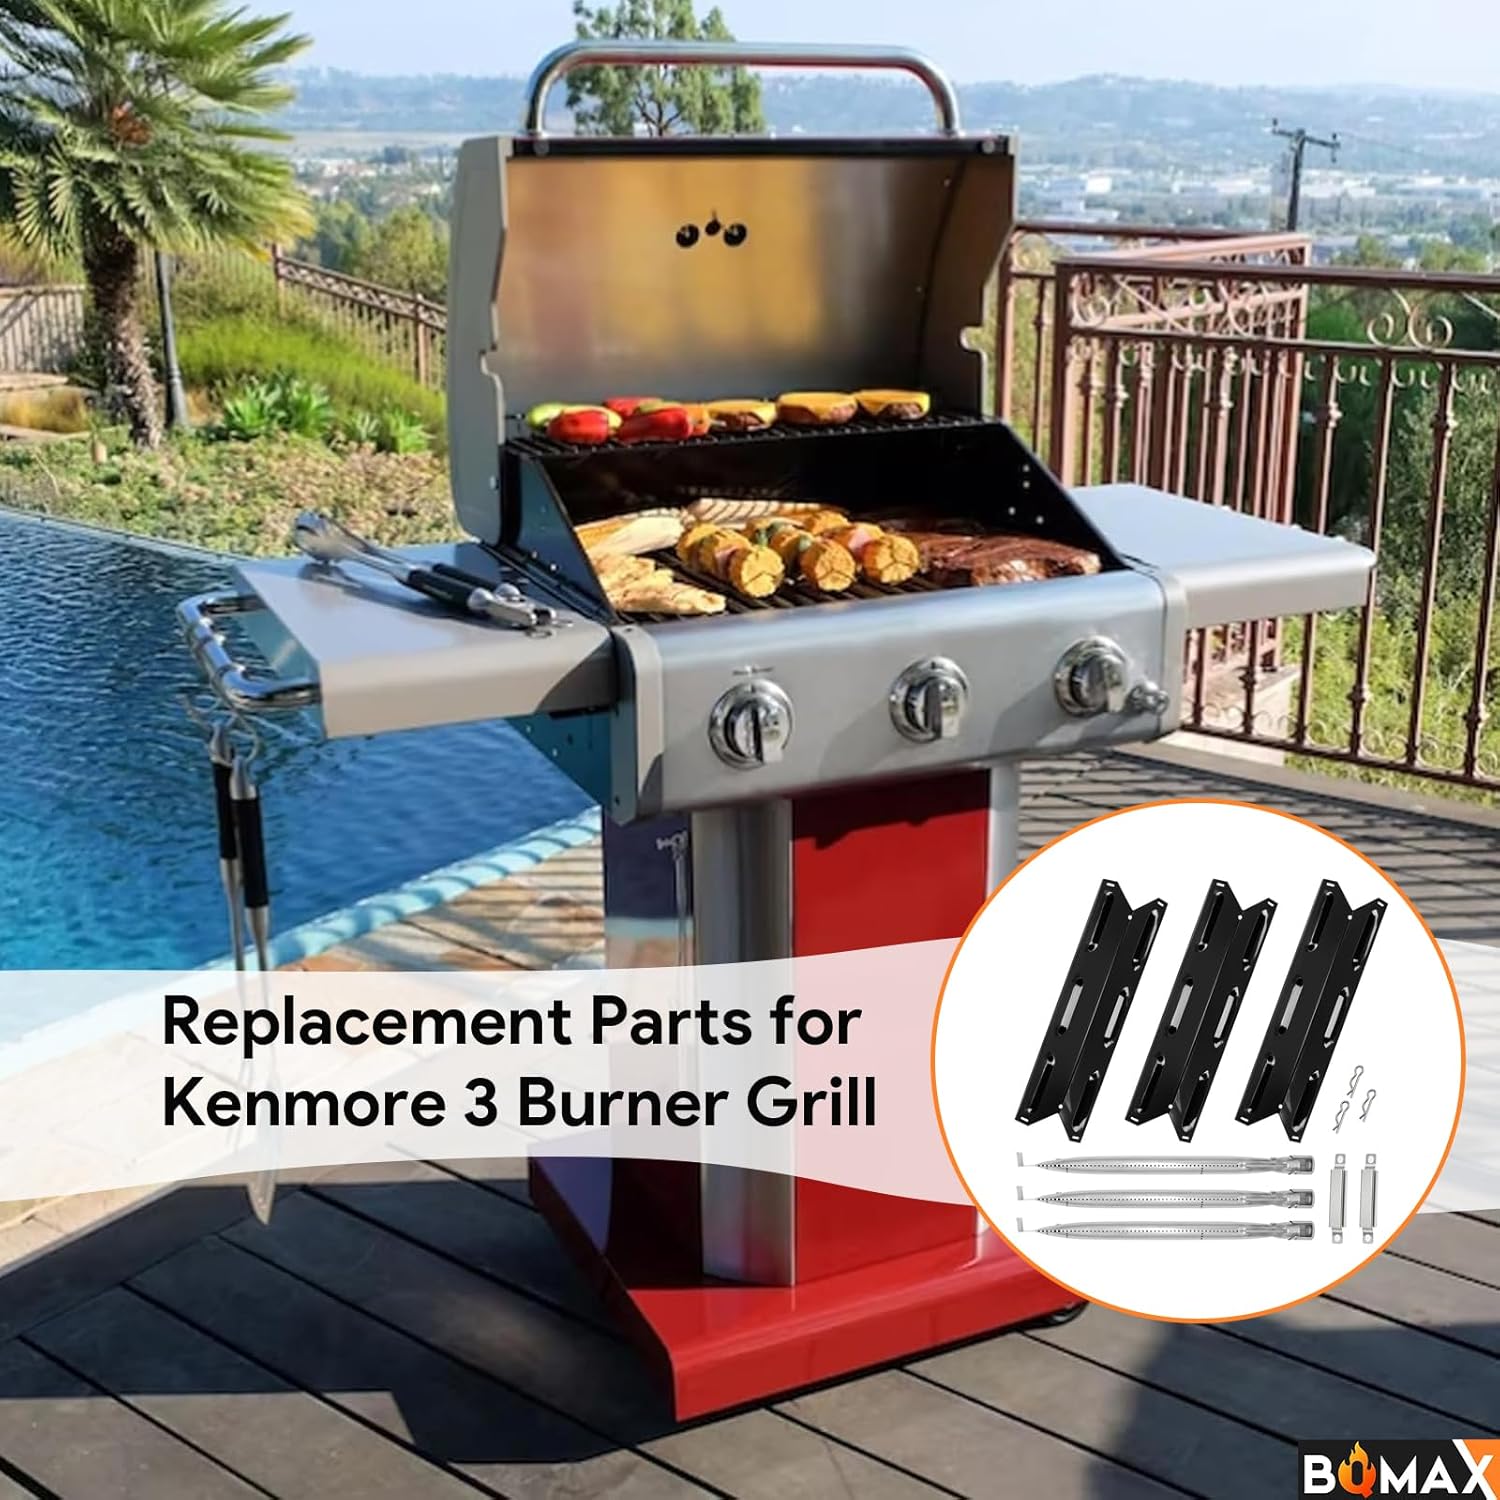
3. Package Contents
Your BQMAX replacement kit includes the following components:
- 3 x Burner Tubes (Stainless Steel)
- 3 x Heat Plates (Porcelain Steel)
- 2 x Adjustable Crossover Tubes (Stainless Steel)
4. Product Dimensions
Ensure these dimensions match your existing grill components for proper fit:
- Burner Tube: 14 3/4 inches (length) x 1 inch (diameter)
- Heat Plate: 14 15/16 inches (length) x 3 13/16 inches (width)
- Adjustable Crossover Tube: Extends from 5 to 9 inches

5. Setup and Installation
Tools Required: Screwdriver (for rusted cotter pins, if applicable), work gloves (recommended).
- Safety First: Ensure your grill is completely cool and disconnected from its gas supply before beginning any installation or maintenance.
- Remove Old Components: Carefully remove the cooking grates and existing heat plates. Detach the old burner tubes and crossover tubes. Note how the old parts were connected, especially any igniter wires or pins.
- Clean Grill Interior: While the grill is disassembled, clean out any debris, grease, or rust from the firebox.
- Install New Burner Tubes: Place the new stainless steel burner tubes into position. Ensure they are properly seated over the gas valve orifices at one end and secured at the other end, typically with a pin or screw.
- Connect Crossover Tubes: Install the adjustable crossover tubes between the main burners. These tubes facilitate flame transfer between burners. Adjust their length as needed for a secure fit.
- Install New Heat Plates: Position the new porcelain steel heat plates (also known as flame tamers or flavorizer bars) over the burner tubes. Ensure they sit securely and evenly.


Important Note on Igniters: Some grill models may have an igniter electrode attached directly to the original burner tube. This replacement kit's burner tubes may not include a specific attachment point for the igniter. In such cases, you may need to manually light the grill or adapt your existing igniter setup if possible. Consult your grill's original manual for igniter placement and operation.
6. Operating Instructions
After installation, perform a leak test on all gas connections before first use. Refer to your grill's original manual for specific lighting procedures. Once confirmed safe, operate your grill as usual. The new components are designed to provide even heat distribution for optimal cooking results.
7. Maintenance
Regular maintenance will extend the life of your replacement parts:
- Cleaning: After each use, clean the heat plates and burner tubes to remove food residue and grease. Use a grill brush for heat plates and ensure burner ports are clear.
- Inspection: Periodically inspect burner tubes for any signs of corrosion or blockages. Ensure heat plates are free from excessive rust or damage.
- Storage: If storing the grill for extended periods, consider covering it to protect components from the elements.
8. Troubleshooting
- Uneven Heating: Check if burner tubes are properly aligned and seated. Ensure all burner ports are clear of debris. Verify heat plates are correctly positioned.
- Burner Not Lighting: If using an igniter, ensure it is sparking correctly and positioned close enough to the burner ports. If the replacement burner tube does not have an igniter bracket, manual lighting may be required. Check gas flow to the burner.
- Low Flame: Inspect burner tubes for blockages or damage. Ensure gas supply is adequate and connections are secure.
9. Specifications
| Product Type | Grill Heat Plate & Burner Kit |
| Brand | BQMAX |
| Burner Material | Stainless Steel |
| Heat Plate Material | Porcelain Steel |
| Burner Dimensions | 14 3/4" L x 1" Dia |
| Heat Plate Dimensions | 14 15/16" L x 3 13/16" W |
| Crossover Tube Adjustment | 5" to 9" |
| Item Weight | 3.3 pounds |
10. Support
For any questions, concerns, or assistance with your BQMAX grill replacement parts, please contact BQMAX customer support. We aim to provide a fast response within 24 hours.
Visit the official BQMAX store for more information and products: BQMAX Store on Amazon


