
1. Introduction
This manual provides detailed instructions for the installation, operation, and maintenance of your Topcony 2K WiFi Outdoor Solar Security Camera, Model DK401. This camera is designed to offer reliable outdoor surveillance with advanced features such as 2K resolution, color night vision, AI human detection, and solar-powered operation. Please read this manual thoroughly before using the product to ensure proper functionality and safety.
2. Product Overview
Key Features
- 2K (1440p) Ultra-Clear Resolution: Captures sharp and detailed video footage.
- Color Night Vision: Enhanced night vision with 4 infrared lights and a 200-lumen spotlight for clear, colored images in low-light conditions.
- AI Human Detection: Advanced algorithms accurately identify human shapes, reducing false alarms from pets or environmental factors.
- Integrated Solar Panel & Battery: Provides continuous power, ensuring year-round operation without frequent recharging.
- IP65 Waterproof Rating: Designed to withstand various adverse weather conditions.
- Sound-Light Alarm: Features an 80dB siren and a 200-lumen spotlight to deter intruders.
- Customizable Detection Zones: Allows users to define specific areas for motion detection.
- 130° Wide Viewing Angle: Offers extensive coverage of your surveillance area.
Package Contents
- 1 x Topcony 2K WiFi Outdoor Solar Security Camera (Model DK401)
- 1 x Wall Mounting Bracket
- 1 x USB Charging Cable (for initial charge if needed)
- 1 x Screw Pack for Installation
- 1 x User Manual

Image 2.1: Topcony 2K WiFi Outdoor Solar Security Camera (Model DK401).

Image 2.2: Visual comparison demonstrating the 2K ultra-clear resolution of the camera.

Image 2.3: The camera unit showing its integrated solar panel, battery power, and motion-activated floodlight feature.
3. Setup
3.1 Initial Charging
Before installation, it is recommended to fully charge the camera's internal battery using the provided USB cable. Connect the camera to a 5V/2A USB power adapter (not included) until the charging indicator turns solid green.
3.2 App Installation and Account Creation
- Download the "Topcony Cam" app from your smartphone's app store (iOS or Android).
- Open the app and follow the on-screen instructions to create a new account or log in if you already have one.
3.3 Camera Pairing with Wi-Fi
- Ensure your smartphone is connected to a 2.4 GHz Wi-Fi network. The camera does not support 5 GHz Wi-Fi.
- In the "Topcony Cam" app, tap "Add Device" or the '+' icon.
- Select your camera model from the list.
- Follow the app's instructions to connect the camera to your Wi-Fi network. This typically involves scanning a QR code generated by the app with the camera lens.
- Once connected, the camera's indicator light will change, and the app will confirm successful pairing.
3.4 Physical Installation
Choose a location that provides optimal sunlight exposure for the solar panel and a clear view of the area you wish to monitor. The camera should be mounted securely using the provided wall mounting bracket and screws.
- Mark the drilling points on the wall using the mounting bracket as a template.
- Drill holes and insert wall anchors if necessary.
- Attach the mounting bracket to the wall with screws.
- Secure the camera to the mounting bracket and adjust its angle for the desired coverage. Ensure the solar panel is positioned to receive maximum direct sunlight throughout the day.
4. Operating Instructions
4.1 Live View and Recording
Open the "Topcony Cam" app and select your camera to access the live video feed. From here, you can manually record video, take snapshots, and listen to audio.
4.2 Motion Detection and Alerts
The camera features advanced PIR (Passive Infrared) human detection to minimize false alarms. When motion is detected, the camera can trigger an alarm and send notifications to your smartphone.
- Customizable Detection Zones: In the app settings, you can define specific areas within the camera's view where motion detection should be active. This helps focus surveillance on critical areas and ignore irrelevant movements.
- Sensitivity Adjustment: Adjust the PIR sensor's sensitivity level in the app to suit your environment and reduce unwanted alerts.
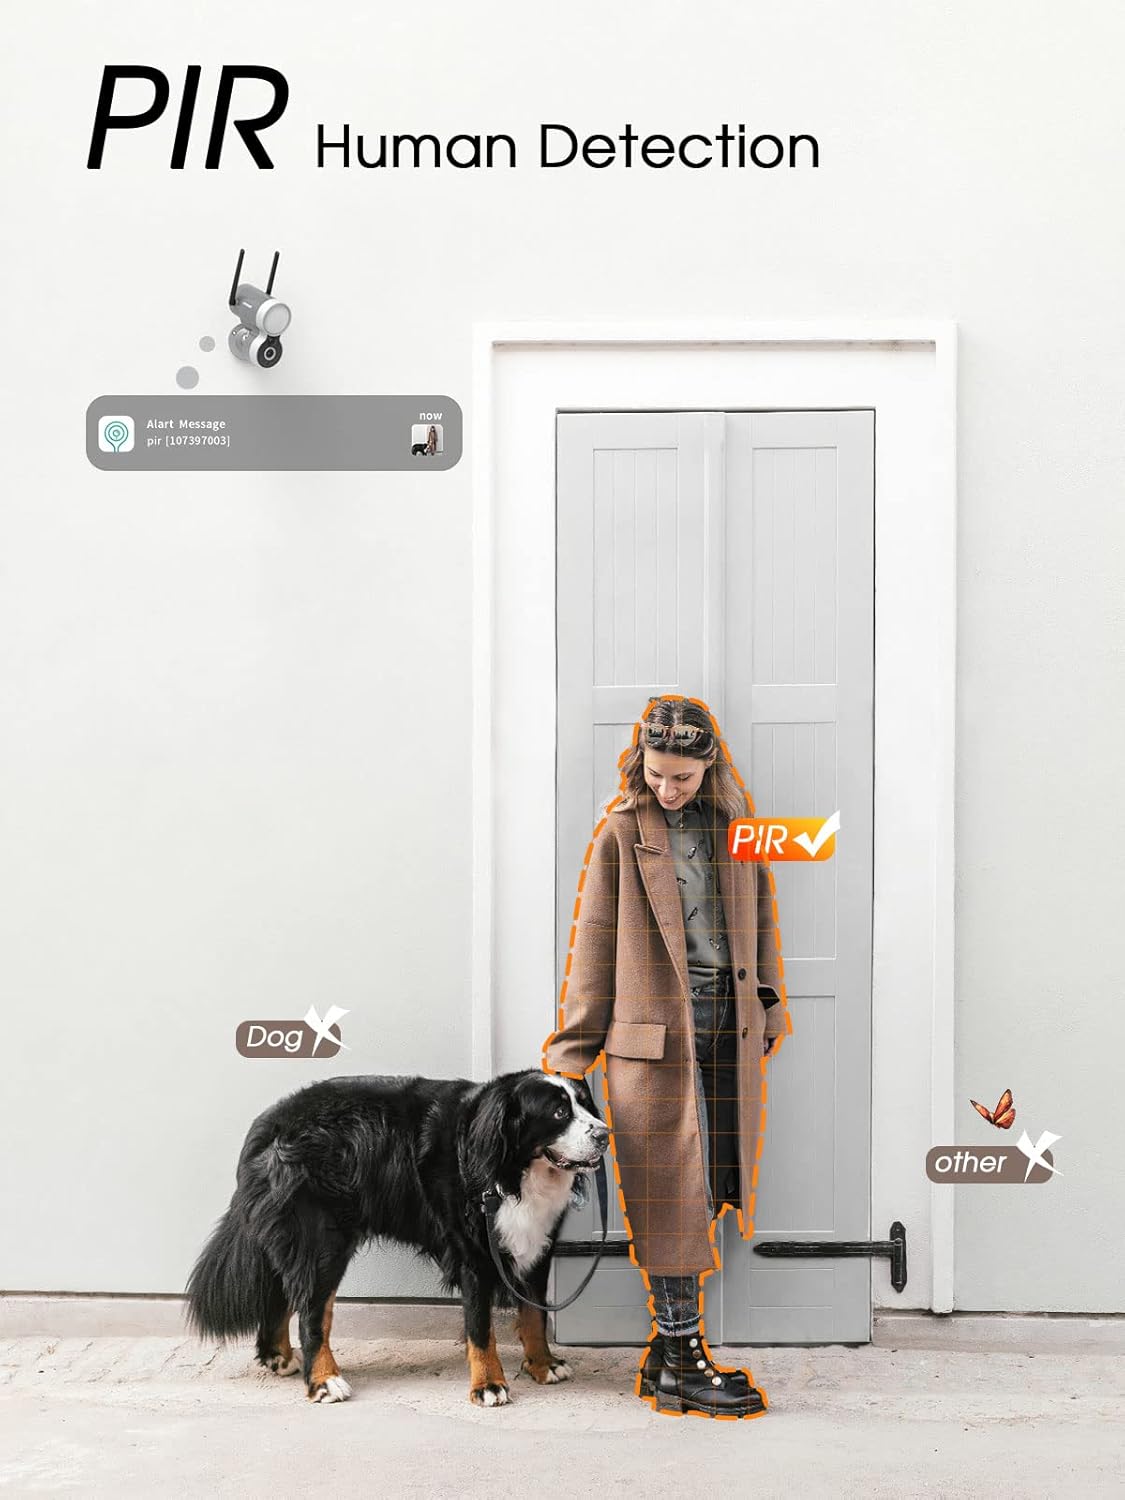
Image 4.1: Illustration of the PIR human detection capability, distinguishing humans from other objects.

Image 4.2: Depiction of the camera's 130° PIR sensor and 110° wide viewing angle, covering a range of up to 15 meters (50 feet).
4.3 Night Vision
The camera offers both infrared and color night vision modes.
- Infrared Night Vision: Provides clear black and white video in complete darkness.
- Color Night Vision: When motion is detected or manually activated, the integrated 200-lumen spotlight illuminates the area, allowing the camera to capture full-color video even at night.

Image 4.3: Example of the camera's upgraded color night vision in 2K FHD.
4.4 Sound-Light Alarm
Upon detection of an intruder, the camera can automatically activate its 80dB siren and 200-lumen spotlight to deter unwanted visitors. This feature can be configured in the app.

Image 4.4: The sound-light alarm system in action, deterring an individual with audio and light.
4.5 Storage Options
Recorded footage can be stored in two ways:
- Micro SD Card: The camera supports a Micro SD card up to 128GB (not included). Insert the card into the designated slot on the camera.
- Cloud Storage: A basic cloud storage plan is available, allowing you to store and access recordings remotely. Refer to the app for details on cloud service options.

Image 4.5: Detail of the camera's Micro SD card slot for local storage of motion-activated recordings.
5. Maintenance
5.1 Cleaning
Regularly clean the camera lens and solar panel with a soft, damp cloth to ensure optimal performance. Avoid using harsh chemicals that could damage the surfaces.
5.2 Solar Panel Performance
Ensure the solar panel remains free from obstructions (e.g., leaves, dirt, snow) to maximize sunlight absorption and maintain continuous battery charge. Periodically check the panel's angle to ensure it receives direct sunlight.
5.3 Battery Life Considerations
The battery life is influenced by the frequency of activation and environmental conditions. For example:
- Low Activity (e.g., garage, 5 activations/day): Battery life can extend to 4.5-5 months.
- Moderate Activity (e.g., home, 20 activations/day): Battery life typically lasts 2.5-3 months.
- High Activity (e.g., store, 100 activations/day): Battery life may be around 1.5-2 months.
Frequent live view access and alarm activations will consume more battery power.

Image 5.1: The camera demonstrating its IP65 waterproof capability, suitable for outdoor use.
6. Troubleshooting
| Problem | Possible Cause | Solution |
|---|---|---|
| Camera not connecting to Wi-Fi | Incorrect Wi-Fi password; 5 GHz network used; camera too far from router; weak signal. | Ensure correct 2.4 GHz Wi-Fi password. Move camera closer to router. Check router settings to ensure 2.4 GHz is enabled. Reset camera and try pairing again. |
| Frequent false alarms | PIR sensitivity too high; objects like trees or flags in detection zone; strong light changes. | Adjust PIR sensitivity in the app. Define custom detection zones to exclude irrelevant areas. Ensure camera is not directly facing strong light sources. |
| Poor night vision quality | Protective film on lens; dirty lens; insufficient ambient light for color night vision. | Remove any protective film. Clean the camera lens. Ensure the spotlight is enabled for color night vision. |
| Battery not charging via solar panel | Insufficient sunlight; dirty solar panel; panel obstructed. | Relocate the camera/panel to an area with more direct sunlight. Clean the solar panel. Remove any obstructions. |
| No app notifications | App notifications disabled; phone's notification settings; camera offline. | Check app settings to ensure notifications are enabled. Verify phone's system notification settings for the "Topcony Cam" app. Ensure camera is online and connected to Wi-Fi. |
7. Specifications
| Feature | Specification |
|---|---|
| Model Number | DK401 |
| Video Resolution | 2K (1440p) |
| Viewing Angle | 130 Degrees |
| Night Vision Range | Up to 15 meters (50 feet) |
| Wireless Technology | Wi-Fi (2.4 GHz only) |
| Power Source | Solar Power, Lithium-ion Battery |
| Water Resistance Level | IP65 (Waterproof) |
| Material | Plastic |
| Dimensions (L x W x H) | 12 x 10 x 6 cm |
| Weight | 860 grams |
| Special Features | Sound-activated recording, Night Vision, Integrated Spotlight |
| Recommended Use | Outdoor Security |
| Compatible Devices | Smartphone (Android, iOS) |
8. Support
For any questions, technical assistance, or after-sales support, please contact Topcony customer service. You can communicate with online after-sales support directly through the "Topcony Cam" application.
Please refer to the app for the most up-to-date contact information and support resources.

