
SIXTOP SIXTOP
SIXTOP Dual Dash Cam User Manual
Model: SIXTOP
1. Product Overview
The SIXTOP Dual Dash Cam is a comprehensive driving recorder designed to capture both front and interior views of your vehicle. Featuring a 3.16-inch IPS screen and 1080P HD resolution, it provides clear video footage for enhanced safety and documentation. Key functionalities include automatic loop recording, low-light night vision, and emergency recording capabilities.

Image: The SIXTOP Dual Dash Cam, showcasing its compact design, dual lenses for front and interior recording, and the included 64GB TF card.
2. Specifications
| Feature | Detail |
|---|---|
| Display Size | 3.16 inch IPS screen |
| Power Interface | DC 5V/1.5A |
| USB Interface | mini USB |
| Video Format | MOV |
| Picture Format | JPEG |
| Image Sensors | 1/4" color Sensor |
| Minimum Illumination | <0.5 Lux |
| Effective Pixels | 1296P, 1080P, 720P |
| Lens Angle | 150° (Front) |
| Operating Temperature | -20°C to +75°C |
| Battery | 150mAh built-in |
| Supported TF Card | Up to 64GB (maximum) |
| Languages | Russian, Japanese, French, Italian, German, English, Chinese (simplified), Chinese (Traditional), Korean, Spanish, Portuguese |
3. Package Contents
Verify that all items are present in the package:
- 1 x Dash Cam
- 1 x Car Charger
- 1 x 64G TF Card
- 1 x User Manual

Image: Visual representation of the product package contents, including the dash cam unit, car charger, 64GB TF card, and user manual.
4. Installation Guide
The SIXTOP Dual Dash Cam is designed for straightforward installation. Follow these steps for optimal placement and connection:
- Choose Mounting Location: Select a position on your windshield that does not obstruct your view of the road. The area behind the rearview mirror is often ideal.
- Clean Surface: Ensure the chosen area on the windshield is clean and dry before attaching the dash cam.
- Attach Dash Cam: Securely attach the dash cam to the windshield using the provided adhesive mount. Press firmly for several seconds to ensure a strong bond.
- Connect Power: Insert the mini USB end of the car charger into the dash cam's power interface. Plug the other end into your vehicle's cigarette lighter socket.
- Route Cable: Carefully route the power cable along the edge of the windshield and dashboard to minimize interference with driving.
- Insert TF Card: Insert the provided 64GB TF card into the designated slot on the dash cam. Ensure it is inserted correctly until it clicks into place.

Image: An illustration demonstrating the recommended placement of the dash cam on the windshield and how to route the power cable discreetly within the vehicle's interior.
5. Operation
5.1 Power On/Off
The dash cam will automatically power on and begin recording when your vehicle's ignition is turned on (and power is supplied to the cigarette lighter socket). It will power off automatically when the ignition is turned off.
5.2 User Interface (UI) Navigation
The 3.16-inch IPS screen provides access to various settings and playback options. Use the physical buttons (Switch, UP, Down, MODE, RESET) located on the device to navigate the menu and adjust settings.

Image: Multiple screenshots illustrating the dash cam's user interface, displaying options for resolution, loop recording, exposure, language selection, and other system settings.
5.3 Dual Camera Views and Split Screens
The dash cam features two cameras: a front-facing camera to record the road ahead and an internal camera to record the vehicle's interior. These two views can be displayed simultaneously on the screen in a split-screen format.
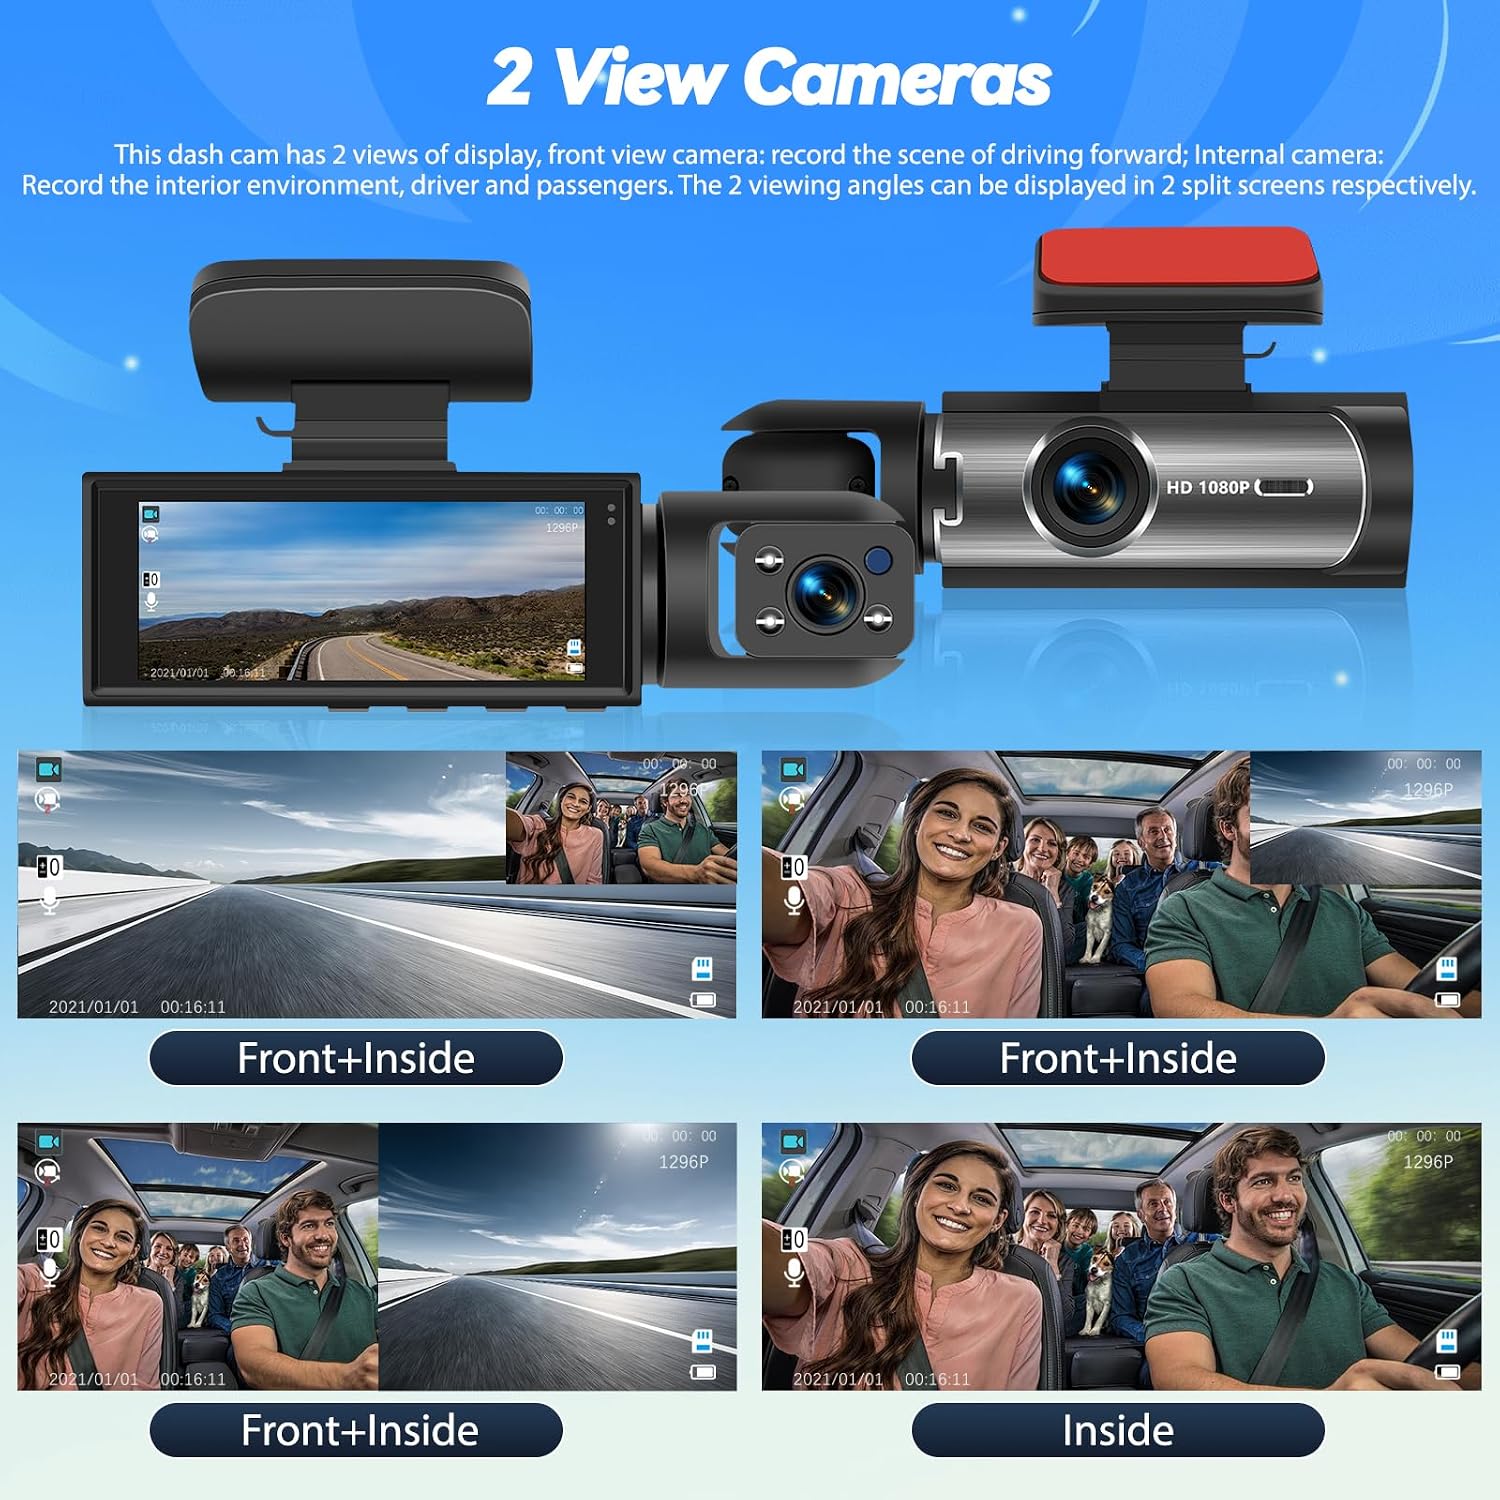
Image: Examples of the dash cam's display modes, including full-screen front view, full-screen interior view, and various split-screen configurations showing both views simultaneously.
5.4 Automatic Loop Recording
Both cameras support DVR recording with automatic loop coverage. When the TF card reaches its storage limit, the oldest unlocked video files will be overwritten by new recordings. This ensures continuous recording without manual intervention.

Image: A visual representation of the dash cam's 150-degree front recording capability and the concept of automatic loop recording, where older footage is replaced by new as storage fills.
5.5 Low-light Night Vision
The dash cam is equipped with low-light night vision technology, allowing it to capture clear images even in challenging low-light conditions or at night. This feature enhances visibility and recording quality during nighttime driving.

Image: The dash cam's screen showing clear video footage captured in low-light conditions, highlighting its 1080P resolution, 150-degree wide angle, and night vision capabilities.

Image: The dash cam unit positioned above a car at night, illustrating its HD night vision feature which provides clear recordings in dark environments.
5.6 Emergency Recording (G-Sensor)
The built-in gravity sensor (G-sensor) automatically detects sudden impacts, such as emergency braking or collisions. When triggered, it locks the current video segment, preventing it from being overwritten by loop recording. This ensures critical incident footage is preserved.

Image: A graphic depicting a car collision, with a lock icon overlayed, symbolizing the automatic activation of emergency recording by the G-sensor to protect critical video footage.
6. Troubleshooting
If you encounter issues with your SIXTOP Dual Dash Cam, refer to the following common problems and solutions:
- Dash Cam Not Powering On:
- Ensure the car charger is securely plugged into both the dash cam and the vehicle's cigarette lighter socket.
- Check if the vehicle's cigarette lighter socket is receiving power.
- Verify the car charger cable is not damaged.
- Recording Stops or Freezes:
- Ensure the TF card is properly inserted and not full.
- Format the TF card regularly (at least once a month) to maintain optimal performance.
- Use a high-speed (Class 10 or U3) TF card from a reputable brand.
- Poor Video Quality:
- Clean the camera lenses to remove any dust or smudges.
- Ensure the protective film has been removed from the lenses.
- Check the resolution settings in the dash cam's menu to ensure it is set to 1080P or higher.
- Buttons Unresponsive:
- Try resetting the device using the RESET button (if available, refer to the product diagram).
- Disconnect and reconnect the power supply.
7. Maintenance
To ensure the longevity and optimal performance of your dash cam:
- Regularly Format TF Card: Format the TF card every 2-4 weeks to prevent data corruption and ensure smooth loop recording. Back up any important footage before formatting.
- Clean Lenses: Gently wipe the camera lenses with a soft, lint-free cloth to remove dust and smudges that can affect video clarity.
- Avoid Extreme Temperatures: Do not expose the dash cam to prolonged direct sunlight or extreme cold, as this can damage internal components.
- Secure Mounting: Periodically check that the dash cam is securely mounted to the windshield to prevent vibrations from affecting video quality or causing the device to fall.
8. Warranty and Support
For technical support or warranty inquiries, please contact SIXTOP customer service.
Online Support: SIXTOP123@163.com
Please provide your product model and a detailed description of the issue when contacting support.

Image: A visual representation of customer support, showing a person with a headset, indicating availability for assistance.
Ask a question about this manual
Ask about setup, troubleshooting, compatibility, parts, safety, or missing instructions. Manuals+ will review the question and use this page’s manual context to help answer it.