1. Introduction
The ORVIBO Touch Matter Dimmer Switch is designed to provide intelligent lighting control and enhance your smart home experience. Featuring a sleek touchscreen interface, it offers seamless 0%-100% dimming capabilities, allowing you to create tailored lighting atmospheres for any occasion. This smart dimmer switch is compatible with Matter ecosystems, ensuring effortless syncing with popular platforms like Alexa, Google Assistant, Apple HomeKit, and SmartThings. It also supports uninterrupted operation through LAN control, maintaining connectivity even when offline.
Beyond lighting control, the ORVIBO Smart Dimmer Switch can transform your living space into a connected hub with advanced intercom and broadcast features, facilitating unified communication throughout your home (requires multiple D1 devices). Its user-friendly design ensures hassle-free installation in standard 1-gang electrical boxes, requiring neutral wires and a 2.4GHz Wi-Fi connection.

Figure 1.1: The ORVIBO Smart Dimmer Switch with its intuitive touchscreen interface.
2. Setup and Installation
Before beginning installation, ensure you have the necessary tools: a flat-head screwdriver, a Phillips-head screwdriver, and pliers. It is crucial to turn off the power at your circuit breaker before handling any electrical wiring. If you are unsure about performing these operations safely, consult a professional electrician.
2.1 Identifying Wires
After turning off the power, carefully remove your old switch. Identify the following wires:
- Neutral Wire: Normally white.
- Ground Wire: Usually green or bare copper.
- Line Wire: Typically black and energized even when the power is on (use a non-contact voltage tester to confirm).
- Load Wire: Also typically black, but not energized when the power is on.
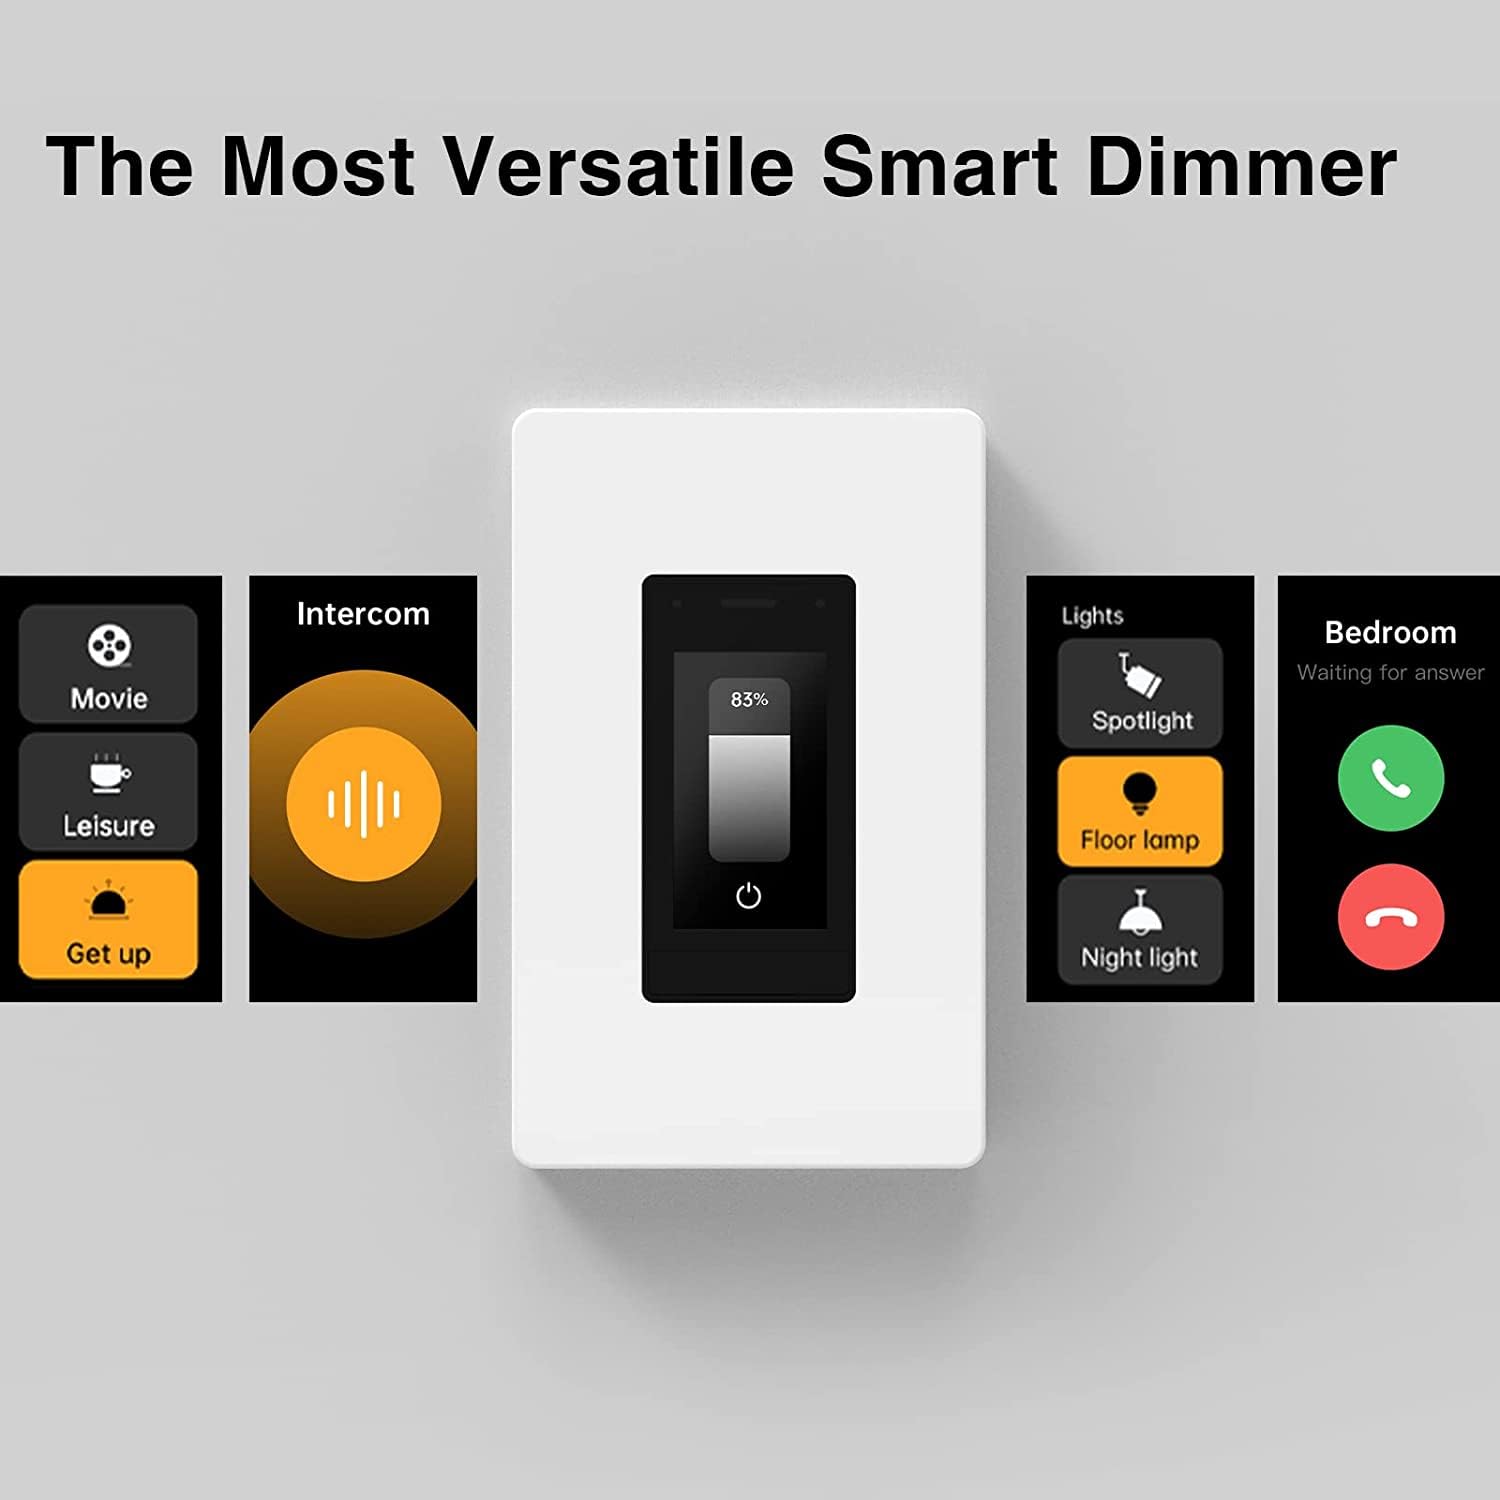
Figure 2.1: Identifying the electrical wires in the wall box.
2.2 Wiring the MixDimmer
Use the provided wire connectors to connect the wires from the MixDimmer to the corresponding labeled wires coming from the wall. Ensure all connections are secure.

Figure 2.2: The MixDimmer is designed for plug & play installation in US standard junction boxes.
2.3 Installing the Switch and Panel
Carefully push the wired MixDimmer into the wall box. If the switch doesn't sit flush, pull it out and rearrange the wires; do not force it. Secure the switch with screws, then install the decorative face panel.

Figure 2.3: Securing the switch in the wall box.

Figure 2.4: Attaching the decorative face panel.
2.4 Initial Power-Up and App Integration
Once the switch is physically installed, turn the power back on at the circuit breaker. The switch's screen will power on. You will need to download the ORVIBO HOME App to complete the setup and integrate the device into your smart home system. Scan the QR code displayed on the switch's screen or in the instruction manual to download the app and add the device.
Video 2.1: Detailed installation guide for the ORVIBO Mixpad D1 Smart Dimmer Switch.
3. Operating the Smart Dimmer Switch
The ORVIBO Smart Dimmer Switch offers multiple ways to control your lighting and smart home environment.
3.1 Touchscreen Control
The 1.9-inch touchscreen allows for direct control of dimming levels from 0% to 100%. You can also select different lighting scenes and access various settings directly from the switch.

Figure 3.1: Direct dimming control via the touchscreen panel.
3.2 App Control (ORVIBO Home App)
The ORVIBO Home App provides comprehensive control over your dimmer switch from anywhere. You can adjust brightness, set timers, create schedules, and manage scenes.

Figure 3.2: Control your lighting from anywhere using the ORVIBO App.
3.3 Voice Control
With Matter compatibility, the ORVIBO Smart Dimmer Switch seamlessly integrates with voice assistants like Alexa and Google Assistant. Simply use voice commands to turn lights on/off, adjust brightness, or activate scenes.

Figure 3.3: Voice control integration with Alexa and Google Assistant.
3.4 Intercom and Broadcast Features
When two or more ORVIBO D1 devices are installed and connected to the same router, they enable intercom and broadcast functionalities. This allows for seamless communication between rooms, enhancing convenience and connectivity within your home.

Figure 3.4: Intercom functionality between ORVIBO MixDimmer devices.
Video 3.1: Demonstrates the smart dimming and intercom features of the ORVIBO switch.
Video 3.2: Overview of the ORVIBO Matter Smart Dimmer Switch with 1.9-inch touchscreen, highlighting its features.
Video 3.3: Comprehensive demonstration of the Matter Smart Dimmer Switch (Mixpad D1) capabilities.
4. Maintenance
To ensure optimal performance and longevity of your ORVIBO Smart Dimmer Switch, regular maintenance is recommended. Keep the touchscreen clean by gently wiping it with a soft, dry cloth. Avoid using abrasive cleaners or solvents that could damage the screen or housing.
5. Troubleshooting
If you encounter any issues with your ORVIBO Smart Dimmer Switch, refer to the following common troubleshooting steps:
5.1 Device Not Responding / Screen Black
If the device is unresponsive or the screen is black, a simple restart procedure can often resolve the issue:
- Carefully remove the wall plate.
- Locate the Fast Switching Tab at the bottom of the switch and pull it out.
- Wait for the screen to go black, then reinsert the tab firmly.
Video 5.1: Instructions on how to reboot the Mixpad D1 Smart Dimmer Switch.
5.2 Intercom/Broadcast Functionality Issues
For seamless intercom and broadcast functionality between multiple Mixpads, ensure all devices are connected to the same router. Network configuration can impact these features.
6. Specifications
| Feature | Detail |
|---|---|
| Product Dimensions | 4.12 x 1.75 x 1.8 inches; 4.8 ounces |
| Item Model Number | V70X-Touch-Matter-Dimmer |
| Date First Available | March 20, 2024 |
| Manufacturer | ORVIBO |
| Operation Mode | OFF |
| Current Rating | 2.5 Amps |
| Operating Voltage | 120 Volts (AC) |
| Contact Type | Spst |
| Connector Type | Crimp |
| Terminal | Through Hole |
| Item dimensions L x W x H | 4.12 x 1.75 x 1.8 inches |
| Circuit Type | 1-way |
| Actuator Type | Touchscreen |
7. Warranty and Support
ORVIBO is committed to providing high-quality smart home appliances. While specific warranty details are not provided in this manual, reliable troubleshooting and support are available for any unforeseen issues. For further assistance or inquiries, please refer to the contact information provided with your product packaging or visit the official ORVIBO website.


