
1. Safety Information
WARNING: Read and understand all instructions and safety information in this manual before operating this product. Failure to follow these instructions may result in serious injury or property damage.
General Safety Precautions:
- Always wear appropriate personal protective equipment, including safety glasses and gloves.
- Ensure the lift is on a flat, level, and stable surface capable of supporting the lift and the motorcycle's weight.
- Do not exceed the maximum load capacity of 1100 lbs (500 kg).
- Secure the motorcycle properly using the wheel clamp and additional tie-down straps before lifting.
- Keep hands, feet, and other body parts clear of moving parts and pinch points during operation.
- Never work under a lifted motorcycle unless it is properly supported by the lift's safety lock pin.
- Do not modify the lift in any way. Use only original replacement parts.
- Keep children and unauthorized persons away from the lift during operation.
- Inspect the lift for damage or wear before each use. Do not use if damaged.
2. Product Overview
The Strongway Hydraulic Motorcycle Lift is designed to provide stable elevated access for motorcycle maintenance, service, and repair tasks. It features a heavy-duty welded steel frame and a diamond-plate platform for enhanced traction and stability. The foot-operated hydraulic pump allows for controlled, hands-free lifting. A removable ramp and wheel clamp assist with secure loading, and integrated transport wheels facilitate repositioning.
Key Features:
- Professional, dedicated integrally-cast, foot-operated pump for reliable hands-free lifting.
- Quickly lifts up to 1,100 lbs. to 30 inches in height.
- Rugged diamond plate steel platform for durability and grip.
- Removable ramp with hinges and rollers.
- Safety lock pin prevents accidental falls.
Components Included:
- 1000-Lb. Hydraulic Motorcycle Lift (main assembly)
- Loading Ramp
- Front Wheel Clamp
- Foot Pump and Release Pedal Assembly
- Safety Lock Pin
- Transport Wheels and Adjustable Leveling Feet

Figure 2.1: Strongway Hydraulic Motorcycle Lift in its lowered position with the loading ramp attached.

Figure 2.2: Strongway Hydraulic Motorcycle Lift elevated to its maximum height, showing the scissor lift mechanism.

Figure 2.3: Detailed view of the adjustable front wheel clamp with rubber pads, used to secure the motorcycle.

Figure 2.4: Close-up of the foot-operated hydraulic pump and release pedal mechanism.
3. Setup
Assembly:
The Strongway Hydraulic Motorcycle Lift typically arrives partially assembled. Complete the assembly by attaching the loading ramp, front wheel clamp, and any remaining components as per the included assembly diagram (not provided in this manual). Ensure all bolts and fasteners are securely tightened.
Positioning the Lift:
- Choose a flat, level, and stable concrete surface for the lift.
- Roll the lift into the desired position using the transport wheels.
- Adjust the leveling feet at each corner of the lift's base to ensure maximum stability and prevent movement during operation.
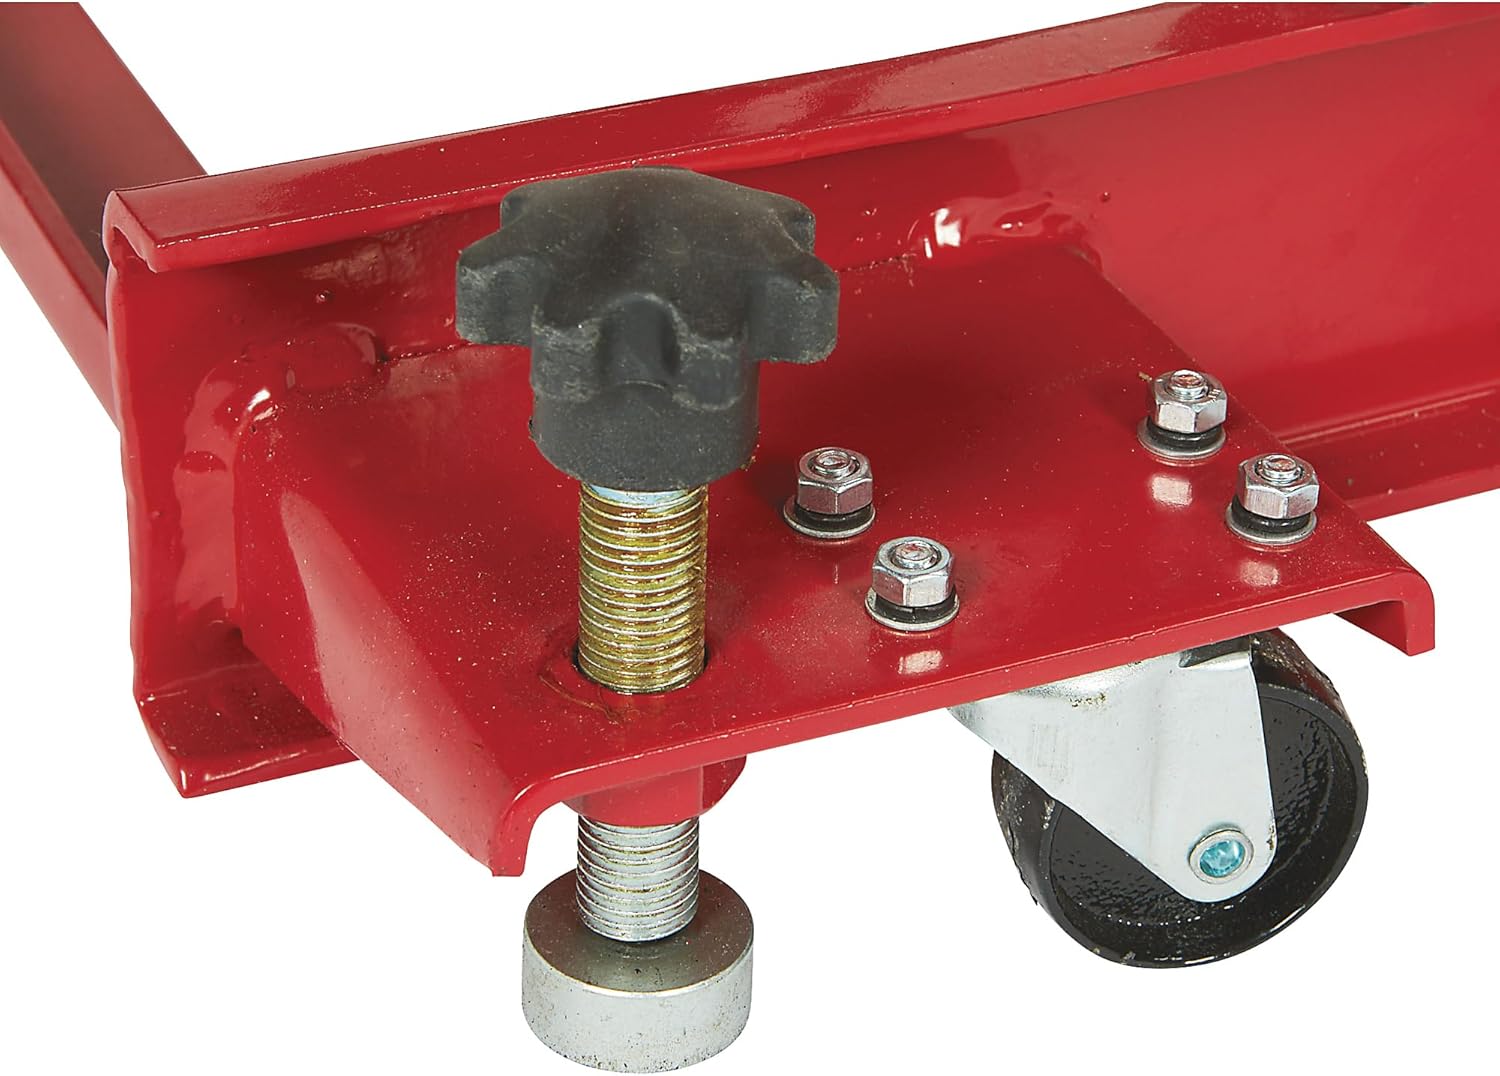
Figure 3.1: Adjustable leveling feet and transport wheels for stable positioning.
4. Operating Instructions
Loading the Motorcycle:
- Ensure the lift is in its lowest position with the ramp securely attached.
- Carefully push or ride the motorcycle up the ramp onto the lift platform.
- Position the front wheel into the wheel clamp. Adjust the clamp to firmly secure the wheel.
- Attach additional tie-down straps from the motorcycle frame to the lift's tie-down points to prevent tipping.
Lifting the Motorcycle:
- With the motorcycle securely loaded, repeatedly press the foot pedal of the hydraulic pump to raise the lift.
- Lift the motorcycle to the desired working height.
- Once at the desired height, insert the safety lock pin into the nearest available hole in the lift mechanism to prevent accidental lowering. This is a critical safety step.
Lowering the Motorcycle:
- Ensure the area around the lift is clear of obstructions and personnel.
- Slightly raise the lift using the foot pump to relieve pressure on the safety lock pin, then remove the pin.
- Slowly depress the release pedal to gradually lower the lift. Control the descent speed by adjusting pressure on the pedal.
- Once the lift is fully lowered, release the tie-down straps and the front wheel clamp.
- Carefully remove the motorcycle from the lift.

Figure 4.1: Front section of the lift with wheel clamp and handle, ready for motorcycle loading.

Figure 4.2: Removable access panel for rear wheel maintenance.
5. Maintenance
Regular Inspection:
- Before each use, inspect the hydraulic system for leaks, cracks, or damage.
- Check all bolts, nuts, and fasteners for tightness. Tighten as necessary.
- Inspect the lift platform, ramp, and wheel clamp for any signs of wear, bending, or damage.
- Ensure the safety lock pin operates freely and is not bent or damaged.
Hydraulic System:
- Check the hydraulic fluid level periodically. Refer to the manufacturer's specifications for the correct fluid type and filling procedure.
- If the lift does not raise or hold pressure, it may indicate low fluid, air in the system, or a faulty seal. Consult a qualified technician for repairs.
Cleaning and Storage:
- Clean the lift regularly to remove dirt, grease, and debris.
- Store the lift in a dry, protected area when not in use to prevent corrosion.
6. Troubleshooting
Common Issues and Solutions:
- Lift does not raise:
- Check hydraulic fluid level. Refill if low.
- Ensure release valve is fully closed.
- Inspect pump mechanism for damage or blockages.
- Lift lowers slowly or drifts down:
- Check for hydraulic fluid leaks.
- Inspect seals for wear or damage.
- Ensure release valve is fully closed.
- Motorcycle feels unstable on lift:
- Verify the lift is on a level surface and leveling feet are properly adjusted.
- Ensure the front wheel clamp is securely tightened.
- Always use additional tie-down straps to secure the motorcycle to the lift.
- Confirm the motorcycle is centered on the platform.
- Ramp is too steep for loading:
- Consider using a longer auxiliary ramp if available, or position the lift at a slight incline (if safe and stable) to reduce the ramp angle.
For issues not covered here, or if problems persist, contact customer support.
7. Specifications
| Specification | Detail |
|---|---|
| Model Number | ZD04101D-500 |
| Load Capacity | 1,100 Pounds (500 kg) |
| Material | Steel |
| Minimum Height | 7.08 inches |
| Maximum Height | 30 inches |
| Vehicle Service Type | Motorcycle |
| Item Weight | 335 pounds |
| UPC | 840321750570 |
8. Warranty
The Strongway Steel Hydraulic Motorcycle Lift comes with a 1-year limited warranty from the manufacturer. This warranty covers defects in materials and workmanship under normal use. Please retain your proof of purchase for warranty claims. For specific terms and conditions, refer to the warranty documentation included with your product or contact Strongway customer support.
9. Customer Support
If you have any questions regarding the assembly, operation, maintenance, or troubleshooting of your Strongway Steel Hydraulic Motorcycle Lift, please contact Strongway customer support.
For more information or to explore other Strongway products, visit the official Strongway Store:
