
Xflyee 099
Xflyee RGB Digital Wall Clock User Manual
Model: 099
Brand: Xflyee
Product Overview
The Xflyee RGB Digital Wall Clock is a versatile and highly visible timekeeping device designed for various indoor environments. It features a large, high-definition LED display with bold, easy-to-read digits, ensuring clear visibility from a distance and at different angles. This clock offers multiple display modes, adjustable brightness, and convenient remote control operation, making it a practical addition to any room.
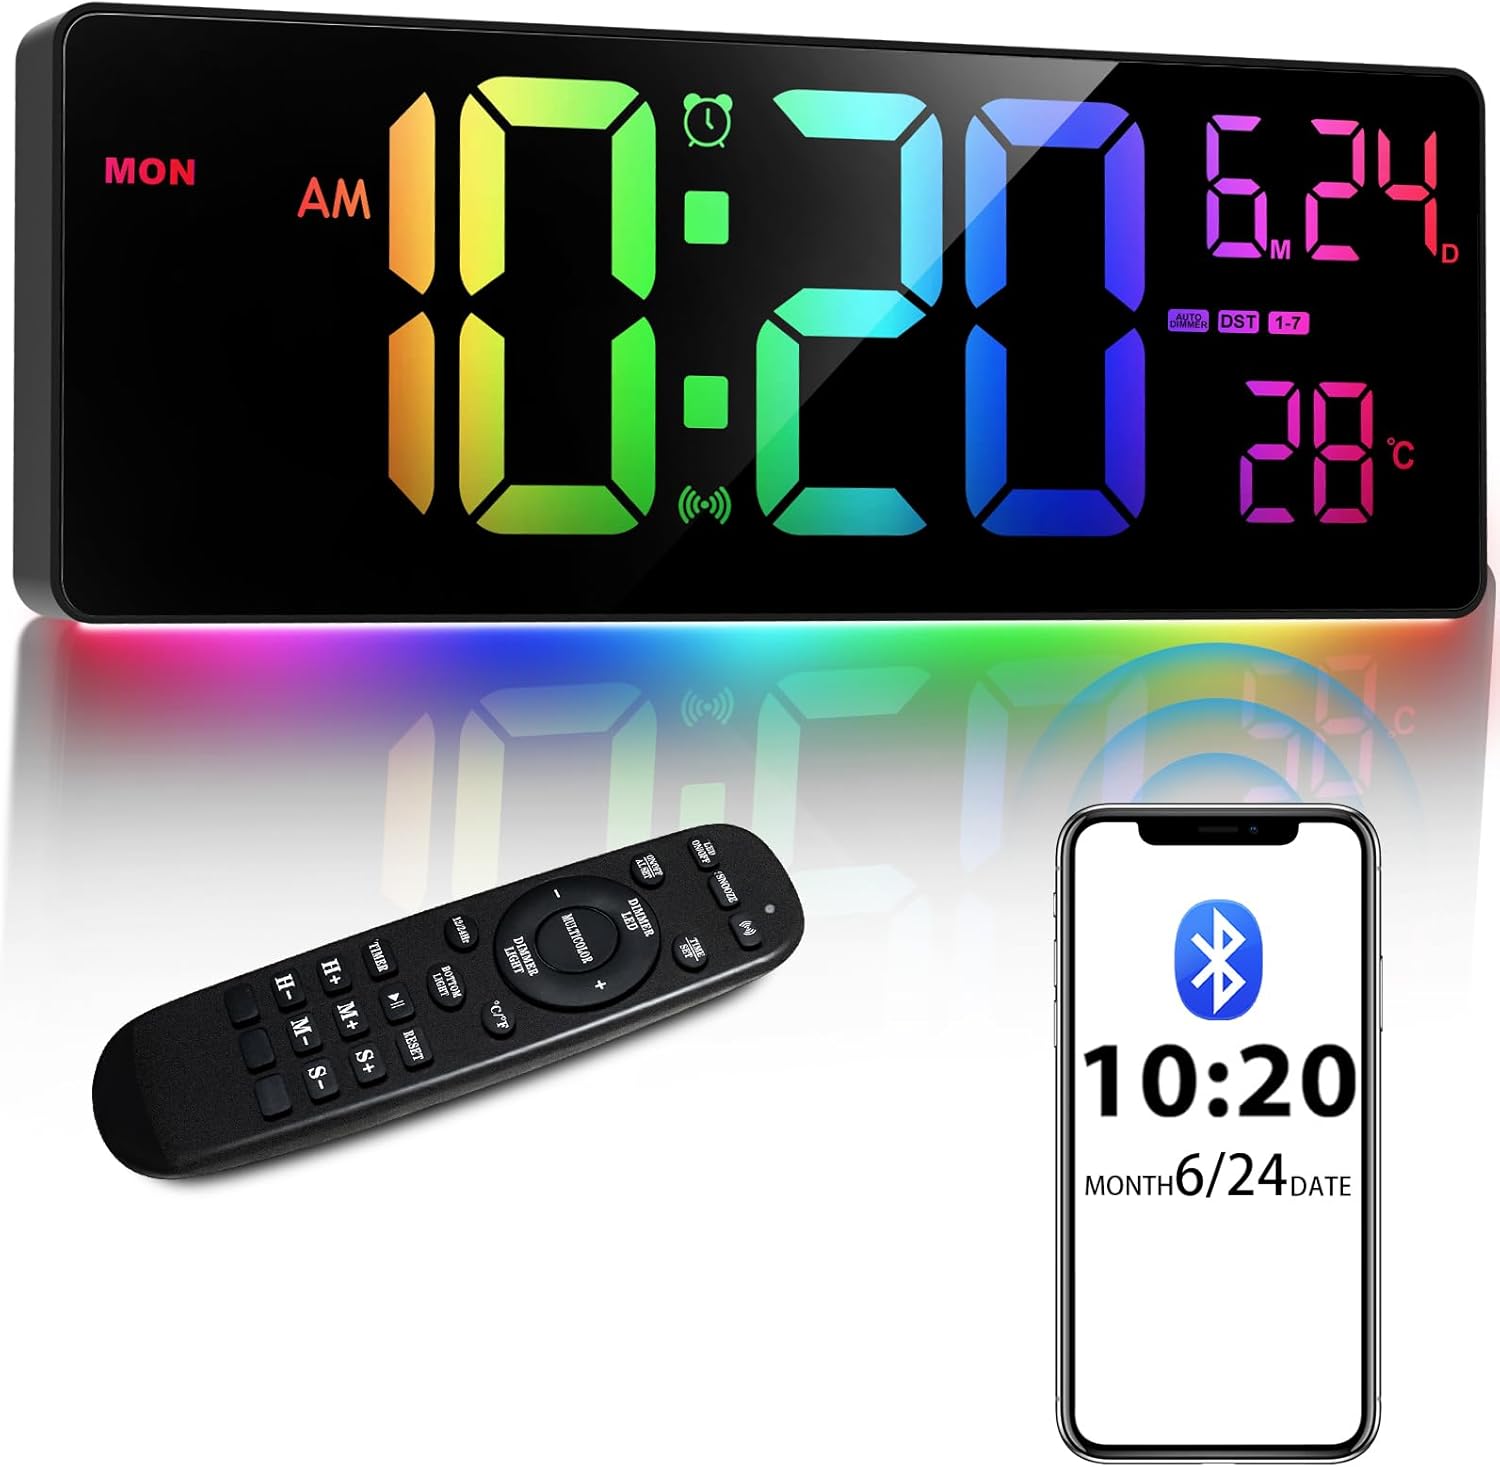
Image: The Xflyee RGB Digital Wall Clock displaying time and date, accompanied by its remote control and a smartphone illustrating Bluetooth time synchronization.
Setup Guide
1. Unboxing and Components
Carefully remove all components from the packaging. Ensure you have the following:
- Xflyee RGB Digital Wall Clock
- Remote Control
- Power Cable
- Mounting hardware (screws, wall anchors)
- AAA Batteries (2x) for the remote control (included)
2. Power Connection
Connect the provided power cable to the clock's power input port and plug the other end into a standard electrical outlet. The clock will power on automatically.
3. Initial Time Synchronization (Bluetooth)
The Xflyee clock utilizes Bluetooth 5.1 technology for effortless time synchronization with your smartphone. This process ensures accurate time display and automatic updates.
- Ensure Bluetooth is enabled on your smartphone.
- Open your phone's Bluetooth settings and search for available devices.
- Locate and select the Xflyee clock (e.g., "C3016" or similar identifier) to pair.
- Once paired, the clock will automatically sync its time with your phone within seconds.

Image: The digital clock displaying time, date, and temperature, with a smartphone nearby illustrating the Bluetooth 5.1 connection for time synchronization.
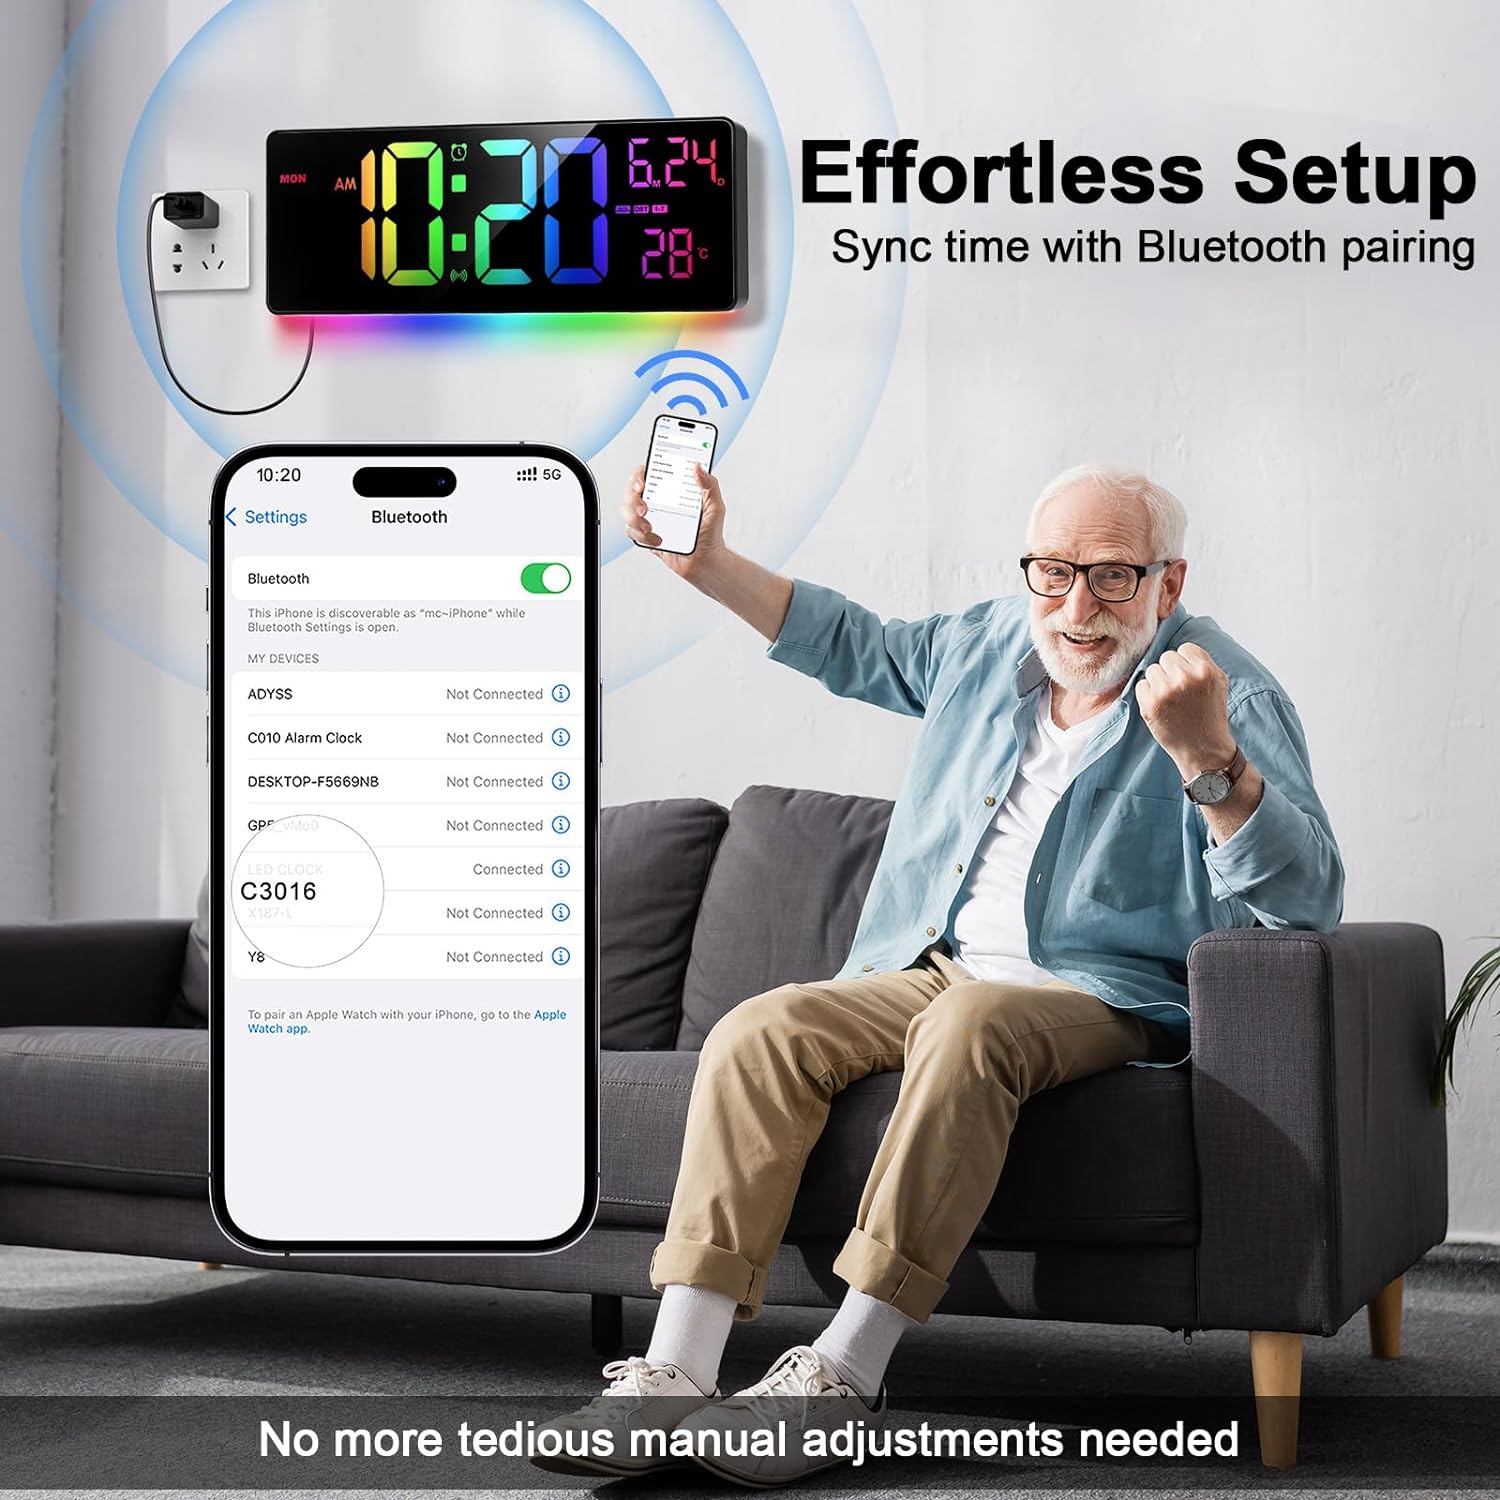
Image: A person on a couch easily setting up the Xflyee clock using their smartphone's Bluetooth settings, demonstrating the effortless setup process.
Note: The clock also has a backup battery feature to maintain time settings during power outages, ensuring you don't need to re-sync after a brief power interruption.
4. Wall Mounting
The clock comes with necessary hardware for wall mounting. Choose a suitable location, mark the drilling points, and secure the clock firmly to the wall.
Operating Instructions
1. Display Modes and Information
The clock primarily displays time (in AM/PM or 24-hour format), date (month/day), and indoor temperature (in Celsius or Fahrenheit). These can be cycled or set via the remote control.
2. Brightness Adjustment
The clock offers two main brightness settings: manual and automatic dimming. You can adjust the brightness to suit your environment and preference.
- Manual Brightness: Use the remote control to select from 5 levels of brightness (0%, 25%, 50%, 75%, 100%).
- Automatic Dimmer: Enable the auto-dimmer function for the clock to automatically adjust its brightness based on ambient light conditions.
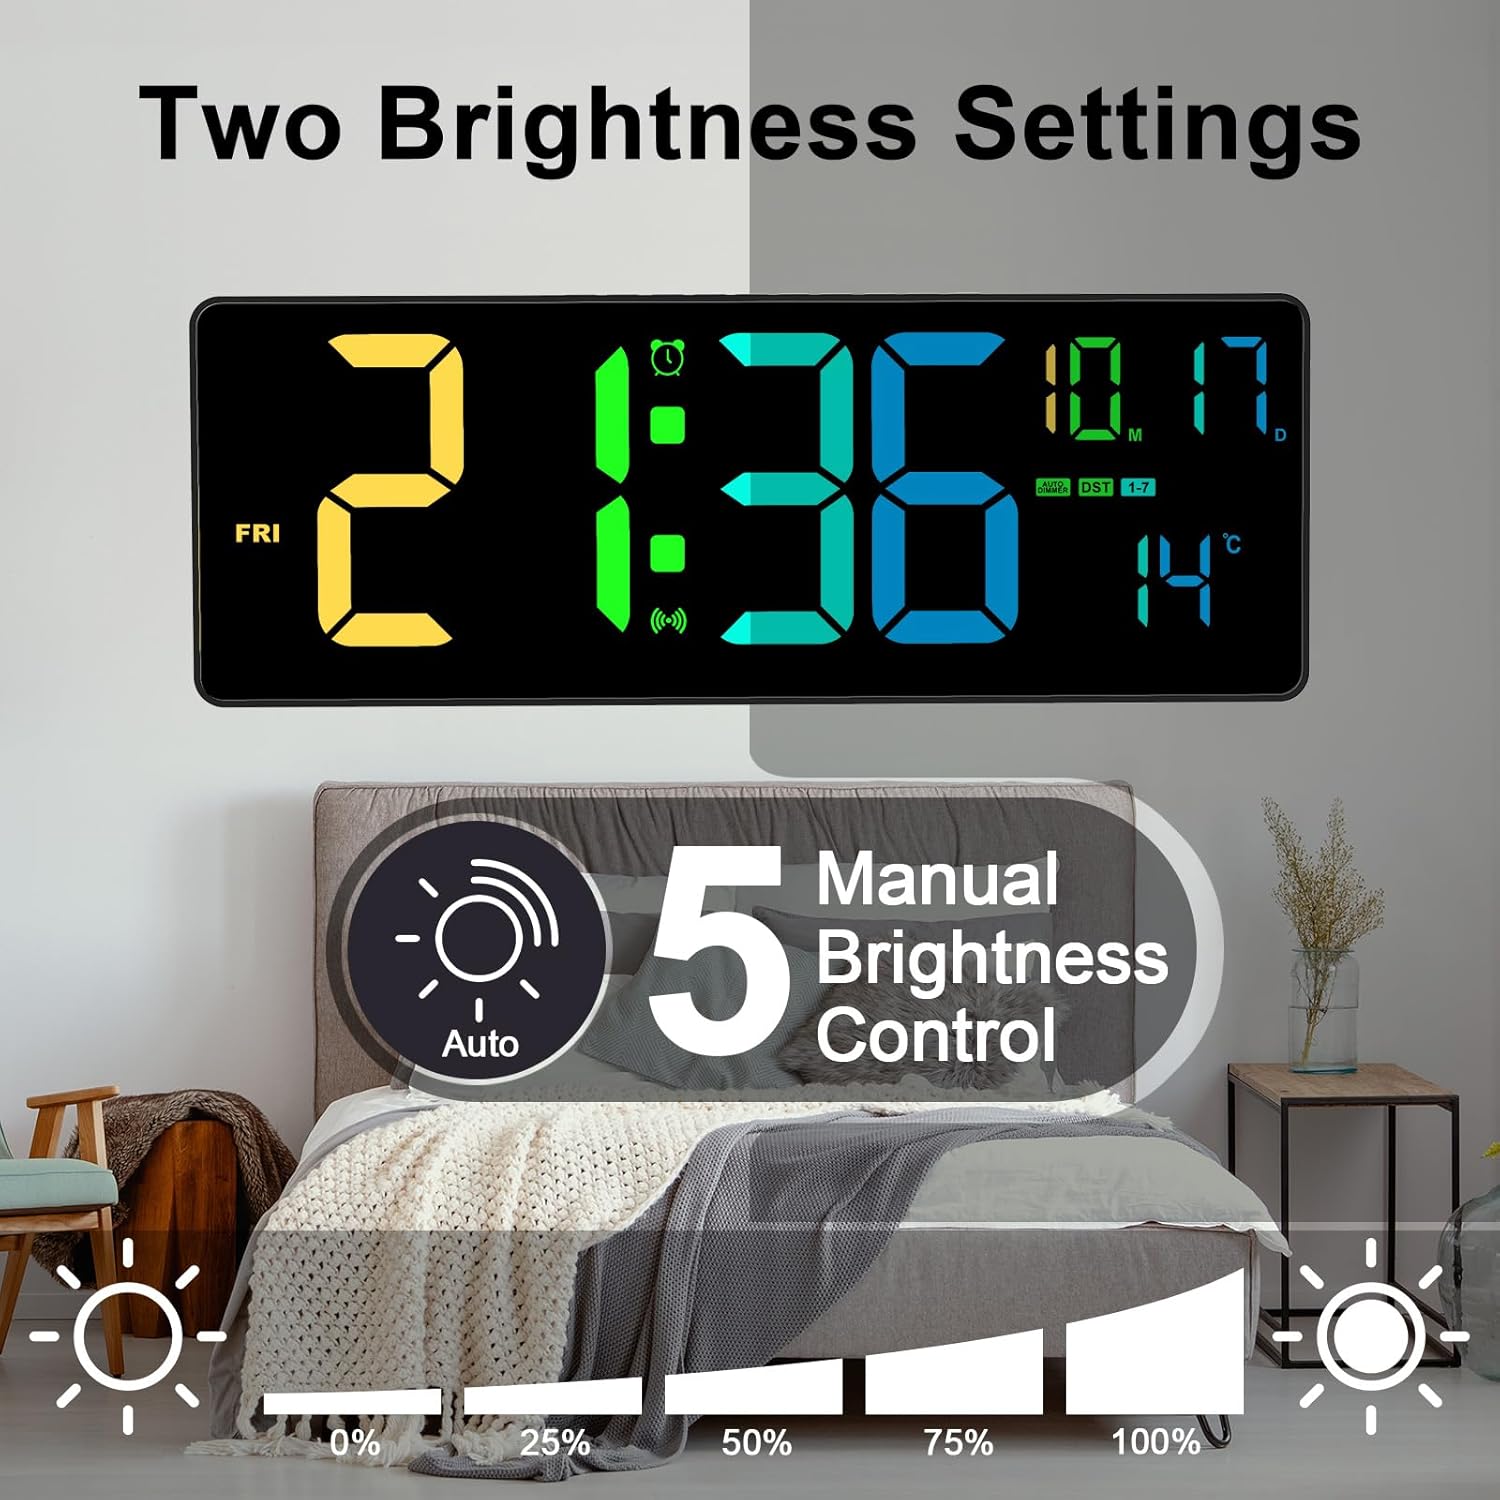
Image: The digital clock displaying time and temperature, with an overlay illustrating the two brightness settings: automatic dimming and five manual brightness levels (0% to 100%).
3. Color Modes Display
Personalize your clock's appearance with 10 distinct color display modes, including 6 pure colors and 4 dynamic RGB modes.
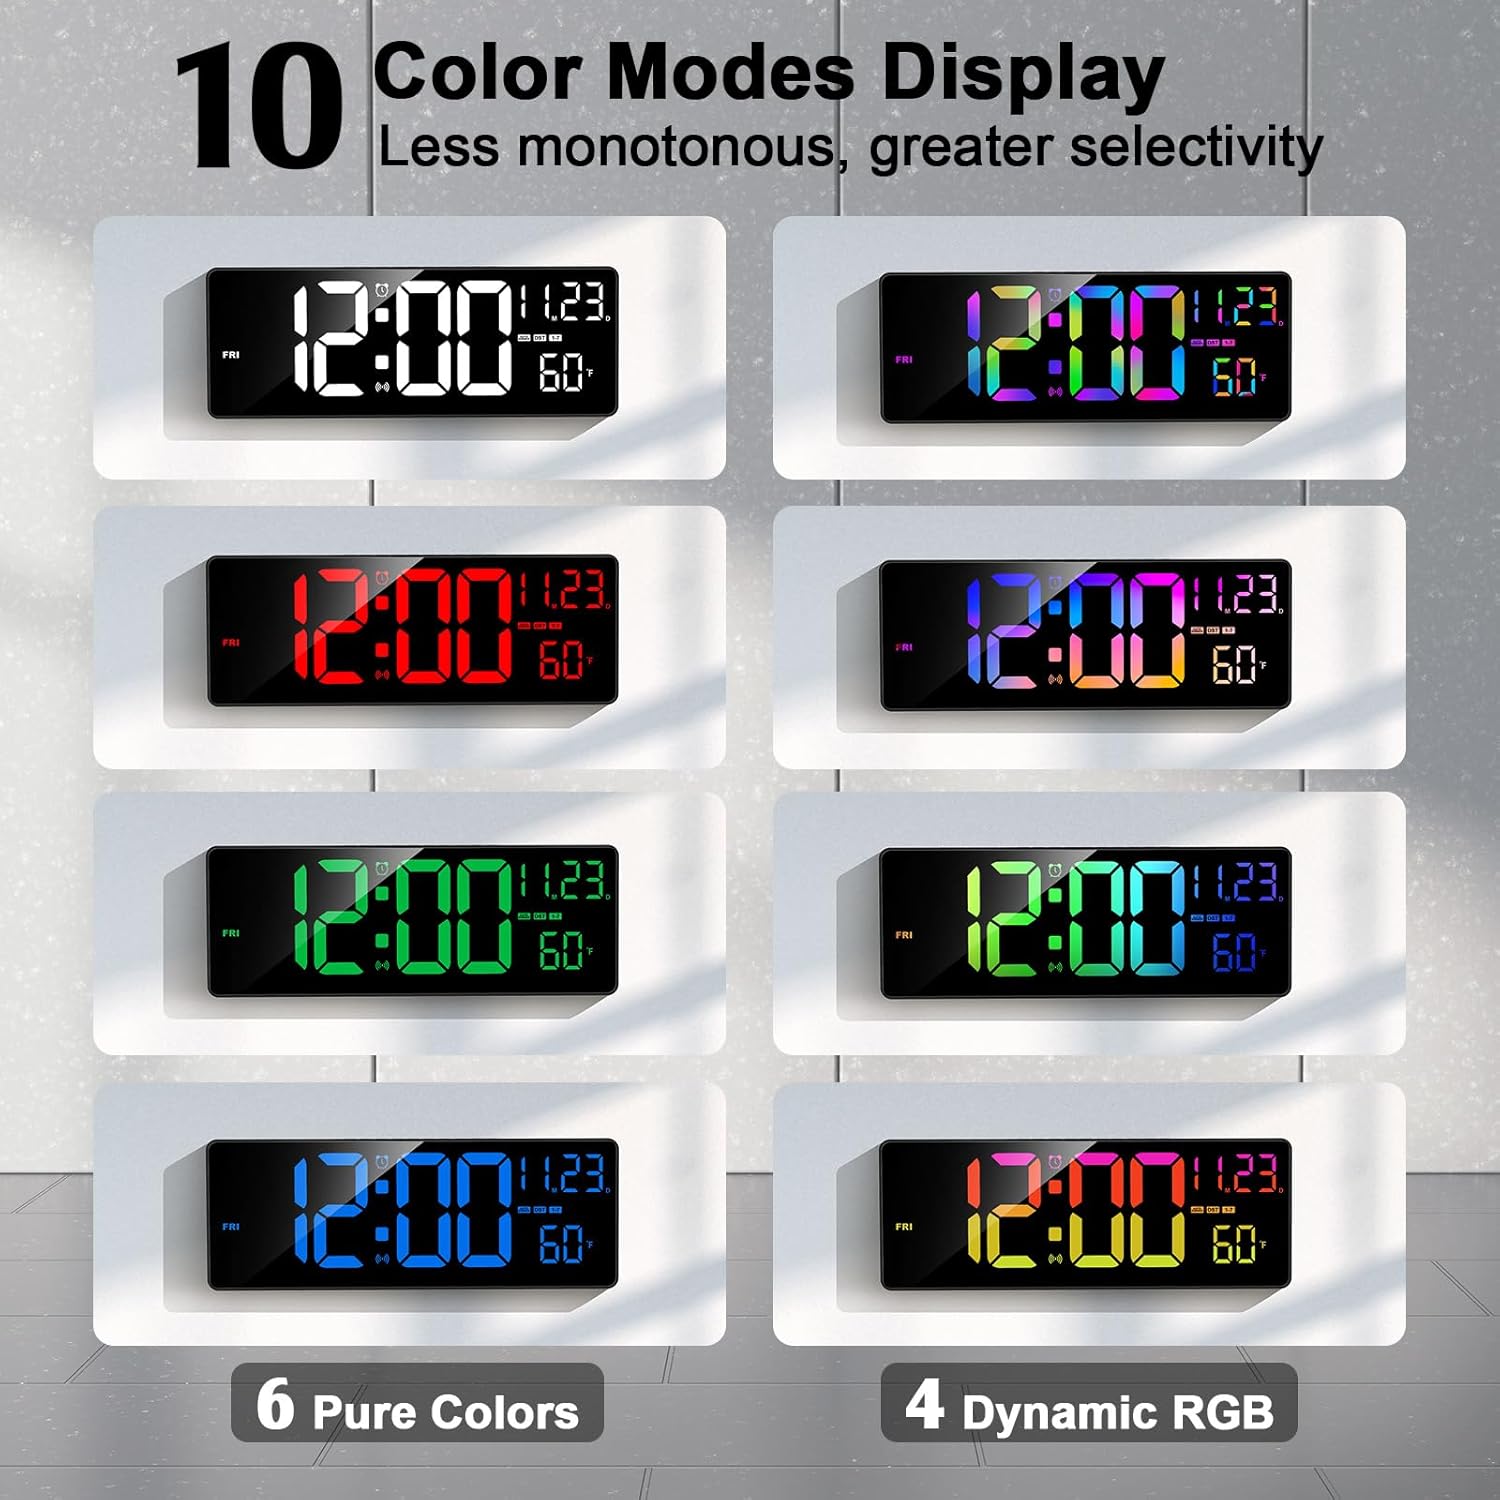
Image: A visual representation of the ten available color display modes for the clock, showcasing six pure colors and four dynamic RGB options.

Image: Several clocks arranged to demonstrate the selective RGB night light feature, showing various color options and five brightness levels.
4. Remote Control Functions
The included remote control provides full functionality for managing the clock's settings:
- Power On/Off: Turn the clock display on or off.
- Brightness Control: Adjust display brightness levels.
- Color Mode Selection: Cycle through or select specific color modes.
- Time/Date/Temperature Settings: Manually adjust if needed, though Bluetooth sync is recommended.
- Alarm Settings: Set and manage alarms.
- Timer Functions: Activate and control count-up or count-down timers.
5. Alarm and Timer Functions
The clock includes integrated alarm and timer features for daily use.
- Alarm Clock: Set multiple alarms with customizable sounds and snooze options.
- Count Up/Down Timer: Utilize the timer for various activities, from cooking to exercise.

Image: A composite image showing the Xflyee clock in different modes: as a large digital timer clock, a count-up/down timer during exercise, and an alarm clock set for 6:00 AM.
Maintenance
1. Cleaning
To clean the clock's display and casing, use a soft, dry, or slightly damp cloth. Avoid abrasive cleaners, solvents, or excessive moisture, as these can damage the display or internal components.
2. Remote Control Battery Replacement
The remote control requires 2 AAA batteries. If the remote's functionality diminishes, replace the batteries by opening the battery compartment on the back of the remote.
Troubleshooting
| Problem | Possible Cause | Solution |
|---|---|---|
| Clock display is off or not responding. | No power, loose connection, or clock is turned off. |
|
| Time is incorrect or not syncing. | Bluetooth not connected, phone's time is incorrect, or interference. |
|
| Remote control not working. | Dead batteries, obstruction, or remote out of range. |
|
| Temperature reading seems inaccurate. | Clock placed near heat sources or in direct sunlight. |
|
Specifications
| Feature | Detail |
|---|---|
| Brand | Xflyee |
| Model Number | 099 (also referred to as 3016) |
| Color | RGB (Multi-color display) |
| Product Dimensions (L x W x H) | 38.07 x 3.81 x 13.97 cm (15 x 1.5 x 5.5 inches) |
| Item Weight | 1.05 Kilograms (2.31 pounds) |
| Display Type | Digital LED |
| Special Features | Adjustable Brightness, Remote Control, Bluetooth Time Sync, Alarm, Timer, Temperature Display |
| Power Source | Corded Electric |
| Batteries (for remote) | 2 AAA batteries (included) |
| Date First Available | May 26, 2024 |

Image: The Xflyee RGB Digital Wall Clock with its dimensions (16 inches wide, 5.7 inches high) clearly marked, alongside a smaller inset showing a 9.8-inch time display.
Warranty and Support
Specific warranty information for the Xflyee RGB Digital Wall Clock is not provided within this manual. For details regarding warranty coverage, returns, or technical support, please refer to the product listing on the retailer's website or contact Xflyee customer service directly.
Please retain your proof of purchase for any warranty claims.
Ask a question about this manual
Ask about setup, troubleshooting, compatibility, parts, safety, or missing instructions. Manuals+ will review the question and use this page’s manual context to help answer it.