
Introduction
Thank you for choosing the Keonjinn Lighted Medicine Cabinet. This manual provides essential information for the safe installation, operation, and maintenance of your new medicine cabinet. Please read these instructions thoroughly before installation and keep them for future reference.
Safety Information
Electrical Safety: This LED medicine cabinet is equipped with a plug. It can be used as a plug-in unit or hardwired. If hardwiring is desired, it is crucial to handle the connection safely. If you are unsure how to perform a hardwire connection, please consult a professional electrician to avoid electrical hazards.
Glass Handling: The cabinet features tempered glass mirrors and shelves. While tempered glass is designed for enhanced durability and impact resistance, handle all glass components with care to prevent breakage and injury.
Weight Capacity: Do not exceed the maximum weight capacity of 43 pounds for the shelves to prevent damage or injury.
Product Specifications
| Feature | Detail |
|---|---|
| Brand | Keonjinn |
| Color | Silver |
| Material | Glass |
| Product Dimensions (D x W x H) | 4.92"D x 40"W x 32"H |
| Additional Features | Fogless, Frameless, Illuminated, Rectangular, Touch Sensor |
| Number of Shelves | 3 (Adjustable Tempered Glass) |
| Installation Type | Wall mount (Recessed or Surface Mount) |
| Weight Capacity Maximum | 43 pounds |
| Item Weight | 68.3 pounds |
| Power | Built-in Outlets & USB Ports |
| Lighting | Double-Sided LED, 3 Color Temperatures (Warm, Natural, White), Stepless Dimming |
| Clock | Bluetooth Time Sync Digital Clock |
Setup and Installation
Unpacking and Inspection
Carefully remove the medicine cabinet from its packaging. Inspect all components for any damage. Report any damage to the retailer immediately. Ensure all parts listed in the package contents (mirror, shelves, mounting hardware) are present.

Image: Multi-layer packaging ensures safe delivery of the medicine cabinet.
Wiring Methods
The medicine cabinet supports two wiring methods: plug-in or hardwired.
- Plug-in: The cabinet comes with a pre-connected plug for easy installation into a standard wall outlet.
- Hardwired: For a seamless look, the plug head can be cut off, and the cabinet can be hardwired into a junction box. Caution: If you are not experienced with electrical wiring, please consult a professional electrician for hardwiring.

Image: Illustration of plug-in and hardwired installation options.
Mounting Options
The medicine cabinet can be installed using either recessed mounting or surface mounting. Detachable side panels are provided for surface mounting.

Image: Recessed Mounting vs. Surface Mounting options.
Recessed Mounting Installation Guide
This video demonstrates the steps for recessed installation of the Keonjinn medicine cabinet.
Video: Keonjinn Recessed Medicine Cabinet Installation Guide. This video provides a step-by-step visual guide for installing the medicine cabinet into a wall cutout.
- Before installation, remove the side panels and detach the cabinet door.
- Make an outline for the cabinet on the wall, cut through the drywall, and frame the cutout opening according to the dimensions provided in the table below.
- Place the cabinet in the cutout opening, secure it to the wall, and then reinstall the cabinet door.

Image: Step-by-step guide for recessed mounting.
Surface Mounting Installation Guide
This video demonstrates the steps for surface installation of the Keonjinn medicine cabinet.
Video: Keonjinn Surface Mounted Medicine Cabinet Installation Guide. This video provides a step-by-step visual guide for surface mounting the medicine cabinet.
- Confirm the desired installation location and mark spots for the lower bracket.
- Drill at the marked spots and securely attach the lower bracket to the wall.
- Place the medicine cabinet onto the lower bracket and secure two upper brackets on top of the cabinet.

Image: Step-by-step guide for surface mounting.
Cutout Dimensions for Recessed Installation
For recessed installation, refer to the table below for appropriate cutout dimensions. Note that the cabinet's cutout size is not the same as the mirror size.

Image: Cutout dimensions reference for recessed installation.
Wall and Anchor Recommendations
Choose the appropriate wall anchors based on your wall thickness and the cabinet's net weight. Always use a stud finder to ensure hanging brackets are screwed into studs for maximum security.

Image: Guide for selecting the correct wall and anchors.
Installing Adjustable Shelves
The cabinet includes height-adjustable tempered glass shelves. Insert the shelf supports into the desired slots on the cabinet interior, then place the glass shelves securely on top of the supports.
Video: Installation of height-adjustable shelves. This short video demonstrates how to easily install and adjust the glass shelves inside the medicine cabinet.

Image: Height-adjustable shelves and internal features.
Operating Instructions
LED Lighting Control
The medicine cabinet features double-sided LED lighting (front and interior) with 3 color temperatures and stepless dimming. The lighting system includes a smart memory function that recalls your last brightness and color temperature settings.
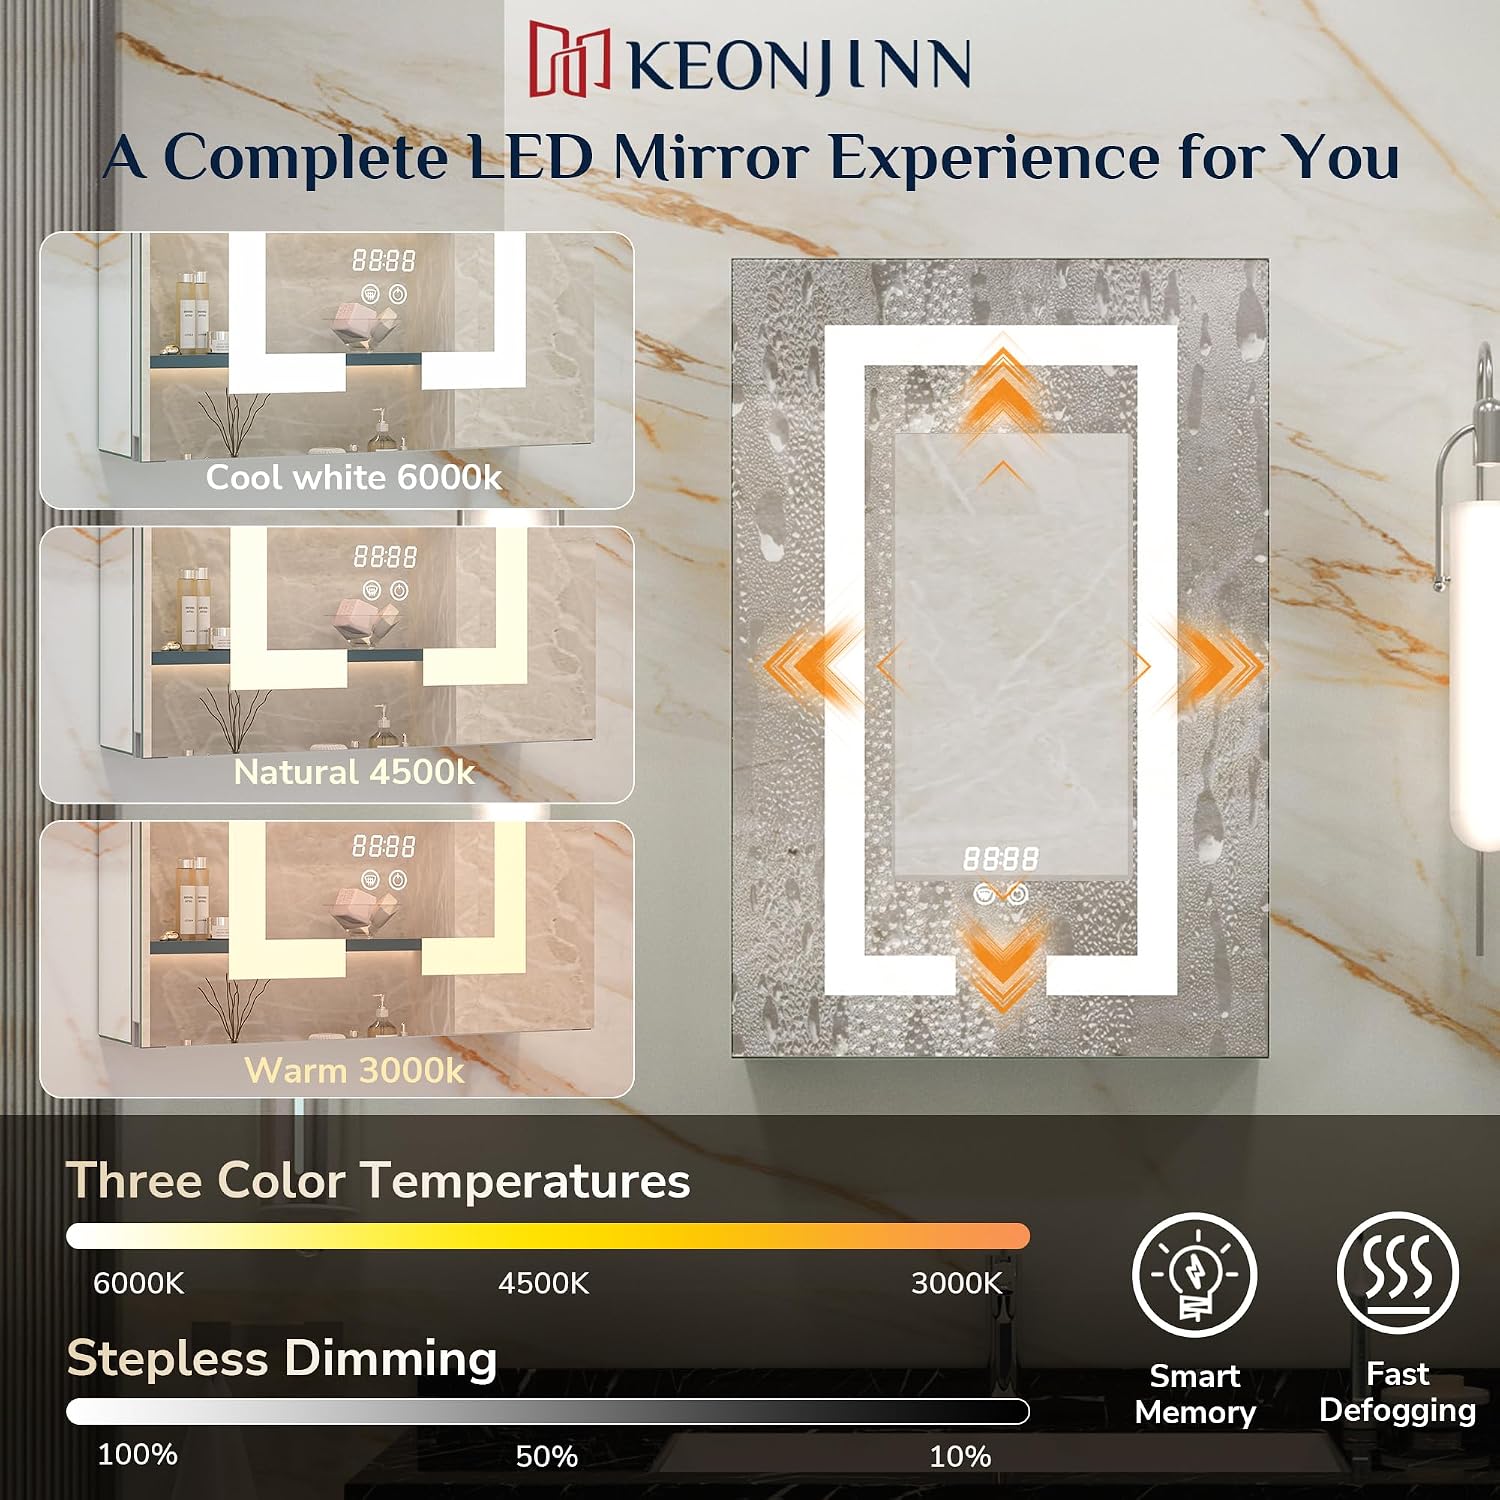
Image: LED lighting features including color temperatures and dimming.
- Power On/Off & Brightness Adjustment: Use the designated touch sensor button on the mirror surface to turn the lights on or off. Hold the button to adjust brightness steplessly.
- Color Temperature Selection: Tap the color temperature button to cycle through Warm (3000K), Natural (4500K), and Cool White (6000K) light settings.
Video: Keonjinn Lighted Medicine Cabinet for Bathroom with Mirror. This video showcases the various lighting features and controls of the cabinet.
Defogger Function
The integrated anti-fog feature keeps the mirror clear after showers. Activate the defogger using its dedicated touch sensor button on the mirror surface.
Bluetooth Time Sync Clock
The built-in digital clock keeps time visible and supports Bluetooth automatic synchronization for accuracy. Manual adjustment is also available.

Image: Bluetooth clock features for daily routine management.
- Auto Calibration: Pair your phone's Bluetooth with "Smart Clock" to automatically synchronize the time.
- Manual Adjustment:
- Minute: Hold the Defog button for 3 seconds, then press the Power button to adjust minutes.
- Hour: Tap the Defog button, then press the Power button to adjust hours.
- Exit: Tap the Defog button again or wait 5 seconds for auto-exit.
- Hide Clock Display: Press both the Power and Defog buttons together to hide the clock display.
Video: Keonjinn Lighted Medicine Cabinet with Bluetooth Clock. This video demonstrates the Bluetooth clock's features, including auto-sync and manual adjustment.
Built-in Outlets and USB Ports
The cabinet includes integrated outlets and USB ports inside for convenient charging of toothbrushes, razors, and other devices, helping to keep your countertop clutter-free.
Maintenance
Cleaning
To clean the mirror and cabinet surfaces, wipe with a damp cloth. Avoid abrasive cleaners or harsh chemicals that could damage the finish or electronic components.
Glass Care
The tempered glass is designed for durability. To maintain its clarity and prevent streaks, use a glass cleaner specifically designed for mirrors. Do not apply excessive force to the mirror surface.
Troubleshooting
- Lights not working: Check the power connection. If hardwired, ensure the electrical connection is secure. If plug-in, ensure the plug is fully inserted into a working outlet.
- Defogger not activating: Ensure the defogger touch sensor is pressed firmly. Check power connection.
- Bluetooth clock not syncing: Ensure your device's Bluetooth is on and correctly paired with "Smart Clock." If manual adjustment is needed, follow the steps in the Operating Instructions.
- Outlets/USB ports not charging: Verify the cabinet has power. Ensure devices are properly connected to the ports.
- Door not closing smoothly: Check the DTC soft-close hinges for any obstructions. The hinges are designed for smooth operation.
Warranty and Support
Warranty Information
Keonjinn offers a 2-year warranty on this product. In case of damaged products upon arrival, please send photos of the damaged mirror to the seller for a free replacement without returning the damaged one. Free mirror repair is also available within 3 years.
Customer Support
For support regarding Keonjinn products or orders, please follow these steps:
- Locate the product on the purchase platform (e.g., Amazon) and click on the 'Keonjinn' brand name.
- On the brand page or product page, select "Ask a question" to access the Seller Messaging Assistant.
- In the chat window, follow the prompts to type your question and submit it. Please include your product name or ASIN (B0CY883D8J) within your message.
You can also refer to the official User Manual (PDF) for additional details: Download User Manual (PDF)

Image: Guide on how to contact Keonjinn customer support.


