
Introduction
Thank you for choosing the MHPRO 21V Cordless Drill. This manual provides essential information for the safe and efficient operation, maintenance, and troubleshooting of your new tool. Please read these instructions carefully before first use and keep them for future reference. Proper use and care will ensure long-lasting performance and reliability.
General Safety Instructions
WARNING: Read all safety warnings, instructions, illustrations, and specifications provided with this power tool. Failure to follow all instructions listed below may result in electric shock, fire, and/or serious injury.
- Work Area Safety: Keep your work area clean and well-lit. Cluttered or dark areas invite accidents. Do not operate power tools in explosive atmospheres, such as in the presence of flammable liquids, gases, or dust.
- Electrical Safety: Avoid body contact with earthed or grounded surfaces such as pipes, radiators, ranges, and refrigerators. There is an increased risk of electric shock if your body is earthed or grounded.
- Personal Safety: Always wear eye protection. Use personal protective equipment such as dust masks, non-skid safety shoes, hard hats, or hearing protection when appropriate. Dress properly. Do not wear loose clothing or jewelry. Keep your hair and clothing away from moving parts.
- Tool Use and Care: Do not force the power tool. Use the correct power tool for your application. Do not use the power tool if the switch does not turn it on and off. Disconnect the battery pack from the power tool before making any adjustments, changing accessories, or storing power tools.
- Battery Pack Use and Care: Recharge only with the charger specified by the manufacturer. Do not use battery packs with any other power tools. When battery pack is not in use, keep it away from other metal objects.
Package Contents
Upon unpacking, please verify that all items listed below are present and undamaged. If any parts are missing or damaged, please contact MHPRO customer support.
- MHPRO 21V Cordless Drill (Model: MR5805T)
- User Manual
- Note: Battery and charger are typically sold separately unless specified otherwise.
Product Overview
The MHPRO 21V Cordless Drill is a versatile and powerful tool designed for drilling into various materials and driving screws. Its compact design and cordless operation provide excellent maneuverability and convenience for a wide range of DIY and professional tasks.
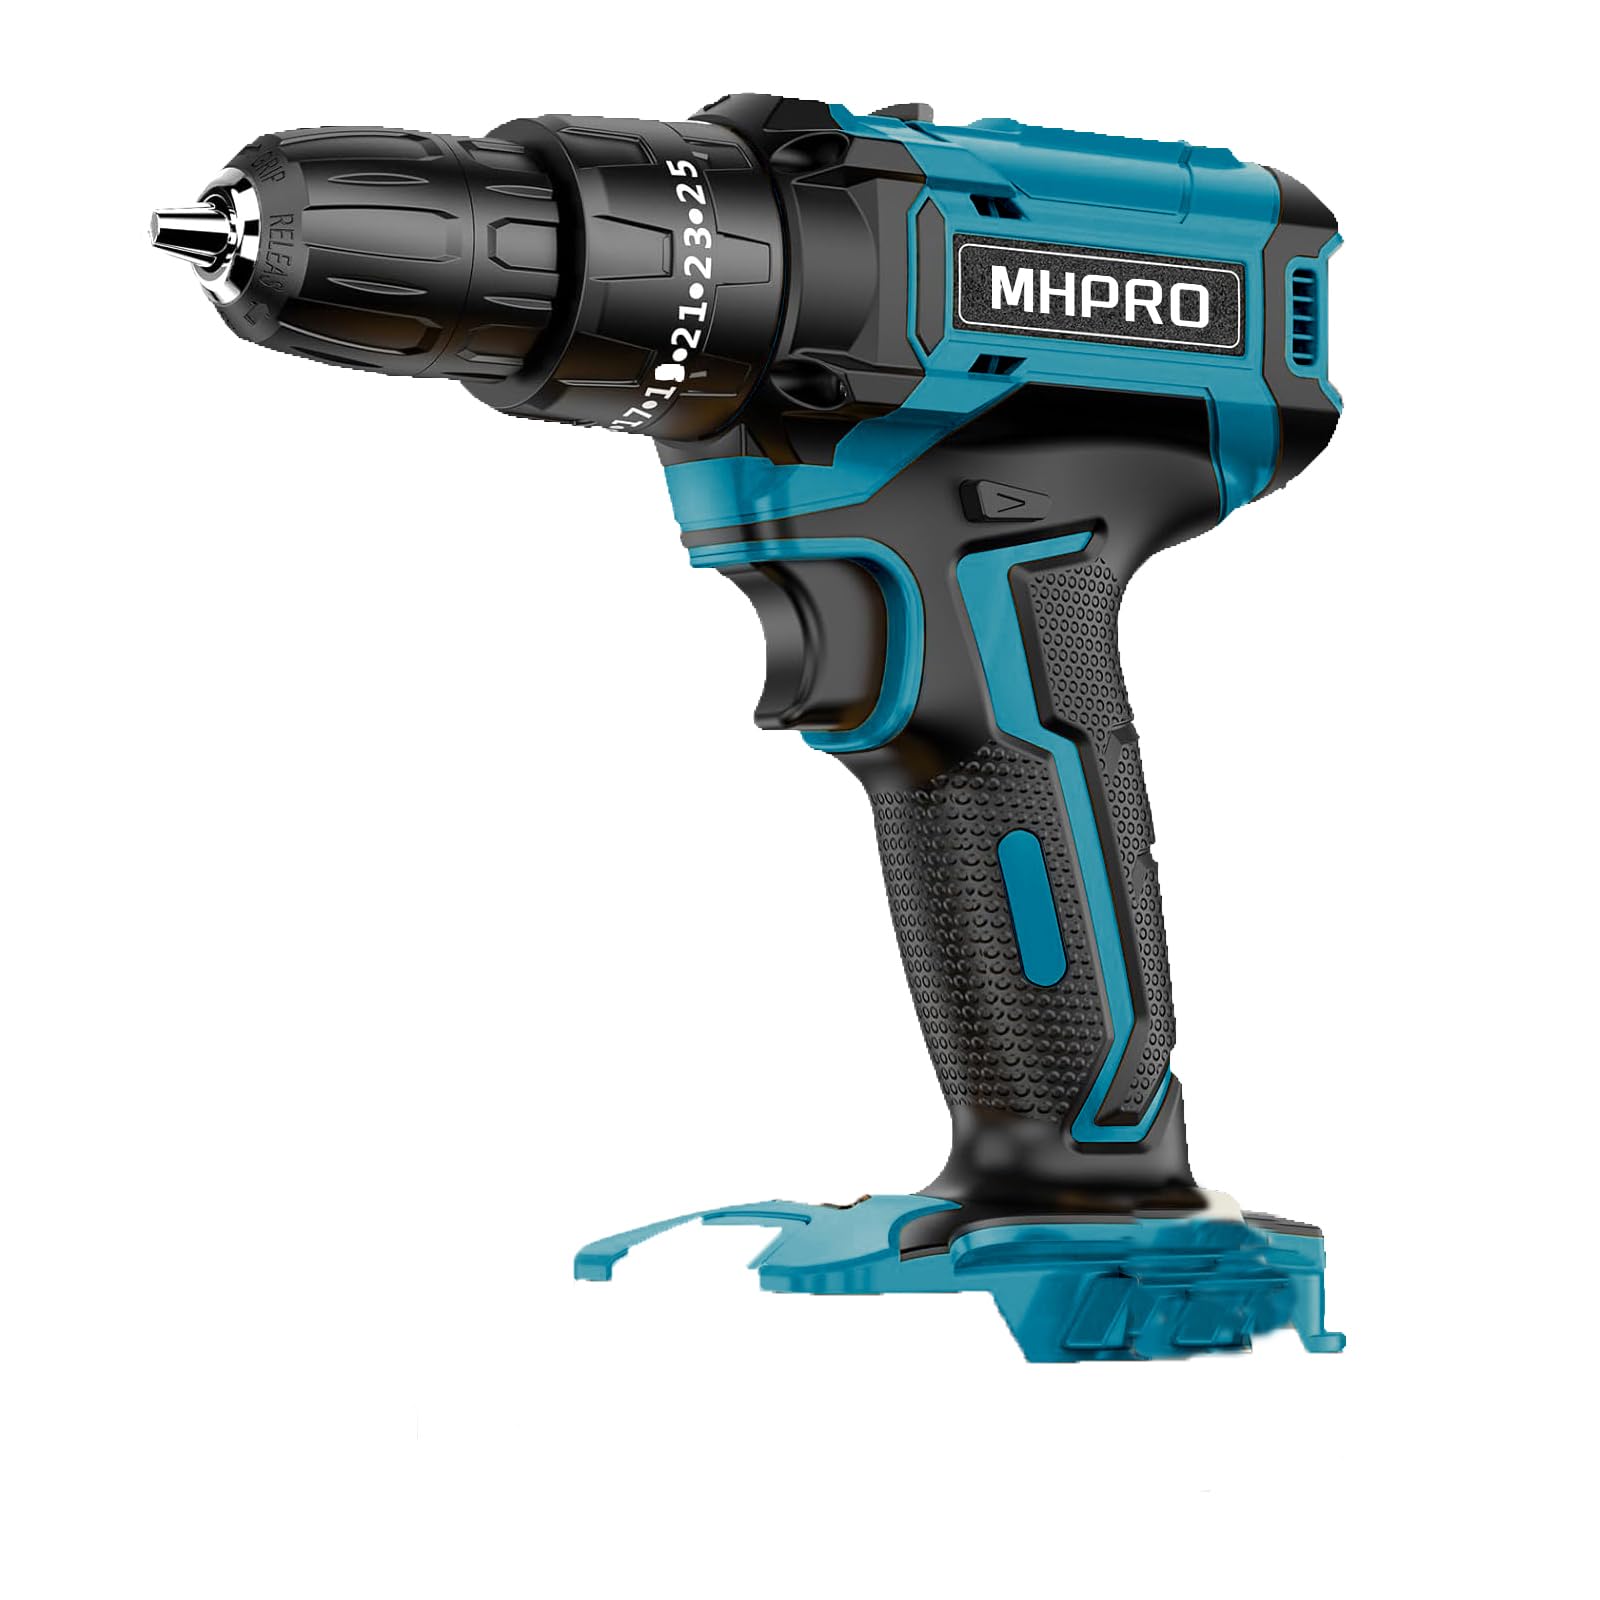
Figure 1: MHPRO 21V Cordless Drill. This image shows the main body of the drill, highlighting its ergonomic handle, chuck, and ventilation slots. The battery pack is not shown attached.
Key Components:
- Chuck: Used to hold drill bits or screwdriver bits securely.
- Torque Adjustment Ring: Allows selection of different torque settings for driving screws and a drill mode for drilling.
- Speed Selector Switch: Controls the gear speed (typically low for high torque, high for high speed).
- Forward/Reverse Switch: Changes the rotation direction of the chuck.
- Trigger Switch: Activates the drill and controls variable speed.
- Battery Release Button: Used to detach the battery pack (if included or purchased separately).
- LED Work Light: Illuminates the work area for better visibility.
Setup
1. Charging the Battery (if applicable)
If your drill came with a battery and charger, ensure the battery is fully charged before first use. Refer to the separate battery charger manual for specific charging instructions.
- Connect the charger to a suitable power outlet.
- Insert the battery pack into the charger.
- Wait for the charging indicator light to signal a full charge.
- Remove the battery from the charger once fully charged.
2. Installing the Battery Pack
- Align the battery pack with the base of the drill handle.
- Slide the battery pack firmly into place until it clicks, indicating it is securely locked.
- To remove, press the battery release button and slide the battery out.
3. Installing/Removing Drill Bits or Screwdriver Bits
- Ensure the drill is switched off and the forward/reverse switch is in the center (locked) position to prevent accidental starting.
- Rotate the chuck counter-clockwise to open the jaws.
- Insert the drill bit or screwdriver bit into the chuck, ensuring it is centered.
- Rotate the chuck clockwise to tighten the jaws securely around the bit. Hand-tighten firmly.
- To remove, rotate the chuck counter-clockwise to loosen the jaws and pull the bit out.
Operating Instructions
1. Selecting Rotation Direction
Use the forward/reverse switch located above the trigger to select the desired rotation direction:
- Forward (clockwise): For drilling and driving screws.
- Reverse (counter-clockwise): For removing screws or backing out drill bits.
- Center Position: Locks the trigger to prevent accidental starting. Always set to this position when changing bits or not in use.
2. Adjusting Torque and Mode
The torque adjustment ring allows you to set the appropriate torque for driving screws or select the drilling mode:
- Torque Settings (numbered): Use lower settings for smaller screws and softer materials, and higher settings for larger screws and harder materials. The drill will stop rotating once the set torque is reached, preventing overtightening or stripping.
- Drill Mode (drill icon): For drilling holes. In this mode, the clutch is disengaged, providing maximum torque.
- Hammer Drill Mode (hammer icon, if applicable): For drilling into masonry or concrete. This mode engages a hammering action in addition to rotation.
3. Selecting Speed
The speed selector switch (usually on top of the drill) controls the gear speed:
- Speed 1 (Low Speed): Provides higher torque for driving large screws or drilling large holes.
- Speed 2 (High Speed): Provides higher speed for drilling smaller holes or when less torque is required.
4. Starting and Stopping
Press the trigger switch to start the drill. The variable speed trigger allows you to control the drilling speed by applying more or less pressure. Release the trigger to stop the drill.
5. Drilling Techniques
- Always secure your workpiece to prevent it from moving.
- Apply steady, even pressure. Do not force the drill.
- For deep holes, periodically withdraw the bit to clear chips and allow the bit to cool.
- When drilling metal, use a cutting lubricant.
Maintenance
Regular maintenance ensures optimal performance and extends the life of your MHPRO Cordless Drill.
Cleaning
- Always disconnect the battery pack before cleaning.
- Use a soft, damp cloth to wipe down the exterior of the drill. Do not use harsh chemicals or abrasive cleaners.
- Keep the ventilation openings clear of dust and debris to prevent overheating. Use compressed air if necessary.
- Clean the chuck jaws regularly to ensure proper grip on bits.
Storage
- Store the drill in a clean, dry place, away from direct sunlight and extreme temperatures.
- Remove the battery pack from the drill before storing for extended periods.
- Store battery packs partially charged (around 50%) if not used for a long time to prolong battery life.
Troubleshooting
| Problem | Possible Cause | Solution |
|---|---|---|
| Drill does not start. | Battery not charged or not properly installed. Forward/reverse switch in center (locked) position. | Ensure battery is fully charged and securely installed. Move forward/reverse switch to forward or reverse position. |
| Loss of power during operation. | Battery charge is low. Overload protection activated. | Recharge the battery. Reduce pressure on the drill or use a sharper bit. Allow the tool to cool down. |
| Bit slips in chuck. | Chuck not tightened sufficiently. Bit shank is dirty or damaged. | Tighten the chuck firmly. Clean or replace the bit. |
| Excessive vibration or noise. | Damaged or dull bit. Loose components. | Replace the bit. Check for any loose parts and tighten if possible. If problem persists, contact service. |
Specifications
| Feature | Detail |
|---|---|
| Brand | MHPRO |
| Model Number | MR5805T |
| Voltage | 21 Volt |
| Max Torque | 50 Newton meters |
| Drill Type | Basic Drill Machine |
| Material | Metal |
| Product Dimensions (L x W x H) | 21L x 19.5W x 7H cm |
| Item Weight | 1 Kilogram |
| Included Components | Cordless Drill Housing (main unit) |
Warranty and Support
MHPRO products are manufactured to high-quality standards. For warranty information, technical support, or service inquiries, please refer to the warranty card included with your purchase or visit the official MHPRO website. Please have your model number (MR5805T) and serial number (JK00011) ready when contacting support.
For further assistance, please contact your retailer or the MHPRO customer service department.

