
DMSIDN DSZF
DMSIDN Electric Hot Water Heater (Model DSZF) Instruction Manual
31 Gallon Tank Storage with LED Display, 110V 1500W
1. Introduction and Safety Information
This manual provides essential instructions for the safe installation, operation, and maintenance of your DMSIDN Electric Hot Water Heater. Please read this manual thoroughly before installation and use, and retain it for future reference. Failure to follow these instructions may result in property damage, personal injury, or death.
Important Safety Instructions:
- Electrical Safety: Ensure the power supply matches the unit's requirements (110V, 60Hz). All electrical connections must be performed by a qualified electrician and comply with local codes. Disconnect power before any service or maintenance.
- Water Pressure: The rated pressure is 0.7MPa. Do not exceed this pressure. Install a pressure relief valve if local codes require it or if water pressure is excessive.
- Temperature Settings: Hot water can cause severe burns. Set the thermostat to a safe temperature. Test water temperature before use.
- Installation Location: Install the water heater in a location where water leakage will not cause damage to the surrounding area. Ensure adequate clearance for maintenance.
- Children and Pets: Keep children and pets away from the water heater, especially during operation.
- Ventilation: Ensure proper ventilation around the unit.
2. Product Overview
The DMSIDN Electric Hot Water Heater (Model DSZF) is a 31-gallon tank storage unit designed for home bathroom and shower use. It features a 1500W heating element for quick heating, an adjustable thermostat, and an LED display for easy temperature monitoring.

Figure 2.1: DMSIDN Electric Hot Water Heater and included components. This image displays the main unit, control panel, and various accessories such as the faucet, hand shower, hoses, and mounting hardware.
Key Features:
- Capacity: 31.7 Gallons (120 Liters)
- Power: 1500W, 110V
- Heating Element: Stainless steel for efficient heat transfer.
- Liner: Ceramic liner for anti-rust, anti-corrosion, anti-scale, and anti-leakage properties.
- Temperature Control: Adjustable thermostat with a range of 25-75°C (77-167°F).
- Display: Clear LED digital display for current temperature.
- Mounting: Wall-mounted design.
3. Specifications
| Feature | Specification |
|---|---|
| Brand | DMSIDN |
| Model | DSZF |
| Liner Capacity | 120L / 31.7 Gallons |
| Rated Voltage | 110V |
| Rated Frequency | 60Hz |
| Rated Power | 1500W |
| Rated Pressure | 0.7MPa (101.5 PSI) |
| Waterproof Level | IPX4 |
| Temperature Range | 25-75°C (77-167°F) |
| Product Dimensions (D*H) | 41cm * 75cm (16.14in * 29.52in) |
| Mount Type | Wall-mounted |
| Material | Stainless Steel, Enamel, Plastic |
| Interface | G1/2 |
| Color | White |

Figure 3.1: Product dimensions. This image illustrates the height and width measurements of the water heater unit.
4. Installation and Setup
Proper installation is crucial for the safe and efficient operation of your water heater. If you are unsure about any step, consult a qualified professional.
4.1. Pre-Installation Checklist:
- Verify all components are present: Water heater unit, faucet, hand shower, 3 hoses, English manual, mounting brackets, and screws.
- Choose a suitable wall-mounted location that can support the weight of the full water heater (approximately 36.16 lbs empty, significantly more when full).
- Ensure the location has access to a 110V, 60Hz power outlet and water supply lines.
- Confirm adequate space for maintenance and proper ventilation.
4.2. Mounting the Unit:
- Mark the desired mounting position on the wall, ensuring it is level and at a height that allows for comfortable use and access to controls.
- Use the provided mounting brackets as a template to mark drilling points.
- Drill holes and securely fasten the mounting brackets to the wall using the appropriate screws and anchors for your wall type.
- Carefully lift the water heater and hang it onto the secured mounting brackets. Ensure it is stable and level.
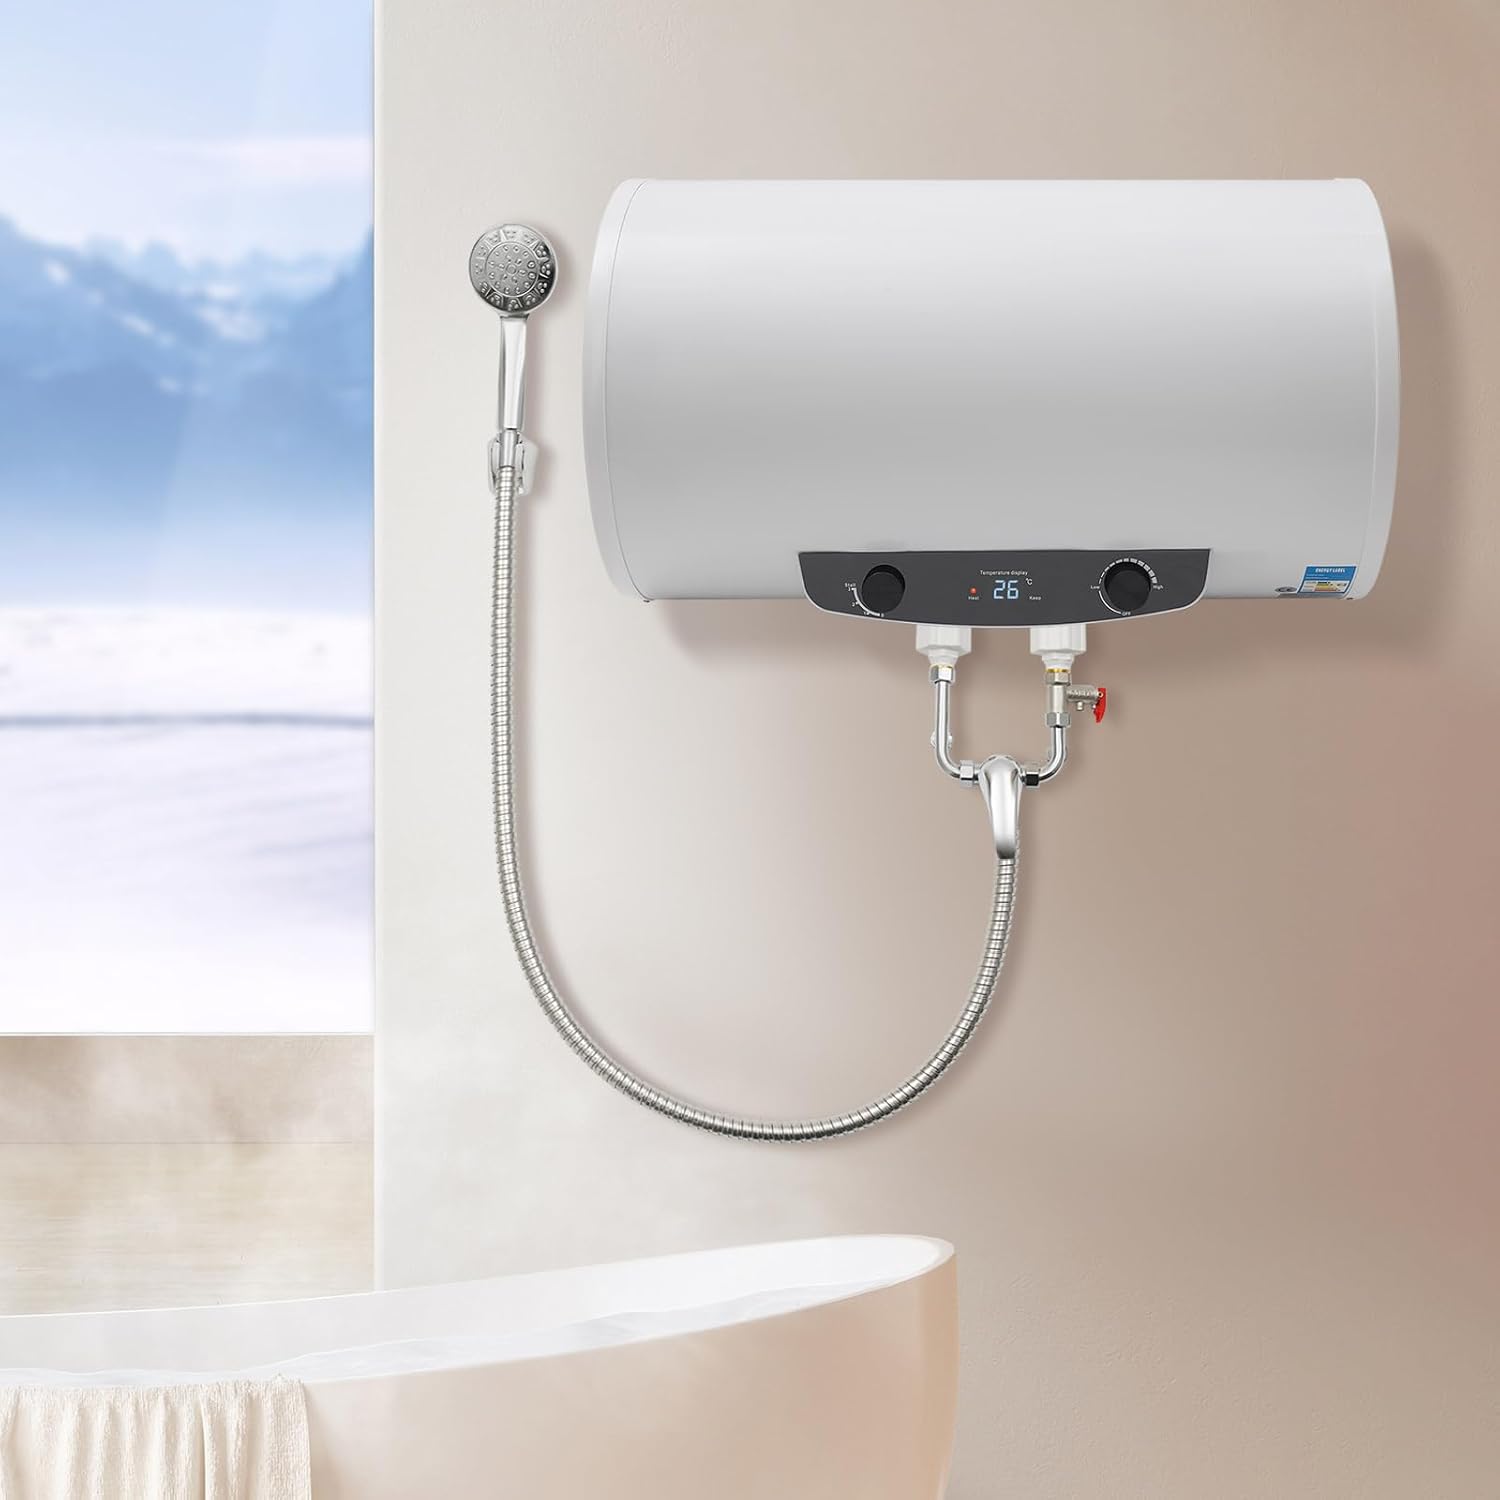
Figure 4.1: Example of a wall-mounted installation in a bathroom setting. This image shows the water heater mounted above a bathtub with the shower hose connected.
4.3. Plumbing Connections:
- Connect the cold water inlet to the designated port on the water heater (usually marked blue or "IN").
- Connect the hot water outlet to the designated port (usually marked red or "OUT").
- Install the provided faucet and hand shower using the included hoses and fittings. Ensure all connections are tight to prevent leaks.
- Open the main water supply valve and check for any leaks. Allow the tank to fill completely before proceeding to electrical connection. Open a hot water faucet in your home to purge air from the system.

Figure 4.2: Detailed view of the plumbing connections, including the inlet/outlet pipes and the pressure relief valve assembly.
4.4. Electrical Connection:
- Ensure the water heater tank is completely filled with water before connecting to power. Operating an empty tank will damage the heating element.
- Plug the water heater into a properly grounded 110V, 60Hz electrical outlet.
- Verify that the circuit breaker for the outlet is rated appropriately for a 1500W appliance.
5. Operation
Once installed and connected, operating your DMSIDN Electric Hot Water Heater is straightforward.

Figure 5.1: Detailed view of the control panel with LED display and adjustment knobs.
5.1. Powering On:
- After ensuring the tank is full and electrical connections are secure, turn on the power at the wall outlet or circuit breaker.
- The LED display on the front panel will illuminate, showing the current water temperature.
5.2. Adjusting Temperature:
- Locate the temperature adjustment knob on the control panel.
- Rotate the knob to select your desired water temperature within the range of 25-75°C (77-167°F). Turning towards "High" increases temperature, and towards "Low" decreases it.
- The LED display will show the set temperature briefly, then revert to displaying the current water temperature as it heats.

Figure 5.2: A hand demonstrating the adjustment of the temperature control knob on the water heater's front panel.
5.3. Heating Process:
- The 1500W heating element will activate to heat the water to the set temperature. The "Heat" indicator may illuminate.
- Once the desired temperature is reached, the heater will enter a "Keep" mode, maintaining the temperature with minimal power consumption.
6. Maintenance
Regular maintenance ensures the longevity and efficient operation of your water heater. Always disconnect power before performing any maintenance.
6.1. Draining the Tank:
- Frequency: Annually, or more often in areas with hard water.
- Procedure:
- Turn off the power supply to the water heater.
- Close the cold water inlet valve to the heater.
- Open a hot water faucet in your home to relieve pressure and allow air into the tank.
- Connect a hose to the drain valve at the bottom of the water heater and direct it to a suitable drain.
- Open the drain valve and allow the tank to empty completely.
- Once drained, close the drain valve, remove the hose, and refill the tank before restoring power.
6.2. Anode Rod Inspection:
- The anode rod protects the tank from corrosion. Inspect it every 1-3 years.
- If the rod is heavily corroded or less than 1/2 inch thick, it should be replaced. Consult a professional for this procedure.
6.3. Cleaning:
- Wipe the exterior of the unit with a soft, damp cloth. Do not use abrasive cleaners or solvents.
7. Troubleshooting
Before contacting support, review the following common issues and solutions.
| Problem | Possible Cause | Solution |
|---|---|---|
| No hot water / Insufficient hot water |
|
|
| Water is too hot | Thermostat set too high. | Adjust thermostat to a lower setting. |
| Water leakage |
|
|
| Unusual noises (e.g., popping, rumbling) | Sediment buildup in the tank. | Drain and flush the tank to remove sediment (refer to Maintenance section). |
8. Warranty and Support
Specific warranty details are typically provided with your purchase documentation. Please refer to the warranty card or contact your retailer for information regarding warranty coverage and terms.
For technical support, replacement parts, or service inquiries, please contact DMSIDN customer service through the contact information provided at the point of purchase or on the official DMSIDN website.
Ask a question about this manual
Ask about setup, troubleshooting, compatibility, parts, safety, or missing instructions. Manuals+ will review the question and use this page’s manual context to help answer it.