
Philips 588087
Philips LED Slim 6-inch Canless Downlight Instruction Manual
Model: 588087
1. Introduction
Thank you for choosing the Philips LED Slim 6-inch Canless Downlight. This product is designed to provide versatile, energy-efficient lighting for your home. Its ultra-thin profile and canless design allow for easy installation in various settings, including new construction and remodel applications, even in damp locations.
Featuring EyeComfort technology, these downlights deliver high-quality light that is gentle on your eyes, minimizing flicker and glare. With selectable color temperatures, you can customize the ambiance to suit any room or mood.
2. Important Safety Information
WARNING: Risk of electric shock. Disconnect power at the fuse or circuit breaker before installing or servicing.
- Read all instructions before installation.
- Ensure the electrical rating of the fixture is compatible with your power supply (120 Volts).
- Installation should be performed by a qualified electrician if you are unsure.
- Do not modify or alter the fixture.
- Suitable for damp locations.
- IC-rated for direct contact with insulation.
3. Package Contents
Verify that all components are present before beginning installation:
- Philips Slim Canless 6" Downlight (Quantity: 12)
- Integrated Driver Junction Box (attached to each downlight)
- Instruction Manual (this document)

Figure 3.1: Philips LED Slim Canless Downlight 12-Pack and individual units.
4. Product Specifications
| Feature | Specification |
|---|---|
| Brand | Philips (LED) |
| Model Name | SLM US 6" 5CCT DIM 12PK |
| Model Number | 588087 |
| Light Source Type | LED |
| Wattage | 11.5 watts (equivalent to 60W incandescent) |
| Brightness | 1000 lumens |
| Voltage | 120 Volts |
| Color Temperature | Selectable White (2700K - 5000K) |
| Profile | Less than 0.98" thick |
| Product Dimensions | 6.69"L x 6.69"W x 0.98"H |
| Lifespan | Up to 50,000 hours |
| Installation Type | Direct Wire with Spring Clip (No Housing Required) |
| Rating | IC Rated (for direct contact with insulation) |
| Water Resistance Level | Water Resistant (Suitable for damp locations) |

Figure 4.1: Product Dimensions.
5. Setup and Installation
The Philips Slim Canless Downlight is designed for easy installation without the need for a traditional recessed housing or junction box. Follow these steps for a seamless setup:
5.1 Preparation
- Turn off Power: Before starting any electrical work, ensure the power to the installation area is turned off at the circuit breaker or fuse box.
- Choose Location: Select a suitable location on your ceiling. The slim design allows for installation in drywall or suspended ceilings, even in damp locations.
- Cut Hole: Use a 6-inch hole saw to cut a circular opening in the ceiling at your desired location.

Figure 5.1: Installation in drywall or suspended ceilings without the need for housing.
5.2 Wiring the Junction Box
- Access Wiring: Open the integrated driver junction box attached to the downlight.
- Connect Wires: Connect the household electrical wires to the corresponding wires in the junction box. Typically, this involves connecting:
- Black (Live) to Black
- White (Neutral) to White
- Green/Bare Copper (Ground) to Green
- Close Box: Close the junction box securely.
- Place Box: Carefully push the wired junction box up through the ceiling hole and place it above the ceiling.

Figure 5.2: No housing required! Slim design fits in mostly any space.
Video 5.1: Philips Slim Downlights - Easy Installation. This video demonstrates the simple wiring and placement of the junction box above the ceiling.
Video 5.2: Philips LED 6" Canless Downlight Setup. A visual guide to the setup process, including wiring and installation.
5.3 Installing the Downlight
- Connect Downlight: Ensure the quick-connect plug from the downlight is securely connected to the receptacle on the junction box.
- Insert Fixture: Push the spring-loaded clips on the sides of the downlight upwards.
- Secure in Hole: Insert the downlight into the ceiling hole. The spring clips will automatically snap down and hold the fixture firmly in place against the ceiling.

Figure 5.3: Designed to fit anywhere - even damp locations (IC rated).
Video 5.3: Philips LED Slim Canless Downlight - It's so easy. This video provides a quick overview of the entire installation process, from cutting the hole to securing the light.
5.4 Daisy Chain Compatibility
These downlights are designed to be daisy chain compatible, allowing multiple fixtures to be connected to a single power source. Consult a qualified electrician for complex installations involving multiple units.

Figure 5.4: Daisy chain compatible setup.
6. Operating Instructions
6.1 Selecting Color Temperature
The Philips Slim Canless Downlight features 5 selectable color temperatures. Before final installation, locate the switch on the integrated driver junction box. You can choose from the following options:
- Soft White (2700K): Warm, inviting light, similar to traditional incandescent bulbs.
- Bright White (3000K): A slightly cooler white, suitable for living areas.
- Neutral White (3500K): A balanced white, good for general lighting.
- Cool White (4000K): A crisp, clean white, ideal for task lighting.
- Daylight (5000K): A bright, bluish-white light, mimicking natural daylight.
Select your preferred color temperature using the switch before securing the light in the ceiling.
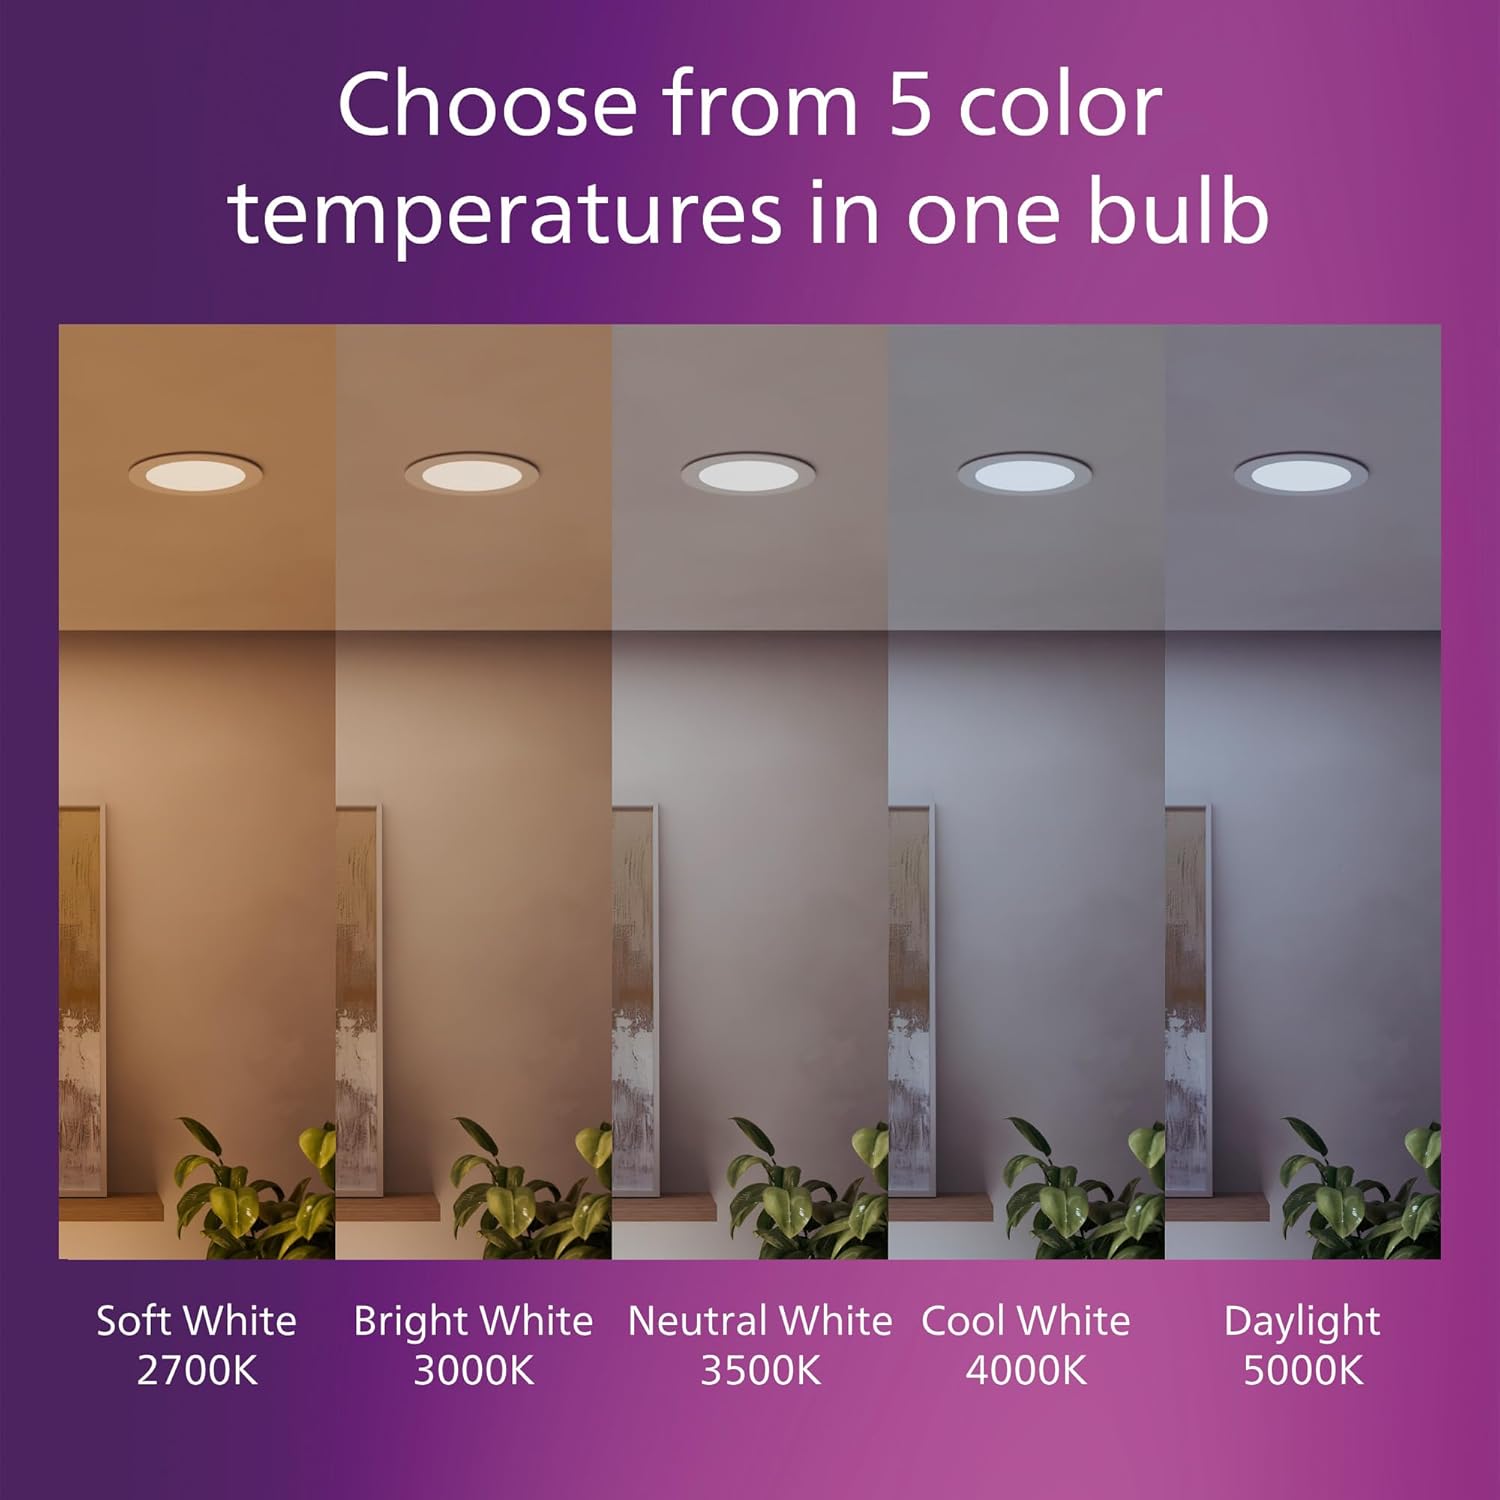
Figure 6.1: Choose from 5 color temperatures in one bulb.
6.2 Dimmable Functionality
These downlights are dimmable, allowing you to adjust the brightness to create the perfect atmosphere. Ensure you use a compatible LED dimmer switch for optimal performance. Refer to your dimmer switch's instructions for proper operation.

Figure 6.2: Customize bulb brightness to fit any space.
7. EyeComfort Technology
Philips EyeComfort technology ensures that these LED lights meet strict criteria for visual comfort. This means the lights are designed to minimize factors that can cause eye strain or discomfort.
- No Visible Flicker: Designed to minimize irritating flicker effects that can cause distraction or eye strain.
- Reduced Glare: Engineered to reduce harsh glare that can make it difficult to see and cause visual discomfort.
- High Color Rendering: Provides accurate and true-to-life color representation of objects in your room.
Video 7.1: Philips Better Eyecomfort. This video explains the benefits of EyeComfort technology, focusing on flicker and glare reduction.
8. Maintenance
The Philips LED Slim Canless Downlight requires minimal maintenance. The LED light source is integrated and not replaceable. Do not attempt to open or service the light fixture.
- Cleaning: To clean the fixture, ensure power is off. Wipe with a soft, dry, or slightly damp cloth. Do not use abrasive cleaners or solvents.
- Longevity: With a lifespan of up to 50,000 hours, these lights are designed for long-term use, reducing the need for frequent replacement.
9. Troubleshooting
| Problem | Possible Cause | Solution |
|---|---|---|
| Light does not turn on. | No power to the fixture; Loose wiring; Faulty fixture. | Check circuit breaker/fuse. Verify all wire connections are secure. If problem persists, contact a qualified electrician or Philips support. |
| Light flickers or dims unexpectedly. | Incompatible dimmer switch; Loose wiring; Power fluctuations. | Ensure you are using an LED-compatible dimmer. Check wiring connections. If issues continue, consult an electrician. |
| Incorrect color temperature. | Color temperature switch set incorrectly. | Carefully remove the fixture from the ceiling (if possible) and adjust the color temperature switch on the junction box. |
10. Warranty and Support
This Philips LED Slim Canless Downlight comes with a 2-year manufacturer's warranty. This warranty covers defects in materials and workmanship under normal use.
For warranty claims, technical support, or further assistance, please contact Philips customer service. Keep your purchase receipt as proof of purchase.
For more information, visit the official Philips Lighting LED store: Philips Lighting LED Store
Ask a question about this manual
Ask about setup, troubleshooting, compatibility, parts, safety, or missing instructions. Manuals+ will review the question and use this page’s manual context to help answer it.