
Adviace 46463655421
Adviace Repair Kit User Manual
Grill Replacement Parts for Char-Broil Performance Gas Grills
1. Introduction
This manual provides detailed instructions for the installation, operation, and maintenance of your Adviace Repair Kit. This kit is designed to replace worn-out or rusted components in compatible Char-Broil gas grills, restoring their functionality and extending their lifespan.
Regular maintenance and proper installation are crucial for the safe and efficient operation of your grill. Please read all instructions carefully before proceeding with installation.
2. Compatibility
This Adviace Repair Kit is compatible with various Char-Broil Performance Gas Grill models. Please verify your grill model number against the list below to ensure proper fit.
- For Char-Broil Performance 2-Burner Grills: 463655421, 463655621, 463655021, 463654022
- For Char-Broil Performance 3-Burner Grills: 463732623, 463732823
- For Char-Broil Performance 4-Burner Grills: 463365021, 463331221, 463366022, 463351021, 463350722, 463354021, 463330521, 463352521, 463341421, 463351221, 463331021, 463331422, 463341021, 463353021, 463351521, 463344523, 463341221, 463345022
- For Char-Broil Performance 5-Burner Grills: 463448021, 463449021, 463455021, 463466522, 463451022, 463450022, 463459021, 463458021, 463456022, 463468021, 463468421, 463465022, 463468221
- For Char-Broil Performance 6-Burner Grills: 463229521, 463229021, 463284022, 463228622, 463284422, 463259223

Image: Visual representation of compatible Char-Broil grill models, confirming the perfect fit of the repair kit.
3. Components Included
The Adviace Repair Kit for 2-burner grills typically includes the following components:
- 2 x Grill Burners (Stainless Steel, Original Part Number: G327-2100-W1)
- 2 x Heat Plates / Heat Tents (Stainless Steel, Original Part Number: G325-0002-W1)
- 1 x Crossover Tube Burner (Adjustable from 5" - 9.5", Stainless Steel)
- 2 x Grill Igniters (with 39.5-inch braided cables)

Image: All components of the Adviace Repair Kit, including heat tents, burners, crossover tube, and igniters.

Image: Detailed view of the igniter and its durable, long braided cable, emphasizing ease of installation without screws.
4. Setup and Installation
Before beginning installation, ensure your grill is completely cool and disconnected from its gas supply. It is recommended to wear protective gloves.
- Remove Old Components: Carefully remove the cooking grates, heat tents, and old burners from your grill. Disconnect any old igniter wires.
- Clean Grill Interior: Clean any debris, grease, or rust from the grill's firebox. This will ensure optimal performance and longevity of the new parts.
- Install New Burners: Place the new stainless steel grill burners into their designated slots. Ensure they are properly seated over the gas orifices.
- Connect Crossover Tube: Install the adjustable crossover tube, connecting the burners to allow flame transfer.
- Install Igniters: Attach the new grill igniters. The design allows for easy, screw-free installation. Route the igniter wires to the ignition module, ensuring they are securely connected. The 39.5-inch cable provides ample length for routing.
- Place Heat Plates: Position the new heat plates (heat tents) over the burners. These protect the burners and help distribute heat evenly.
- Reinstall Grates: Place the cooking grates back into the grill.

Image: New heat tents and burners correctly installed within a grill, demonstrating a precise fit.
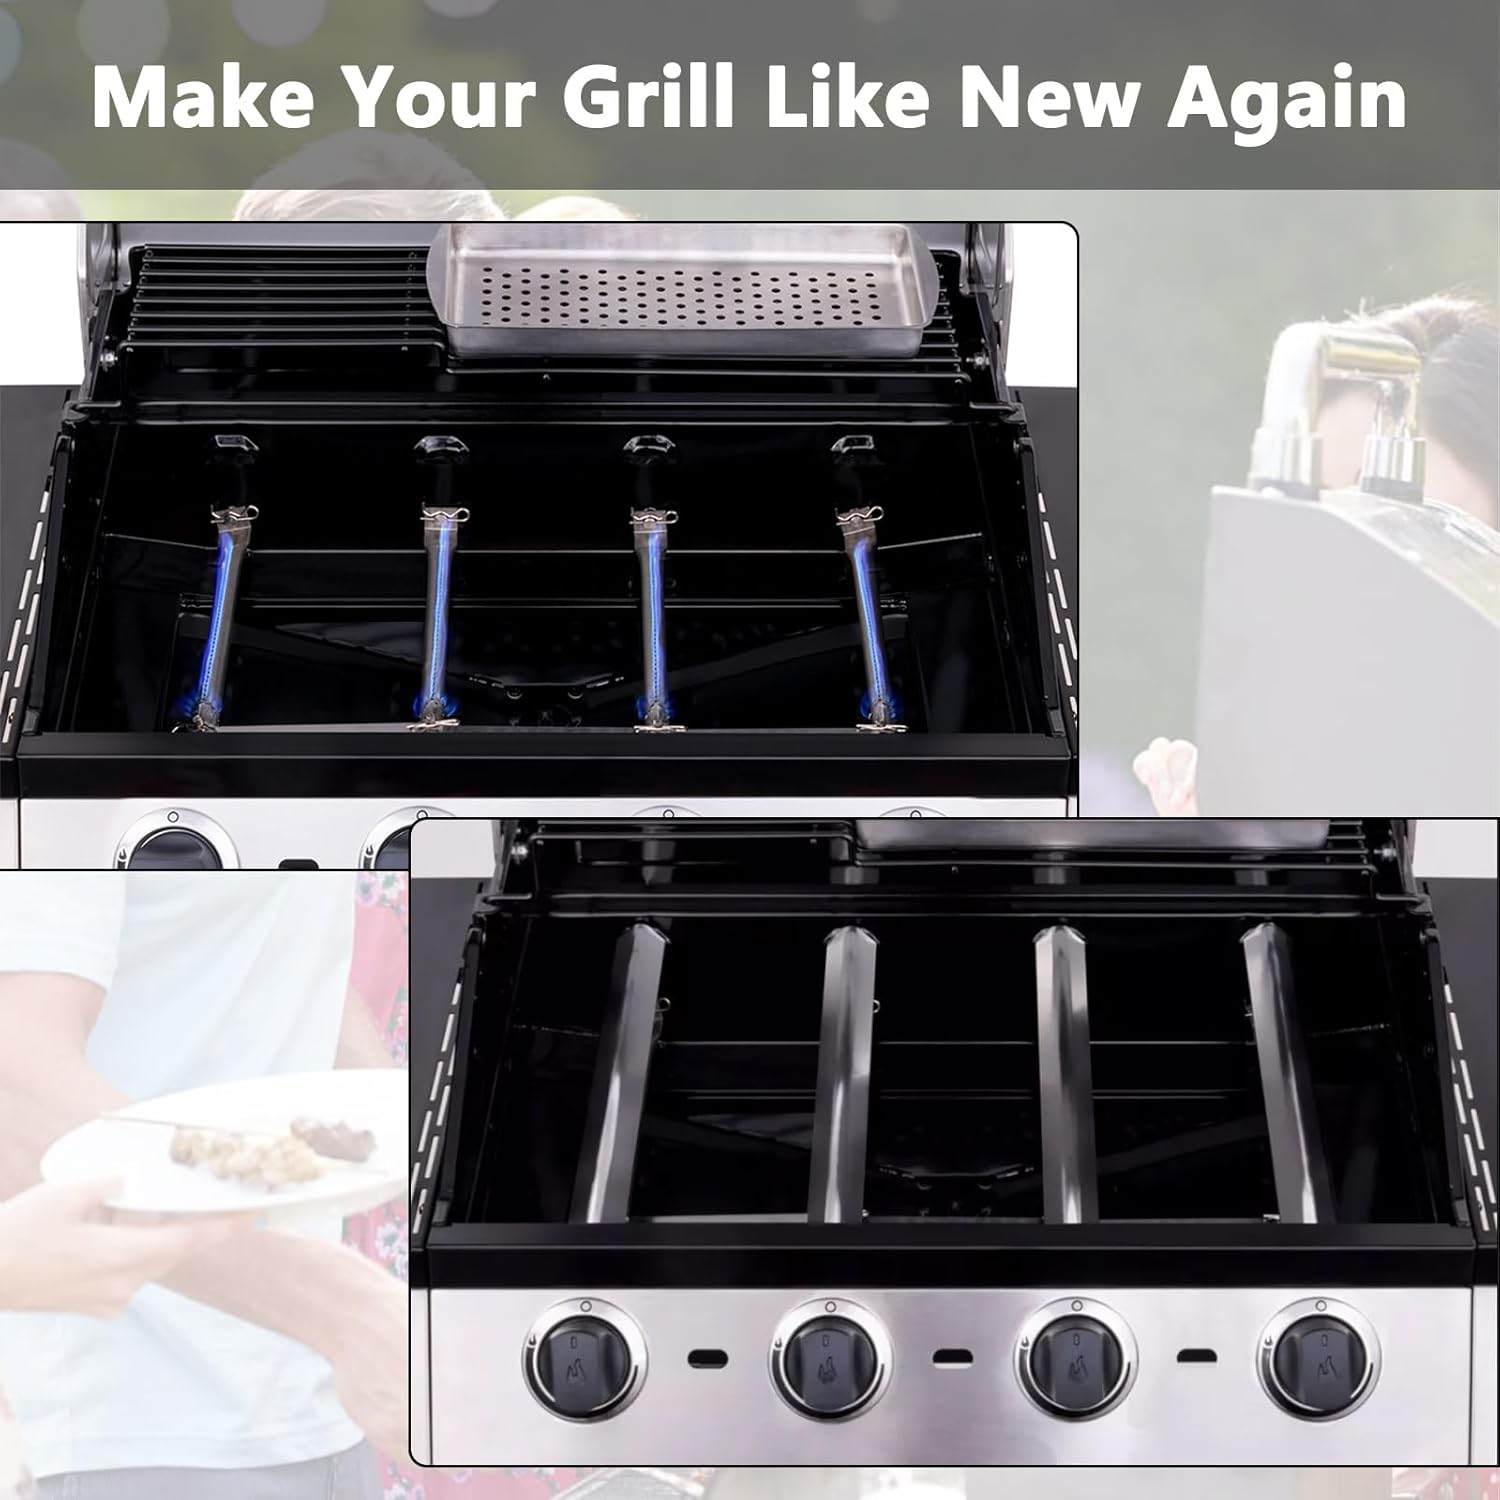
Image: Comparison showing the transformation of a grill from old, worn parts to new, functional components with even blue flames.
5. Operating
After installation, reconnect the gas supply and perform a leak test according to your grill's original manufacturer instructions. Once confirmed safe, proceed with ignition.
- Ignition Check: Turn on the gas and attempt to ignite the burners. Observe the flame. It should be primarily blue with minimal yellow or orange, indicating proper combustion.
- Even Heat Distribution: Allow the grill to preheat and check for even heat distribution across the cooking surface.
6. Maintenance
To ensure the longevity and optimal performance of your new grill parts, follow these maintenance guidelines:
- Regular Cleaning: After each use, clean the cooking grates. Periodically, remove the grates and heat tents to clean any food debris or grease buildup from the burners and firebox.
- Inspect Burners: Regularly inspect the burner ports for any blockages. Use a wire brush or a stiff wire to clear any obstructions.
- Check Heat Tents: Ensure heat tents are free of excessive grease buildup or corrosion.
- Storage: If storing the grill for an extended period, ensure it is clean and dry. Consider using a grill cover to protect it from the elements.
7. Troubleshooting
If you encounter issues after installing the repair kit, consider the following:
- Burner Not Lighting:
- Check if the gas supply is fully open.
- Ensure igniter wires are securely connected to both the igniter and the ignition module.
- Verify that the igniter electrode is positioned correctly near the burner port to create a spark.
- Check for blockages in the burner ports.
- Uneven Flame or Low Heat:
- Ensure burners are properly seated over the gas orifices.
- Check for any blockages in the burner tubes or crossover tube.
- Verify that the gas regulator is functioning correctly.
- Gas Smell:
- Immediately turn off the gas supply.
- Perform a leak test using soapy water on all gas connections. Bubbles indicate a leak. Tighten connections or replace faulty parts.
- Do not operate the grill if a gas leak is detected.
8. Specifications
| Component | Material | Dimensions/Notes |
|---|---|---|
| Grill Burners | Stainless Steel | Original Part Number: G327-2100-W1 |
| Heat Plates / Heat Tents | Stainless Steel | Original Part Number: G325-0002-W1 |
| Crossover Tube Burner | Stainless Steel | Adjustable, extends from 5" - 9.5" |
| Grill Igniters | Ceramic / Braided Cable | Cable length: 39.5 inches |

Image: Detailed view of the premium quality stainless steel used for components, emphasizing durability and ease of maintenance.

Image: Close-up of the burner construction, highlighting its robust stainless steel material and design for longevity.
Ask a question about this manual
Ask about setup, troubleshooting, compatibility, parts, safety, or missing instructions. Manuals+ will review the question and use this page’s manual context to help answer it.