
1. Introduction
This manual provides detailed instructions for installing the Adviace Grill Repair Kit, designed to replace worn-out components in various Char-Broil Performance Series gas grills. By following these instructions, you can restore your grill's functionality and extend its lifespan.
1.1 Compatible Models
This repair kit is compatible with the following Char-Broil Performance Series grill models:
- 6-Burner Grills: 463229521, 463229021, 463284022, 463228622, 463259223, 463284422
- 5-Burner Grills: 463448021, 463449021, 463455021, 463466522, 463451022, 463450022, 463459021, 463458021, 463456022, 463468021, 463468421, 463465022, 463468221
- 4-Burner Grills: 463365021, 463331221, 463366022, 463351021, 463350722, 463354021, 463330521, 463352521, 463341421, 463351221, 463331021, 463331422, 463341021, 463353021, 463351521, 463344523, 463341221, 463345022
- 3-Burner Grills: 463732623, 463732823
- 2-Burner Grills: 463655421, 463655621, 463655021, 463654022

Image 1.1: Visual representation of compatible Char-Broil grill models.
2. Important Safety Information
Always prioritize safety when performing maintenance on gas appliances. Failure to follow these safety guidelines could result in property damage, injury, or death.
- Disconnect Fuel Source: Before beginning any work, ensure the grill is completely cool and disconnected from its fuel source (propane tank or natural gas line).
- Allow Cooling: Do not attempt repairs on a hot grill. Allow ample time for all components to cool down.
- Wear Protective Gear: Wear appropriate safety gear, such as heavy-duty gloves, to protect your hands from sharp edges and potential residue.
- Ventilation: Perform work in a well-ventilated area.
- Original Manual: Refer to your grill's original manufacturer manual for specific disassembly instructions and safety warnings relevant to your particular grill model.
3. Package Contents
Your Adviace Grill Repair Kit includes the following components:
- 6 x Stainless Steel Gas Grill Burners (Original part number: G327-2100-W1)
- 6 x Stainless Steel Heat Plates (Original part number: G325-0002-W1)
- 5 x Stainless Steel Crossover Tubes (Adjustable from 5" - 9.5")
- 2 x Grill Igniters
Video 3.1: An overview of the components included in the Adviace Grill Repair Kit.
4. Installation Instructions
Follow these steps to replace the components of your Char-Broil Performance Series gas grill. It is recommended to take photos of your grill's current setup before disassembly for reference.
- Prepare the Grill: Ensure the grill is cool and the gas supply is disconnected. Open the grill lid.
- Remove Old Components: Carefully remove the existing grill grates, warming rack (if applicable), and old heat tents. Then, disconnect and remove the old burners and crossover tubes. Note how they are attached for easier reassembly.
- Install New Burners: Place the new stainless steel burners into their respective positions. Ensure the burner ends are properly seated into the gas manifold orifices at the back of the firebox. Secure them if necessary, typically with a pin or screw at the front.
- Connect Crossover Tubes: Attach the new crossover tubes between the burners. These tubes facilitate flame transfer between burners. Ensure they are securely fastened.
- Install Igniters: If replacing igniters, connect the new igniter electrodes to the appropriate burners and route the wires to the igniter module. Ensure connections are snug.
- Place Heat Plates: Position the new stainless steel heat plates (also known as flame tamers or vaporizers) over the burners. These protect the burners and help distribute heat evenly.
- Reassemble Grill: Replace the grill grates and any other components removed earlier.
- Leak Test: Before first use, reconnect the gas supply and perform a leak test on all gas connections using a soapy water solution. Apply the solution to all connections; if bubbles appear, there is a leak. Tighten connections or replace faulty parts as needed.

Image 4.1: Proper seating of the new stainless steel burner into the grill's gas manifold.

Image 4.2: Detailed view of the igniter connection and wire, emphasizing ease of installation.

Image 4.3: New heat tents installed over the burners, ensuring even heat distribution.
Video 4.1: A visual guide demonstrating the installation process for grill burners, crossover tubes, and heat plates.
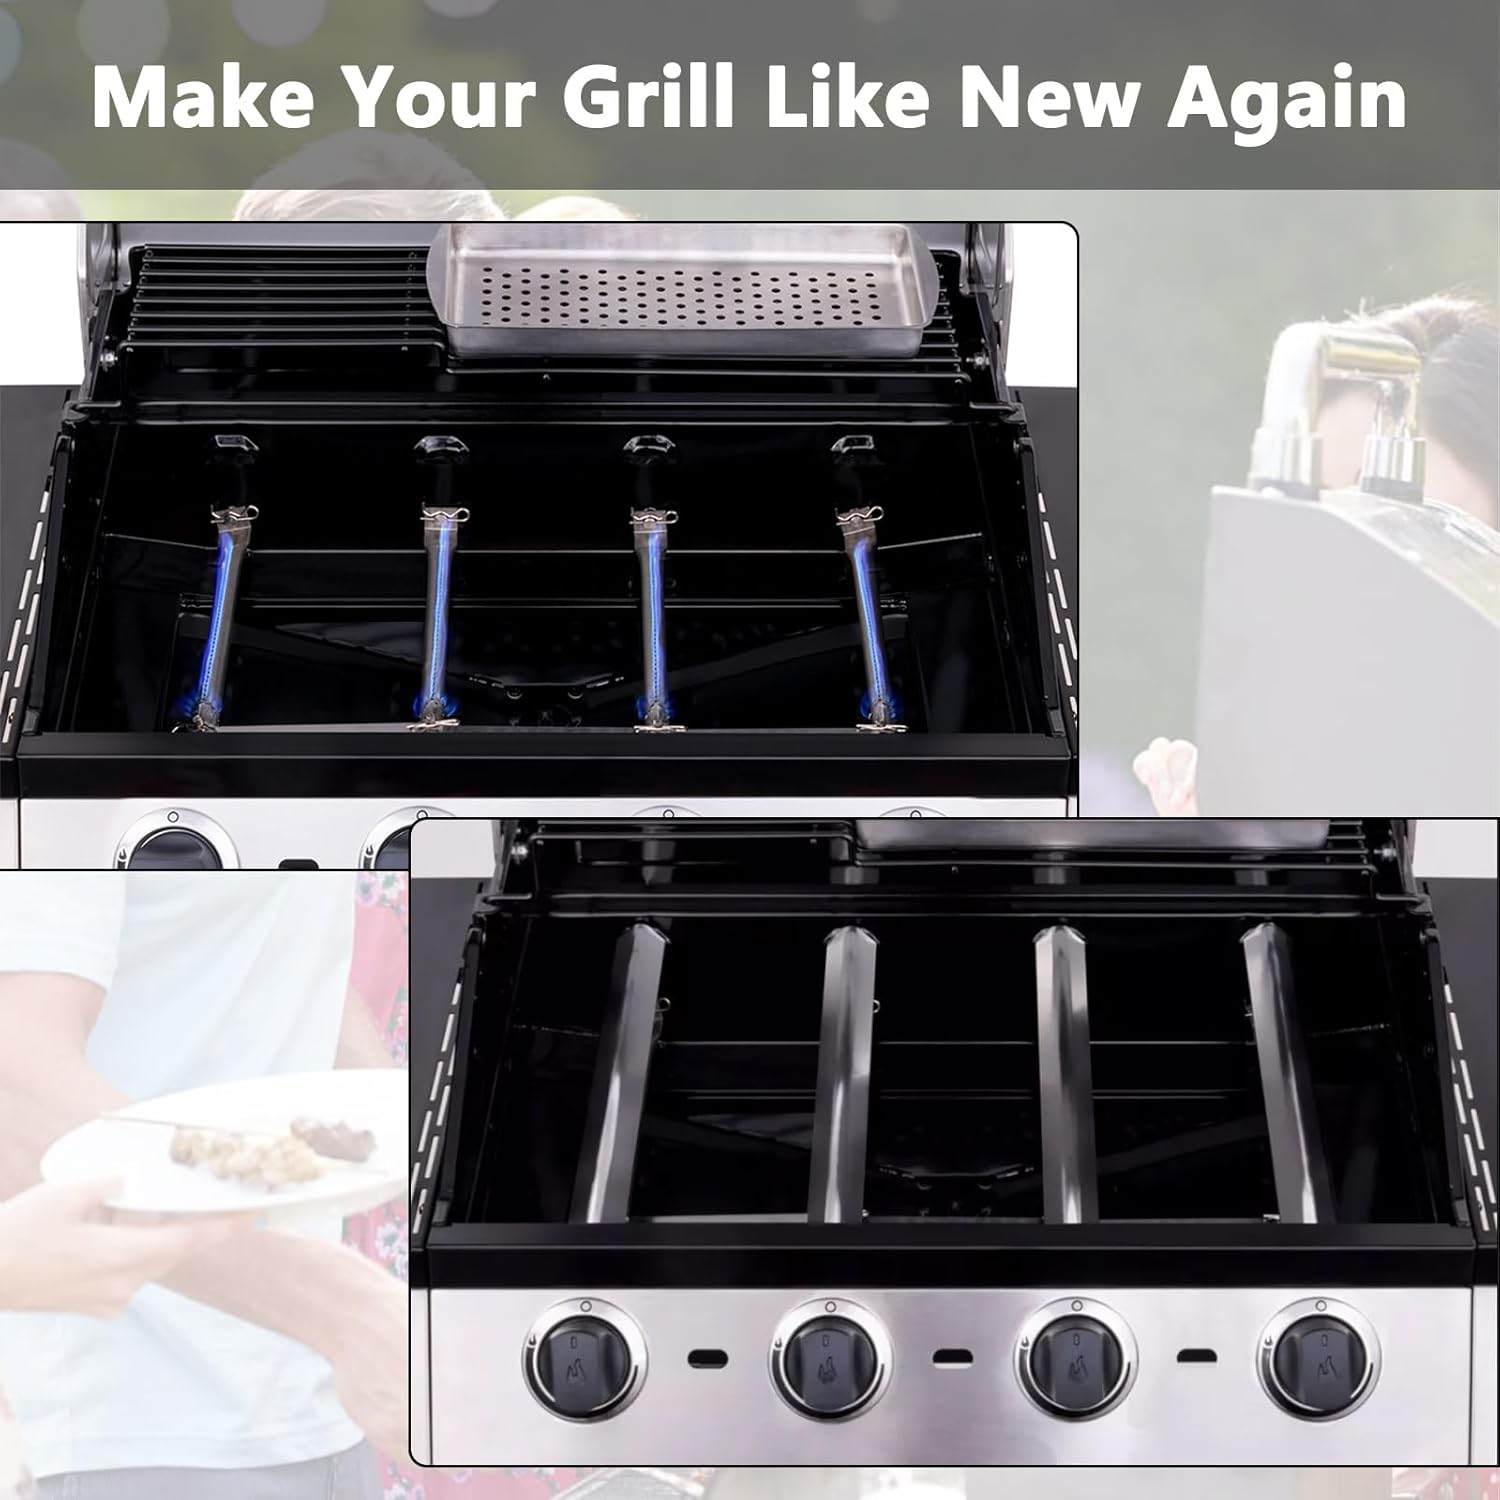
Image 4.4: A view of the grill interior with new burners and heat tents installed, showcasing the refreshed appearance.
5. Operating Your Grill After Repair
After successful installation and a confirmed leak-free gas supply, you can operate your grill. Open the gas supply valve slowly. Turn on each burner individually to ensure proper ignition and a consistent blue flame. Adjust burner settings as needed for cooking.
6. Maintenance
Regular maintenance will help prolong the life of your new grill components and ensure optimal performance:
- Regular Cleaning: After each use, allow the grill to cool, then clean the grill grates. Periodically remove the grates and heat tents to clean the burners and inside of the firebox, removing any grease or food debris.
- Inspect Components: Periodically inspect the burners, heat plates, and crossover tubes for signs of wear, corrosion, or blockages. Replace any damaged parts promptly.
- Ventilation: Always ensure proper ventilation when operating your grill to prevent carbon monoxide buildup.
7. Troubleshooting
- Burner Not Lighting:
- Ensure the gas supply is open and there is fuel in the tank.
- Check the igniter connection to the burner and the igniter module.
- Clean any debris or spiderwebs from the burner ports and venturi tubes.
- Uneven Heat:
- Verify that the heat plates are correctly positioned and not obstructed.
- Ensure all burner ports are clear and free of debris.
- Check for proper gas flow to all burners.
- Gas Leak Smell:
- Immediately turn off the gas supply at the tank or main line.
- Do not operate the grill.
- Check all gas connections for leaks using a soapy water solution. If bubbles appear, tighten connections or replace faulty parts. If the smell persists, contact a qualified technician.
8. Product Specifications
- Burner Material: Stainless Steel (Original part number: G327-2100-W1)
- Heat Plate Material: Stainless Steel (Original part number: G325-0002-W1)
- Crossover Tube Dimensions: Adjustable, extends from 5" to 9.5"
- Kit Contents: 6 burners, 6 heat plates, 5 crossover tubes, 2 igniters
- Product Dimensions: Approximately 15 x 2 x 3 inches (packaging)
- Item Weight: Approximately 4.05 pounds

Image 8.1: Close-up of a stainless steel heat tent, highlighting its durable properties.
9. Warranty Information
For specific warranty details regarding your Adviace Grill Repair Kit, please refer to the product packaging or contact Adviace customer support directly. Warranty terms may vary.
10. Customer Support
Should you require further assistance, have questions about installation, or need to report an issue, please visit the Adviace Store on Amazon or refer to the contact information provided with your product packaging.