
1. Introduction
This manual provides detailed instructions for the safe and efficient operation of your new TOSHIBA Rice Cooker, Model RC-5DSTCA(W). This appliance is designed to cook a variety of dishes with ease, featuring 8 cooking functions, Fuzzy Logic technology, a 24-hour delay timer, and an auto keep warm function. Please read this manual thoroughly before first use and retain it for future reference.

Figure 1.1: TOSHIBA Rice Cooker RC-5DSTCA(W) with included measuring cup, spatula, and soup ladle.
2. Important Safeguards
When using electrical appliances, basic safety precautions should always be followed to reduce the risk of fire, electric shock, and/or injury to persons, including the following:
- Read all instructions before using the appliance.
- Do not touch hot surfaces. Use handles or knobs.
- To protect against electrical shock, do not immerse cord, plugs, or the appliance body in water or other liquid.
- Close supervision is necessary when any appliance is used by or near children.
- Unplug from outlet when not in use and before cleaning. Allow to cool before putting on or taking off parts.
- Do not operate any appliance with a damaged cord or plug or after the appliance malfunctions or has been damaged in any manner.
- The use of accessory attachments not recommended by the appliance manufacturer may cause injuries.
- Do not use outdoors.
- Do not let cord hang over edge of table or counter, or touch hot surfaces.
- Do not place on or near a hot gas or electric burner, or in a heated oven.
- Extreme caution must be used when moving an appliance containing hot oil or other hot liquids.
- Always attach plug to appliance first, then plug cord into the wall outlet. To disconnect, turn any control to "off", then remove plug from wall outlet.
- Do not use appliance for other than intended use.
3. Product Components
Your TOSHIBA Rice Cooker consists of the following main components:
- Main Unit with Control Panel and LCD Display
- Removable Non-Stick Inner Pot
- Detachable Inner Lid
- Anti-Overflow Steam Valve
- Measuring Cup
- Spatula
- Soup Ladle

Figure 3.1: The compact design of the rice cooker, measuring approximately 8 inches wide, 11 inches deep, and 9 inches high, making it suitable for small kitchens.

Figure 3.2: The inner pot features a non-stick coating with carbon fiber, a heat-transmitting aluminum alloy coating, and a wear-resistant black matte finish for even heating.
4. Before First Use
Before using your rice cooker for the first time, please follow these steps:
- Remove all packaging materials and promotional labels.
- Wash the inner pot, detachable inner lid, measuring cup, spatula, and soup ladle with warm, soapy water. Rinse thoroughly and dry completely.
- Wipe the exterior of the main unit with a damp cloth. Do not immerse the main unit in water.
- Ensure all parts are dry before assembling and plugging in the appliance.
5. Operation Guide
5.1 Control Panel Overview

Figure 5.1: The intuitive control panel features a large LCD display and buttons for various cooking functions and settings.
- OFF/CANCEL: Stops the current cooking cycle or cancels a setting.
- TIMER: Activates the delay timer function. Press to cycle between Timer 1 and Timer 2.
- HR./MIN.: Adjusts hours and minutes for delay timer or other settings.
- START: Begins the selected cooking program.
- KEEP WARM/REHEAT: Activates the keep warm function or reheats cooked food.
- WHITE RICE: Selects the White Rice cooking program.
- MENU: Cycles through the 8 cooking functions: Quick Cook, White Rice, Brown Rice, Mixed Grain, Slow Cook, Porridge, Cake, Egg.
5.2 Basic Cooking Steps
- Measure the desired amount of rice using the provided measuring cup. One cup of uncooked rice typically yields two cups of cooked rice.
- Rinse the rice thoroughly under cold water until the water runs clear.
- Place the rinsed rice into the inner pot. Add the appropriate amount of water according to the water level markings inside the inner pot or your recipe.
- Place the inner pot into the main unit, ensuring it is seated correctly. Close the lid securely.
- Plug the power cord into a wall outlet. The display will illuminate.
- Press the MENU button to select your desired cooking function (e.g., White Rice, Brown Rice).
- Press the START button to begin cooking. The cooking indicator light will illuminate.
- Once cooking is complete, the cooker will automatically switch to the Keep Warm mode (if applicable for the selected function) and emit a beep.
- Allow the rice to rest in Keep Warm mode for 5-10 minutes before serving for optimal texture. Use the provided spatula to fluff the rice.
5.3 Cooking Functions
The TOSHIBA Rice Cooker offers 8 versatile cooking functions:
- White Rice: For perfectly cooked white rice.
- Quick Cook: For faster cooking of white rice, typically within 30 minutes.
- Brown Rice: Optimized for cooking brown rice, ensuring proper texture and doneness.
- Mixed Grain: Suitable for cooking various mixed grains like quinoa and other blends.
- Slow Cook: For preparing stews, soups, and other slow-cooked dishes.
- Porridge: Ideal for cooking oatmeal or other types of porridge.
- Cake: Allows for baking small cakes directly in the inner pot.
- Egg: For cooking eggs.

Figure 5.2: The Quick Cook function allows for rice preparation in approximately 30 minutes.
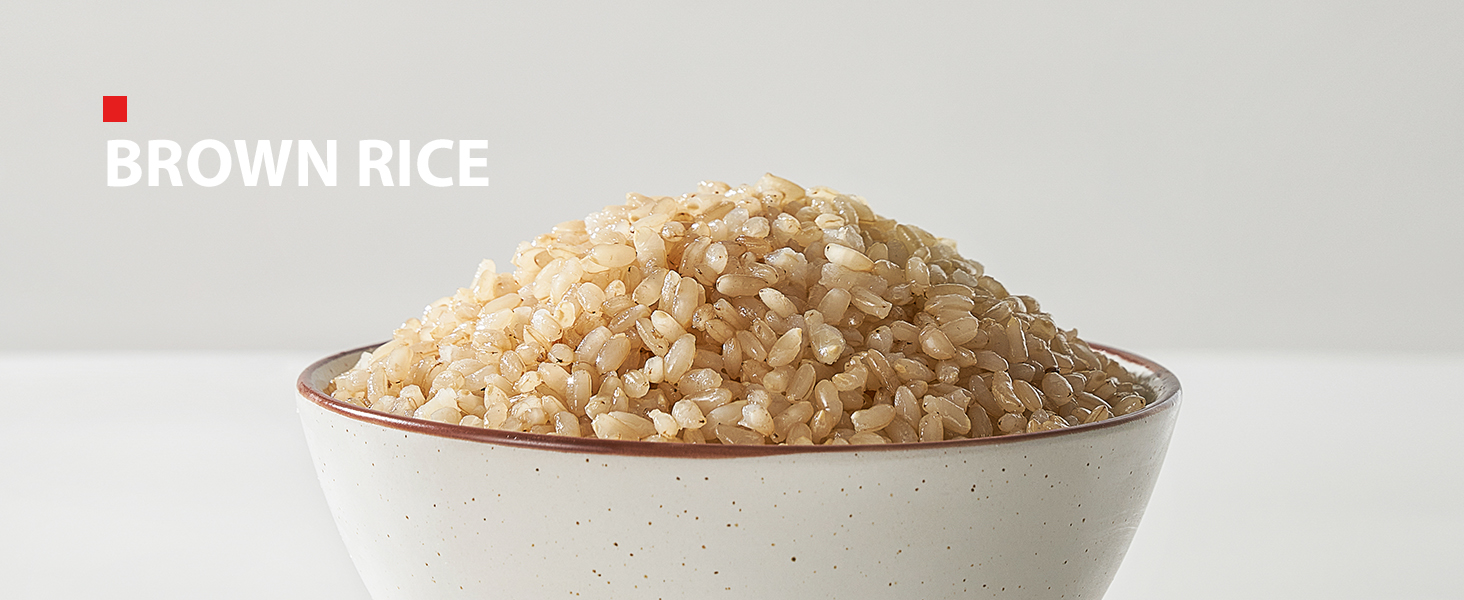
Figure 5.3: Example of brown rice cooked using the dedicated function.
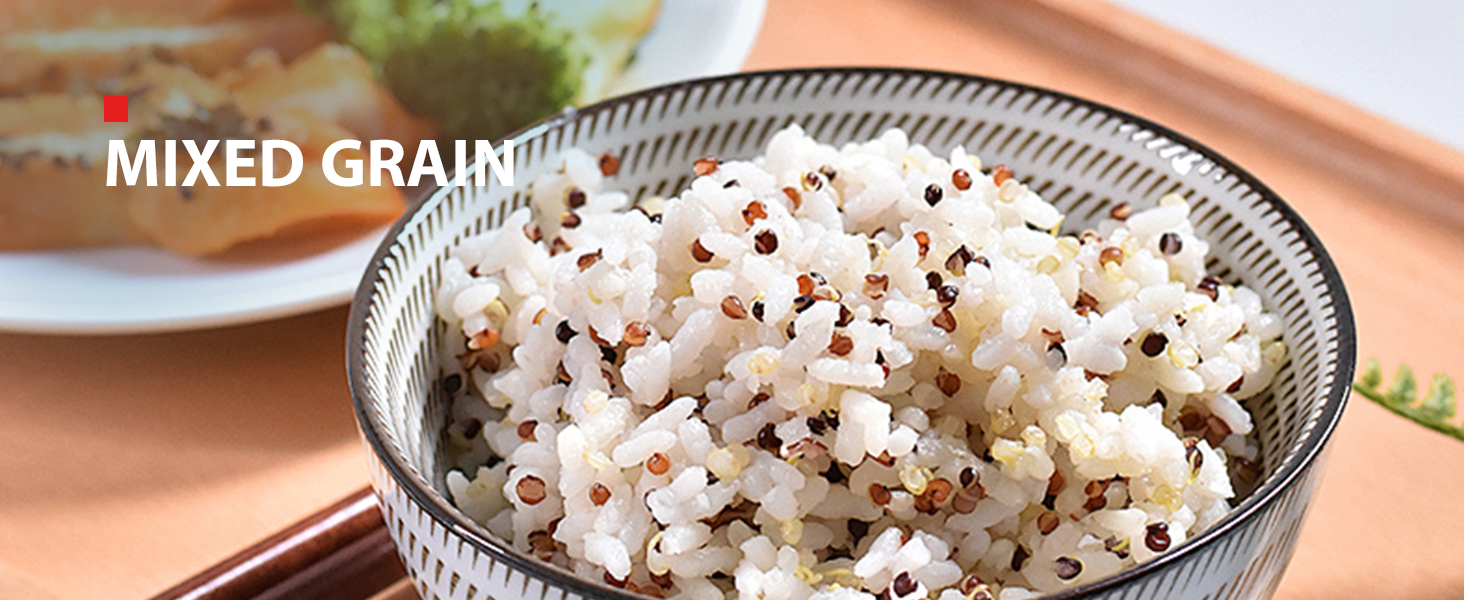
Figure 5.4: Example of mixed grain cooked using the dedicated function.

Figure 5.5: The rice cooker's versatility allows for preparing a wide range of dishes beyond just rice.
5.4 Fuzzy Logic Technology
The rice cooker incorporates Fuzzy Logic technology, which automatically senses the moisture content of the rice and adjusts the temperature and cooking time accordingly. This ensures consistent and optimal cooking results for various types of rice and grains, eliminating the need for manual adjustments.

Figure 5.6: The advanced heating technology, guided by Fuzzy Logic, creates an ideal temperature profile for perfectly cooked rice.
5.5 Delay Timer Function
The 24-hour Delay Timer allows you to program the rice cooker to complete cooking at a specific time. This feature is useful for preparing meals in advance.

Figure 5.7: The rice cooker features two programmable timers, allowing users to set cooking completion times for convenience.
- Prepare rice and water in the inner pot as described in Basic Cooking Steps.
- Select your desired cooking function using the MENU button.
- Press the TIMER button. The display will show a default delay time.
- Use the HR. and MIN. buttons to adjust the desired completion time.
- Press START. The timer indicator will light up, and the cooker will begin the countdown. Cooking will start automatically to ensure the meal is ready at the set time.
5.6 Keep Warm/Reheat Function
After cooking, the appliance automatically switches to the Keep Warm mode, maintaining the food at an optimal serving temperature for up to 24 hours. To manually activate or reactivate this function, press the KEEP WARM/REHEAT button.

Figure 5.8: The rice cooker can maintain food warmth for up to 24 hours, ensuring meals are ready when needed.
6. Care and Maintenance
Proper cleaning and maintenance will ensure the longevity and optimal performance of your rice cooker.
6.1 Cleaning the Inner Pot
The non-stick inner pot should be washed with mild soap and a soft cloth or sponge. It is not recommended for dishwasher use to preserve the non-stick coating.

Figure 6.1: The non-stick inner pot is designed for easy cleaning with a soft cloth.
6.2 Cleaning the Detachable Inner Lid and Steam Valve
The inner lid and steam valve are removable for thorough cleaning.
- To remove the inner lid, gently pull it downwards from the main lid.
- The steam valve can be detached by pulling it upwards from the main lid.
- Wash both parts with warm, soapy water, rinse, and dry completely before reattaching.

Figure 6.2: Key features for ease of cleaning and use: detachable inner lid, anti-overflow steam valve, LED display, and compact size for storage.
6.3 Cleaning the Main Unit Exterior
Wipe the exterior of the main unit with a damp cloth. Do not use abrasive cleaners or scouring pads. Ensure the unit is unplugged and cool before cleaning.
7. Troubleshooting
If you encounter any issues with your rice cooker, please refer to the following common problems and solutions:
| Problem | Possible Cause | Solution |
|---|---|---|
| Rice is too hard or undercooked. | Insufficient water; incorrect rice-to-water ratio; lid not properly closed. | Add more water next time; ensure lid is sealed; allow rice to rest in Keep Warm mode after cooking. |
| Rice is too soft or mushy. | Too much water; rice not rinsed properly. | Reduce water next time; rinse rice thoroughly until water runs clear. |
| Rice sticks to the inner pot. | Inner pot not properly cleaned; using metal utensils. | Ensure inner pot is clean; use only the provided plastic spatula or silicone utensils. |
| Cooker does not turn on. | Not plugged in; power outage; faulty outlet. | Check power cord connection; verify power supply; try a different outlet. |
| Steam leaks from the lid. | Lid not closed properly; steam valve clogged or not installed correctly. | Ensure lid is securely latched; clean and re-install steam valve. |
8. Product Specifications
| Specification | Detail |
|---|---|
| Brand | TOSHIBA |
| Model Number | RC-5DSTCA(W) |
| Colour | White |
| Capacity | 3 Cups (Uncooked) |
| Power/Wattage | 460 watts |
| Voltage | 110 Volts (AC) |
| Material | Stainless Steel (exterior), Non-Stick (inner pot) |
| Auto shut-off | Yes |
| Special Features | Non-Stick, One-Touch Operation, Fuzzy Logic, 24-Hr Delay Timer, Auto Keep Warm |
| Item Weight | 3 kg |
| Product Dimensions | 23D x 29.5W x 20.4H Centimetres |
9. Warranty and Support
For warranty information and customer support, please refer to the warranty card included with your product or visit the official TOSHIBA website. Keep your purchase receipt as proof of purchase for any warranty claims.


