
Kidde 20SD10
Kidde Smoke Detector Instruction Manual
Brand: Kidde | Model: 20SD10
Introduction
The Kidde Smoke Detector, Model 20SD10, offers advanced fire safety with its 10-year sealed lithium battery and enhanced sensing technology designed to reduce false alarms. This compact, 5-inch alarm provides fast alerts, giving your family more time to react in case of a fire. It features self-testing capabilities and an easy twist-and-click mounting system for straightforward installation. This manual will guide you through the setup, operation, and maintenance of your new smoke detector.

Figure 1: Kidde Smoke Detector (Model 20SD10) and Packaging
Key Features
- 10-Year Sealed Battery: Provides continuous power for a decade, eliminating the need for battery changes and preventing low battery chirps.
- Enhanced Sensing Technology: Reduces nuisance alarms often caused by cooking, ensuring reliable detection of actual smoke.
- Self-Testing Alarm: Internal components continuously monitor the alarm's functionality, ensuring it is always operating as expected. (Note: This does not replace weekly manual push tests.)
- LED Warning Light Indicators: Clear visual cues for normal operation (green), operating errors (amber), and smoke detection (red).
- Easy Installation: Features a simple twist-and-click mounting bracket for quick and secure ceiling installation without wiring.
- Test & Hush Button: Allows for easy testing of the alarm and temporary silencing of nuisance alarms.
- Modern 5-inch Design: Compact and aesthetically pleasing, ideal for various living spaces including living rooms, hallways, kitchens, and bedrooms.

Figure 2: 10-Year Battery Power

Figure 3: Reduced Nuisance Alarms
Setup and Installation
Follow these steps to properly install your Kidde Smoke Detector:
- Unboxing and Initial Setup:
Carefully remove the smoke detector and mounting hardware from the packaging. Before installation, it is recommended to mark the current date on the alarm. This helps you track its 10-year lifespan for timely replacement.

Figure 4: Self-Testing Feature
- Mounting Bracket Installation:
The Kidde smoke alarm comes with a twist-and-click mounting bracket. Securely attach this bracket to your ceiling using the provided screws. Ensure the bracket is firmly in place.

Figure 5: Simple Installation
For a visual guide on installation, watch the official Kidde installation video:
Video 1: Kidde Detector Installation Video. This video provides step-by-step instructions for installing your Kidde smoke detector, including mounting and activation.
- Battery Activation (10-Year Battery Models):
For models with a 10-year sealed battery, the internal battery will self-activate once the alarm is securely twisted and clicked onto the mounting bracket. You will hear a confirmation beep indicating activation.
- Attaching the Alarm:
Align the smoke detector with the mounting bracket and twist it clockwise until it clicks securely into place. Ensure it is flush with the ceiling.
- Removing Dust Cover (If Applicable):
If your alarm came with a red dust cover (often for protection during construction or painting), ensure it is removed after all construction or renovation work is complete (at least 24 hours after). The alarm will not operate until this cover is removed.
Operating Instructions
Your Kidde Smoke Detector is designed for continuous operation. Here's how to understand its status and test its functionality:
LED Notifications:
- Green LED: Indicates normal operation or standby mode. For hardwired alarms, it's a steady green light. For battery-operated alarms, it flashes every 60 seconds.
- Amber LED: Indicates an operating error or fault. It may blink 1-4 times with chirps every 60 seconds.
- Red LED: Indicates smoke detection. The alarm will sound a loud 85-decibel alarm (3 long beeps) with the red LED flashing in time.
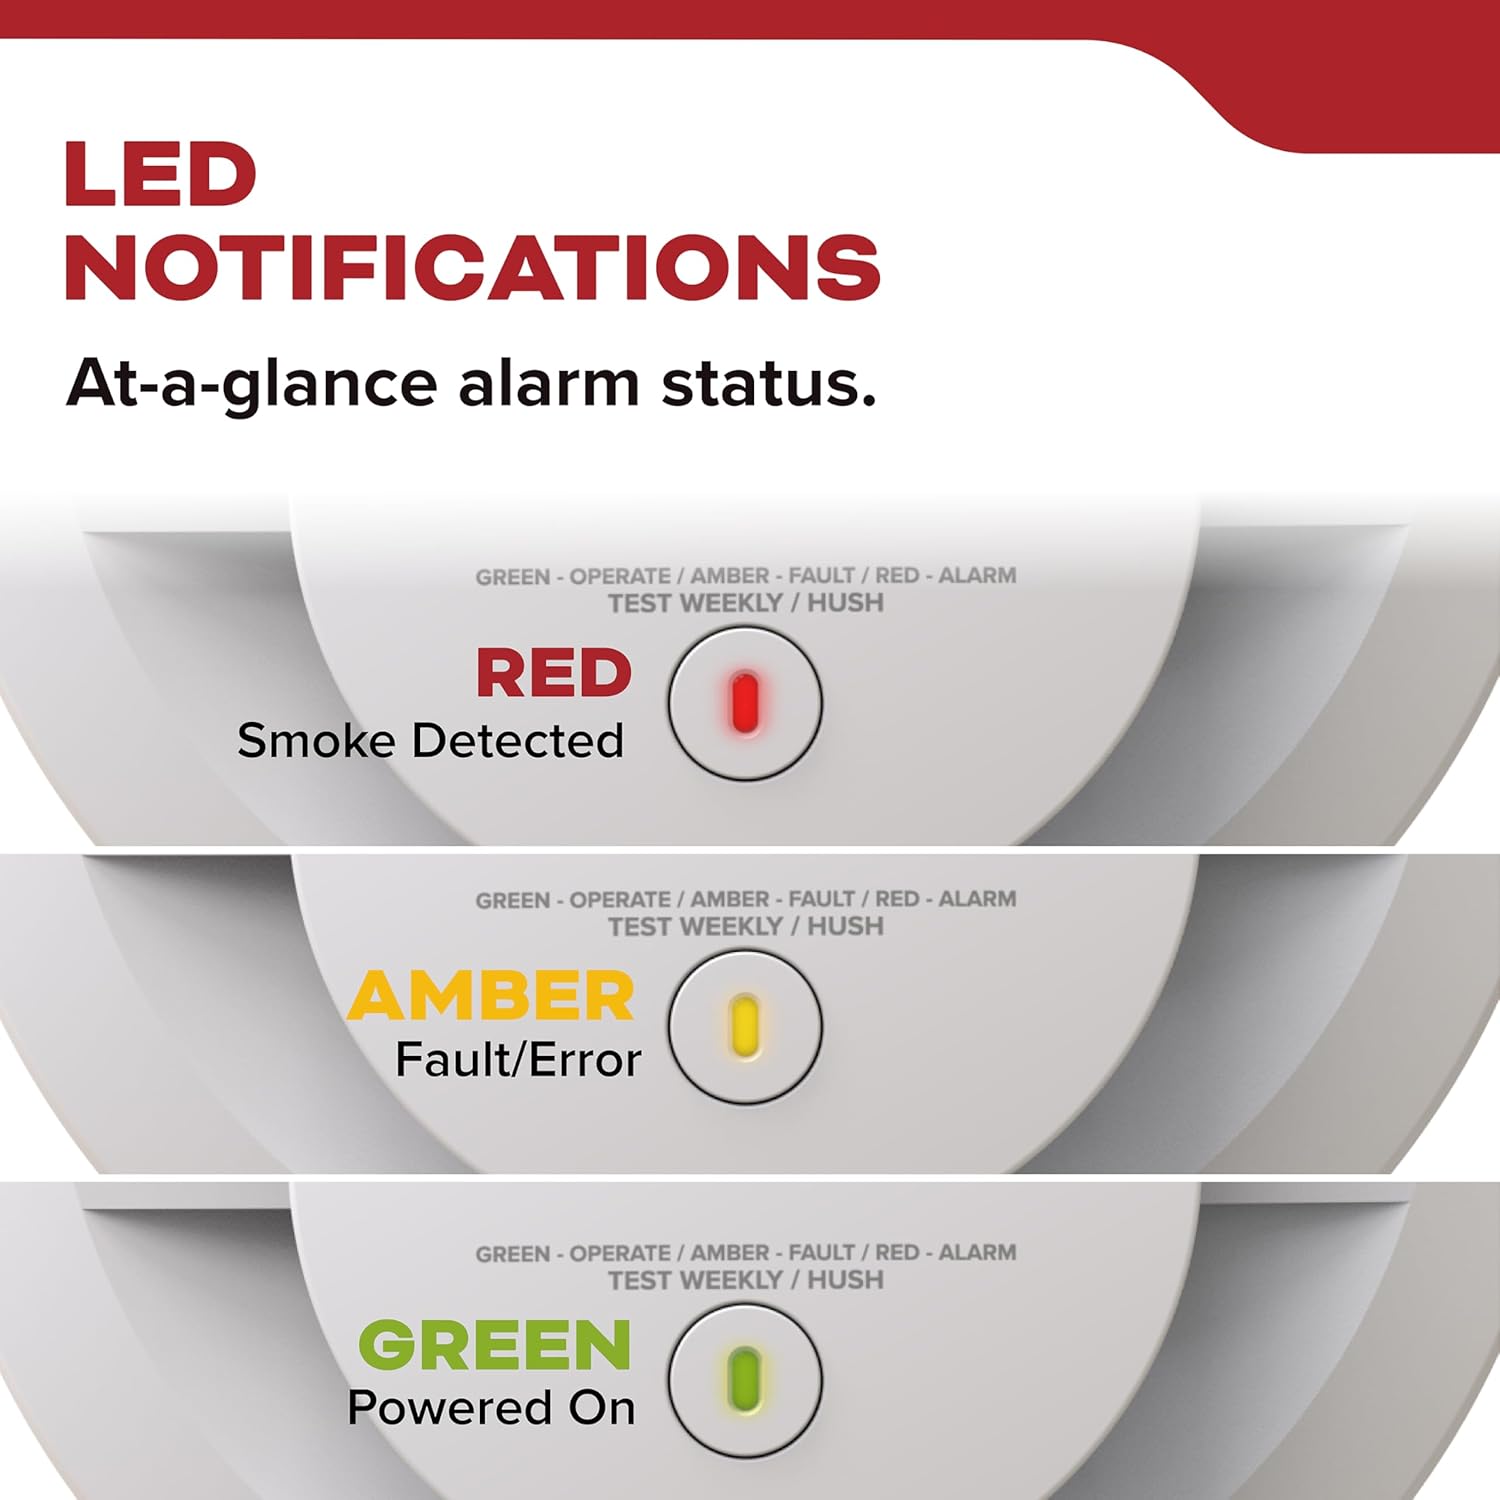
Figure 6: LED Notification Indicators
Testing the Alarm:
It is crucial to test your smoke alarm weekly to ensure it is functioning correctly. Press and release the central test/hush button. The alarm will sound a test pattern. Since the alarm is loud, consider standing about 2.5 feet away or using ear protection during testing.
Hush Feature:
In case of a nuisance alarm (e.g., from cooking), you can temporarily silence the alarm by pressing the test/hush button. The alarm will enter a temporary hush period.
Maintenance
Proper maintenance ensures the longevity and effectiveness of your smoke detector:
- Cleaning: Clean your smoke alarm annually to prevent dust buildup from affecting its performance. Use a soft brush attachment on your vacuum cleaner to gently remove dust from the vents. Do not paint the alarm.
- Battery: The 10-year sealed lithium battery does not require replacement for the life of the detector.
- End-of-Life Notification: At the end of its 10-year lifespan, the alarm will provide an end-of-life notification (amber LED blinks twice with two chirps every 60 seconds) to remind you it's time for replacement.
Troubleshooting
If your smoke detector is not functioning as expected, refer to the following common issues:
| Problem | Possible Cause | Solution |
|---|---|---|
| Alarm sounds without smoke (Nuisance Alarm) | Cooking fumes, steam, high humidity, dust buildup. | Use the Hush button. Ventilate the area. Clean the alarm. Relocate if consistently triggered by normal activities. |
| Amber LED blinks 1-4 times with chirps every 60 seconds | Fault in the alarm. | Clean the alarm. If the issue persists, the alarm may need to be replaced. |
| Amber LED blinks twice with 2 chirps every 60 seconds | End of unit life. | Replace the smoke alarm immediately. |
| No sound during test | Battery not activated (for 10-year models, not properly mounted), or unit is faulty. | Ensure the alarm is securely twisted onto the mounting bracket. If still no sound, replace the unit. |
Specifications
| Attribute | Detail |
|---|---|
| Brand | Kidde |
| Model Number | 20SD10 |
| Power Source | 10-Year Sealed Lithium Battery |
| Sensor Type | Photoelectric |
| Alarm Sound Level | 85-decibel |
| Product Dimensions | 2"D x 5"W x 5"H |
| Item Weight | 0.6 Pounds (9.6 ounces) |
| Color | White |
| Operating Humidity | Up to 95% relative humidity (RH), non-condensing |
| Upper Temperature Rating | 100 Degrees Fahrenheit |
| Certifications | UL 217 9th Edition, FCC, CSFM |
Warranty and Support
Your Kidde Smoke Detector comes with a 10-year limited warranty. The warranty period begins when the alarm is powered on. If the power-on date is unknown, it should be assumed that alarms should be replaced after 10 years from the manufacturing date.
For additional support or warranty claims, please contact Kidde customer service:
- Phone: 1-800-880-6788
- Online User Guide: Download PDF User Guide

Figure 7: 10-Year Limited Warranty
Related documents20SD10


Ask a question about this manual
Ask about setup, troubleshooting, compatibility, parts, safety, or missing instructions. Manuals+ will review the question and use this page’s manual context to help answer it.