Introduction
This manual provides essential information for setting up, operating, and maintaining your ASUS VA329HE 32-inch Full HD LED Backlit LCD Monitor. The ASUS VA series is designed to enhance productivity with vivid visuals and eye care features. This bundle includes a dual monitor stand for an optimized workspace.
Setup
1. Unboxing and Component Check
Carefully remove all components from the packaging. Ensure the following items are present:
- ASUS VA329HE Monitor
- Power Adapter and Cable
- HDMI Cable
- VGA Cable
- Dual Monitor Desk Mount Stand (with heavy-duty desk clamp and detachable VESA bracket plates)
- User Manual (this document)
2. Monitor Assembly
The monitor can be used with its included desk mount stand or mounted using its VESA compatibility.

Figure 1: Components of the Dual Monitor Desk Mount Stand. This image shows the various parts of the desk mount, including the main pole, adjustable arms, and VESA plates, ready for assembly.
For Desk Mount Stand:
- Attach the VESA bracket plates to the back of each monitor using the provided screws.
- Assemble the desk mount stand according to its specific instructions, securing the heavy-duty desk clamp to your desk.
- Attach the monitors (with VESA plates) to the adjustable arms of the stand.
- Adjust the height, tilt, swivel, and rotation of the monitors for optimal viewing comfort.
For VESA Wall Mount (not included):
- The monitor is VESA compatible. Remove the pre-attached stand (if any) and follow the instructions provided with your VESA wall mount kit.

Figure 2: Rear view of the ASUS VA329HE monitor, highlighting the VESA mounting holes for attaching to a compatible stand or wall mount.
3. Connecting Cables
Connect the necessary cables to your monitor and computer.
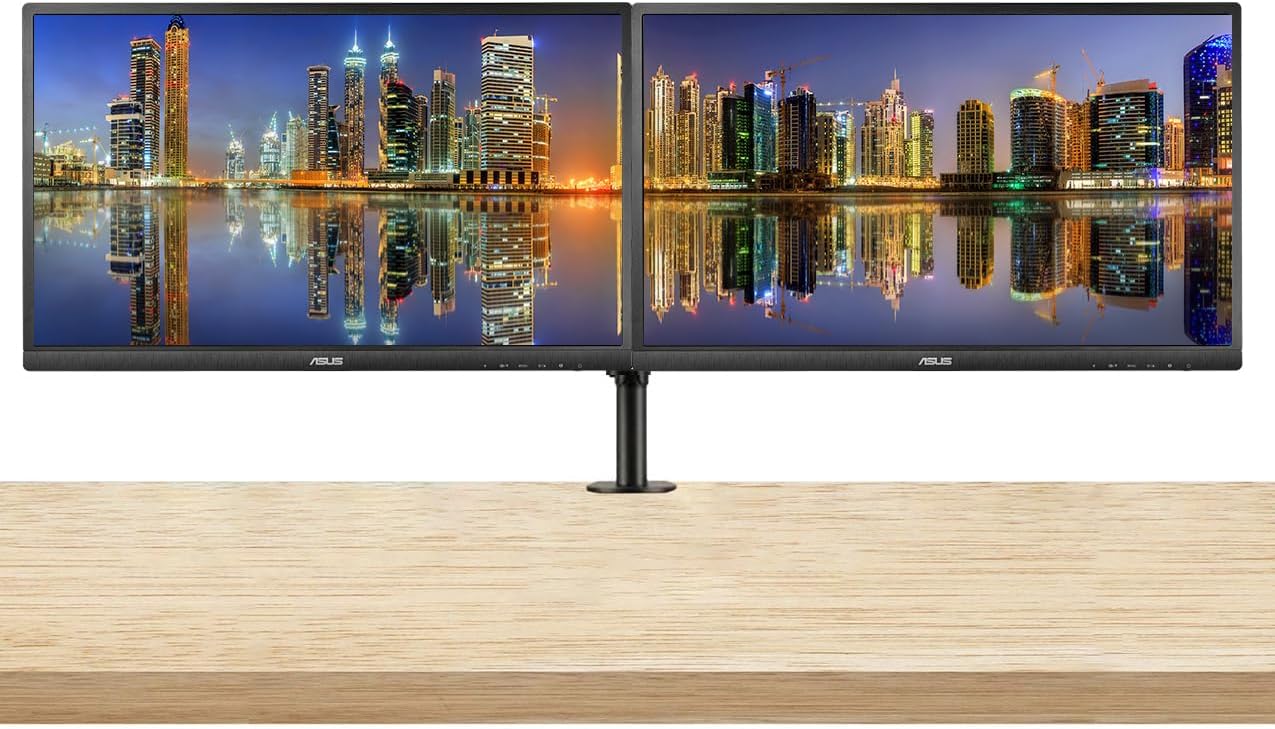
Figure 3: Two ASUS VA329HE monitors displayed on a dual monitor stand, showcasing a typical setup for enhanced productivity.
- Power: Connect the power adapter to the monitor's power input and then to a power outlet.
- Video Input: Connect either the HDMI cable or the VGA cable from your computer's video output to the corresponding port on the monitor.
- Audio (Optional): If you wish to use external speakers or headphones, connect them to the monitor's audio output jack.
Video 1: This video demonstrates the unboxing and initial setup of an ASUS 31.5-inch 1080P monitor, including connecting cables and powering it on. It provides a visual guide to the physical setup process.
Operating Instructions
1. Power On/Off
Press the power button located on the bottom right side of the monitor to turn it on or off. The power indicator light will illuminate when the monitor is active.
2. On-Screen Display (OSD) Menu
The OSD menu allows you to adjust various monitor settings. Use the control buttons located on the bottom right bezel of the monitor to navigate the menu.
- Press the Menu button to open the OSD menu.
- Use the Navigation buttons (up/down/left/right arrows) to move through options.
- Press the Select button (often the center button) to confirm a selection.
- Press the Exit button to close the OSD menu or go back to the previous level.
3. Key Features and Settings
- Input Selection: Use the OSD menu to switch between HDMI and VGA inputs.
- Brightness/Contrast: Adjust these settings in the OSD menu to optimize visual clarity for your environment. The monitor features an ultra-high 3,000:1 contrast ratio and 300cd/m² brightness.
- ASUS Smart Contrast Technology: This feature, with an 80,000,000:1 contrast ratio, optimizes color brightness, contrast, and sharpness. Access various modes like Reading and Darkroom via the OSD.
- Eye Care Technology: The VA Series includes a certified Blue Light Filter to reduce harmful blue light emissions. Select from four different filter settings in the OSD menu to minimize eye strain during extended use.
- AMD FreeSync: This technology helps eliminate screen tearing and choppy frame rates for smoother visuals, especially during dynamic content. Ensure your graphics card supports AMD FreeSync for optimal performance.
Maintenance
1. Cleaning the Monitor
- Always turn off the monitor and unplug the power cord before cleaning.
- Use a soft, lint-free cloth lightly dampened with water or a mild, non-abrasive screen cleaner.
- Wipe the screen gently. Avoid applying direct pressure to the screen.
- Do not use alcohol, ammonia, or abrasive cleaners, as these can damage the screen surface.
2. General Care
- Avoid placing heavy objects on the monitor or its cables.
- Keep the monitor away from direct sunlight, heat sources, and excessive moisture.
- Ensure adequate ventilation around the monitor to prevent overheating.
Troubleshooting
If you encounter issues with your monitor, refer to the following common solutions:
| Problem | Possible Solution |
|---|---|
| No image on screen |
|
| Image is blurry or distorted |
|
| No sound from speakers/headphones |
|
| Screen flickering |
|
Specifications
| Feature | Detail |
|---|---|
| Model Number | VA329HE |
| Screen Size | 32 Inches |
| Resolution | 1920 x 1080 Pixels (FHD 1080p) |
| Aspect Ratio | 16:9 |
| Refresh Rate | 75 Hz |
| Image Brightness | 300 cd/m² |
| Contrast Ratio | 3,000:1 (Typical), 80,000,000:1 (ASUS Smart Contrast Ratio) |
| Viewing Angle | 178° Wide-View |
| Screen Surface | Glossy |
| Connectivity | VGA, HDMI |
| Product Dimensions | 9 x 24 x 28 inches |
| Item Weight | 30 pounds |

Figure 4: The ASUS VA329HE monitor with its physical dimensions (height, width, depth) clearly indicated for reference.
Warranty and Support
For warranty information and technical support, please refer to the official ASUS website or contact ASUS customer service directly. Keep your purchase receipt for warranty claims.


